The need for such changes as sealing window openings in a wooden log house does not arise often, so not everyone imagines how to install a window in a wooden house without resorting to such a labor-intensive and costly operation as complete dismantling of the log house with the subsequent installation of new logs.
Just as in many other situations, sealing windows in a wooden house is more complicated than similar operations performed during the reconstruction of a stone building. The differences are due to the special structure of wooden building materials, as well as the fact that in this case it is necessary to take into account the moisture deformation of the wood.
The need to install a window in a wooden house
The installation of a window is usually necessary during redevelopment.
The opening parameters are initially included in the building design, taking into account shrinkage, load distribution, seasonal fluctuations in temperature and humidity. The decision to install a window in a wooden house must have serious justification.
The reasons for carrying out such intervention in the layout of the house may be the following:
- large heat losses;
- redevelopment according to an individual project;
- major repairs;
- weakening of load-bearing structures, when sealing an opening is cheaper than replacing several crowns.
Eliminating the window will entail additional costs for the design of the facade and interior decoration inside the building.
Installing new, smaller windows
The opposite case is when the new window is smaller than the old one. The need for such a replacement often arises when renovating bathhouses and utility rooms.
Several solutions are already possible here, among which there are simple and complex options.
By simple we mean those situations when changes in size occur within a small range.
Plastic extensions for expansion
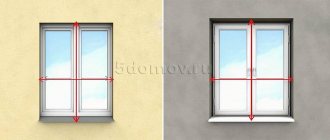
That is, if it is necessary to move the window to the left or right by a few centimeters, then the resulting void can be filled using special expanders (if it is a PVC window), or by increasing the thickness of the casing strips with ordinary boards of suitable thickness.
Let us formulate the main rule for such changes in size: the planned displacement of the window must be such that the resulting voids in the frame can be covered with platbands.
It should be noted that any attempt at such changes will be accompanied by difficulties in finding optimal proportions in the external design of the window, which will be extremely difficult to find with increased or uneven frame thickness.
Therefore, in order for modified window openings to look correct and beautiful both from the outside and inside, a much more complex technology should be used, based on replacing logs in the crowns.
Ways to bookmark a window
Filling the opening with a butt beam
This procedure is not often performed, but over the centuries of operation of houses made of logs and timber, builders of different eras have accumulated a lot of experience in this direction.
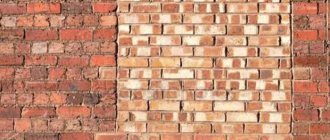
You can lay a window in a wooden house in the following ways:
- Replacing part of the wall. This option is effective and radical, as it will preserve the integrity of the facade. However, external attractiveness has its negative sides. To implement this idea, it will be necessary to dismantle the roof and dismantle more than half of the three walls. In addition, the new links will shrink, which will lead to the formation of large cracks.
- Bookmark the opening. The procedure is similar to applying a butt patch. The material is taken in accordance with the material from which the wall is made - timber or logs. The fragments are selected by color, sawn to size, and can even be dried to minimize shrinkage. This method is more accessible, cheaper, much simpler and faster. But in any case, there will be a mismatch of shades, which will require additional cosmetic work. In addition, filling a hole with solid lumber is quite difficult; you cannot do it without helpers.
- Installation of a built-in closed frame. This technology is most in demand, as it is characterized by efficiency, minimal investment and ease of implementation. Only lightweight materials are used here, there is no shrinkage or the need for labor-intensive adjustment.
In private construction, the frame method of sealing window openings is especially popular. The best results are achieved at low costs.
Work order
Proper use of masonry mortar.
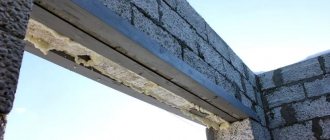
As a rule, when sealing an unnecessary doorway with brick, a partition thickness of 12 cm (half a brick) is maintained, since this structure does not bear any load; the upper part of the existing wall is held by a lintel. A window in an external fence can also be laid in half a brick, provided that additional insulation is provided.
To ensure that a blocked door can bear the load from hanging cabinets or any household appliances, the usual method of laying stones is used - on spoons. In this case, it is necessary to bandage the seams by half or a third of the length of the brick. Sometimes another method of embedding is used - a one-and-a-half hollow stone 88 mm high is laid with a bandage on the edge. But it should be taken into account that such a partition will not be able to bear additional load.
The work is carried out in the following order:
- Prepare a simple cement-sand mortar of M50 grade, using 1 part M400 cement to 5 parts well-sifted sand. Another option is to purchase ready-made masonry mixture and mix it with water, following the instructions on the bag.
- Moisten the base and sides of the opening with water. Place 1 row of stones near the installation site, cut the last one to the required size.
- Carefully spread the mortar to the length of 2-3 stones and begin laying 1 row. After each laid brick, pull the mortar to its side with a trowel, and then press it with the next stone.
- Apply the mortar to the end of the last brick in advance and put it in place. To maintain the thickness of the seam, the stones must be tapped.
- Fill the entire opening in this way, focusing on the plane of the existing wall. Do not allow the masonry to bulge or cave in; to do this, constantly check the wall, applying an even plank to it. Another option is to pull the mooring line and navigate along it.
In a situation where it is necessary to pass heating pipes made of PPR, metal-plastic or metal through the gap being laid, steel sleeves (cases) are placed in the partition. Their diameter must be greater than the outer size of the pipe. The length of the case is selected so that its ends extend beyond the surface of the masonry by 2-3 cm.
After the mortar has hardened, the structure must be lined so that the door covered with bricks does not differ in appearance from the rest of the walls. Choose the appropriate type of finishing - plaster, drywall or other material.
Required tools and materials
Set of tools
To seal a window in a wooden house using the frame method, you will need the following tools:
- drill;
- hacksaw;
- nail puller;
- level;
- screwdriver;
- roulette;
- mounting gun;
- hammer;
- mallet;
- paint brush;
- marker.
List of materials:
- board 15-20 mm;
- drywall;
- sealant to seal cracks;
- sealant;
- polyurethane foam;
- impregnation;
- dye;
- hardware (nails, screws, corners).
The work is not difficult, but there are certain health hazards. It must be carried out wearing construction glasses and gloves.
DIY window bookmark
Laying openings in a wooden structure is carried out in several stages, each of which requires care, concentration and accuracy.
First, the window block is removed:
- Remove the doors and immediately take them to a safe place.
- Remove the hardware, cut and remove the polyurethane foam. Carefully remove the frame from its socket. It is not worth sawing and breaking it in the traditional way, since the product can be useful on the farm.
- Clean the opening from debris and sealant residues. Scrape or grind off areas damaged by rot.
- Treat the wood with an antiseptic and a hydrophobic agent. Wait until the material is completely dry.
In a log house, you can sew up the opening with a block house.
Sequence of frame assembly:
- Cut four fragments from a thick board corresponding to the parameters of the opening. There are no special requirements for casing. The main thing is that the material is well dried, treated with an antiseptic and a hydrophobic agent.
- Install casing. The boards are screwed or nailed to the walls of the opening. It is necessary to ensure that there is room for shrinkage, which in wooden houses lasts constantly. Seal the remaining cracks with sealant or foam.
- Make a frame. Depending on the size of the opening, this can be done directly in the wall or on a flat surface next to the house. First you need to assemble the box, and then sew up one of the walls with waterproof plasterboard.
- Carry out insulation. First, a membrane film is laid, which will provide ventilation to the room. According to the experience of developers, polyurethane foam and basalt wool are considered the best insulation materials. The disadvantage of the first material is that it practically does not allow air to pass through, and the second is its high hygroscopicity. The insulation is covered first with a membrane and then with a shield.
- Perform external cladding. From the outside, it is best to seal the opening with a block house made of wood or plastic - whichever will look better and more harmonious. From a practical point of view, plastic is more resistant to the external environment, but the advantage of wood is that it will change its color and texture synchronously with the wall material.
- Carry out interior finishing. Here the cladding is selected in accordance with the previously applied one. In most cases, rooms are sheathed with slats or wallpapered over drywall. All that remains is to select and secure the material.
In conclusion, you need to eliminate minor imperfections and defects left after installation - seal the joints, cover the cracks, if necessary, paint the insert so that it does not stand out against the background of the facade. Similar work is carried out inside the house.
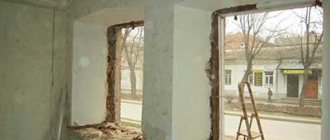
Expanding the window opening
During a major renovation, the opposite situation may arise: the opening should not be removed, but, on the contrary, expanded so that more light penetrates into the premises. In this case, you will need to dismantle the old window, disassemble the frame and cut a hole to the size of the new one. However, you need to take into account that the opening must be at least 14 cm wider than the selected window sashes: 5 cm on each side will be required for a new frame and another 2 cm for a layer of polyurethane foam that will hold the frame.
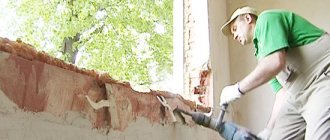
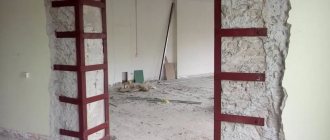
The side parts of the pigtail - the carriages - are made of wooden blocks in which grooves are cut. Protrusions are cut out at the ends of the logs, and with their help the casing is installed in place. A gap of 7–10 cm is left between it and the top log above the window, which will gradually decrease in the future due to shrinkage.
After installing a plastic window, it is filled with insulation, which will shrink over time. The height of this gap should also be taken into account when preparing a new opening. The gap cannot be filled with polyurethane foam: this material will not allow the logs to sink.
Recommendations from experts
Experts who have filled openings dozens of times have developed a number of useful recommendations that will help beginners.
- It is not always possible to choose a finish to disguise the insert inside the house. You can solve this problem for free and effectively - put a cabinet there or hang a large picture.
- Matching the timber, log or block house color to the wall should be done after installation. The paint will cover up any defects obtained during installation and will capture part of the wall, making the insert almost invisible.
- An original way to disguise an opening from the inside and outside is to install a false window. You can equally successfully use previously dismantled blocks, decorations, and even professional painting.
- It should be possible to access the contents of the frame for inspection and periodic replacement of insulation. The optimal solution would be a shield on hinges or screwed to the wall with self-tapping screws.
It is quite possible that the home owners will sooner or later want to return the window to its place. With a frame insert this won't cause much trouble.
Defect classification
The design features of wooden windows are determined by the properties of the material. Wooden products can deteriorate due to natural aging or become deformed from exposure to environmental factors. Cracks of different sizes form in them, through which dust, cold air and moisture pass.
Over time, they expand and become holes through which most of the heat loss occurs. This process is much faster if mold colonies form on the wooden frame. Such a defect greatly reduces the ability of a wooden window to maintain room temperature and increases heating costs.
Main places where the problem occurs
To quickly cope with the difficulties that arise, you need to know the problem areas of wooden windows.
This is where the gap defect occurs.
Cracks primarily appear between :
- frame and sash;
- frame and glass;
- window sill and frame;
- slopes and frame;
- window and opening.
In any case, you should choose the optimal sealing method in order to effectively eliminate the problem.