There are no extra meters in the house: this is the golden rule of the science of interior design. Every day new ideas appear on how to literally equip a personal office, dressing room, greenhouse or bar out of nothing. And in this regard, the most valuable, spacious and cozy additional space is the attic.
Moreover, it is possible to transform almost any attic into a residential one, and the problem of lack of light and air can easily be solved by high-quality installation of a dormer window on gable walls or slopes. And it doesn’t matter exactly where you choose for this element and how many windows you want to install - such an “operation” is completely safe for the roof if you take into account all the recommendations of experts and ensure reliable waterproofing of the frames.
Let's study all the rules that relate to this process.
Installation of roof windows
The delivery package most often includes the following components:
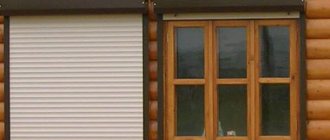
- awning or roller shutters for external shading;
- salary for protection from negative atmospheric influences;
- the window itself is a closed hermetically sealed system;
- waterproofing sealant;
- internal slopes.
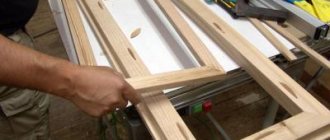
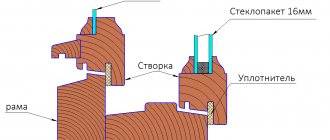
A standard set of attic windows includes a double-glazed window, frame, frame, slopes, fittings
. Of course, you can also find more modest sets on sale, but it is recommended to choose the option with built-in curtains. Due to the fact that the structure itself will be located at an angle, classical means of darkening may not be effective.
Planning and calculations
Installing a roof window into a finished roof should begin with the planning stage. First of all, you will need to calculate the required dimensions. The formula for calculation is quite simple: 1 square meter of glazing for every 10 square meters of room .
It is also necessary to choose the correct height at which the windows will be installed. The location of the skylights should be selected in such a way that the lower part of the frame rises 1-1.5 meters above the floor level.
The lower part of the frame should be 1-1.5 m above the floor level
The choice of installation location and size of a roof window in a metal tile or soft roof should be made in such a way that, if possible, it does not affect the rafter system during installation. The dimensions should allow the window frame to be mounted between the rafters and leave a margin of about 10 cm.
Work plan and tools
Whether it is installing a roof window in a soft roof or a metal tile, for any option, the installation instructions are as follows:
- preparing the opening;
- frame installation;
- heat and waterproofing;
- preparation of the drainage system;
- installation of flashing parts;
- installation of double-glazed windows;
- interior finishing, including installation of slopes and vapor barrier.
Installing roof windows with your own hands is quite a feasible task, but the master will not be able to do it without a suitable tool:
- screwdriver and screws;
- wooden slats and beams;
- level;
- nails;
- materials for heat and waterproofing.
How to properly install a window frame
Manufacturers' recommendations require mounting brackets to be secured to the frame. For example, the manufacturer Fakro recommends removing the double-glazed window before installing the brackets, and the manufacturer Velux advises removing it after installing the brackets.
It is best to lay and fix thermal insulation on top and bottom of the window with a stapler before installing the frame in the opening.
Window installation
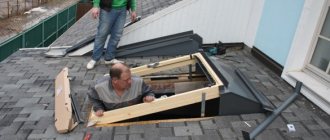
Once the location for installing the skylights has been selected, the planned work site should be marked out in advance. Following the outline, several holes are made in the material to unload the materials of the roofing pie - this will help to avoid their damage in the process. Cut the opening using a circular saw or band saw. It is important to cut diagonally, and not along the contour, after which the vertices of the resulting triangles are cut off and only after that an opening is formed.
The opening in the roof is formed using a circular saw.
Separately, it should be noted the work with roofing material. Installation of roof windows in metal tiles is carried out in the same way as in the case of corrugated sheets or sheet iron. If we are talking about skylights in a seam roof or similar materials, then the casing will first need to be disassembled.
Frame installation and adjustment
Important: for safety reasons, frames are mounted without glass. It can only be established in the final stages .
It is recommended to install the frame without glass
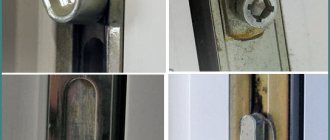
When installing a frame for roof windows, you should immediately carefully fasten the lower brackets, but you should not tighten the fastening of the upper ones to the end - this will then help you adjust the sash more easily. This is done using a level. If any deviations in the inserted window are found, they should be eliminated using plastic corners - these spare parts are often included in the delivery kit. It is also recommended to briefly insert the glass into the frame to check the quality of the installation. Once the adjustment is completed, tighten the screws.
Insulation and drainage
After the fasteners are securely wrapped, thermal and waterproofing material will need to be laid around the frame for greater tightness . The waterproofing apron is fixed using a stapler.
Waterproofing is fixed using a stapler
The drainage gutter is made at the top of the frame. Two pieces are cut out of the sheathing directly above the opening to fit the size of the drainage gutter. A piece of waterproofing material is also prepared of similar sizes. The gutter is inserted under the cuttings of waterproofing and attached to the sheathing. It must be installed at an angle, otherwise the sealing will suffer - rainwater may go out the window.
Salary setting
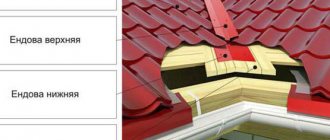
Today, two main types of flashing are used for different rebates. The first is used to work with flat roofing material, the second - with wavy ones. Companies involved in the production of skylights include the frame in the delivery package. The principle of working with both types is identical.
The window frame is included in the delivery of the structure, and installation rules are described in the manufacturer’s instructions
The first step is to attach the lower part of the dormer window frame. It should be installed in such a way that the waterproofing apron extends both beyond the frame itself and beyond the roofing sheets. Then you should move on to the side components. The edges of these elements must be laid on the frame itself.
The window frame is attached to the sheathing and frame
The seal is laid along the outer part of the frame. Most often, it, fasteners and all other components are included in the package, but in some cases they will have to be purchased later. In any case, after these steps, you should carefully check everything for accuracy and strength, because Replacing or repairing roof windows, if necessary, will cause a lot of trouble.
Installation of double-glazed windows and interior finishing
At the next stage of installing roof windows, you will need to return the double-glazed window to the frame. This is done quite simply, but the technology depends on the manufacturer, so the process itself is comprehensively described in the manual.
The glass unit is installed at the very last stage, the finish is chosen to match the interior
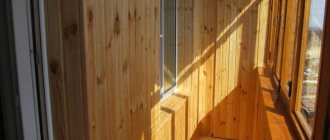
Also, the interior decoration of the skylights should not cause problems - it all depends on personal preferences. In addition, many manufacturers also add special cladding solutions to the set of roof windows. Most often, the kit includes sealant, a miter box and a template. Such templates are equally good at installing and removing, if necessary.
As an alternative, you can use ordinary drywall, but in this case, mechanical installation structures should be abandoned.
Preparing the site
As for how to properly install a roof window, it is better to do this before finishing the interior of the room. The roof may already be ready. First, from the inside of the room, they mark on the waterproofing film where the window will be located. The distance on the sides from the rafters on the right and left should be 4-6 centimeters. Install the window on the lower mounting beam or rafters. Then mark the lower border of the window, retreating 4-6 centimeters for flat roofing materials and 9 for profiled ones. Then mark the top point, putting another 9-15 centimeters on top.
When cutting out waterproofing material, leave a margin of 20 centimeters on all sides. The rest of the linen is wrapped inside the room. The roof covering is removed or cut out, and, stepping back 2 centimeters from the rafters, the sheathing is cut off.
Before installing the roof window, a mounting beam with a thickness of 50 mm is nailed down below; the distance to the sheathing should be 8-10 cm. Using a level, the beam is set strictly horizontally. The lower edge of the waterproofing is attached to the mounting beam with a stapler, and the upper edge is attached to the sheathing above. The side edges are pulled outward.
Features of attic window insulation
Separate mention should be made about working with insulation on the roof. Very often, improper insulation of roof windows results in many problems with its operation. Many inexperienced builders prefer to use conventional foam for insulation. This should not be done: expansion of the material can lead to distortions and problems with insulation . Correct installation technology recommends using materials in the form of stone wool mats with a high service life.
For thermal insulation of a roof window, it is best to use stone wool
As an additional measure, it is highly recommended to install heating devices under the attic window. The flow of warm air will equally warm up the window slopes and protect from condensation. Metal elements should not be used for installing insulation - they can form cold bridges.
This is all you need to know about installing a roof window in a soft roof or tile. Despite the apparent complexity, the process itself is quite simple and requires not so much skill as time.
Key Installation Steps
When performing installation work, do not forget that the windows embedded in the inclined elements of the roof take on the load of protecting the building from climatic phenomena and other environmental factors. Therefore, when choosing a suitable double-glazed window, increased demands are placed on the quality of materials.
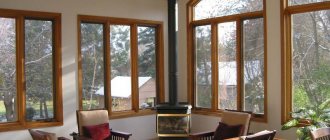
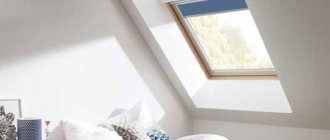
Plastic components must be UV resistant and glass must have shockproof properties. Also, the reliability of the window structure is largely determined by the presence of external protective linings made of durable composite and high-quality rubber seals. Roller shutter systems or blinds built inside can successfully replace traditional curtains or drapes.
Roller shutters or blinds will help protect you from the bright sun or the full moon Source akmcompany.ru
In addition, when choosing a window for the attic, the following characteristics are taken into account:
- dimensions of the structure;
- method ;
- installation technology depending on the roof covering;
- the presence of additional devices to ensure air circulation (removable mosquito net, supply duct).
After choosing a window design, installation is performed, consisting of a number of operations that are performed in a certain sequence:
- preparing a hole in the roof;
- installation work on fastening the frame;
- providing hydro- and thermal insulation;
- fixing the drainage tray and window frame;
- installation of double-glazed windows ;
- finishing work around the window.
See also: Catalog of projects of houses with an attic presented at the exhibition “Low-Rise Country”.
Determining the required glazing area
The size of the window opening, which will provide sufficient illumination of the attic, depends on the area of the room. For every 10 m² there should be 1 m² of glazing. It should be taken into account that the light flow depends not only on the dimensions of the window, but also on its placement. The higher the glazed structure is located, the greater its light transmittance.
However, high placement is only suitable for roofs with a gentle slope at an angle of no more than 20º. In addition, such an installation is not suitable if you plan to admire the beauty of the surrounding landscape. When arranging a window opening in a roof with steep slopes, the distance to the floor should vary between 1 m and 1.4 m.