This article is a continuation of the installation guide for Velux roof windows.
Once you have planned the installation of a roof window on the roof of your house, have chosen a design with a convenient opening method and taken into account all construction requirements, the installation process begins.
Management:
- Planning. Choosing a roof window.
- Installation of a roof window.
- Combined installation. Windows in groups.
- Installation options. Installation in roofs of various configurations.
- Installation of roof windows in various roofing materials.
- Replacement and repair of roof windows.
Window location in the room
Immediately before installing the window, you need to decide where it will be located. When choosing the location of the dormer window, you need to consider:
- purpose of the premises;
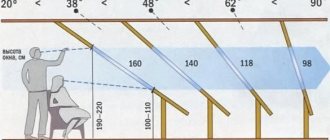
- review from a standing and/or sitting position;
- ease of use (window with opening along the central axis or with combined opening);
- the presence of a vertical wall/wall, if any;
- optimal slope design;
- building regulations;
Getting rid of condensation using I-glass
As you know, condensation appears in the form of drops on the coldest surface of the room.
If you notice fogging on the window glass, then its thermal insulation performance is unsatisfactory. Modern roof windows with i-glass can almost completely eliminate the appearance of condensation on the surface of the glass.
The appearance of condensation or moisture inside a hermetically sealed glass unit indicates a manufacturing defect. The glass unit must be replaced free of charge under warranty.
To order a warmer (Low-E) double-glazed window with so-called “I-glass”, contact one of the VELUX representatives in your region. Most likely, you will receive assistance in improving the properties of the window.
Roof window
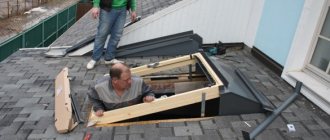
If there is no access to the roof from the outside, then it is necessary to make an opening by cutting a small hole, approximately 400x400 mm, from the inside through the roof structure. After removing the sheathing elements in the opening, the final location of the window in the roof structure can be determined. When taking measurements, it is necessary to provide a margin for placing thermal insulation around the window frame.
If possible, in order to minimize the overlap of roofing materials, adjust the position of the window across the slope, leaving the recommended distance to the beams/rafters (supports) and roofing material if installed in tiles.
Depending on the type of frame, it is necessary to adjust the position of the window on the slope. If installed with profiled roofing materials, then it is necessary to provide a full row of tiles under the window.
When determining the final position and dimensions of the roof opening, add 20-30mm to the sides of the window to ensure proper insulation around the window frame. Determine the opening for the window along the length between the sheathing elements (it should be 45 mm larger than the window), as well as along the sides between the rafters.
What attracts Velux products ↑
- It is noteworthy that in the production of high-quality solid wood, especially durable, dense pine - northern. For frames and boxes, glued laminated timber impregnated with an antiseptic is used. Finished products are additionally protected by monolithic polyurethane or special varnish applied to the surface of the frames.
- Installation is allowed on roofs with a slope greater than 15⁰. They are installed deeper than analogues from other manufacturers, almost flush with the roofing. Thus, the junction points are much warmer, since in this case it is much easier to insulate the window frame.
- The main feature of all windows is the unique ventilation device with which they are equipped. For example, the designs of the GGL or GGU models combine an opening handle and a special window valve designed for ventilation. All of them have a removable filter - excellent protection against the penetration of insects or dust.
- For glazing, the Danish company uses energy-saving double-glazed windows made using innovative technology called “warm perimeter”. In such designs, the aluminum dividing strip is replaced with thin-walled steel. Such a replacement leads to the absence of condensation along the perimeter of the glass unit, which, in turn, increases the performance characteristics of the windows.
- Velux double-glazed windows are filled with argon, and silicone is used for sealing instead of butyl sealant.
- They have a three-level seal along the contour, which eliminates drafts and increases heat-saving qualities. They were tested at temperatures of about minus 55⁰ and, according to the test results, were found to be frost-resistant. That is why they are recommended for use even in the coldest regions of Russia.
- Modern design, ergonomic shapes, as well as reliability, environmental friendliness and high quality, confirmed by relevant certificates.
Opening in waterproofing and finishing
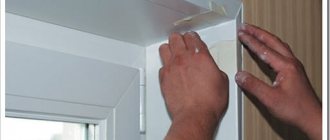
The waterproofing should be cut as shown in the picture and tucked in to ensure a connection to the roof window frame and to prevent side leakage from under the counter beam.
If the room has interior trim, project the dimensions of the window frame perpendicular to the ceiling trim and make marks.
Cut out the hole. To install a window, you need to cut a temporary hole; its size should be smaller than the size of the box. Keep in mind that you should leave the option to restore the vapor barrier (if any) in the existing roof structure with a new vapor barrier around the window.
The final adjustment of the hole in the ceiling trim is made during the installation of the slopes.
If the window is installed from inside the room, then it is necessary to remove the rotating window frame/sash. If installation is carried out externally, then it is not necessary to remove the rotating frame.
Our works
Roofing from scratch in Khimki
Reconstruction of the roof in the village of Gorodishche
Roofing from scratch in the community center "Nightingale Grove"
Installation of a pie on the rafters in the Ramensky district
Mounting plates and thermal insulation circuit
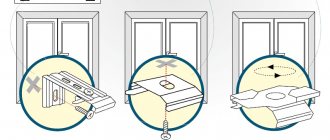
Mounting plates are supplied with the window or flashing for some special installations.
Windows with a height of 1400 mm and above are supplied with additional brackets that are installed in the middle of the side surfaces of the frame.
The brackets and mounting plates must be installed on the window frame before installing the roof window.
Some products and combinations (shown in the illustration) require special brackets.
For certain window and flashing combinations, special brackets are supplied with additional window elements such as GIL, VFE or EBW beam.
The BDX 2000 installation kit window insulation circuit consists of four strips of extruded polyethylene foam on steel tracks. Assemble the guides into the shape of a frame, then place them on the sheathing, framing the opening in the roof before installing the window.
Place the window frame on top of the outline and secure both elements with mounting plates.
If there is not enough free space between the rafters, the insulation loop may need to be adjusted to ensure the correct position. Fit the outline by tearing along the grooves on the sides.
The thermal insulation contour reliably insulates the junction of the slopes and the window frame. When using locally fabricated slopes, it may be necessary to adjust the top and bottom of the insulation loop by tearing along the grooves on the sides.
Model range for the attic ↑
The range of Velux windows is very diverse: four modifications with a central axis, two with an upper axis, balcony designs and others.
Let's highlight the most common ones:
- “Economy” (GZL) is a basic model with a central opening axis. The profile is covered with two layers of varnish. Equipped with a washing filter, ventilation is carried out through the top;
- “Classic” (GGL) – a wooden product, opening along the central axis, treated with three layers of varnish. For ventilation, a window valve is used, equipped with a washing filter, and allows installation of electrical equipment
- “Smart” (GGL or GGU Integra) - equipped with an electric drive to adjust the position, there is a remote control, as well as a rain sensor. Allows installation of curtains and roller shutters.
- “Moisture resistant” (GGU) is a white product, the surface of the wood is covered with monolithic polyurethane. There is a valve-window, as well as a washing filter. Allows installation of electrical equipment.
- GPL - has two opening options: central axis and top 45⁰.
- Window-balcony (GDL) – has an interesting design solution: when the upper sash is lifted, something similar to a roof is formed, a fence is created by slightly opening the lower sash. “Coming out” onto such a balcony, although a person continues to remain indoors, he is practically in the fresh air.
Securing and adjusting the window
It is important to adjust the position of the window to ensure a tight fit between the frame and the frame, as well as to achieve optimal functionality.
Start by fitting the bottom of the window frame to the bottom trim, which should be level.
Adjust the distance between the window frame and the pivot frame to ensure even gaps on the sides.
The bottom of the box and the bottom of the swing frame should be parallel to each other. If the frame does not rotate due to the non-parallel position of the rafters, adjust it using the supplied wedge according to the installation manual.
Once the window is in the desired position, secure it as described in the installation instructions.
Summarizing
Looking back, we can formulate a short list of steps for installing Velux roof windows:
- immediately purchase a complete window set with all the necessary accessories;
- The kit includes instructions for installing a Velux roof window , which should be carefully studied and always kept at hand. All branded accessories are supplied with the same instructions;
- choose the right installation location;
- maintain the dimensions of the opening;
- when installing the box, eliminate any possible distortions and only then finally secure it to the sheathing;
- work consistently; finish each stage by checking what has been done, then move on to the next.
It should be remembered that, unlike a regular window in a vertical wall, a dormer window is subject to increased loads. After all, wind, rain, and hail affect the glass almost at a right angle. So a poorly made window will not last long. In addition, by purchasing branded Velux materials for your window, you get not only an increased service life of the product, but also the opportunity to increase the warranty period for it.
Waterproofing
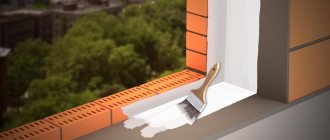
For a secure connection to the roof flashing, use the proprietary BFX waterproofing liner. As waterproofing, you should use a “breathable” membrane that can allow moisture and evaporation to pass through from the roof structure and not let moisture in.
Place the BFX on the window frame and secure with a staple gun, shape over the sheathing and secure to the sheathing. Place a drainage channel directly above the first continuous piece of sheathing above the window, but no further than 50 cm, so that it can channel water away from the window.
Attach the supplied self-adhesive butyl tapes as shown in (a) to protect the waterproofing at the cut points above the top mounting rail.
Place the top edge of the VELUX waterproofing flashing over the drainage channel, place the channel under the waterproofing cut and secure with the supplied clamps (b). To properly position and secure the BFX flashing contour under the window, trim the contour as shown in figure (c).
Flashings for roofing materials
Installation of flashings and overlays must be carried out in the sequence specified in the installation instructions. Some individual parts may be numbered on the back or side, which also indicates the assembly sequence. Remember that there are right and left parts.
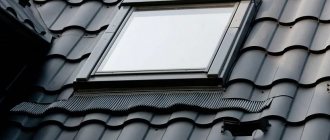
When installing flashings for profiled roofing materials, it is important that the porous seal and flexible parts of the lower section of the flashing are fitted tightly to the roofing material to prevent rain and snow from getting under the flashing and roofing material.
When using flashing options -W, it is recommended to cut off the sharp corners of the roofing material below the window before installing the lower flashing section. Temporarily install the lower flashing section and bend the flexible portion to the shape of the roofing material. Remove the flashing and then bend the flexible portion slightly before reinstalling and securing. Folding the bottom will provide a tighter fit to the roofing material.
Bend the side edges of the bottom section of the flashing. This is especially important on roofs with a gentle slope, as an additional guarantee against water flow.
The lower edge of the flashing must be tapped with a rubber hammer for a tighter fit to the roofing material.
To ensure proper sealing of the flashing, it may be necessary to remove the tenon from the shingles.
Since driving screws into flashing is strictly prohibited, in some cases it may be necessary to secure the shingles with wire and/or bond (if possible) to the adjacent shingles with an appropriate sealant.
When installing special EDL/EDN flashings on roofs with asphalt shingle roofing material, it is important that the bottom section of the flashing overlaps the roofing material with at least the same overlap as the roofing material itself. To ensure better water drainage around the window, leave distances between the roofing material and the window as specified in the installation instructions.
