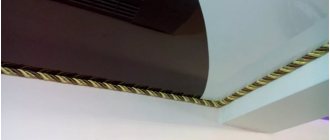
Attaching ceiling plinths gives the ceiling a finished look. Thanks to their installation, you can hide unevenness, unsightly joints of surfaces and improve the room. After a design project or your own idea for renovating a room has been implemented, baguettes have been selected and purchased, the question arises: how to glue the plinth to the ceiling? Is it possible to carry out the installation of fillets yourself, or is it better to entrust their fastening to professionals?
In this article you will find answers to these and many other questions that arise in the process of laying skirting boards.
Get the basics right
Ceiling plinth, baguette, fillet, cornice - all these are different names for a decorative element that is installed at the junction of the walls and ceiling along the perimeter of the room. It gives the design of the room a finished look and allows you to hide flaws in the junction of two surfaces.
What are there
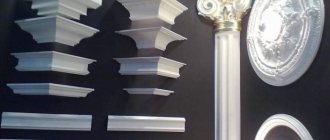
Skirting boards are made from polystyrene foam, polystyrene foam, polyurethane, as well as gypsum and wood. The most common ones are made of polystyrene foam. They are quite durable, light, cute and have an affordable price. A budget option is more fragile foam baguettes.
Polyurethane curtain rods are very durable due to their high density, but for this reason they are quite heavy, and, in addition, expensive. Plaster and wooden skirting boards are made to order - a rarity.
How to calculate quantity
The standard length of a baguette is 2 meters, so calculating the required amount is quite simple. You just need to find out the perimeter of the room by adding the length of all the walls and dividing by two.
For example, for a room of 3.5 × 5 meters you will need (3.5 + 3.5 + 5 + 5) / 2 = 8.5 pieces. Let's round up to 9 and add one more just in case. As a result, you need to buy 10 skirting boards.
At what stage to glue
Baguettes are installed after the walls and ceiling are leveled, but before they are finished. Usually the decor is glued before painting the ceiling and painted along with it, after which wallpaper is pasted or the walls are painted. We recommend doing just that.
The installation option after finishing the ceiling and walls is also sometimes found, but is less correct. The only advantage that this approach provides is the ability to easily create a joint between the baseboard and wallpaper. There are more disadvantages. Firstly, when changing the wallpaper, you will most likely have to re-glue the baguette. Secondly, if the walls are uneven, then it will no longer be possible to cover the cracks under the baseboard with putty on top of the wallpaper.
What to glue on
There are several options. It is worth choosing depending on the material of the baguettes. For polystyrene foam and polystyrene foam, finishing putty with the addition of PVA (1 part glue to 4 parts mixture), liquid nails or glue-putty is suitable.
For heavy polyurethane skirting boards, it is better to use special adhesives for stucco molding and decor. Wooden versions are attached to nails, plaster - to a solution of gypsum and alabaster.
How to deal with stretch ceilings
Skirting boards can also be installed with suspended ceilings. The only difference is that in this case the adhesive is applied only to the lower edge, which is adjacent to the wall. The upper part is applied dry close to the canvas, but is not attached to it. When painting, in order not to stain the ceiling, just insert a sheet of paper between it and the baguette and move it as you go.
Briefly about ceiling cornices
These designs allow you to visually make the ceilings higher and give the interior solution a finished look.
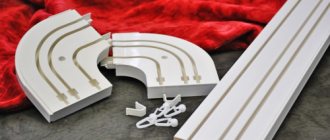
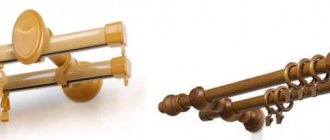
That is why cornices that are mounted on the ceiling are replacing wall cornices and curtains. They are easy to fit into almost any design. They are distinguished by their low weight, low cost and simple lines. But this does not in any way affect their durability. Their installation is simple, regardless of the shape of the window over which they need to be fixed and its width. They move easily across the ceiling and are easy to care for.
Make the markings
The fillets are easy to move when gluing, then their joints will not match, and the frame itself will be uneven. To prevent this from happening, the skirting boards must be placed on the same level. And to do this, in turn, you need to put one of the parts in its place and mark its lower edge with a pencil. Next, use this line to draw a line around the perimeter of all the walls.
Illustration: Artyom Kozoriz / Lifehacker
If the ceiling is flat, it is enough to measure the distance from the mark to the ceiling, make several more similar points and connect them with a pencil and a rule.
Illustration: Artyom Kozoriz / Lifehacker
When the ceilings are not perfectly level, you first need to draw a line in one of the corners at an arbitrary height. Then use a water level or laser level to transfer the mark to the remaining corners and connect. The result will be a reference line set strictly along the horizon, from which the distance to the bottom of the baguette should be measured.
How to glue to a stretch ceiling
To do this, you will need to make holes with a hammer drill, according to the holes on the ceiling cornice. You will need to drill a concrete slab, take a drill with a Pobedit tip. We install the dowels, soaking them in ceiling tile adhesive.
It is mounted in two ways: open (before stretching the ceiling, a wooden block is placed in the installation site) and closed. With the open method, the block is strengthened with an insert in the places where there will be screws holding the cornice. The holes are secured with plastic rings so that the canvas does not tear or stretch during the installation of the baguette.
If the block is not installed when installing the ceiling, you can install it at a height of 20 cm from the wall. The edge of the ceiling is fixed to the beam with a wall molding. This technique produces a flowing shelf vault that appears higher than it actually is.
Estimate the layout of parts
The wall opposite the door is completely covered with two pieces; one will even have to be shortened a little.
On the side wall, after installing the corner elements, you will only need to glue an insert about a meter long. Illustration: Artem Kozoriz / Lifehacker The skirting boards are 2 meters long, so you can’t do without joints. They will be less noticeable if you start installation from the most noticeable place - the wall, which is visible when entering the room.
You should also avoid short pieces of baguette if possible. Instead, you can shorten the adjacent parts to make an additional plinth with a length of one meter or more.
All this needs to be thought through before gluing the fillets. Measure the length of each wall and estimate how many parts and what length are needed to cover it.
“Pros” and “cons” of attaching moldings/plinths to adhesive mixtures
Among the undoubted advantages of the method under consideration are the following:
- Strong adhesion to the mounting base;
- The finishing process is relatively short in time;
- A wide range of fastening mixtures on the current Russian market;
- Possibility of fixing skirting boards/moldings even on unprepared substrates;
- The ability of some types of compounds to successfully withstand temperature changes and increase/decrease in humidity (and this allows the compositions to be used in rooms where there is no thermoregulation for a certain period of time, for example, a country house in winter).
Among the shortcomings it is possible to note:
- 100% need to level the base surface to fix planks made of hard materials (wood, plaster, clay, rigid polyurethane, MDF);
- The likelihood of a long period of adhesion for some types of adhesive substances and materials - it is necessary to maintain the connection for some time through muscular efforts until hardening occurs.
Cut skirting boards at an angle
For the joint, adjacent skirting boards must be cut at an angle of 45°. This can be done in different ways. The simplest one is in a special template called a miter box. You can do without additional devices and cut the fillets by trying them on next to each other.
How to trim a baguette in a miter box
Illustration: Artem Kozoriz / Lifehacker
Place the plinth in the miter box, press its edges against the walls of the template and cut at the desired angle in the required direction: one of the baguettes from right to left, the second from left to right. It is better to work with a stationery knife with a new blade or a hacksaw with a fine tooth in the case of hard cornices.
When trimming a ceiling molding, it is applied to the wall of the miter box closest to you. The far one is intended for floor skirting boards, and if you use it as a guide, the parts will not fit together.
Place the pieces together and check how accurate the joint is. If necessary, trim with a sharp knife or cut again.
How to trim a baguette without a miter box
Illustration: Artem Kozoriz / Lifehacker
Place the left plinth in the corner, then move the right one close to it. On the first element, use a pencil to mark the distance by which it overlaps with the second piece.
Illustration: Artyom Kozoriz / Lifehacker
Now swap them: place the right baguette in the corner and, moving the left one towards it, make a similar mark.
Illustration: Artyom Kozoriz / Lifehacker
Next, all that remains is to cut off both fillets from the mark to the opposite edge. As a result, the elements must fit together perfectly.
Illustration: Artyom Kozoriz / Lifehacker
The advantage of this method is that it is suitable for surfaces with any angles. Whereas a miter box allows you to trim skirting boards only for walls with perfectly right angles.
Which glue is better
Before gluing ceiling skirting boards, you need to choose high-quality glue. It’s better to figure out from the beginning what is the best way to glue the ceiling plinth, so that there are no problems later.
Specialized departments offer the following types of glue for gluing ceiling skirting boards:
- Acrylic
. The main substance here is water, so this substance does not smell. This inexpensive composition for gluing skirting boards to the ceiling is recommended for use in rooms with a normal microclimate: it does not withstand direct contact with moisture. - Polymer
. This glue is characterized by strength and moisture resistance. The substance contains chemical solvents that maintain its liquid consistency. Polymer glue dries for quite a long time (several days), emitting a specific odor throughout this period. Despite significant shortcomings, this particular composition is most popular among consumers. We are talking about such well-known brands as “Titan” or “Moment”. Their distinctive feature is reliability and versatility. Within the line of polymer compositions, there may be differences in the speed of setting and the degree of resistance to low temperatures.
When choosing between polymer and acrylic glue for gluing ceiling plinths, the functional purpose of the room is taken into account. In children's rooms it is better to use a safe acrylic variety. It is recommended to decorate the kitchen and bathroom with a moisture-resistant polymer substance. You can find special glue for working with wet parts. There are also quick-drying compounds that are very convenient when working at heights. To fix wooden baguettes, you can use not only glue, but also screws and nails.
Start installation
It is most convenient to do this from the corners, and then install all the straight sections.
Illustration: Artyom Kozoriz / Lifehacker
Apply putty or glue to both edges of the baguette from the back and carefully apply it to the wall and ceiling, aligning it along the marking line. If you use glue, press the part for the time specified in the instructions. This is not necessary for putty.
In the case of a suspended ceiling, the adhesive is applied only to the lower edge of the fillet, which is adjacent to the wall.
Using the same principle, attach the second plinth. First, align the 45° cut joint, then align with the mark and press. Remove the remaining mixture with a spatula. Fill the resulting cracks with putty and smooth with a damp sponge or rag.
If the length of the wall is less than 4 meters and two whole baguettes do not fit, stick one of them first. Cut the second one at an angle, attach it to the surface and only then mark the junction with the first element. Trim off the excess.
Installation of baguettes
If the ceiling is finished with PVC panels, then plastic skirting boards are installed. Before attaching the plinth, markings are made and a fastening strip (plastic corner) is installed around the perimeter of the room at an angle of 90 degrees.
The fastening strip is installed on self-tapping screws in increments of 30-50 cm
Then the corner elements are trimmed and installed. The ceiling plinth is snapped onto the plank on one side.
Plastic plinth fasteners
Thus, a recess is formed between the baguette and the strip, into which it is convenient to install PVC panels. During their installation, holes are made for wiring. And then the PVC ceiling plinth is fastened on the remaining three sides.
The baguette snaps into place - fastening is complete
More information about installing skirting boards - video:
[su_youtube url=”https://www.youtube.com/watch?v=N9JhaFVwX1I”]
Install the rest of the items
When all the baguettes in the corners are glued, you can start gluing the intermediate parts. Since it is much easier to fit an element with straight ends than with ones cut at 45°, it is most convenient to do just that.
Straight sections are glued using the same technology. The only difference is that putty or glue must be applied not only to the edges on the back side of the cornice, but also to the junction of the straight ends. Also cover the cracks with putty: after drying and painting, they will not be visible.
Painting
The final procedure for installing ceiling plinths is painting: it gives the ceiling a finished, beautiful look. Most often, water-based, acrylic or latex paints are used for this. Wooden products are decorated with nitro paint, after having been coated with a primer. Before painting the friezes, they need to be allowed to dry: usually a day is enough for this. Acrylic or water-based compositions demonstrate the greatest practicality. For application, a soft brush of appropriate width is usually used. It is most convenient to paint baguettes together with the ceiling, using identical material. Wallpapering or other types of wall decoration can be done after the paint has dried.
