There are especially lightweight designs for which liquid nails can be used. A lot of innovative developments greatly simplify a person’s life, because for such installation you do not need to have special specialist skills. Naturally, with such actions, you need to remember about preliminary work on preparing the surface, selecting material for installation and the cornice itself. It is worth remembering that high-quality liquid nails can withstand a lot of weight, but if you plan to use multi-tiered curtains made of such a heavy material as jacquard, then it is much better to give preference to a more durable hanging cornice made of plastic. In addition, the glue can dry out over time, which will lead to collapse of the structure, repeated actions and additional costs.
Advantages of cornices
Craftsmen highlight the following advantages in wooden cornices:
- affordable price;
- large palette of colors, variety of designs;
- they do not require special care;
- visually increase the space.
This handmade product will fit perfectly into any interior. Double-row cornices will allow you to use both heavy curtains and multi-level structures in the interior of the room.
Ceiling cornices made of wood have their advantages. You can even make 3-4 rows for attaching curtains (at your discretion). The guides are covered with a decorative panel. To decorate the panel, carvings are made. This mount will decorate the ceiling in both the bedroom and living room. The ceiling structure can be disguised with a suspended ceiling.
Today, carved cornices are used as decorations for wooden houses and dachas. The elements, transforming the facade of the building, make the buildings unique.
You can make your own wooden cornice at home, which will also be exclusive. It will highlight the original taste of the master, the high skill of the carver and the beauty of the wooden product.
Wooden curtain designs look stylish in any home. For the kitchen they use single-row ones, for the bedroom - multi-level ones. Double-row ones are suitable for a room with a simple design.
The classic interior is traditionally decorated with expensive noble wood in dark shades. A frame made of lighter wood species will look good in a small living room.
Kinds
Plas have the same structure and are divided only by the number of rows for roller hooks:
- single-row version – designed for lightweight fabrics that serve primarily an aesthetic function. Often combined with roller blinds, providing the creation of a light regime;
- two-row modification is the most common type. It is used for the classic combination of tulle curtains and curtains made of thick fabric;
- three-row variety - used to create a complex curtain ensemble. This version of the suspension system has the greatest width and weight. Therefore, an additional number of fastenings should be provided for it.
Cornice with wall mounting
The main advantage of curtain rods that are attached to the wall is a more convenient method of fixation. It is enough to attach the plank to the wall, mark the fixation points, and secure the racks. There are no special difficulties during repeated repairs. In order to change the wallpaper, it is enough to make small cuts on the sheets of wallpaper that would go around the cornice posts. With proper fixation, not just with screws, but with dowels, their service life increases several times. The only modern addition is the strips that cover the place where the screw is screwed in.
Cornice with ceiling mounting
The second option for curtain rod systems are those that are fixed to the ceiling. This look is more modern. Unlike the first type, after installing such systems there is no space left between the plank and the ceiling. This feature is one of the main advantages. Now many people prefer to choose curtains for their home that completely cover the section of the wall where the window is located. Many people lead a very unstable and non-standard rhythm of life, many work at night and rest during the day. To plunge a room into darkness, you simply need to completely and tightly curtain the windows. Even with blinds, there is no guarantee that light will not enter the room. Only a ceiling cornice and thick curtains can help solve this problem. It allows the curtains to completely cover the entire section of the wall with the window. Similar systems are also used in hotels.
Cornice systems for suspended ceilings
Fixing a cornice on a regular ceiling is a fairly simple process. But now the most popular type of ceiling covering is a suspended ceiling. Regardless of its type, attaching the cornice becomes much more complicated.
For suspended ceilings, of course, it is better to choose systems that are fixed to the wall. The fact is that the structure of suspended ceilings itself implies the presence of a distance between the edge of the ceiling and the wall. Sometimes lighting systems are fixed in this space. In addition, this type of ceiling covering lowers the ceiling height by several centimeters. With all this, if the height of the windows in the room coincides with the height of the wall, the window is located at its entire height, you simply will not have space to fix the cornice on the wall.
Another argument for choosing a ceiling cornice is that the system itself can be hidden under the canvas. As a result, only beautiful curtains and stretch fabric are visible. Cornices for suspended ceilings are divided into types according to material: wood; aluminum; steel; plastic.
Each material has its own characteristics:
- Wooden cornice systems are very popular due to their elite appearance. But they have more weight and higher cost.
- Aluminum is a fairly light metal. Due to this property, such cornices are used in combination with complex ceiling structures that are not able to withstand heavy weight. The cost of this option is not high, which is another advantage of such curtain rods. But they are not suitable for attaching heavy fabrics. Due to the fact that aluminum is a fairly ductile and soft metal, it can be deformed under the weight of the curtains. For heavy textiles, steel systems are used.
- Steel is a very strong metal. Such systems themselves are quite heavy and not flexible. It is thanks to these properties that they can withstand thick and heavy curtains.
- Plastic systems are an economical option. This is a budget type of curtain rods. They are durable and not expensive. Plastic curtain rods are one of the most popular system options. But, firstly, they do not have a very presentable appearance, and secondly, they are easy to damage. It is especially bad to combine plastic with suspended ceilings and lighting around the perimeter. The fact is that due to lighting fixtures, plastic can melt.
Nuances to consider during installation
To avoid additional difficulties and to ensure that the work process is not interrupted, it is better to take into account some points in advance.
For example, the brackets must be fixed in a strictly symmetrical position relative to the windows and walls. So, you will achieve the perfect harmonious look of the curtained window.
If the base of the cornice is too long and the curtains are very heavy, then it is better to also attach a bracket in the center. This will serve as additional fastening.
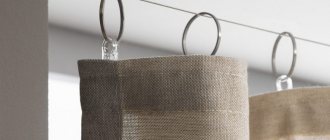
Position the mounting rings so that they are the same distance from each other. Then you will get even folds on the curtains.
If you are installing a round curtain rod, leave one free ring at each end. This secret will help in the future when fixing curtains in extreme positions.
It is worth purchasing a special pointer for moving curtains - a “driver”. Its use will make managing the curtains easy, and the curtain rod will remain durable for a long time.
Methods of fastening to a suspended ceiling
It is impossible to fix the cornice to the surface of the stretch ceiling; the canvas simply will not withstand the weight of the systems and curtains. Therefore, they are mounted on the surface of the main ceiling. It is best to additionally use a mortgage made of wood or plastic. This way you will be absolutely sure that the cornice will not break.
installation methods :
- A wooden plank is installed under the canvas, then the canvas is stretched, and then the cornice is fixed. Thus, the cornice system itself is on the surface and can be seen.
- The hidden system option requires a certain distance between the ceiling structure and the wall. Thus, the system itself is not visible and the canvas is not damaged.
10.DECORATION
You can use mirrors or glossy surfaces in the interior of the apartment. A mirror will not only increase the height of the ceiling, but also visually expand the space of the room.
You should not abuse a large number of framed photos, paintings or brought souvenirs on the shelves. They will create a feeling of congestion in the room.
Instead of several small paintings, it is better to choose one larger one. Moreover, it is better to choose a canvas with a vertical rather than horizontal composition. If you do choose several small paintings, hang them slightly above eye level.
Installation of ceiling cornice
If you have chosen a suspended ceiling and a ceiling cornice, it is better to choose fabric material. The film is quite elastic, which makes it easy to tear. And fixing the open ceiling cornice involves piercing the canvas.
- The first thing to do is mark the mounting points on the main ceiling.
- After this, you should make notes on the walls where you plan to install profiles for the stretch ceiling structure.
- The next stage of work is the installation of a mortgage to further fix the cornice on it.
- The bar is fixed to metal hangers using self-tapping screws. It should be located 3 mm above the level of the stretch ceiling, so that the canvas is placed directly below the plank.
- After installing the ceiling covering, you can attach the cornice in the place where the plank, which is the base, is located.
If you decide to install a hidden cornice, the order and scheme of work will change slightly. When installing a hidden cornice system, the most important thing is that the suspended ceiling structure will be smaller than the main ceiling. The fact is that you will need to retreat a certain distance from the wall with the window to the edge of the structure. It is in this area that the cornice system will be installed. The process of fixing the cornice itself is quite simple. You just need to measure the distance from the window and secure the bar with fasteners.
What are liquid nails?
This composition for installing polystyrene foam ceiling moldings differs from polymer glue in that it does not harm the material. You can always be sure that the moldings will remain intact and will be securely fixed for at least 10 years. Liquid nails come in the following 2 types:
The difference between them is that the first type is made from an organic solvent. Such liquid nails have a pungent odor and are hazardous to health in a liquid state if simple safety rules are not followed during the work.
The good thing about neopropylene adhesives is that you simply cannot do without them for use in rooms with very high levels of moisture. Acrylic glue is considered the most harmless to humans and does not have any harmful effects on moldings. The disadvantage is that such a composition is sensitive to high humidity, so it is better not to use them in the bathroom or kitchens.
How to assemble a cornice
Every housewife will tell you that the highlight of any apartment is a window with a chic cornice. For this reason, such an important element of the interior needs special decoration. The abundance of offers on the market extends not only to curtains and decorative elements. And there are also several types of cornices, including single-row, double-row, ceiling and others.
Window decoration is not limited to just purchasing the product you like, as it still needs to be assembled and secured. In this article we will look at how to assemble a cornice yourself.
Assembling a double-row cornice
The initial stage of the assembly process involves unpacking and trying on the product. Each cornice is packed in compacted polypropylene using a thermal method. It is more convenient to open such packaging with a sharp knife.
It is necessary to separate all elements from the main pipe. After this, carefully make an incision along the polypropylene seam and remove it from the rod.
IMPORTANT! Careless cutting of the packaging material can damage the cornice, after which it will become unusable.
Installing the product without trying it on will cause significant difficulties. There are certain rules in this process.
Before the final installation of the double-row cornice, it is necessary to position the pipe along the window and partially assemble the product by putting brackets and ends on it.
During the fitting process, you should remember that it is not recommended to hang it at a short distance from the heating pipe. Such close proximity can lead to deformation of an interior element.
If the eaves pipe is found to be excessively long, it should be shortened to the required size. After this, you can move on to another stage, which is pruning.
Before shortening, you must make marks on the pipe with a marker. Then saw through it five millimeters deep along the seam. Carry out similar manipulations in the marked place, cutting its tire to the same length.
ATTENTION! While cutting, you must carefully monitor the “playing” tire. The sawn edges can be straightened by bending them inward with pliers. Any irregularities that appear are removed with a file.
The next stage is preliminary assembly. To do this, place the double-row cornice on the floor, put the end on the pipe, and secure the bracket using self-tapping screws. In this case, it is necessary to ensure that this part is completely hidden. For this reason, the bracket is directed towards the ceiling, with one ring placed between it and the tip.
Then you need to put on half the rings and place the middle bracket in the middle of the pipe. After the manipulations have been completed, you should repeat the procedure, only in the opposite order - put on the remaining rings with the exception of one, the bracket, the last ring and the tip. Proper installation requires clearance between the tip and the bracket.
Assembling a round cornice
The process of assembling a round cornice begins with marking the places for fixing the brackets. After this, the supports for their fastening are installed on the wall using screws and dowels.
The guide fasteners should be fixed with screws on the brackets, placing them on the rod along with the rings, leaving one at the edges.
Then you need to place decorative tips on the rod, insert the hooks into the guide, and install the end caps. Then snap the guide into the fasteners.
The last step is to install the finished cornice brackets into the supports and secure the structure with screws.
Assembling the ceiling curtain
This process does not require serious knowledge and skills. If the curtain is made in the form of a tire, then the entire assembly is carried out during installation of the structure. If the standard length is not enough for you, increase it using the same tire. After installing the curtain, runners and plugs along the edges are inserted into it.
Try not to use curtains that are too heavy if their weight is not provided for by the design features of the ceiling cornice.
If the cornice is made in the form of a rod, then the brackets are secured first. After installing the first bracket, a rod is inserted into it, rings with sliders are put on, and then the rod is attached to the second bracket. Finally, plugs are installed on the sides.
To fasten profiles to wooden structures, it is necessary to estimate the distance between such structures and the profile. If this distance is large, then the screws for fastening must be taken with a large diameter - at least 5 mm.
Ceiling mounted options
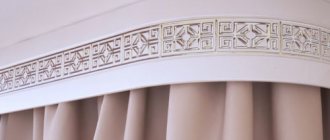
If you want to purchase and install wooden ceiling cornices, you need to take into account that usually such suspensions are installed together with a decorative panel that hides the guides and is the main decorative detail. Without such a decorative strip, the design will not look very good.
In addition, you need to calculate the length of the curtain in advance, since in the case of ceiling mounting it should be longer than when fixing it on the wall. Many people prefer three-row ceiling devices, since in them the first row of guides serves as a mount for the lambrequin. Below are a few examples of what wooden ceiling curtain rods look like.
Ceiling options are suitable for those who do not yet have experience in installing such structures. They are easier to mount, and the cost is even less than wall-mounted options. The only disadvantage of this solution will be a smaller range of devices. It is also very important to choose the right decorative strip that hides the guides and hooks, since it is responsible for the final appearance of the entire solution.
Installation of rod-type curtain rod devices
Installation of cornices of most designs is not complicated, does not require expensive tools and is quite possible to do it yourself. However, during the installation process, a number of rules regarding the layout and drilling of holes must be observed.
Requirements for the location of the cornice
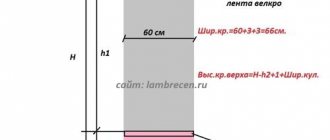
When choosing a cornice, first of all you need to decide on its width - whether the curtains will cover only the window opening, or whether you plan to place them over the entire width of the wall.
In the first case, the length of the device should exceed the width of the window opening by 0.4-1.0 m, that is, the end tips of the accessory should extend beyond the lines of the side slopes by 0.2-0.5 m - the wider the window, the greater this value , and more voluminous than the folds of parted curtains.
Assembling a sliding cornice
The sliding one consists of a pair of tubes of different diameters, one of which is inserted into the other. Inside the structure there is a simple fastening mechanism or spring.
These interior elements are divided into two types depending on the fastening - installed between two walls or window slopes and fixed to the wall or ceiling supported by brackets.
The standard length of products of the first type is up to 210 centimeters, the edges are equipped with rubber tips. Installation of the rod does not require the use of any tools. To install, you need to mark the surface and stretch the rod. After this, place one end in the marked place, and push the other to the opposite mark.
Wall-mounted models are more practical. Installation of such products comes down to securing the brackets and installing a rod that extends to the required length.
How to assemble a two-row metal cornice: detailed description
Installing curtain rods is a service for which repair organizations charge from 2,000 rubles. At the same time, the installation of the cornice, if you have the necessary equipment, takes no more than an hour of time.
Window decoration in the living room
From this article you will learn how to assemble a double-row curtain rod and install it on a wall or ceiling, which will allow you to do all the work yourself, saving money and ultimately getting a high-quality result.
Required Tools
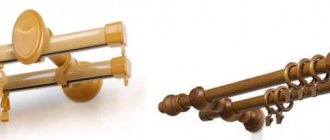
With a single-color decorative overlay.
Installing any: three-row, two-row or single-row is quite simple. First of all, everything needs to be correctly calculated and laid out. This is usually done at the stage of planning and preparation of upcoming work.
All you need next is:
- selected model;
- drill;
- 2 drills of different diameters;
- fasteners;
- knife or file (you can use a jigsaw)
- pencil, square and tape measure.
Wall mounting
Before hanging curtain rods on the wall, you need to decide on the distances. At what distance from the ceiling should it be installed? Curtains look best when there is 1/3 of the entire distance between the window and the ceiling from the cornice to the ceiling, and 2/3 to the window. It must be remembered that the minimum gap from the window is 5 cm.
At what distance from the ceiling should you hang a cornice?
It is also worth deciding at what distance from the window opening the edges of the cornice (pipe or profile) should end. This applies more to the choice of cornices, but it would be useful to remind you: the minimum distance is 15 cm, and the maximum is up to 40 cm (more is possible, but it may look disproportionate).
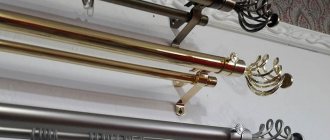
Types of brackets
To hang curtain rods, you need to consider the bracket on which it is attached. They come in several types:
- In the shape of the letter "G". Metal curtain rods are usually equipped with such brackets. They are the easiest to work with: the holes for fasteners are clearly visible.
L-shaped brackets are the easiest to install
The most difficult installation is for round collapsible brackets. The difficulty is that they disassemble and assemble. Otherwise, everything is the same, the installation procedure is the same as for other types.
How to wash things with iron rings?
How to wash clothes with metal fittings?
- The product (sweatshirt) can be machine washed, quick cycle or delicate wash. ...
- If there are sewn-on stones or rhinestones on the clothing, then the product should be turned inside out and loaded into the drum of the machine.
Interesting materials:
How to make an image of Windows 8.1 on a USB flash drive? How to share iCloud? How to share a folder in Google Drive? How to share a folder on Windows 10? How to share screen on Skype? How to do a master reset on Nokia? How to create a joint account at Tinkoff? How to make a general newsletter in Yandex mail? How to boot Windows normally? How to make a regular ponytail?
Replacing a cornice on a suspended ceiling
The first thing that can scare an inexperienced builder in such work is the myth that this requires dismantling the ceiling structure. But this is just a myth. If the cornice was initially installed tightly, to replace the outer strip it will be enough to simply unscrew the screws, remove the cornice strip, and install a new one in the same place.
Dismantling a hidden cornice on a stretch ceiling is carried out by simply unscrewing the screws from the old cornice strip. After which the old one is removed, and a new panka is attached in its place. The space between the wall and the edge of the ceiling structure should be enough to freely remove the old cornice and install a new one. In this case, just like in the first, there is no need to disassemble the ceiling structure.
Well, the third option for changing the cornice on a suspended ceiling is to change the location where the system is fixed. In this case, you must be prepared for the fact that if the method is open, marks and cuts will remain on the canvas. All these defects are especially visible on the film canvas. In this case, the ceiling structure will have to be dismantled. Otherwise, you simply will not be able to unscrew the old base bar and attach the new one.
Methods for attaching a cornice to a suspended ceiling
So, is it possible to change the cornice on a suspended ceiling? The answer to this question directly depends on how it was installed. As you know, any additional elements are installed on a suspended ceiling using special mortgages. They are fixed to the base ceiling. It is the mortgages that hold the weight of the cornice and ensure its reliable fastening.
Ceiling cornices can be installed in two ways:
- Directly on the suspended ceiling . In this case, the cornice is attached to plastic platforms fixed to the base ceiling using metal hangers. Holes are made in the cornice and in the canvas itself, through which self-tapping screws are screwed into the plastic platform. This installation method allows for a tight fit of the cornice to the surface of the stretch ceiling, which ensures an aesthetic appearance of the structure.
- In the niche between the window and the suspended ceiling . In this case, when installing the structure between the window and the suspended ceiling, a small space is specially left in which a cornice of the required size and shape is installed. Often this space is left without any finishing. That is, looking beyond the edge of the tension fabric, you will see the rough ceiling. An option with a hidden niche is also possible. In this case, at some distance from the edge of the ceiling, a wooden beam with a BP-40 profile is attached. A kind of niche is formed, on the inside of which an aluminum wall profile is fixed around the perimeter. This design involves installation of mortgages in a niche under the cornice. After installing the canvas around the perimeter of the room, craftsmen stretch a separate film in a niche, fixing it to the wall profiles. Then holes are made in the canvas, which allow you to attach the cornice to the mortgages.
Is it possible to do the replacement yourself?
Before answering the question of whether it is possible to change the cornice on a suspended ceiling with your own hands, you should determine how it was installed. Experts strongly do not recommend proceeding with independent replacement if the cornice is fixed not to the base ceiling, but to special mortgages. In this case, an inexperienced technician may make mistakes that will lead to the need for repairs or complete replacement of the stretch ceiling.
For example, if you choose a new cornice, which differs from the old one in greater weight, you risk damaging the mortgages and even tearing the canvas. If the type of mortgages and their number do not match the weight of the new cornice, they may simply break or move away from the base ceiling. In the best case, the mortgage will simply fall onto the tension fabric, and in the worst, it will leave a hole in the ceiling. The same problem can happen if you decide to install a longer or wider cornice.
If you want to replace a cornice installed directly on a suspended ceiling, and have chosen a model that is fundamentally different from it, proper replacement may require the installation of other or additional mortgages. Only professionals can cope with such work, as partial dismantling of the coating will be required. The craftsmen will determine whether it will be possible to use the covering after its dismantling, will correctly remove part of the canvas and install new platforms. Once the ceiling is reinstalled and the embeds match the cornice model, they will carefully make new holes in the canvas and secure the cornice.
You can start replacing yourself only if you are sure that the old mortgages are completely suitable for the new cornice. It is also important to have at least minimal knowledge about the features of working with stretch ceilings made of different materials. For example, you should remember that it is strictly prohibited to simply make holes in a stretched PVC film, because this material easily “creeps” and breaks. To make holes for self-tapping screws, you need to use a heated needle or special thermocouples.
Is it possible to change the cornice on a suspended ceiling if it is installed in a niche? You can do this kind of work yourself only if the cornice is installed on a base ceiling and not on a suspended ceiling. With such a replacement, you don’t have to worry about the safety of the canvas, since all work will be carried out with a rough overlap.
If the cornice is installed in a niche that has a tension covering, the risks increase. Any inexperienced actions can lead to rupture of the canvas. Of course, in this case, only a small part of the ceiling, which is located in a niche, will have to be replaced, however, even such material costs money.
Based on the foregoing, we can conclude that if the need arises to replace the cornice on a suspended ceiling, it is better to entrust the work to professionals. They will help you choose a new cornice, can easily change the design of the mortgages or increase their number, and also avoid damage to the coating.
Question answer
When is it better to invite a specialist to install a tension shelf, before or after making major repairs?
It is best to install suspended ceilings after the main repairs have been made, since if you install a suspended ceiling first, there is a high probability of damaging the ceiling when wallpapering, when drilling any holes, and problems with wiring may also arise.
What to do in case of a flood when the ceiling begins to sag? How to drain the water?
If the ceiling is flooded, you do not need to take any independent action; you must contact a specialist
How to care for stretch ceilings?
Stretch ceilings do not require special care! It is allowed to wipe the ceiling surface with soft cloths using soapy, non-aggressive chemicals. Wiping should be done without strong pressure, in order to avoid contact of the ceiling material with the internal elements of its cavity. When caring for glossy surfaces, it is worth using alcohol solutions to prevent streaks from appearing.
What is the service life of suspended ceilings?
Typically, manufacturers of suspended ceilings claim a service life of 10 years, but in practice, ceilings last until they receive mechanical damage.
How much will the ceiling level drop after installing tension structures?
The minimum loss of height in a room when installing a stretch ceiling is 3-4 cm. If you plan to install spotlights or you need to hide various ventilation systems and alarms, then the loss of height during installation will be from 5 cm.
Does dirt remain after installing a stretch ceiling?
It is noteworthy that the process of installing suspended ceilings is relatively “clean”. We have already emphasized more than once that the installation of suspended ceilings is carried out at the final stage of finishing work. That is why there is practically no dust and dirt during this process. However, some dust is still present. It is better to cover furniture and carpets with something.
Where can suspended ceilings be installed?
The range of applications for suspended ceilings is limited only by your imagination. Stretch ceilings are successfully used in the decoration of apartments and cottages, banks, shops and offices, hotels and restaurants, swimming pools and sports facilities, medical, educational institutions, museums and concert halls. It is also worth noting the non-traditional purpose of suspended ceilings 1. In technical rooms for protection against leaks. 2. Decorative finishing of walls, creation of false partitions, etc.
How long does the stretch ceiling installation process take?
Stretch ceilings are installed within one day. As a rule, installation of a ceiling with an area of 18 square meters. m. takes a team of 2 people from 2 to 4 hours. However, the installation time for the ceiling directly depends on the complexity of the selected structures and the number of built-in lighting fixtures, as well as on other conditions that complicate installation.
Why do you need to install skirting boards?
Skirting boards are needed to close the gap and profile between the ceiling and the wall, as well as to give the ceilings an aesthetic appearance.
Is it necessary to install a baseboard?
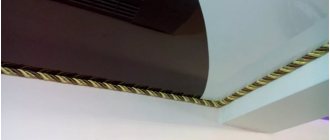
It is not necessary to install a plinth; there is no technical need for it. You can replace the masking tape-plinth with foam or polyurethane skirting boards, as well as decorative rope. Our company provides only installation services for special plinths for suspended ceilings.
Useful advice from experts
- If the cornice system is planned to be mounted on the canvas, the base bar should be located 3 mm above the stretch ceiling canvas.
- If there is a large gap between the canvas and the bar, the canvas can deform quite strongly.
- For heavy and dense textiles, it is better to choose curtain rods made of steel or wood. Plastic and aluminum slats may not support the weight of the curtains.
- Wooden cornices have a very presentable appearance, so there is no point in fixing them in a hidden way. If you have settled on this installation method, it would be more relevant to buy a budget version of the system.
- When fixing the strip to the canvas, it is better to choose fabric materials. They show less visible cut marks. In addition, the film web is easier to damage.
- Do not neglect the plugs to mask the areas where screws are screwed in. They have more than just aesthetic value. If the screw comes loose, the plug will help hold it in its socket, thereby preventing the cornice from breaking.
- If the design of the room provides for lighting fixtures around the perimeter of the structure, it is better to buy a cornice made of metal or wood. Plastic strips may melt.
How to remove a curtain rod
Of course, not a single modern room (be it a house, apartment or office) will look attractive and cozy without such an important interior element as curtains. Harmoniously chosen curtains can rightfully become the highlight of the overall design of the room, giving it uniqueness and sophistication.
The curtains are fastened using curtain rods. Modern stores offer a huge selection of these products of all types, styles, sizes, colors.
A hung curtain rod can serve you for many years. However, sometimes you may need to remove the curtain rod. This will require certain skills, tools and devices. Later in our article we will tell you how to carefully remove the cornice.
To dismantle the cornice you will need a stepladder (stool), a screwdriver or a screwdriver.
First of all, remove the curtains - depending on the type of curtain rod you have, you can simply remove the curtains either together with the hooks or separately from them. Then climb onto a stepladder or stool and pick up a screwdriver.
If your cornice is wall-mounted, you first need to remove the additional bracket. Unscrew the fixed screws that hold it in place and remove them from the wall. Now remove the pipe itself and place it on the floor.
Your next action should be to unscrew the brackets one by one and, if necessary, remove them from the wall. So, if you are dismantling the cornice in order to replace the wallpaper on the walls, then there is no particular need to remove the dowels from the wall, since this will simply be unnecessary work.
If your cornice is a ceiling one, your dismantling steps should be as follows:
- remove the screws used to secure the existing side roundings, then unscrew the roundings themselves,
- we begin to unscrew the screws holding the cornice itself - starting from the edges, remove one screw from each side in turn,
- When we have unscrewed the last screw, hold the cornice with your hand and remove it.
Now that the cornice has been removed, if necessary, you can disassemble it into its component parts.
As you can see, dismantling the cornice is not such an easy task.
How to shorten tulle?
The procedure is as follows:
- Secure the curtains
to the curtain rod and give them time to hang down. - Take a thick darning needle and thread a wool or nylon thread through it. It can be plain or colored. ...
- It is more convenient to do all the work starting from the middle of the curtain, first in one direction, then in the other.
Interesting materials:
How to open local policies? How do I open the drive tray? How to open a DM in Discord? How to open m3u on Samsung TV? How to open the application store on a Samsung TV? How to open a Starline car key fob? How to open MDF? How to open the file manager? How to open the Android menu? How to open the Google Chrome browser menu?
Advantages and features of aluminum curtain rods
The main and main advantage of aluminum curtain rods used for installing curtains is that they are inexpensive and have many modifications of finishing strips of various shapes, colors, shades. But aluminum cornice has a number of features that do not add to its popularity.
- They do not have rotating corners, like PVC ceiling plastic cornices, which limits their use when installed above a window; the result is an unfinished and not entirely neat look.
- The hooks are inserted into aluminum cornices through the ends of the tires and, as a rule, there are no special slots for this. It’s good if there are end caps that prevent them from popping out later. But on cheap models (and the vast majority of them), there is no such important element.
- On wall-to-wall aluminum curtain rods, the hooks are usually driven into the rail and it is installed in the spacer between the walls. There is no way to remove them through the ends.
The main misconception and inconvenience is to remove and hang curtains and tulle in aluminum curtain rods in a position where the hooks are inserted into the rail.
You have to suffer, trying to get hooks into the curtain tape while hanging, raising your arms, in a very uncomfortable position. Therefore, installing and dismantling curtains turns into a real torture, your hands get very tired.
Which design to choose
There are many options among the range of finishing materials:
- steel;
- wooden;
- aluminum;
- plastic.
They are good if you need to implement some design solution. But in the vast majority of cases, PVC guides are used. They are a flat rail with grooves along which curtain hooks move. Depending on the number of rows, they are divided into:
- Single row. Most often they hang muslin on them, which is used for zoning rooms. Less commonly installed near a window to complement the curtain with blinds or roller blinds.
- Double row. They are the most popular and in demand. One row is used for tulles, the second for night curtains.
- Three-row. Typically used in sophisticated interiors, where the third row serves as a lambrequin. Instead of drapery, you can hang one of the night curtains on it so that they overlap each other when closed.