Door installation
Modern interior door leaf has many advantages: reliable, easy to install, and has a variety of designs. But some points encountered during installation require detailed consideration. Installation of interior doors involves several stages, each of which has its own nuances. Foaming a door leaf is not so easy; such work requires care and strict adherence to the rules, then you will get a good result.
How to use the product?
Before using sealant, you need to correctly calculate its volume.
If you need to foam the door with polyurethane foam, then the gaps between the frame and the wall 3–5 cm wide will be filled from a 300 ml cylinder. The output will be about 30 liters of expanded polyurethane. A 500 ml container will produce 35 to 40 liters of foam. This is enough for one and a half door frames. A 750 ml container is capable of dispensing from 45 to 50 liters of sealant. Enough foam to handle two doors. Before foaming, the surface is cleaned of dust and grease and moistened generously with water. In winter, ice, snow, and frost are removed. To increase the foam yield, shake the container for 30 seconds and warm it to room temperature, but not over the fire.
To properly foam with polyurethane foam, the container is held upside down. In the reverse position, only gas will come out. When using a gun, the cylinder is screwed onto the seat. Extrusion occurs by pressing the trigger. If household foam is used, a plastic tube with handles for pressing is screwed onto the spout of the balloon.
The seams are foamed from bottom to top. They try to apply a uniform layer with a thickness of half the free space. Crevices with a depth of more than 5 cm are filled in twice, allowing time for the first layer to dry.
At the end of the work, the gun is washed with a special solvent. The cylinder is disposed of. After drying, the excess that appears is cut off with a knife.
Checking quality is worth your time and money!
Your foam should be flexible and adhere well to the surface.
The fact that after shrinking and completely frozen, it will not crumble will also speak about its quality. Do not add additional work to yourself - you cannot touch or process the polyurethane foam before it has completely hardened, so as not to change the structure of the material itself and not to interfere with the polymerization process. If the material meets existing standards, then you will be satisfied with the quality. This means that you won’t need to redo the work done. Just keep in mind that different manufacturers offer cans with different foam output volumes. Sometimes it is cheaper to buy an expensive can of aerosol that will cover all your joints than to buy two cheaper ones.
remoskop.ru
How to use polyurethane foam correctly
Let's consider situations when it is advisable, and when it is not, to use polyurethane foam:
- You should not use foam to seal cracks less than 1 cm wide. Sealants or more plastic materials, such as putty, are better suited for these purposes. In addition, these materials do not have secondary expansion.
- If the width of the gap exceeds the 10 cm mark, before filling it with polyurethane foam, it is better to further reduce the space using wooden beams, bricks or any other sealant. This will significantly reduce foam consumption and increase its adhesion to the surface. Otherwise, under its own weight, it can simply slide along the walls of large cracks.
- The optimal size of gaps for filling with polyurethane foam is 2-8 cm.
- For faster polymerization and better adhesion of the foam to the adjacent surface, many recommend slightly moistening the walls before application. And then, spray the assembly seam with water from a spray bottle after initial hardening.
- It is not recommended to use foam on surfaces such as Teflon, silicone, polyethylene and other greasy or dusty walls. It simply will not stick to such materials.
- Be sure to consider the primary and secondary expansion ratios. This will help you understand how thick a seam needs to be placed in a gap of a certain width.
- Before using the can, be sure to clean the surface according to the instructions on the package.
- If the bottle is too cold or you brought it from the cold, keep it in warm water (no more than 20°C).
- To ensure better mixing of the components, turn the can upside down and shake for 1 minute.
- Wear protective gloves. Dried foam is very difficult to wash off.
- Do not touch freshly applied foam under any circumstances until it has hardened. You will not only get dirty, but also disrupt the structure of the material. This may result in poor cure or incomplete expansion.
- To ensure that the full volume of foam comes out of the container, be sure to hold it vertically and upside down until the job is completed.
- The polyurethane foam should have a pale yellow color throughout its entire service life. But you can notice that over time it may darken. This is caused by the harmful effects of ultraviolet rays, which destroy the structure. If possible, it is better to plaster or paint the seams, thereby protecting them from sunlight.
Using a can of household foam is very simple. Just screw on the tube and the working nozzle is ready. But if you still decide to purchase professional foam and a special gun, you need to be able to use it correctly. The principle of its operation is very simple - the gun is screwed onto the cylinder, after which the foam enters the barrel through the supply valve. It stays there until you pull the trigger. The material is then released at a predetermined volume.
basic moments:
- Choose guns that are made of solid metal only.
- To make cleaning and replacing parts easier, it is better to purchase collapsible rather than monolithic models.
- Immediately purchase a special cleaner.
- Before installing the gun on the cylinder, you need to unscrew the fastening screw, lubricate the socket with technical petroleum jelly and only then proceed to fasten it.
- You must first set the adjustment unit to the minimum foam consumption rate.
- Turn the can over and do a couple of test presses. This way you can visually assess the need to increase the flow and adjust the volume to suit your needs.
- Make sure that the cylinder is always in an upright position during operation.
- Upon completion of work or when replacing the cylinder, be sure to thoroughly clean the gun.
By following these key recommendations, you will easily cope with using any type of polyurethane foam.
Subtleties of application
First you need to determine what type of material to use: household, professional foam. If you plan to process a large area, you need to take into account the volume of the cylinder. Household-grade products from some manufacturers are sometimes of worse quality than their professional-type counterparts. For this reason, for more serious problems, it is better to choose the latter option. Possible methods of applying foam without a gun:
- Professional grade material is used, for which a tube is used. You should be prepared for the fact that under high pressure foam will come out in excess.
- Use household material, attaching a tube to the valve, which is equipped with a cylinder.
- Professional foam is used by attaching two tubes of different sections: first a larger one, then a tube of a smaller diameter is inserted into it and fixed well. This will reduce material consumption.
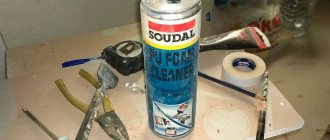
A container of polyurethane foam that does not require a gun to work with
Preparing for work
The site that will be processed must be put in order. Having figured out how to work with polyurethane foam without a gun, perform simple manipulations:
- Remove any contaminants: dust, dirt. If the gap is quite large, it is pre-filled with foam, which will provide improved thermal insulation qualities in this area and will reduce foam consumption. Using a material such as foam, it is recommended to seal cracks no more than 8 cm in width.
- The area is moistened with water, for which it is better to use a spray bottle, then the surface will be moistened evenly.
- Monitor environmental conditions. It is better to carry out work at air temperatures from +5 to +20 degrees. The maximum upper limit is +30 degrees. But in cold conditions, a different type of polyurethane foam is used - frost-resistant.
The procedure must be carried out wearing protective equipment. Gloves and goggles are usually sufficient.
What is the difference between household polyurethane foam and professional foam? Comparison of polyurethane foam.
Watch this video on YouTube
Instructions for applying foam without a gun
The principle of performing the work is similar to that when using a special tool. If polyurethane foam is used without a gun, how to properly use the tube included in the kit? Step-by-step instruction:
- The container must be shaken, and to get a good result this should be done for about 30 seconds. This way ensures the homogeneity of the material and increases the intensity of its output.
- The protective cap of the cylinder is removed, and a PVC tube is attached to the valve. It may be included in the kit if the foam is household, or it will have to be purchased separately, since a cylinder with professional-grade material may not be equipped with such a part.
- The free end of the tube is brought to the area that is planned to be sealed. When considering how to use polyurethane foam without a gun, you should know that the gap is filled no more than 30-50%. This is due to the properties of such a material - it increases in volume as it dries. In addition, partial filling of the area reduces foam consumption. As a result, if everything was done correctly, the gap will be filled 100%. In cases where not enough material was initially laid, an additional layer can be applied as it dries. However, manual sealing (without a gun) is usually carried out the first time, since the foam comes out in excess and is dispensed worse.
- The material begins to flow into the tube, and then to the desired area when the valve is pressed.
It takes an average of 8 hours for the foam to completely harden. Do not worry if, after this period of time, swelling appears on the treated area. They can be cut with a stationery or regular sharp knife.
Door leaf installation
Work is carried out after the frame is securely fastened in the passage
However, before hanging the product, it is important to increase the reliability of the structure. To do this, the remaining gaps between the frame and the wall are blown in using foam.
In this case, it is necessary to place special spacers in the box, which will avoid damage and distortion of the structure when the foam expands.
The sash is hung from the open door position. To do this, the product is lifted above the counter pin in the frame and placed on it. If necessary, the position of the door relative to the floor and walls is adjusted by tightening the fastening elements of the hinges. After this, the product is checked several times for correct placement by opening and closing.
The final stage of installation of a new interior door is the installation of platbands. After marking the decorative strip, it is cut using a circular saw or a fine-toothed hacksaw. The upper sections are cut at an acute angle of 45 degrees. After the fitting procedure, the planks are installed. To fasten them, use construction adhesive or finishing nails. It is also permissible to use self-tapping screws and then disguise them with decorative plugs to match the trim. After reading our instructions, you will now easily understand how to easily change interior doors yourself and avoid mistakes.
Our offer
Sika is pleased to offer you an extensive catalog of mounting foams for interior work, installation of doors and other structures. We sell professional formulations that are easy to use and have the necessary set of performance characteristics. Products are offered at competitive prices. We sell with delivery and process incoming orders promptly. The company invites legal entities and construction organizations to cooperate. Individuals can order products through the company's dealers. Contact us to find out more and get help with product selection.
There is foam - there are no cracks!
This sealant is one of the most sought after among the different types of sealants available. It is the foam that will allow you to efficiently process seams and various joints whose width is more than three centimeters. The material, which is much needed in everyday life, is sold in metal aerosol spray cans; it has a fairly small weight, but despite this, its concentration is very high. Thus, one can produces over 40 liters of foam for filling joints and cracks. Using video tutorials, you can learn how to properly use a foam assistant during installation work in your home and not have problems with drafts.
When starting to work with this substance, remember that it hardens very quickly when exposed to moisture and at the same time greatly increases in volume after using the can. The resulting porous substance has excellent heat-insulating properties. Along with this, taking into account the possibility of a long service life of this material, it is clear why polyurethane foam is recognized as an indispensable assistant in construction and repair
It is polyurethane foam that will allow you to seal seams, glue certain structural parts, successfully fix joints and, importantly, provide these places with heat and sound insulation
This miracle solution is divided into several types - there is semi-professional and professional (pistol), there is winter, summer and for all seasons. It was no coincidence that such a convenient design was invented - polyurethane foam can be easily expelled from cylinders using a special gas. Thus, the liquid polymer on the surface to be coated successfully hardens and forms a rigid frame (polyurethane foam).
So, it makes sense to choose miracle foam in a store for its main properties - thermal insulation, sound insulation, ease of installation, the ability to connect, fasten and glue different parts. At the same time, taking into account its ability to expand, polyurethane foam successfully fills hard-to-reach joints and seams, and when it hardens itself, it does not require special attention in the future. Previously, only cement mortar could replace foam in this field, but its preparation is a more labor-intensive process than working with an aerosol can. Therefore, choosing convenience and simplicity, many people prefer polyurethane foam. Moreover, it can be successfully combined with stone, concrete, wood, metal, plaster, and glass.
Basic recommendations
If you are not sure that the foam will not be exposed to sunlight outside, the sealant must be puttied and painted. Experienced craftsmen advise adhering to some rules in their work:
- The putty mixture must be thoroughly mixed until a homogeneous thick consistency is obtained.
- To speed up the process, you can use an electric drill with an attachment or a construction mixer.
- A small depression is made in the foam under the protective layer. And the mixture itself is applied with a slight excess.
- For external work to protect polyurethane foam, use frost-resistant putty in a layer of at least 5 mm.
- The tool must be cleaned immediately after work - dried putty is difficult to remove.
According to its technical characteristics, polyurethane foam is ideal for filling joints and gaps. The service life of the material increases significantly when a protective layer is applied against UV rays. Surfaces can be treated with putty and acrylate paint, which is “not afraid” of frost and moisture.
Which foam to choose
The work of installing an interior door depends on the technology, as well as on the correctly selected foam. Which polyurethane foam is best to choose for interior doors? This question is asked by every person faced with the installation of a door leaf. To solve this problem, you need to know that polyurethane foam is classified according to different criteria:
- by composition;
- by scope of application;
- according to the degree of combustion;
- according to temperature of use.
Compound
All types of polyurethane foam available on the construction market have the same composition with minor additions, which is why they are called polyurethane one-component aerosol sealant. There are also complex foam compositions, which are called two-component. But they are rarely used for domestic use.
The composition of one-component foam includes:
- prepolymers (polyol, isocyanate), which act as the basis of the foam;
- a mixture of butane and propane, acting as a propellant gas;
- elements that increase adhesion and the degree of foaming perform the functions of additives.
Types of polyurethane foam
Areas of application
The scope of application of foam is hidden in the name - assembly foam, so it is used for any repair work:
- when installing windows and doors;
- when installing structures made of wood, metal, concrete or plastic.
Based on this, polyurethane foam can be:
- professional, which is used by experienced craftsmen. The foam is inserted into a special gun and dispensed in portions in the right places;
- semi-professional, which is sprayed with a plastic tube attached to a pressure lever. It is recommended to use it for solving small problems.
Flammability degree
This indicator is indicated on polyurethane foam cylinders. The following classes of foam are available on the construction market:
- B1 - polyurethane foam with fire-resistant properties;
- B2 - foam capable of self-extinguishing;
- B3 is a foam that is susceptible to burning.
Application temperature
Foam is used in different conditions, so temperature conditions have different effects on foam components. To avoid problems when installing doors or windows, select foam based on the temperature range in the room.
Depending on this, there are three types of polyurethane foam:
- summer foam, which is used at temperatures from +5 to +35 ° C;
- winter foam, which is used at temperatures from -18 to +35 ° C;
- universal or all-season foam, which is used at temperatures from -10 to +35 ° C.
Properties of sealant
The popularity of polyurethane foam is explained by its performance properties, which are also its advantage. In this regard, polyurethane foam has:
- high adhesion to any materials;
- heat resistance;
- non-conductivity of electricity;
- high speed of setting and hardening;
- atoxicity before and after polymerization;
- non-flammability (only some types);
- moisture resistance;
- a combination of plasticity and elasticity;
- low thermal conductivity;
- slight shrinkage during the year;
- chemical resistance;
- high strength;
- good sealing effect, which cannot be achieved even with cement mortar;
- short time for foaming;
- lack of additional materials and tools;
- lack of power sources.
Results
Polyurethane foam is a convenient and lightweight tool for installing window doors and other critical structures. Main important points:
- it may consist of one or two components. Its properties, price, and operating parameters directly depend on this;
- To install the door, you need to fix it correctly, check the angles and levels;
- It is not necessary to use a gun, however, it will help to easily dose the foam and make the connection more accurate;
- Commercial all-purpose foams should be avoided as they will not provide the desired effect. If you perform the installation in the summer, use summer foam, in the winter, winter foam.
Preparing the work area
Since it is possible to correctly replace an interior door only if a certain sequence of work is followed, all stages should be considered in more detail. You need to start, of course, with preparing the surface. If you had a door installed in the opening, it must be removed.
First, remove the canvas. Then you need to remove the trim from the door. How to do this will depend on the way they are attached. If the structure was installed using glue or using the tongue-and-groove method, it is enough to lightly pry the elements and pull them to the side. It's a little more difficult if the trim is nailed to the box, in which case you can use an ax to pry it up and tear it off the base. After this, you need to carefully remove the door frame. It is recommended to remove all fittings, namely the lock and hinges; they will also need to be replaced.
First of all, you need to dismantle the old door
To simplify the process, use a grinder and a crowbar. Saw the box in half and tear its parts from the wall in the opening. This is not difficult to do, but you need to minimize the destruction of the walls in the room.
If serious damage cannot be avoided, preliminary alignment of the sides will be required.
Installation of interior doors
Door manufacturers offer a wide range of products. The door is immediately equipped with a door frame. All you need to do is take measurements of the doorway and go to the store. Remember that there must be a gap between the wall and the frame for the foam, which guarantees the reliability and strength of the structure being installed.
Interior doors
Installing an interior door is easy if you follow the instructions. Working with a door leaf requires preparation, so the first thing you need to do is purchase a set of tools, which includes:
- roulette;
- level;
- hacksaw;
- perforator;
- hammer;
- mount;
- screwdriver;
- knife.
Hardware elements for door installation:
- door hinges;
- lock with handle.
To install the interior fabric you need to complete several steps:
- dismantle the old door. To do this, remove the door and disassemble the door frame;
- assemble a new door frame. To assemble it, remove the racks from the packaging and fasten them together with self-tapping screws. Assemble the box with rectangular or beveled corners of the posts;
Box installation
- install door hinges on the frame. To secure the hinges, you will need tools such as a cutter, a screwdriver, an awl, a thin drill and a drill. Sometimes a circular saw and pencil are used to secure the hinges;
It is important! Remember that large hinges are installed on the frame, and small hinges are installed on the door. For greater precision in installing the hinge, place the door and make the necessary notes. When placing hinges on the door leaf, pay attention to which direction the hinges are turned. According to the rules, the hinge hinges should face the front side. All that remains is to fix the hinges, aligning the holes.
Door hinge insertion
- Place the frame in the doorway and secure it with wooden wedges. But installing the box is not enough; you also need to align it vertically and horizontally. As a result, the box must stand so that the door is motionless in three positions: open, closed and half-closed;
It is important! Remember that the “foam” gap between the frame and the wall should be 1-2 cm. This distance will be enough to secure the door frame and not damage it.
- the gap between the wall and the box is filled with foam. To find out how to do this correctly, pay more attention to this point.
Foaming gaps
How to properly foam the gap between the box and the wall
Step-by-step instruction:
- First, you will need to seal the installation site with masking tape if the finishing has already been done.
- Wedge the door, checking the levels. If the door frame is tilted, the doors will open on their own and swing due to the tilt.
- When everything is insulated and the box is in place, you need to fill everything with foam.
- It hardens in 20 minutes to an hour. Do not use a hair dryer for drying, because oxygen must penetrate inside so that the foam fills all porosities and “inflates from the inside.” Foam components draw air inside and high temperatures will interfere with the process.
- When the foam has hardened, you need to cut off the remains using a stationery or construction knife and remove the masking tape.
- Done, now you can remove the wedges, and fill the space that has formed with foam, if desired.
Installation of platbands
After the box is installed and the joints are sealed with foam, it’s time to attach the trim. They are nailed down. If these are frames made of fragile material, then drill holes in them before installation. This will prevent them from cracking.
All that remains is to remove the protective film and we can assume that the work of installing the door leaf is completed.
Fastening platbands
Tips for all occasions
Most often, polyurethane foam is purchased in the required volume for one time and after use, even if it is unfinished, is thrown away. And also it is not bought in advance, as it has a limited shelf life. It is worth considering the nuances described below in more detail in order to be able to save money.
Can it be used several times?
There is a widespread belief among buyers that professional foam with a gun can be reused, but the household type with a flexible tube, alas, is disposable and cannot be reapplied to the surface. Indeed, most often, if you leave the cylinder on the gun and block the trigger with a dispenser, the gun will not allow air to enter the cylinder and the composition will not harden. The next time you use it, it will be enough to remove the remaining frozen foam from the nozzle and you can start working again. However, exactly the same can be achieved from a household product. To do this, you need to start releasing the foam from the balloon, but without letting it come out, bend and tie the soft tube with wire. The foam at its end will harden, but the bend will not allow air to penetrate further and spoil the entire volume of the substance. The next time you use it, the cured edge of the PVC tube is simply cut off and the foam is ready for use. The container can be stored in this form for no more than a few weeks.
Can I use expired?
If the shelf life of the foam, which is usually from 12 to 18 months, is exceeded by only a few days, then it is unlikely that such foam will be much different from the usual one. If the expiration date is significantly exceeded, the use of the product is still not recommended. Over time, the composition loses its properties and can behave unpredictably, which will entail even greater waste on reworking the repair than will be saved on purchasing a new cylinder.
What is the shelf life after application?
According to manufacturers, good quality foam, applied properly and protected from exposure to large amounts of moisture and direct sunlight, can last up to 15 years. However, in practice it often turns out that its service life is limited to 3–4 years. To increase it, the foam needs to be plastered on top with a high-quality solution, which will double its service life, after which you will have to remove the old layer and re-lay the new foam.
To ensure that repairs using polyurethane insulation do not bring unexpected troubles, it is necessary to correctly calculate the required number of cylinders and use them correctly. It is most convenient to use professional products that include a construction gun in the kit, but for small volumes of work, household polyurethane foam will do just as well.
Recommendations for use
In order to avoid any problems during both minor and major repairs of your own house or apartment, you need to be able to use both professional and household foam. To work correctly with the first one, you must correctly install and use a special construction gun.
Gun installation includes the following steps:
- To begin, the foam balloon is heated in warm water to room temperature, after which it is shaken vigorously for 30 seconds. This will give the polyurethane a homogeneous state, which will allow it to come out of the cylinder smoothly and in full;
- The protective cap is removed from the upper tank of the gun, it is turned with the handle down and the cylinder is screwed into it. The container is screwed in with force until a hissing sound appears, which means that the mixture has begun to flow into the tool;
- if the gun has been previously used and has not been thoroughly washed, then the hissing will not be heard and you will have to purchase a new tool;
- The system of connected elements is shaken vigorously several more times, the adjustment screw is turned a quarter turn and, holding the trigger, they begin to apply.
Working with such equipment does not require specific skills, but it will require considerable dexterity if this is the first time.
Applying foam from a gun is performed as follows:
- first you need to clean the working surface from dust and dirt, then lightly wet it with a regular spray, since the foam interacts better with a wet surface;
- the tool nozzle is directed to the surface;
- foam is supplied in the required quantity by smoothly pressing the trigger;
- to pour the composition into a vertical recess, it must be applied from bottom to top;
- wide spaces are filled with zigzag movements of no more than a third of the volume, since the foam expands greatly in air;
- It is better to replenish the area afterwards than to cut off excess hardened substance.
Polyurethane foam – your confidence in an excellent repair result
When buying polyurethane foam, remember that the container is designed for one-time use only. So don't try to halve. It is not difficult to calculate the volume if you already have experience working with similar material. If not, it is better to consult with those who work in the construction industry or with a salesperson in a store. Reusing the same cylinder is allowed only if you are going to “repeat the maneuver” in the near future. Then, at the end of the first stage of work, you need to wash the tube (gun) itself and the valve with a special cleaning liquid. However, workers at the sites often do not do this.
Useful tips and secrets of working with the material:
- Prepare a water sprayer and a pruning knife in advance.
- It’s good if you have a soft sponge and acetone on hand - they help wipe off the foam that has stuck in unnecessary places.
- If you use polyurethane foam sparingly, you can get by with fewer cans.
- It is better to treat the surface (trimming with a knife) after applying the foam after about 4 hours have passed - after 7–8 hours the foam will harden completely and will be much more difficult to deal with.
- Use a respirator (protect your body from unnecessary chemicals). It would be great if glasses and gloves were also available.
- Ventilate the room (unless, of course, you just decided to hang wallpaper in the same room).
- Do not wait for the foam to darken - a change in color is already an indicator that a reaction is taking place and the process of exposure to ultraviolet rays (initially it is light yellow).
- Do not use the cylinder near a fire and do not leave it in direct sunlight (this is a rule familiar to everyone, however, many do not follow it and risk later encountering the consequences of a fire and arriving firefighters). After all, this polyurethane foam sealant contains various flammable materials that can lead to undesirable consequences. Your foam may belong to one of three classes - fire-resistant, self-extinguishing or flammable (it is better to find out in advance).
- Problems may also arise if the foam is applied to a dirty surface (for example, when using such materials, window frames are cleaned with a vacuum cleaner).
The viscosity of the product may not meet the standards if the foam container was at temperatures below plus 5. The required consistency will be violated even if the air temperature increases to 30–35 degrees (only all-season foam can work at temperatures from minus 10 to plus 40 degrees) .
So if you have taken into account all the tips and secrets indicated here, you can safely begin sealing window, door blocks or other structures in the rooms of a house or apartment using polyurethane foam. Also, with the help of this material, it will be easier for you to cope with the insulation of the distribution network and with the sealing of seams and cracks of different widths, and in addition, your assistant - foam will help you easily and simply fill unnecessary voids in the walls. So go ahead and have a good repair!
They installed an iron door - the jambs freeze. Can they be foamed inside?
IMHODom › Forums › urgent question › We installed an iron door - the jambs are freezing. Can they be foamed inside?
This topic has 76 replies, 40 voices, last updated Max 2 years/years, 3 months. back.
- Berlinka
They installed a street door, a sandwich, everything was fine. The door stands on foam.
Two shortcomings - no quarters were made in the wall for the door
and the iron jamb turned out to be empty (it didn’t even occur to me to look, I kept staring at the door - and now I looked into the lockbox - it’s empty)
There were no major frosts yet, but frost formed along the bottom of the jambs. I am seriously afraid that the door may simply freeze and I won’t open it.
- drill holes every 40-50 cm - and foam all the internal cavities through the tube?
- make wooden trim inside and outside...??
- do some work on the vestibule so that the door is not so much on the street.
Please advise what to do first...
And like other iron doors, the jambs are also empty. I just never thought about it before......
Air conditioners for baths.
- Dewdrop
They installed the door for me, when they arrived the frame was already pre-foamed. It is easier to remove the door along with the frame, foam the frame around the perimeter from the inside and put it in place
- Owner of the Establishment
It is good to insulate iron jambs with felt. In different configurations)
- Rainbow
A heating cable is also laid around the perimeter inside the box. The thing, I think, is not cheap to operate, it actually heats the street, but there is a 100% guarantee against freezing. door stores offer a cable with a control unit. funny - you open the door, and her rib is warm
— no quarters were made in the wall for the door.
don’t be upset: for hardware in its pure form they are not needed. Although I don’t know the design of your door. Take a photo. I don’t really know them anymore, because an iron door, in my understanding, is literally not associated with the concept of “warm”.
You can, of course, foam the box, but the bridge of cold will not go away from it.
IMHO. Insulate the outside of all iron parts (box and sheet) in contact with the atmosphere. Think about how. Possible materials: isolon, EPS. And you can already snuggle up a little under the “quarter”...
It is good to insulate iron jambs with felt.
)))))))))))))))))) Tough. Felt in such places died long ago as a class.
A heating cable is laid around the perimeter inside the box. The thing, I think, is not cheap to operate, it actually heats the street, but there is a 100% guarantee against freezing.
This option is also possible. The better you insulate, the more practical the operation will be.
- Berlinka
I'll try to take pictures tomorrow
Air conditioners for baths.
- Stepanovka
There is also such a problem.
There are several areas near a metal entrance door where condensation or frost appears more often than others. These include door handles, cylinders, peepholes, and the flap part of a metal door (the so-called cold bridges, where increased heat transfer occurs). This is due, first of all, to the concept of thermal conductivity of the materials from which the metal entrance door is made.
For example, consider part of the door - the vestibule. For solid doors it is made of wood, for plastic doors it is made of plastic, and for metal doors it is made of metal. Wood, plastic and metal have different thermal conductivities, and in order for a metal door in its hinged part to have the thermal conductivity of the hinged part of a “solid” door, it must be 200 times thicker than a wooden one! Instead of 4 centimeters, the thickness of the vestibule should be 8 meters
Improving the characteristics of Chinese products
The Chinese-made door is a non-demountable structure. To insulate it, remove the door and place it horizontally. We remove the handles, peephole, locks. Then we begin to attach the frame and stiffeners to it, both from the inside and from the outside. Therefore, we choose a wooden beam with a thickness of 20 * 20 mm, or more (we start from the thickness of the insulation material). If desired, you can weld a metal base, attach it with self-tapping screws or weld it to the door leaf, and fill the joints with polyurethane foam.
The next step is laying insulation. If fibrous materials are selected (mineral wool, stone wool), we lay out a water-repellent material larger in size than the base cavities, approximately 200 mm, secure with glue (liquid nails) and line the wool, having previously cut out a canvas slightly larger than the size of the base cells, and cover with another layer of water-repellent material. We fold the edges of the film tightly onto the top layer and secure with tape.
We cover the insulation with foil isolon or penofol with the foil side facing the room. This will improve the soundproofing qualities of the door. Polystyrene foam, expanded polystyrene, polystyrene, foil-coated isolon do not need waterproofing, since they themselves have water-repellent properties. Next, use a tape measure to measure the distance between the stiffeners, cut the insulation a little larger than necessary to avoid the formation of a cavity between the insulation and the base of the door. We glue the insulation into the cavity with glue (liquid nails).
We coat the base attached to the surface with mounting foam at the joints. The next step is to decorate the structure with an MDF sheet, panel or alternative material. It is important to remember that the decorative panel must be attached from the bottom up. We secure it, install locks, a peephole and handles, and hang the door. Now the door keeps the house warm and also protects from noise.
Without dismantling
Insulation without dismantling is carried out in three ways. The first is suitable for metal doors with removable panels. To do this, unscrew the screws, starting from the bottom, moving to the top of the canvas. We do not unscrew all the screws and place the metal door on a stand. Carefully advance the insulation treated with glue (liquid nails) and fix it. Foil-coated isolon is suitable for this method. We screw in the screws. The door is ready.
The second method is suitable for solid metal doors. We make holes on top, after making sure that there are no more holes or gaps. We take any crumbly insulation (non-flammable bulk wool, granulated polystyrene foam, vermiculite, sawdust). We pour it into the holes and tap the door to ensure that the cavity is completely filled. This method is completely unsuitable for doors with deadbolt locks. After filling, put plugs on the holes.
The third method is external insulation. We completely follow the step-by-step method of fastening using the external method. You can stick insulation on the inside surface of the doors.
Classic scheme for foaming a double-glazed window
The master must approach the solution of this problem as responsibly as possible, since the durability of the entire structure depends on this. Filling existing gaps is quite simple if you know the basic steps:
It is necessary to thoroughly moisten the surface of the window opening using a regular spray bottle. Care must be taken to ensure that no smudges or large drops of water form. Otherwise, the master simply will not be able to foam the slopes efficiently. If the planned construction work does not involve the construction of special seams, then it is necessary to cut a small piece of vapor barrier tape along the width of the opening with a slight allowance. Along the edges of the material involved there are two adhesives, which are hidden from dust by small strips of paper. It is necessary to remove the protective coating from the adhesive tape and carefully glue it to the frame. At this time, the second edge remains unused. The bottle should be heated to the optimal temperature, which is indicated by the manufacturer on the bottle. The container must be shaken at least 16 times. It is also worth shaking the composition periodically during use. The tape should be held by the unused edge so that it does not get dirty. It is necessary to slowly foam the free space between the double-glazed window and the internal compartment of the wall. All openings must be tightly closed to a maximum of 3⁄4. This is directly related to the fact that after some time the foam will gradually increase in size and fill all the defects. If the holes are too deep, then they are filled in two approaches. The pause before applying subsequent layers should be 15 minutes. You need to glue the free end of the adhesive strip to the structure, but only so that it is not stretched. The tape will smooth out as much as possible during the natural expansion of the foam composition. It is necessary to gradually seal the seams without any gaps on the outside
Particular attention is paid to the areas around the nails. Otherwise, the windows will freeze in the winter. To thoroughly seal the slopes, you need to apply thin strips of material 25 mm wide
The distance between them should be at least 1 mm. Consumption depends on the initial state of the structure. Foamed areas harden in 140 minutes, but it is best to let the structure stand for two days. After this time, you can begin further work on the seams. During this process, the foam is partially trimmed.
Construction of a reliable structure