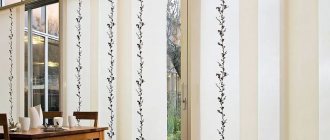
Fans of minimalism will definitely be pleased with the fashion trend - Japanese panels, or as we are more accustomed to calling them, Japanese curtains.
Almost any curtain store can offer a huge variety of these.
With their help, you can visually increase the space of the room and at the same time reliably protect it from sunlight. But if you are fond of sewing, you can try to make Japanese curtains with your own hands, and we will teach you how.
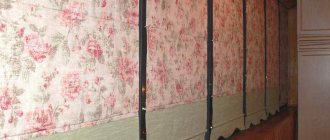
Japanese panels are primarily a stylish decor that can be used to decorate windows, doors and zoning the space of a room. Why panels? Because of their appearance. They are more similar to vertical blinds, but they can only be moved in one plane. These are strips of fabric with a width of 0.4 m to 0.8 m, which are attached to the cornice. Special weights are attached to the bottom of the curtains, or, if the fabric is too light, a special frame (frame) is created.
Curtain panels can be of different shades, with different patterns, and various textures. The number of panels can reach up to 10-12 pieces, which allows you to freely and quickly change the design to suit your mood.
Advantages of Japanese curtains
In addition to the excellent design project, Japanese curtains have a number of undeniable advantages:
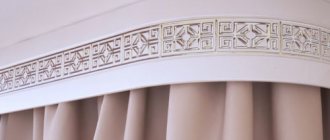
Important. Japanese panels look quite impressive in combination with panoramic windows.
Which room should I hang it in?
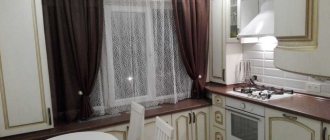
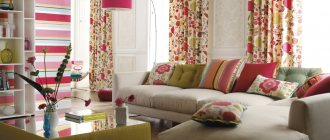
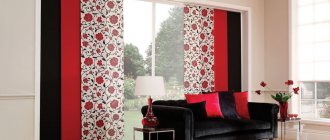
The beauty of Japanese curtains is that they go well with many interior designs. They will look best in the living room. Since this is the main room, you can try experimenting with translucent fabrics, bright colors, different textures and large patterns. It all depends on your wishes.
For the bedroom you should choose laconic, restrained tones. To add liveliness to the interior, you can add a panel with images of flowers, birds or a graphic design. It is also advisable to limit the number of panels. Remember, in the bedroom, the simpler the better.
Japanese curtains will be a wonderful addition to the interior. The main thing to pay attention to is the location of the stove in relation to the curtains.
If too close, it is better to use fire-resistant fabric. It is better to choose flowers that are less susceptible to contamination, otherwise the amount of time spent on maintaining their cleanliness will unpleasantly surprise you.
Which material to choose?
Following the classic traditions of the East, to create Japanese curtains it is better to give preference to natural fabrics such as silk, linen and cotton. The curtains, created using bamboo, rice paper or reeds, look very beautiful, but at the same time unexpected and bright.
If your budget is quite modest, but you really want Japanese curtains, you should choose colored plastic as the material. In addition, you will need a set of special strips that will act as a weighting agent for the curtains and prevent wrinkles from appearing.
! Important. The panel material is easy to change. In summer, you can use translucent fabrics that will add lightness to the interior. In winter, you can give preference to heavy, dense fabrics - they will create a special atmosphere of coziness and comfort in the house.
Step-by-step instruction
As already noted, sewing Japanese curtains with your own hands is not at all difficult, and even a novice master can cope with this task if desired. The main thing is to strictly follow the sewing algorithm.
Guided by this algorithm, you will soon be admiring the finished product decorating yours.
This accessory combines sophistication and rigor, which allows them to fit well into almost any interior. Japanese style look most impressive on large window openings. They will successfully decorate a store window, a niche, can serve as interior partitions and are successfully combined with curtains, drapes, and can be used in curtain format.
The fabric for Japanese curtains can be different: linen, cotton, shikatan, bamboo, silk, sutra. Often materials of different textures and colors are used for panels. The fabric is attached using a special cornice with several channels. To ensure uniform movement of the canvases, the upper edge is fixed with Velcro adhesive tape, and the lower edge is weighted with a special weight that is sewn into their bottom.
It is important to consider the profile material, for example, plastic will reduce noise levels and reduce the distance between the tire and the top panel. When choosing a cornice, you need to take into account the following parameters: dimensions, number and type of brackets, height and side of the cord control, type of sliding (from the center, one-sided). The panels can cover part of the wall or just the opening at the request of the owner.
Step-by-step instructions for sewing Japanese curtains: creating the panels yourself
Anyone who has basic skills in working with a sewing machine can make Japanese curtains with their own hands. Cutting fabrics and sewing are not difficult, the main thing is to choose a good fabric and take the correct measurements.
- We cut the fabric into pieces 60 cm wide, taking into account allowances (it is recommended to iron it before doing this).
- Iron the sides.
- We trim the lower part of the panel with a drawstring, without adding any side allowance. The width of the drawstring should be several millimeters larger than the weighting material.
- Iron the fabric (to shrink the fabric). The craftsman must see the top edge of the curtain and accurately place the Velcro with the front side on the seam allowance, attach it with pins, and stitch. Then the fabric is placed with the right side facing you and the Velcro is folded to the back and secured with a stitch. The panel is carefully ironed.
- We insert the weighting material into the bottom edge of the panel.
- We attach the top edge of the panel to the cornice.
The fabric must be ironed to ensure that the panels are perfectly even. During the work process, it is advisable to process all panels in stages to avoid mistakes.
httpv://youtu.be/Sh3buqBfJ34
Japanese curtains can perfectly complement any interior. The original simple cut, variety of prints and fabrics make it possible to create this important detail of the living space with your own hands for little money.
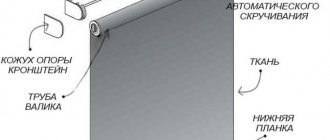
Japanese panels are smooth, narrow sheets of fabric, secured at the top with a cornice holder and at the bottom with a weighting agent.
For such panels, special cornices are produced that have various mounting options, both to the ceiling and to the wall:
As a rule, the length of the upper holder of Japanese panels is 60 cm. This value is considered the standard.
In the most common purchased cornices for Japanese panels, the hard part of the Velcro tape is glued to the upper holder bar, and the Japanese panel itself is held on this bar due to the fact that the soft part of the Velcro tape is glued to its upper part (top):
But there are other designs of top holders for Japanese panels. For example, as on this cornice, in which the holders are a snap mechanism:
And in this case, the holder is made as a metal structure on which a Japanese panel is hung, the top of which is made in the form of a drawstring:
Therefore, before calculating the cut for a Japanese panel on a purchased cornice, familiarize yourself with its design. Japanese panels can be made simple, from one type of fabric, when the weighting material at the bottom is simply inserted into a drawstring that is not covered by anything:
It is also possible to make Japanese combined panels, which usually consist of two types of fabric: the top is made of transparent fabric, and the bottom panel is made of non-transparent fabric. The lower opaque strip plays the role of a decorative element, which at the same time covers the weighting material:
Let's calculate the cut sizes for Japanese panels. Since purchased cornices, as a rule, have a standard length of holders for Japanese panels and it is 60 cm, the cut width is the same for all Japanese panels. And it is equal to: Shir. Kr.=60cm+3cm.+3cm.=66cm. 3 cm is the allowance for finishing the side seams with a hem seam. Now let's calculate the cut length (height) of the Japanese panels. If you calculate the height of the cut for simple Japanese panels, then you need to take the height of the finished Japanese panel, add 1 cm to it for processing the upper edge (top) 1 cm with Velcro tape, plus add an allowance for making the drawstring: Height. Cut=h+1cm+Wide. Let's look at the cutting diagram:
If you want to make combined Japanese panels with a lower decorative strip, then the height of the cut must be calculated for two elements. First, decide on the height of the finished Japanese panel, then you need to make the lower element. Then, in order to calculate the height of the cut of the upper element, you need to subtract the finished height of the lower element (bar) from the finished height of the panel and add 1 cm to the resulting value. for processing the top with Velcro tape, plus all this, an allowance for making the drawstring. High Kr. Top=H-h2+1cm.+Width. Let's look at the diagram:
Now let's look at the manufacturing technology of Japanese panels. I will look at this using the example of manufacturing combined Japanese panels. Initially, you need to make the lower strips for the Japanese panels:
As a rule, such strips are glued with adhesive materials to give them rigidity, just like rigid bandeau lambrequins. When the lower elements are ready, we decide on the cut height for the upper elements and cut them “by thread”, that is, we cut the fabric, pull out the thread and make the cut along the laid path:
Then the upper and lower parts of the Japanese panel must be connected, making a drawstring. It is better to stitch the drawstring with mono thread. Mono thread is a thread in the form of a very thin fishing line; therefore, stitches made with mono thread are practically invisible:
The next step: you need to fold those Japanese panels that you want to make equal in height (for me these will be two side panels) and align their top edge. In conclusion, the upper edge must be treated with Velcro tape, insert the weighting material into the drawstring, and hang the Japanese panels on the upper holders of the curtain rod:
Upper weighting holders for Japanese panels can be made independently. Such holders will fit the ceiling cornice, and they are good because if you want to change the usual and boring curtain for more exotic Japanese panels, you will not have to change the cornice, and you can set the length of the upper holders yourself.
How to make your own top holders for Japanese panels and the process of making them, see my video tutorial “Do-It-Yourself Japanese Panels”:
How to make Roman panels like these that can be hung on a round cornice, see.
Japanese curtains cannot be denied elegance and practicality, but they owe their popularity largely to the functionality that the cornice provides for them. It is thanks to a special cornice that they can be hung above a window, door, wall niche, or used as sliding doors and interior partitions, and by alternating different colors and textures of the canvas in a matter of minutes, transform the appearance of the room. And if you decide to decorate your home with fabric panels, you will have to take care of choosing the right curtain rod for them.
Japanese panels cutting pattern
Japanese panels cutting diagram
Now let's look at the manufacturing technology of Japanese panels. I will look at this using the example of manufacturing combined Japanese panels. Initially, you need to make the lower strips for the Japanese panels:
As a rule, such strips are glued with adhesive materials to give them rigidity, just like rigid bandeau lambrequins. When the lower elements are ready, we decide on the cut height for the upper elements and cut them “by thread”, that is, we cut the fabric, pull out the thread and make the cut along the laid path:
What should a Japanese cornice be like?
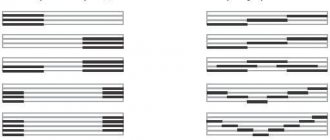
The main design feature of Japanese curtains is that they are not folded, but tightly stretched on special frames or using weight strips. Thanks to this, they can be arranged in a line, one after another, or swapped in places without removing them from the cornice. Therefore, only multi-profile curtain rods are suitable for them, and the number of tracks on them depends on the number of panels that make up the curtains.
So that the canvases can be moved and swapped freely, each of them will need a separate guide track, but if such free movement is not planned, there may be fewer guides (at least one guide for two canvases). Runners with plates attached to them are inserted into the tracks, onto which the panels are in turn attached.
The photo shows an example of an aluminum curtain rod with 5 guides and manual control. The photo shows an example of attaching curtains to the runners using adhesive tape.
weighting material for Japanese panels
weighting material for Japanese panels
Upper weighting holders for Japanese panels can be made independently. Such holders will fit the ceiling cornice, and they are good because if you want to change the usual and boring curtain for more exotic Japanese panels, you will not have to change the cornice, and you can set the length of the upper holders yourself.
Control mechanisms for Japanese curtain rods
There are three types of control for Japanese curtains on the eaves:
- Independent manual. The fabric panels are moved along the window, holding them with your hands.
- Dependent manual. To set the curtains in motion, you need to pull the cord or chain. In this case, all the canvases depend on each other and move either all together or in pairs.
- Automatic. The cornice is equipped with an electric motor powered by a remote control or switch.
If the window is of standard sizes, a double or triple curtain and a manually operated cornice will be sufficient. For wide windows or panoramic glazing, you will need curtains consisting of four or more panels, which are more convenient to control using an electric drive.
Metal curtain rod with electric drive, mounted on the ceiling
When choosing between cornices with manual, rope and electric control, keep in mind: on a simple cornice, the panels can be placed and swapped in any order, but on a cornice with a rope or automatic mechanism, only according to the same, predetermined pattern.
Unusual room design option
It is worth noting that the usual, traditional cornice is not suitable for fastening them. Special ceiling models are required. They will not only allow you to decorate your windows beautifully and unusually, but will also ensure the most convenient control and operation, which is, in principle, where Japanese curtains stand out from other models.
These curtains are mounted on the cornice using a special Velcro that moves freely along the latter. Of course, they can start moving on their own, however, special devices are provided for this case too - in particular, these are special “weights” sewn into the curtains. They pull them down, which avoids “unauthorized” movement.
Manufacturing materials
Most often, curtain rods for Japanese curtains are made from high-quality plastic or metal (aluminum or steel). They are selected based on the following recommendations:
- Simple plastic curtain rods are the most common and fairly cheap option, but they are only suitable for small windows and light curtains. It may not be able to withstand curtains with a lot of weight.
- For heavy curtains consisting of four or more panels, an aluminum curtain rod is better suited to withstand their weight and not bend.
- If you plan to use Japanese curtains to decorate panoramic glazing, it is recommended to choose a steel cornice with automatic control that can withstand heavy loads without loss of performance properties and presentation.
Do-it-yourself cornice installation
It is not necessary to invite professionals to install curtain rods. You can handle this task yourself. Since most curtain rods can be attached to both the wall and the ceiling at will, before installing them you need to decide on the mounting location.
To work you will need:
- electric drill with hammer drill;
- screwdriver or screwdriver;
- fasteners (comes with the cornice);
- pencil and ruler.
Operating procedure:
- Inspect the mounting location, step back from heating pipes, radiators or other heating elements. Please note that the curtains should fall freely, without touching the window sill and radiator. Make sure there are no electrical wires running through the drilling areas.
- To install the cornice perfectly straight, use a pencil and ruler to make markings. Pay attention to which direction the window sashes open, and when marking, take into account the distance for their opening.
- The distance between the fastenings should be 0.3 - 0.7 m. If the window or future partition is large, the load on the cornice increases. Therefore, the step between fastenings should be at least half a meter. On a small window, it is enough to fix the cornice in 3 places (along the edges and in the middle).
- Drill holes for fasteners according to the markings. Install the curtain rod.
- Tighten fasteners. Apply light pressure to the bracket to check if it can support the load.
- Install the curtains and insert the bottom weights into them. Check out the entire design in action. Make sure all panels move smoothly and without obstruction.
To fully use all the capabilities of Japanese curtains, you need to choose the “right” curtain rod.
The basic principle of creating a Japanese interior: only what is necessary and nothing superfluous, also applies to curtain rods. They should be reliable, have a simple shape and not stand out against the background of walls or ceilings. Such a cornice will be a worthy addition to screen panels and will make your life more comfortable.
Making Japanese curtains with your own hands is not that difficult. The main thing is to understand what Japanese-style curtains are and their application. We will tell you how to make them yourself in this article.
Japanese curtains (or panels) are several panels of textile, without folds, located next to each other. To make such panels, you can use both thick textiles and lightweight curtain fabric.
Why are straight fabric panels so popular in interior design? This type of curtains has several advantages:
- Japanese curtains are universal; the severity of their lines allows them to be used in almost any modern style.
- To sew such curtains, you can choose any fabric to your liking, be it thick or light.
- Easy to clean due to the absence of many folds on which dust accumulates.
- For Japanese-style panels, you can install an electric mechanism, which will add even more convenience.
- The design is quite simple to install, and you can sew the fabrics yourself.
In appearance, such panels resemble vertical blinds; they open and move in the same way.
Japanese curtains may not have a standard width
To make such fabric curtains at home, it is advisable to use any natural fabric: linen, cotton, silk, bamboo, shikotan.
By the way, such curtains can be combined with curtains and drapes, or you can assign the function of both only to fabric panels, combining denser fabric with transparent and light one.
Often, for sewing Japanese curtains, fabrics of different colors are chosen, combining all the colors of the interior. You can choose a material with a pattern or a plain one, combining different textures and materials.
The standard width of one curtain panel is 60 cm, but such curtains can be made to order, depending on the width of the window opening or the wishes of the owner.
The panels are most often fastened with Velcro tape, and a weighting material is sewn into the bottom.
Japanese curtains are attached using Velcro tape
Fastening for Japanese panel curtains
This stage occurs as follows:
- A cornice is attached to the ceiling and markings are made for fastenings in the necessary places. The distance between the brackets should not be wider than 70 cm; for large openings, this distance is reduced, as there is an increased load on the cornice. When marking, you need to take into account the indentation of the heating elements and the protrusions of the walls so that the curtains do not touch or “lie” on third-party objects. Curtains should also not interfere with ventilation.
- using a screwdriver or screwdriver, the fastenings are mounted to the ceiling (if necessary, dowels are used);
- after which the cornice is hung on them.
Selection of cornice
Depending on the number of panels, a cornice with several rows of tires can be used. To determine the number of panels, it is important to take correct measurements of the window opening. You also need to take into account that curtain panels can cover either the entire wall or only the window opening.
The plastic profile of the cornice will be less noisy when opening, and will also reduce the distance between the panel itself and the tire.
The cornice for Japanese curtains can be made to order, for example, in the case of non-standard window sizes. But a store-bought cornice that fits your window will be much cheaper. In addition, sewing it yourself can reduce the cost of Japanese curtains.
When choosing the type of cornice, you need to decide on the following parameters:
- Type and number of brackets.
- Dimensions.
- Height and side of the stern control (same as vertical blinds).
- Type of sliding (will the curtains open in both directions or only in one)
An important component is the presence of manual control or electric drive. The cornice itself can be attached to both the wall and the ceiling.
Reviews
Maria: “I bought fabric and sewed Japanese curtains myself. Fortunately, there are many master classes on the Internet now. Budget-friendly and beautiful."
Vera: “I ordered Japanese panels for the kitchen from the studio. I liked the way it looked on the window. It turned out that they can be made from fabric with special impregnation, but they cannot be washed.”
Andrey: “After the renovation, my wife wanted to hang Japanese curtains. We saw a ready-made kit with accessories in the store. I hung the cornice myself. My wife attached the panels. They are very dense. The cat doesn’t climb on them and that’s a plus.”
Have you decided to choose Japanese curtains for your home? This is a very interesting and non-standard solution. We hope we helped you with this!