Mirrors, glass shelves, panels, stained glass windows in one form or another are always present in the house. All these attributes of the home interior are united by one feature - the fastening of these fragile planes to the walls.
Fastening glass to the wall is an important structural unit that ensures safe hanging of glass products. There are many ways to fix transparent and mirror planes on vertical fences of rooms. What is the best and secure way to fix glass to the wall surface? This article will answer this question.
Installing a glass mount on the wall
Mirrors, glass shelves, panels, stained glass windows in one form or another are always present in the house. All these attributes of the home interior are united by one feature - the fastening of these fragile planes to the walls. Fastening glass to the wall is an important structural unit that ensures safe hanging of glass products. There are many ways to fix transparent and mirror planes on vertical fences of rooms. What is the best and secure way to fix glass to the wall surface? This article will answer this question.
External supports
The design of the supports is dowels, self-tapping screws, wall and face washers, support rollers, pads. The composition of the parts may vary, but their property remains the same - reliable fastening.
Fixing the glass on the wall takes into account the following steps:
- The marking of the fasteners takes into account the distance of 50-70 mm from the holes to the corners of the glass (we take into account horizontal and vertical).
- Using pre-applied markings, holes are drilled in the wall to a depth equal to the length of the dowel.
- Plastic dowels are driven into the prepared holes.
- Wall washers, rollers and face washers are put on the self-tapping screws.
- Self-tapping screws are screwed in at the top, bottom, as well as one screw on the side.
- The mirror is wound on the side until it stops.
- The second fastening is fixed on the side.
- Decorative “hats” are used to disguise the heads.
Fastening glass using double-sided tape
- So, the easiest way to secure glass, and not only glass products, to the wall is to use double-sided tape.
- Of course, in theory, this method of fastening looks suspicious, because tape itself is not the most durable material that can be used to hold a glass shelf or mirror.
- However, if you are going to mount it on a smooth surface, then you should understand that the adhesion with such fasteners is very good.
- Plus, you need to use not ordinary office double-sided tape, but specialized tape that is designed for this kind of work. If you buy shelves in a special showroom, ask the seller if he has a special tape for gluing such shelves or mirrors.
- However, if you plan to place heavy shampoos, etc. on such shelves, then it is advisable to use a more reliable mount.
- By the way, another disadvantage of attaching shelves or mirrors with tape is the difficulty of gluing. It is quite difficult to glue the shelves evenly, and after gluing it is advisable not to tear the object off the wall, otherwise you can ruin the tape, and often the surface itself, if we are talking, for example, about wallpaper.
Care of the finished surface
Taking care of suspended glass is not particularly difficult. It is enough to clean the facing material regularly, for which any detergents or glass cleaners are perfect.
It is recommended to ensure that the surface is not greasy and does not get splashed, as they immediately dry in spots.
Glass care
You can further polish it to a shine using microfiber cloths or a waffle towel.
Popular adhesives
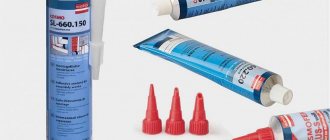
The main criterion when choosing glue is the presence of high adhesion. Many well-proven compounds are suitable for it, for example, silicone sealant. Non-standard solutions are also possible; as an option, you can glue the mirror to liquid nails. A composition intended for aquariums is also suitable for the bathroom. Among all the variety, Titan and Abro products are especially popular.
Titan
Used to work with different surfaces: concrete, metal, tiles, brick, paint, wood, drywall. Reliability is ensured by the organic resins and synthetic rubber included in the composition. Main advantages:
- high adhesion;
- water resistance;
- elasticity;
- strength;
- amalgam preservation;
- ease of use.
Titan is applied to a surface from which grease has previously been removed. The distance between the glue strips is 5 cm. They retreat 2 cm from each edge. If after gluing the position of the mirror is not satisfactory, it can be corrected within a few minutes.
Strong adhesive for mirrors with increased adhesion. The basis is epoxy resin. Used for joining various materials with glass. It can be used for gluing the glass itself, which plays an important role when it is necessary to fix a broken piece. When completely dry, it remains transparent. There are no yellowish streaks left. When used in the bathroom, moisture does not spoil the quality of the seams.
It is sold in a set consisting of two ampoules. One of them contains the adhesive itself, and the other an activator. Before starting work with ampoules, cut off the spouts, squeeze their contents into a container and mix thoroughly. Use a syringe to draw up the adhesive and cover the surfaces to be glued with it.
Loctite
Composition of two components: glue and activator. The contents of the package are enough for one or two mirrors, depending on the dimensions. Before application, the parts are mixed and applied to the amalgam in an even layer. Advantages: quick drying, color retention, no smudges. The product is also available in aerosol form, which makes the task easier. High efficiency is combined with economical consumption.
Permatex
It is used mainly for car mirrors, but the properties of the composition allow it to be used in everyday life. It is highly resistant to temperature changes, making it suitable for the bathroom. Available in a tube. It appears to be a clear liquid. The base is cyanoacrylate resin, which provides high adhesion and rapid hardening. The composition does not contain solvents. The advantage is that the glue consists of one component, so there is no need to mix it, which saves time.
DoneDeal
Silicone based sealant. Has a wide range of applications. Often used for gluing mirror tiles and other decorative elements. When applied to the surface it forms a uniform coating. It is heat resistant. Elasticity and strength guarantee high reliability. Advantages: good adhesive properties, transparent color, moisture resistance, long service life, ease of use, low price. Among the disadvantages is that it cannot withstand heavy loads, so it is not suitable for massive mirrors.
Advantages of glass shelves
Hanging and mounted shelves help to enliven the interior and give it some flair. Many people purchase wooden shelves without knowing about the advantages of glass shelves, which are more practical than wooden ones in many ways. Glass shelves have the following advantages:
- they do not create a feeling of oversaturation in the room. And they give the room airiness;
- combine with other furniture made of glass, wood or plastic, fitting perfectly into any interior;
- Glass shelves can be not only transparent, but also colored. A wide range of colors can make a room both laconic and defiantly bright;
- The glass shelves are quite durable. They can withstand loads of up to 15 kg. subject to correct installation;
- they are durable. A well-made shelf will quietly serve for 10-15 years;
- Shelves made of steel are easy to care for and, unlike wooden ones, they are not afraid of moisture;
- glass allows you to make a shelf of an unusual shape, which will give the room individuality and character;
- You can make glass shelves with your own hands.
Brackets and point mounts
Glass mounting brackets can have a wide variety of designs. It allows you to install the part almost anywhere, since there are situations when you need to fix the glass at the corner junction of two walls. Standard methods are no longer suitable here and you need to look for alternative options.
In the store of appropriate accessories you can find any type with the desired design. If you wish, you can design and manufacture the item yourself, but this will take a lot of time and the initial version will not always be successful, so it may take several attempts.
Glass point mounts live up to their name. This type implies the presence of special holes in the material into which bolts with a wide head and a rubber lining are inserted to reduce the pressure and load on the glass.
This method is used mainly in shower stalls and when installing transparent fences. For such products, thick glass is used, which allows the use of elements on twists. With thinner models this number will no longer work. In any case, do not use excessive force when tightening the bolts.
Required Tools
The tools you will need are: a level, a drill, or better yet a hammer drill, a screwdriver, dowels, self-tapping screws, a jigsaw, wood glue, a fastening set, a set of drills, a pencil, a hammer, and a wrench for anchor bolts.
If you use metal rods, you need to remember that the diameter of the fastening element should be 10-12.
Upon completion of all stages of work, we attach the shelf.
Features of self-installation of glass products
When installing glass structures yourself, you must follow a number of rules to ensure that the product is functional and lasts a long time.
- They determine the location of the glass structure or object, where it will be located - in the bathroom or in the hallway.
- Choose a suitable fastening method (adhesive mounting or installation of special fittings).
- Having chosen the fastening method using fittings, select the appropriate fasteners.
- Depending on the fasteners, they are installed in the correct order.
- Check the reliability of the work performed.
Tips for installing mirrors yourself
When installing a mirror yourself, you should consider many factors. Each material requires a certain type of fastener.
The mirror is fixed to the concrete wall using glue. It is worth considering that glue is not always able to withstand a massive product, so you can use a combination of glue with double-sided tape.
The mirror sheet is fixed to the plasterboard wall using holders. It must be remembered that drywall can be deformed if there is a strong impact on it, so the weight of the mirror sheet should be taken into account.
Rules for installing glass shelves yourself
Attaching a glass shelf yourself is not difficult, if you consider the following:
- To secure a shelf no more than 50 cm long and 20-25 cm wide, only two holders are required, but if you intend to install a longer shelf, the number of holders increases.
- Before installing fittings for a glass shelf, you should mark its location (the holders must be attached so that the shelf is horizontal and level without distortion).
- When installing several shelves, it is better to start installation from the top row.
By following these tips, you can independently carry out a number of activities to install any glass element and structure.
Need for invention is tricky, attach the mirror “tightly”
All of the above methods are real and can be implemented for any wallpaper. Among the above methods, the first two are used for light, small mirrors, the last two, in fact, are universal, but much more complicated, and require increased accuracy and precision.
It is quite easy to check and determine how protected a place on the wall is from dust. It is worth removing dust with a damp cloth from the planned place on the wall. After a couple of days, run your hand over it - if dust appears, it means the place is not suitable.
If the integrity of the wallpaper is not of great value, then the mirror can be attached to the wall using a fairly simple procedure - two dowels and a pair of brackets.
Consumption of double-sided foam tape for gluing mirrors
| Mirror area cm2 | Mirror 3 mm thick | Mirror 4 mm thick | Mirror 5 mm thick | |||
| tape width 19 mm | tape width 25 mm | tape width 19 mm | tape width 25 mm | tape width 19 mm | tape width 25 mm | |
| 600 | 14 cm | 11 cm | 19 cm | 14 cm | 24 cm | 18 cm |
| 800 | 19 cm | 14 cm | 25 cm | 19 cm | 32 cm | 24 cm |
| 1000 | 24 cm | 18 cm | 32 cm | 24 cm | 39 cm | 30 cm |
| 1200 | 28 cm | 22 cm | 38 cm | 29 cm | 47 cm | 36 cm |
| 1400 | 33 cm | 25 cm | 44 cm | 34 cm | 55 cm | 42 cm |
| 1600 | 38 cm | 29 cm | 51 cm | 38 cm | 63 cm | 48 cm |
| 1800 | 43 cm | 32 cm | 57 cm | 43 cm | 71 cm | 64 cm |
| 2000 | 47 cm | 36 cm | 63 cm | 48 cm | 79 cm | 60 cm |
| 2200 | 52 cm | 40 cm | 69 cm | 53 cm | 87 cm | 66 cm |
| 2400 | 57 cm | 43 cm | 76 cm | 58 cm | 95 cm | 72 cm |
| 2600 | 62 cm | 47 cm | 82 cm | 62 cm | 103 cm | 78 cm |
| 2800 | 66 cm | 50 cm | 88 cm | 67 cm | 111 cm | 84 cm |
| 3000 | 71 cm | 54 cm | 95 cm | 72 cm | 118 cm | 90 cm |
The final touch is to remove the protective film from the glued pieces and install the mirror in its intended place. Manufacturers of this type of tape provide a guarantee for 10,000 adhesives, so if it is installed incorrectly, you can correct it.
Fastening the mirror to the wall using 3M adhesive tape is reliable - this material is used in industry for gluing smooth fragments. This compound is not afraid of ultraviolet radiation and has a wide temperature range of use (from -40°C to +90°C). The adhesive composition has excellent resistance to water. The only limitation is that this tape adheres much worse to porous surfaces. But with ceramic tiles, laminated MDF or chipboard, adhesion is excellent. If in doubt, you can conduct an experiment - glue something heavy, then try to tear it off. Based on the results, you can draw your own conclusions.
Backlight
Properly selected lighting makes shelves unusual. It visually expands the room and makes it more alive. If you turn off the main light and light a couple of candles, the room will create an atmosphere of pleasant twilight. LEDs can work in color changing mode, so you will always have the opportunity to add color to the room, which is important at a house party.
Glass shelves are illuminated using LEDs or LED strips. They are connected to a power source with a voltage of 12-24 volts. LED strip allows you to create a pleasant and soft light. Also, its big advantage is that it does not heat up during operation. You can safely put flowers on the shelf.
For small shelves it is better to use single LEDs, and for complex structures LED modules are suitable.
Special controllers that allow you to add effects: changing color, flickering or backlight intensity will help you create a unique shelf design.
How to properly attach a shelf to a wall
Let us now move directly to the process of our work itself. Here are step-by-step instructions for work, consisting of three sections: preparation, marking and installation.
We have already mentioned the first section earlier: you should find and mark the place where the glass shelf or mirror will be located. If the product is large, then only two people can mark it: one applies the product to the surface, the other traces its contours with a pencil, and also marks the places for fasteners. When you plan to install a shelf equipped with decorative racks, before starting work, outline the place for them. They should not warp and have a vertical position.
When everything is ready, take a drill and make holes for screws and screws, the depth of these holes is determined by the length of the fasteners. It also depends on what the load on the shelf will be. To make the holes as accurate as possible, you should wrap the drill bit in a certain part in electrical tape to prevent excessive penetration along the length of the drill into the wall. We insert wooden plugs or dowels corresponding to the dimensions into the wall holes.
Now you need to separate the fasteners from the shelf, then install them one by one in the designated places on the shelf in order of priority. It is very important that the place for placing the item is parallel to the floor and does not allow the assembled product to warp.
Let's move on to installing the glass: first you need to carefully inspect it so that it has rounded and polished corners. The surface is ideally glossy and has no errors in the form of various scratches or cracks. If there are no defects, then you can mount the glass product to the wall.
Remember, if your shelf consists of several levels, first strengthen the upper part, and then the lower one. When everything is ready, you can place on the shelf the items you want to put there.
Now that you know how to attach glass to the wall, you can buy everything you need and feel free to get to work. As you can see, everything is not nearly as complicated as it might initially seem. This work can be done by any person whose profession is far from construction.
Installation options for wall panels
The selection of fittings and fastening options for glass panels is a very important and critical stage in the execution of the order. Wall panel fittings and mounting options are important supporting elements of the overall design, the quality of which directly affects the functionality and durability of the products.
Fastening glass wall panels is carried out by:
- drilling holes;
- use of adhesive materials;
- fixation with locking screws;
- fixation into the frame profile.
A range of products designed for fastening glass panels and mirrors: pendants, plugs, brackets, holders, dampers, spacers, plates, hooks, hidden hangers.
Installation procedure for a glass apron
1. Installation of the apron is carried out before installing the kitchen.
2. When installing a kitchen, the counters (lower cabinets of the kitchen set) are adjusted to the apron by adjusting the legs so that there is a 5 mm gap between the end of the apron and the countertop. This gap is necessary to eliminate pressure on the apron in case the tabletop gets wet. The resulting gap is covered with a plinth.
3. The upper cabinets of the kitchen set are adjusted to the apron by adjusting with a gap of 2-3 mm. This gap is necessary to eliminate pressure on the end of the apron when the cabinets sag when the owner of the set loads dishes into it.
Frame profile.
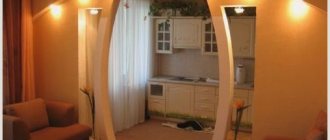
The combination of aluminum and glass is surprisingly harmonious. It looks good both in door designs and wall panels, giving the kitchen, living room, bedroom and office a touch of exclusivity.
Frame profiles are supplied in 5-meter lengths. The standard coating is anodized aluminum. Can be painted in any color. The profiles are designed for glass with a thickness of 4 mm. In profiles for gluing, the glass is secured using double-sided tape.
Profiles for fastening 16 mm wall panels into a niche.
Wall profiles connect the work surface to the wall panel.
The profiles are made of high quality and durable material. Thanks to their special shape, they are not subject to deformation, including when exposed to high temperatures. Special plugs prevent moisture from getting inside and also perform a decorative function.
Profiles for fastening glass aprons and wall panels
4–18 mm per niche.
Profiles for niches are a new word in design.
They are used with panels from 4 to 18 mm.
For glass panels, an LED backlight option has been developed in the upper profile, which creates a stunning visual effect.
Instructions for self-installation of a glass apron using fasteners (via drilling)
1. Make sure that the surface at the mounting location does not have sharp protruding elements that could damage the panel. If there are such wall defects, eliminate them. Curvature and smooth irregularities of the wall that do not lead to significant deflection of the panel are allowed.
2. Check that the dimensions of the ordered product correspond to the dimensions of the opening or surface on which the product will be installed.
3. For two-piece corner splashbacks, ensure that the walls are vertical and there is a 90-degree angle between the walls to ensure an even gap at the corner joint between the glass panels.
4. Check that the number of fasteners matches the number of holes in the panel.
5. If there are electrical sockets, switches, roof rails and other elements, remove the decorative trim from them if these elements will be mounted on top of the installed glass panel. Do not forget to take into account that the glass panel has a thickness of 5-9 mm and in order to fasten the decorative overlays in place it will be necessary to extend the glass of the socket or switch to the same size.
6. Place the glass panel on the surface on which it will be installed. Mark all holes.
7. Remove the panel and drill holes with a diameter corresponding to the diameter of the plastic dowel supplied with the fasteners.
8. Hammer a plastic dowel into the drilled hole.
9. Remove the packaging film from the panel and place it against the wall.
10. Insert a silicone damper into the mounting holes in the panel to prevent the screw from coming into contact with the glass and a threaded brass bushing.
11. Screw the self-tapping screw through the brass bushing into the plastic anchor in the wall.
12. Without releasing the panel, fasten the decorative caps to finally secure the panel. WARNING: Do not over-tighten fasteners. The apron should hang on the fasteners, and not be sandwiched between the fasteners and the wall.
13. Reinstall the previously removed covers for sockets and switches.
Other installation features:
- When attaching the apron to a gypsum board wall, replace the plug included in the holder kit with a butterfly plug;
- If it is necessary to attach additional rails to the panel, remember that the railing must be attached through the glass of the apron into the wall. The roof rail fastening screw must not touch the glass.
- If it is necessary to place a backlight behind the product, the recommended distance to the light source is at least 70 mm for UV printing and 30 mm for artistic triplex;
- When installing a kitchen and an apron at the same time, we recommend the following installation procedure: first, the apron is installed level, then the lower part of the set is adjusted to the apron by adjusting the supports in height, then the upper part is mounted;
- If the glass kitchen apron consists of several parts, to prevent dirt from getting into the cracks, it is recommended to treat the joints with colorless silicone sealant;
- When tightening the mounting screws, excessive tightening force is not recommended;
- If there is a corner joint, first install the panel that rests its end against the wall, then the one that rests its end against the first panel.
Fastening glass using double-sided tape
- So, the easiest way to secure glass, and not only glass products, to the wall is to use double-sided tape.
- Of course, in theory, this method of fastening looks suspicious, because tape itself is not the most durable material that can be used to hold a glass shelf or mirror.
- However, if you are going to mount it on a smooth surface, then you should understand that the adhesion with such fasteners is very good.
- Plus, you need to use not ordinary office double-sided tape, but specialized tape that is designed for this kind of work. If you buy shelves in a special showroom, ask the seller if he has a special tape for gluing such shelves or mirrors.
- However, if you plan to place heavy shampoos, etc. on such shelves, then it is advisable to use a more reliable mount.
- By the way, another disadvantage of attaching shelves or mirrors with tape is the difficulty of gluing. It is quite difficult to glue the shelves evenly, and after gluing it is advisable not to tear the object off the wall, otherwise you can ruin the tape, and often the surface itself, if we are talking, for example, about wallpaper.
Useful tips
- When choosing materials for fastening, give preference to reliable manufacturers who have been releasing products on the market for more than one year and have few complaints. You can get maximum information on the relevant thematic forums.
- Do not use glue that has expired.
- Prepare the surface for work: eliminate obvious pits and protrusions, level. If a mirror hangs on a wall with defects, it will be under stress and will eventually burst.
- After hanging the mirror, do not touch it for 3-4 days - let it harden.
- If the mirror weighs 2 kilograms or more, secure it mechanically or add a small stand or several fasteners.
- When choosing a place, keep in mind that a mirror installed opposite the window opening visually expands it and makes it lighter.
If you are not sure that you can cope with the task, involve experts in the work. If you are overcome by passion and the desire to do everything yourself, don’t be a coward, but don’t rush forward as if to storm. Read several articles on the topic, ask for advice from people with experience - after all, it is important to take into account the quality of materials, the features of the canvas, and dimensions.
Glass glass fittings: what is needed for fastening all-glass structures
For reliable, and most importantly, safe use of all-glass structures, correct fixation of each element is important.
For this purpose, fittings for fastening glass to glass are used, which are presented by different manufacturers. The leaders in the production of such components are considered to be Europeans - Germany and Italy. Their products are of high quality, and some even make designer parts to order. But the average-priced and cheap fittings are made by the Chinese. Moreover, the first - in factories and with a guarantee of use, and the second - in a handicraft way. Such parts can withstand light loads, and the cheapest ones have a weak protective coating, through which rust appears over time. Therefore, purchasing glass fittings is exactly the case when you need the help of a professional, and the savings will be more expensive.
Functionality
This is what characterizes glass fittings.
- The use of such fasteners and connections prevents damage to the transparent surface. With proper selection and installation, the glass will remain intact, without cracks or chips on the edges.
- If all the details are chosen correctly and tastefully, then the glass structure will be not only functional, but also decorative. Such a partition, door or shower stall will have a complete look that matches the style of the overall design of the room.
- Safety and practicality in operation is another function of fasteners, clamps and connectors. High-quality and durable parts are able to withstand the weight of heavy triplex and the additional load that occurs during operation. Therefore, you can use the doors or move the partition apart without fear of getting hurt or damaging the structure itself.
We do not take risks and value the trust of our clients. Therefore, every customer who contacts can safely follow the recommendations of designers and engineers. Our specialists competently and with correct calculations select fasteners for fixing glass, which guarantees the reliability of such structures and use by adults or children.
What kind of accessories can there be?
This concept combines several types of fasteners, clamps and clamps that are mounted directly to the glass surface. This provides a rigid fixation or a movable connection.
Type of glass fittings
They are attached to all types of canvases, connecting 2 - 3 glasses together or glass with a wall or another hard, opaque surface.
High quality steel coated with chrome or nickel plated compounds. Stainless steel parts can be additionally polished or ground, which gives a decorative appearance to such elements.
They are fixed using glass screws and are distinguished by their ability to withstand a weight of about 120 kg. For heavier canvases, 2 sets are used.
They are attached to the edge using a clamp and a rubber (silicone) gasket. The latter eliminates the backlash effect and protects the blade from contact with metal.
High quality stainless steel alloys, anodized aluminum.
Provide protection for translucent panels in the edge area. Glass in a frame is considered more practical and safe to use. They also look completely different than solid structures.
Attached to glass surfaces using special connectors.
High-quality metal alloys with additional chrome plating.
They come in different cross-sectional shapes and provide additional stability to partitions and shower stalls. They also serve a decorative function.
They can be screwed with self-tapping screws or glued with a special compound.
Alloy or stainless steel with an additional protective coating against contact with moisture is used. Therefore, hinges for glass shower doors glass glass do not rust and can easily withstand temperature changes.
Allows you to connect adjacent panes in a flexible way. They have different angles of rotation and are complemented by eccentrics with closers.
In addition to the main parts, additional ones are used. They provide practical operation and give the structures a complete aesthetic appearance. Such elements include special plugs for pipes or decorative overlays that aesthetically decorate the fastening points. Therefore, the user does not see screwed screws or other fastening mechanisms. Stoppers, closers, handles and locks are also installed. All these elements make it safe and practical to use glass structures. They also give booths, partitions or fences a finished look.
What you need to know about barbells
This is a special mount that can connect two glass sheets or glass with a blank material:
- brick wall;
- concrete slab;
- plasterboard.
Glass doors for partitions or entrances to shower stalls are secured using rods. Such fittings are required for fixed panels with a width of 40 cm or more. The part allows you to set and reliably hold the working angle of the transparent panel in a certain position. And this prevents the glass from loosening.
The fittings are installed so that only the fastening points are visible from the outside. And the mechanism itself must be hidden from inside the partition or cabin.
Attention! For triplex or thick tempered glass, telescopic structures are used. They are distinguished by increased power and can be with a round (up to 20 mm) or square (side up to 30 mm) cross-sectional shape. Manufacturers offer such parts in different lengths, but with the ability to change the angle of attachment to the wall or glass. In this way, 2 - 3 adjacent panels or glass can be fixed to the wall.
Another type of fasteners is dial rods. They consist of different parts, which the master selects according to the requirements for the functionality of the door or partition. Such structures will be short in length (about 120 cm) and smaller in diameter (15 – 16 mm).
If the design requires colored fittings, then most often chrome-plated or gold-plated parts are chosen. Such elements can be up to 1 m long.
Methods for attaching the rod
Method of attaching the rod to glass
Using self-tapping screws.
Even at the design stage, the locations for the holes are determined and holes are drilled on the float base. The right angle of fastening is strictly observed.
A stacking rod with suitable elements is used. Attaches to the glass surface at an angle of 30°. The angle of attachment to the wall can be adjusted as needed. Due to the presence of moving elements, the position of the attached rod is adjusted after installation and fixed with special eccentrics.
Glass fastening parts
For all-glass structures, it is very important that all fasteners have a neat appearance and fit the overall style of the decorated room. In this case, the glass must be securely fixed and operated safely. In this case, fittings for glass partitions with a point fastening method are optimal. For such parts, 1–2 small holes are drilled or no mechanical intervention is required at all. In the second option, fixation is performed with clamping screws.
Each fastener is accompanied by a seal. This allows you to protect the transparent surface from contact with metal and possible damage. After all, there is often a temptation to do such installation yourself. In this case, a lack of experience can lead to the fact that the self-tapping screws or clamping screws will:
- overtightened - provokes chips on the glass;
- unevenly tightened - the canvas is deformed and there is a risk of cracks.
And the material, even with a small crack, is no longer suitable for installation and further use. Therefore, rubber or silicone seals will be a way to protect the door leaf or partition from damage and will help to align the fasteners in the desired position for further fixation.
Hinges, connectors and rods allow you to attach glass to the floor, wall or other transparent sheets. In the latter case, glass glass fittings are used and are suitable for installation:
- walls in glass enclosures and booths;
- elements of all-glass partitions;
- door leaves in partitions;
- canvases in “accordion doors” or “books”.
Hinges vary in design, depending on where the hardware will be used. After all, swing and swing doors will require different components. The same applies to connectors and rods.
Another way to fasten solid panels is clamping profiles. These are U-shaped metal structures designed for a certain thickness of glass. Glass is inserted into them and secured with clamps with additional seals. Decorative overlays are installed on top of such profiles, which allows the partition or fence to be treated as one whole wall, completely hiding all technical elements.
Fittings are no less important in glass installation. They are:
- top/bottom;
- designed for setting angles between two stationary glasses;
- for fixing the upper edge of the partition elements.
All of the listed parts are selected individually for a specific glass structure. In this case, the dimensions of the canvases, their weight and thickness are taken into account. They also pay attention to whether the sash should be fixed or movable.
Requirements that the fittings must meet
Since glass is a fragile material that requires careful handling, the fastening elements must be carefully manufactured and correctly selected in size and purpose. Any fastenings must ensure reliable installation and correct fixation of the panels. They must also ensure the safe operation of fairly heavy structures.
An additional requirement is durability and maintaining an aesthetic appearance. In the first case, pay attention to the material itself from which the fittings are made. In the second - for the presence of a protective and decorative coating. If all quality requirements are met, then the kits purchased during installation will last for several decades, excluding the presence of rusty spots or peeling paint.
Loops
In sliding wardrobes, it is sometimes undesirable to reduce the depth of the cabinet due to the use of large-format sliding systems. Quite a few designs of rotary (hinge) hinges have been developed for such frameless glass doors. Regardless of the design of the hinge mechanism itself, they primarily differ in the methods of attaching glass to them. There are hinges in which the glass is inserted into the gap between two plates of the body and secured with screws through an elastic gasket, and hinges that are secured in a hole or shaped groove selected in the glass. In the second case, the hinge body is secured on the front side with a nut covered with a decorative cover. This method almost completely eliminates the displacement and loss of glass during operation, but forces you to purchase quite expensive equipment for drilling glass or processing grooves in it. In addition, any holes, and especially grooves, are stress concentrators and weaken the glass. Tempered glass cannot be processed, and only a few can afford to temper it after all other influences in a furniture factory.
How to glue glass and metal, wood, plastic
Bonding with UV glue
Among the best means for joining glass to glass or metal, we should note compounds that acquire special strength after treatment with an ultraviolet lamp. The connections obtained in this way have high strength qualities.
An important condition: the dimensions of the lamp must allow uniform irradiation of the seam.
During work, safety precautions should be observed:
During processing with a lamp, the parts to be joined must not be moved.
Let's watch a video about gluing glass with UV glue:
A more difficult task is connecting plastic to glass.
Getting a reliable connection between glass and plastic is not at all easy
Due to the very smooth surface and the absence of pores on it, the weak chemical activity of the polymer material, and the low level of adhesion, not every glue can provide a reliable connection of plastic.
Considering this point, in industry and construction they often use a more reliable option - welding.
If there is a need to glue plastic parts at home, you must take into account the type of plastic; different types differ in properties and require an appropriate composition for gluing.
Adhesives for plastic products are divided into categories:
Each type of glue for plastic has a special mark - an abbreviation indicating the type of material for which it is intended.
We invite you to watch an interesting video; its creator suggests using one little trick that will significantly improve the quality of connecting seams:
heating system filter in an apartment
Gluing wood to glass is quite simple.
The simplest and cheapest options:
You can glue wood and glass using glue or double-sided tape
For those who don’t particularly like fiddling with glue, there is an excellent option for joining wood and glass using high-quality double-sided tape ZM.
Especially if the glass is opaque, for example, if you need to mount a mirror on a cabinet door.
Let's summarize: gluing glass to glass, wood and plastic is quite possible, even at home you can achieve a good result.
Of course, subject to choosing the right glue and strictly following the recommendations for organizing the process of joining materials.
When performing work, we must not forget about observing personal safety rules, including protection of skin, eyes, and respiratory organs.
Noticed a mistake? Select it and press Ctrl+Enter to let us know.
Source
How to glue glass to glass at home
Glass product repair
Sometimes homemade adhesives are used. Good quality glue is obtained by mixing ash and bone glue. It will need to be applied to a preheated glass surface.
You can glue two surfaces of the same quality using a mixture of 1 part casein glue and 10 parts silicate glue.
To connect wood to glass, a mixture of wood glue and ash is used; its consistency should be thick.
Small damaged surfaces can be repaired using garlic juice. The layer connecting the parts will be transparent.
When choosing a homemade glue recipe, you should consider:
For example, to repair an aquarium or window frame, you will need to prepare a stronger composition that has the properties of a sealant:
The thoroughly mixed mixture is heated to a boil, removed from the heat, allowed to cool to + 50 C. Then dibutyl phthalate and aluminum powder are added and mixed thoroughly. The mixture is used freshly prepared.
Types of adhesives for mirrors, application technology for different surfaces
The importance of a mirror in the home is difficult to overestimate. In addition to its main function, it helps to visually enlarge the space and even acts as a decorative element. Quite often, reflectors are sold without a special frame and fasteners. In this case, you will need to purchase mirror glue that is suitable for most materials. The domestic and foreign construction industry produces a wide range of these products. In order to choose the option that best suits all the characteristics, it is worth understanding in advance how they differ and what subtleties you need to know in order for gluing to be successful.