Installing a ceiling cornice depends on what kind of cornice you want to install. And what kind of cornice you will mount depends on what and how you will hang on it. The choice of curtain rod depends on the density of the fabric from which the curtains will be sewn, and on the number of rows of curtains.
There can be four rows:
- Tulle.
- Blackout curtains.
- Decorative curtains.
- Lambrequin.
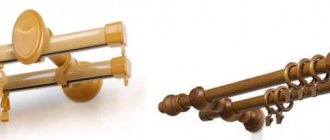
The most common ceiling cornices currently exist in two types: string and plastic.
String curtains usually have two strings and are used for curtains made of light fabrics.
Plastic cornices are manufactured in one-, two-, three- and four-row forms. And they allow you to more freely decide on the choice of fabrics for curtains.
How to shorten tulle?
The procedure is as follows:
- Secure the curtains
to the curtain rod and give them time to hang down. - Take a thick darning needle and thread a wool or nylon thread through it. It can be plain or colored. ...
- It is more convenient to do all the work starting from the middle of the curtain, first in one direction, then in the other.
Interesting materials:
How long will it take to collect documents for selling an apartment? How much time a day should you exercise on a stepper? How much time did the poet spend abroad in total? How long does it take to cook quail eggs? How long does it take to cook lamb for shurpa? How long should I cook white beans after soaking? How long does it take to cook beef tongue? How long does it take to cook pork bones for soup? How long to cook red beans after soaking? How long does it take to cook beaver meat?
At what distance from the battery should you hang curtains?
Batteries are most often located under windows. Leave a distance from the battery to the curtain of at least 6-7 cm.
Interesting materials:
Where can you go in August 2022? Where can you go on vacation in August? Where can you go to the seaside inexpensively in November? Where can you go on vacation in November? Where can you go on vacation in September? Where can you go instead of Thailand? Where can you go abroad in August 2022? Where can you go in winter in Europe? Where can you fly from Ukraine? Where can you fly inexpensively?
Making the markings
Now you need to determine at what distance from the wall the first row of curtains will hang. Usually it's tulle.
If you are going to attach a plastic cornice, then you need to make appropriate marks on the ceiling.
If you are dealing with a perfectly flat wall, you can measure the distance directly from it every 50 - 60 cm. But it is best to measure the distance from the wall in two places where the ends of the cornice will be located, and then attach the cornice to the ceiling (here you can’t do without an assistant) and make marks along it. This will ensure a straight line and the cornice will lie exactly parallel to the wall.
In the case of a string cornice, two marks along the edges will be enough, where it will be attached.
What is a decorative insert?
After installing the stretch ceiling, there remains a gap between it and the wall that needs to be masked. And it is advisable to make this an aesthetically attractive element or unnoticeable.
A decorative insert for suspended ceilings is a plastic plug of a certain shape that closes the gap between the wall and the ceiling. This product is simply inserted into the gap, and the wide sides completely hide it under their surface.
Since such a plug does not adhere to the glue, if it is necessary to dismantle the canvas, for example, when flooded with water, it can be easily removed and then installed again.
How to remove a suspended ceiling?
There can be many reasons for removing the ceiling structure:
- Flooding by neighbors above,
- Replacing the old canvas with a new one,
- Laying new electrical wiring,
- Other work requiring dismantling.
This is a very troublesome task; it requires knowledge, sufficient practical experience, as well as a special tool. For example, you need a kind of spatula with an angled edge (our company’s installers also have it) or a tool that can be used to grip without damaging the surface.
Is it possible to remove the ceiling with your own hands?
Of course, it is enough to follow the following sequence:
- Determine what type of fastening is used in the design: harpoon, glazing bead or wedge. Often only a specialist can do this correctly. In recent years, the first option has become widespread.
Brief description of harpoon technology:
A PVC profile is installed around the perimeter of the room, in which there is a technological groove with a side. After installing the components: mountings for lamps and chandeliers, timber for curtains, electrical wiring, the tensioning stage occurs. The canvas is pre-cut in production with a shrinkage of 5-10% to allow stretching. A harpoon, which looks like a boss with a hook, is soldered along the edge of the film. Soldering is carried out on high-frequency machines using high-frequency current. Next, the panel is tucked into the profile using a spatula. It is heated with hot air for ease of stretching, and the remaining parts are filled. When cooled, the polyvinyl chloride base is stretched and leveled. The final stage will be the installation of lamps, curtains, chandeliers and masking tape.
- The next step is to remove the decorative plug from the edges of the room that covers the groove in the baguette. It is better to start dismantling it from the corners, it is cut there at 45 degrees and is easy to catch.
The foam baseboard is glued to the wall.
- Next, you need to hook the harpoon with the sharp edge of the blade and pull it out with pliers with long jaws. You should act very carefully in this case, without injuring anything. Otherwise, everything will have to change. We also recommend starting from the corner of the room. If a glazing bead or wedge system is used, we recommend that you carefully bend the aluminum profile and release the glazing bead and remove it with a screwdriver with a curved end.
- Complete the work by removing the PVC film.
That seems to be all. But in fact, between operations there are many incidental matters that only a real master can know about. In addition, you should be very careful and know the whole process to avoid marriage.
It is also worth understanding that installing “five-year-old” PVC is a complex procedure. Old polyvinyl chloride is no longer so elastic, and may not stretch when reinstalled.
Need dismantling? Contact us in Chelyabinsk. We will prove that this can be done quickly and efficiently.
Cost - 2000 rubles, without additional services.
You can find out the exact price from our managers by calling +7 (351) 776-23-60. We accept applications daily from 8.00 to 22.00, on weekends and holidays.
Installing the cornice
To easily install a curtain rod alone, you need to start not from the outermost fastening, but from the second or third from the edge. Because, no matter how tightly the self-tapping screw and dowel sit in the outer socket, the weight of the cornice and the large shoulder create a load quite sufficient to tear the fastener out of the socket. By screwing the self-tapping screw into the second or third socket, you reduce the shoulders, and with them the load.
After this, you can safely tighten the remaining screws and admire the cornice installed in place.
It is important to know: if you are installing a four-row plastic cornice, then it is better to make nests for fasteners in pairs, under the outer rows. Otherwise, over time, the cornice may take on the appearance of an inverted U.
In the case of a string cornice, you need to drill two sockets on both sides of the window, screw the brackets, insert and tension the strings. If the span is large enough - three meters or more - then in the middle you need to mount the included W-shaped bracket to support the strings. Then they will not sag along the entire length.
Cord
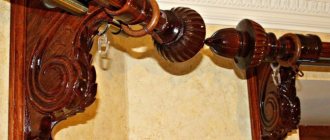
One such option is a thick textile cord; it perfectly masks the gap. The twisted cord is just as easy to install into the mounting groove. It is used not so much to mask the gap, but as an independent decorative element of the interior.
Attention: when inserting the cord into the profile groove, do not use a spatula or other sharp objects; they can easily damage the stretched fabric.
The final stage of installation
Installing caps on the ceiling cornice
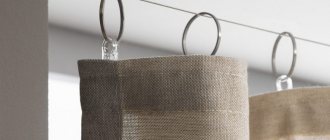
Now you need to calculate how many loops are needed for each row of curtains. Then insert them into your ranks. To prevent them from jumping out, insert the stoppers that come with the kit into special slots at the ends of the cornice.
And to give the cornice a finished look, plugs are placed at its ends. They also come included.
You need to put the loops on the strings before you pull them.
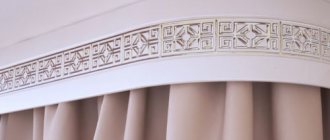
Decorative plug for stretch ceiling: 5 types
Today, many people use suspended ceilings to decorate ceiling surfaces. They are made from modern materials that ensure the reliability and durability of the ceiling covering. Tension fabrics come in different types.
A stretch ceiling consists of a fabric or film sheet that is stretched over a special frame.
Stretch ceilings can have a flat and smooth surface, or they can be stretched in the form of multi-level coverings. This allows you to install suspended ceilings in any interior style. The main thing is its harmonious combination with other finishing surfaces.
Features of suspended ceilings:
- Practicality;
- High quality materials;
- Strength;
- Durability;
- Moisture resistance;
- Fire resistance.
Tensile structures are easy to install and dismantle. This allows you to move the canvas at any time to gain access to hidden communications. In case of flooding, water can also be drained by removing the plug.
Plug on a suspended ceiling: possible sizes
After installation, suspended ceilings do not fit tightly to the wall, which creates small gaps between the surfaces. The insert is designed to remove unsightly space around the perimeter. The ceiling panel can be suture or seamless.
The canvas is attached to the wall using baguettes. Moreover, it can be installed on the ceiling in any condition, regardless of the quality of its surface.
The ceiling plug can be made from materials of different qualities. It is a thin, flexible profile. Typically the plug is white or black. It can also be colored. Some manufacturers offer a richer palette of colors. You can paint the caps yourself. It is better to do this before installing them.
Possible sizes:
- Reel 100 m;
- Reel 170 m;
- A segment of 2 m;
- A segment of 3 m.
Finished sections can be longer, but their installation can be extremely inconvenient. You can secure the plug yourself. Its installation does not require much effort, but requires careful work.
Installation of a stretch ceiling plug
After the canvas is stretched onto the ceiling, a small gap is formed between the wall and the stretched canvases, which has an unsightly aesthetic appearance. To complete the installation of the ceiling, it is necessary to install a decorative plug that will hide the gap formed as a result of the installation. Thus, the ceiling will have a beautiful appearance.
It is important to understand the order in which the plug is attached. It should be done after the main surface finishing.
The plug can be easily removed. This allows you to remove it at any time in case of flooding of the ceiling. After the water has been drained and the ceiling has dried, the plug can be put in place.
Plug installation process:
- Fixed on a baguette.
- The plug is inserted into the slot in the place where the harpoons are attached.
The plug very reliably covers the gap, which allows you to solve various problems. Depending on what the plug is intended for, they are divided into types. You can choose the right one in construction stores or online.
Decorative plug for suspended ceilings
When purchasing a plug, it is important to pay attention to the width of the side. Depending on the gap, you can use a narrow or wide plug. For example, an uneven wall can be successfully covered with a narrow cap.
It is very important to choose the right color of the plug. It should match the color of the ceiling or be a neutral color.
The wide end cap has the ability to highlight surface imperfections. Therefore, if there are sufficient ceiling unevennesses, narrower plugs should be chosen. The choice of type may also depend on the style of the interior.
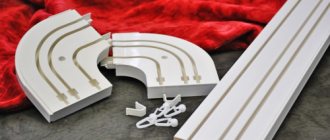
Types of plugs:
- Corner. Similar to ceiling plinth, but has narrower dimensions and an elastic structure.
- T-shaped. It is usually mounted on surfaces covered with tiles or porcelain stoneware.
- Connective. Used to combine fabric consisting of several parts.
- Fabric. It is a fabric cord that is pressed into an empty space.
- Ceiling. This is a plinth that can be made of foam plastic, polyurethane, or wood.
When installing plugs of any kind you need to be extremely careful. Do not use sharp tools that can damage the surface of newly installed ceilings. In the case of a ceiling plinth, it should be taken into account that it will be attached exclusively to the wall, which requires the use of special installation methods.
Installing a plug for a suspended ceiling (video)
Stretch ceilings are modern ceiling coverings that open up wide possibilities for finishing ceilings in any condition. They may or may not be even. Thanks to fabric or PVC sheets, the ceiling will look smooth and stylish. It is important that the ceiling matches the overall style of decoration. In order for suspended ceilings to have an aesthetic appearance, as well as to be practical and functional, their installation is completed with the installation of special decorative plugs.
Structure mounting options
If you have purchased a cornice, then you need to attach it efficiently and securely; this is what will be discussed in this section. I will talk about different technologies for carrying out work, and we will figure out how to reliably fix the structure on absolutely any surface.
Moreover, I decided to take an unconventional route; we will not consider base options, but will analyze which fasteners can be used in different situations.
Option No. 1 – dowel-nails
The most traditional solution for most cases, especially when it comes to city apartments. Let's figure out how to attach a ceiling cornice to the ceiling using dowels:
- This type of fastener is suitable for concrete and other bases made of dense, homogeneous material . The principle of operation is simple: the screw expands the plastic dowel, and due to this it holds very securely;
This is the principle on which this fastener works.
- The cornice is pre-assembled, after which it must be placed evenly on the surface of the ceiling in the way it will stand. Then you need to use a pencil to mark the points where you need to drill holes. The fastening step should not be more than 60 cm, the curves are fixed with separate dowels;
Usually the product comes with a diagram with tips on the working process.
- Before attaching the structure, it is necessary to drill holes of the required diameter and depth; most often, the cornice is fixed using quick-installation dowels 6x40 mm. The work is performed with a hammer drill; it is better to work with safety glasses, since when drilling the ceiling, dust and small particles get into the eyes;
To get less debris into the room when drilling, use this simple device made from a plastic bottle
- Installation is carried out with an assistant; first you need to insert the dowels into the ceiling and push them all the way so that they do not stick out on the surface. Then one person holds the cornice on the ceiling, and the second tightens the screws, you can start from the middle, and then secure the two extreme points, after which the assistant can release the structure, and you can calmly tighten all the other screws;
One person should hold while you grab the curtain rod at several points
- After all the screws are tightened, the plugs that come with the kit are placed on the holes. It is better to do this before hanging the curtains, so that nothing interferes with the elements being inserted well.
Option No. 2 - self-tapping screws
This type of fastener is ideal for those whose ceilings are made of wood and covered with fiberboard, chipboard and other similar materials. Let's figure out how to install a cornice using self-tapping screws, everything is very simple:
- First of all, the structure is assembled. Everything is easy here, because the kit always comes with instructions;
- Then you need to make markings along the line of location of the future structure, this will allow you not to be distracted during the work process and eliminate the possibility that, due to inattention, you install the cornice crookedly. The easiest way is to put a couple of marks on the ceiling from the wall side; after attaching the cornice, they will not be visible;
- Be sure to involve an assistant, as you will not be able to attach the product and hold it at the same time;
An assistant must hold the curtain rod and ensure that it is positioned according to the marks
- For fastening, wood screws with a length of 25 mm or more are used, it all depends on the characteristics of your ceiling and its strength . The fasteners are positioned evenly and carefully screwed in until the structure is completely fixed;
You can tighten the screws with a screwdriver, but this will require some effort.
Do not overdo it: if you tighten the screws too much, they can simply crush the plastic and break it. Therefore, monitor the process, and as soon as the self-tapping screw is pressed tightly against the surface, stop working.
- At the end, I advise you to check the fasteners by slightly tugging the cornice in different places; if it holds well, then you can install plugs. If there is a loose fastening somewhere, then you need to tighten it and then close the holes with plugs.
This is what the final result looks like when using self-tapping screws
Option No. 3 - liquid nails
In this section we will figure out how to glue a cornice to the ceiling. This method has one big advantage - you don’t need power tools to work, and you don’t need to make holes in the ceiling. And one big disadvantage is that to dismantle you will have to tear off the structure, and the surface of the ceiling will have to be cleaned and refinished in any case.
As for technology, the process consists of several main stages:
- First of all, we need to purchase liquid nails; one tube is enough for our work . The cost of the compositions is low; you can buy a good adhesive for about 150-200 rubles. When choosing, give preference to well-known manufacturers who have proven themselves well among buyers and specialists;
Liquid nails “Moment” set instantly and can withstand loads of up to 90 kg per square centimeter
- The work begins with preparing the surface; it must be cleaned of dust, this will improve the strength of the fastening. If the surface is too loose and crumbles, then treat it with a strengthening primer, this will make the base much more reliable;
- Next, the cornice is assembled, here everything is done as usual, with the only difference being that you can immediately insert the plugs, because in this case we don’t need holes;
- The glue is applied in a zigzag motion over the entire surface, then the cornice is pressed against the ceiling . If the length of the structure is large, then it is better to call an assistant to do the job efficiently. Some compositions need to be left on for a couple of minutes, some set quickly, so read the instructions in advance to know how to use the glue;
The main thing is to glue the structure evenly, so watch its position
- The composition usually takes about a day to harden, after which you can hang curtains on the cornice and use it without any restrictions.
In this section, you need to deal with one more aspect. I often get the question, how to hide the cornice behind the ceiling plinth?
Everything is very simple and clear here:
- If the structure will be hidden behind the baseboard, then buy a cornice without a decorative strip . In this case, it is not needed, and you can save money;
- The baseboard is most often located in the form of a protrusion, so you will have to cut the elements at an angle to get around the cornice. To do this, it is best to use a special device called a miter box, which allows you to make perfect joints of the plinth, both on the outer and inner corners;
Using a miter box you can cut the baseboard at the perfect angle
- I think you understand how to secure the ceiling plinth in front of the cornice. To do this, its plane, which is adjacent to the ceiling, is lubricated with liquid nails and pressed against the surface. The composition holds the elements perfectly and, most importantly, neat joints at the corners; the better you combine the elements, the more attractive the end result will be.
Such a neat framing of the cornice with a plinth looks just great
Option No. 4 – dowels for drywall
Let's figure out how to attach a cornice to a plasterboard ceiling. For some reason, many people think that it is impossible to ensure reliable installation with this material, but in fact there are no problems if you know the technology and use high-quality materials and components. I will talk about two types of dowels, each of which is excellent for our purposes.
The first option is a “butterfly” type dowel; this option is called so because when fastened, its protrusions diverge like the wings of a butterfly. The fastening technology in this case is as follows:
The butterfly dowel always comes complete with a self-tapping screw.
- First of all, the cornice is assembled, after which it is applied to the place of future installation, and the places for attaching the structure are marked. Just outline the holes with a pencil, after which the cornice can be put aside for a while;
- Next, holes with a diameter of 10 mm are drilled. Drywall is easy to process, so you don’t need a drill or hammer drill; you can easily get by with a simple screwdriver with a drill of the diameter we need. During work, a lot of debris is generated, so it is better to cover the floor with film or something else;
- After the holes are ready, you need to insert the dowels into them; to do this, simply squeeze their protrusions so that they fit into the hole and push the elements until they stop. All that remains outside is a plastic cap with a hole;
- The cornice is placed against the ceiling, after which you can begin to attach it. To do this, you insert a screw into the hole and begin to tighten it; as you screw it in, it goes into the hole on the end of the dowel, and then tightens the element using the thread . The work is carried out until the protrusions on the back side of the drywall rest against the surface and fix our cornice.
This is what all the stages of fastening with this type of dowels look like:
The second type of fastener is “Driva” type dowels, you can see what they look like below, and even lower I’ll tell you how to properly fasten a cornice using them:
Another good mounting option
- First of all, it should be noted that products can be made of plastic or metal. In turn, plastic options are divided into dowels with a drill tip and products without it. In metal ones there is always a drill, and this option is much preferable, since you do not need to drill holes;
- To attach a cornice to drywall, you first need to assemble it and mark the fixation points on the ceiling;
- Then take the dowels and simply screw them into the desired points using a screwdriver. There is a cross-shaped cutout at the top end, into which it is very convenient to insert a screwdriver and tighten the element;
The dowel is simply screwed into the drywall with a screwdriver
- After all the dowels are installed in their place, you can begin to fasten the cornice; for this, one person holds it on the surface, and the second screws the screws into the prepared holes. As a result, the cornice holds firmly and reliably.
The technology is simple but very effective
Option No. 5 – brackets
If there is no way to fix the structure on the ceiling, then you will have to find a different way out of the situation. Let's figure out how to attach a ceiling cornice to the wall; this option is noticeably different from all those described above:
This is how do-it-yourself fastening work is carried out
- First you need to purchase a set of brackets, usually two pieces are enough for a cornice up to 240 cm wide, but if the structure is wider, then you need more fasteners;
The kit includes a bracket, bracket and screws for fastening it
- Then the brackets need to be attached to the cornice from its upper side. First, you should determine the position of the brackets, after which they are screwed with a screwdriver, since it is quite difficult to screw them into plastic with a screwdriver;
The staples are arranged symmetrically
- The brackets are inserted into the attached rails, after which you need to take the cornice, determine its correct position and mark the drilling locations. If you don’t know at what distance from the ceiling to hang the cornice, then first place it in different positions and find the best option. At the same time, do not forget that the structure must be located at least 10 cm above the upper edge of the opening window sashes so that the curtains do not create interference;
- The holes are drilled according to the size of the dowels you use. For work it is best to use a hammer drill. If the walls are wooden, then you don’t need to drill anything, you can simply screw the screws into the required places;
When drilling, try to keep the hammer drill perpendicular to the wall
- The brackets are fixed to the wall using dowels or self-tapping screws, they must be located at the same level, do not forget to check this aspect when drilling;
- Once the elements are securely fixed, you can begin installing the cornice. It is simply put on the holders and set in the desired position. The advantage of this option is that you can change the distance from the wall by moving the cornice along the bracket, this allows you to choose the optimal position of the structure.
At what height from the ceiling should I hang a cornice? I believe that the higher the structure is located, the better it looks
Holes for fastening
Sample of cornice fastening
In the marked places you need to make small indentations with something sharp, like a dowel for a mounting gun. Then the drill will not “go away” and the hole for fastening will be in place.
If the ceiling is concrete, then it is better to use a drill with the ability to turn on the perforation mode.
Helpful tip: to prevent dust from flying around the room, use a vacuum cleaner when drilling. Place it on a chair or windowsill, and hold the hose with your left hand near the place where you are drilling. At the same time, you can immediately suck out the dust remaining in the next nest.
After the nests are ready, you need to drive dowels into them, which usually come with the cornices. If not, you can always buy them in a store or market.
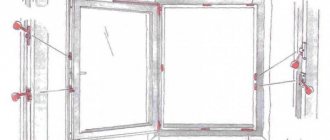
How to properly install a cornice on a wall?
How to attach a cornice to a wall: step-by-step instructions
- Using a simple pencil, make a vertical notch on the wallpaper in the center of the window. ...
- At the required height, we make several horizontal marks in the places where the fasteners are installed. ...
- From the middle of the window opening to the sides we set aside a distance equal to half the width between the mounting cups.
24 Jan
2022 Interesting materials:
How does capitalization work? How does the Rosneft family team card work? How does Cashback Letishops work? How does a bread maker work? How does the EGR valve work? How does an NFC ring work? How does curfew work? How does Finiko work? How does a composter work in Minecraft? How does a condensation hygrometer work?
How to remove a suspended ceiling and can you do it yourself?
A suspended ceiling is installed for a long time, but during operation situations may arise when it is necessary to remove it. Dismantling a ceiling structure requires skills and tools, so it is better to entrust the process to specialists. But if this is not possible, you can do it yourself.
When is dismantling necessary?
The tension covering is removed in the following cases:
● Mechanical damage - ruptures, cracks, punctures.
● Accumulation of water as a result of flooding - you need to drain the excess and dry the canvas.
● Sagging - formed due to sudden temperature changes or improper installation.
● The appearance of mold - not only dismantling is required, but also treatment with antifungal agents.
● The need for repair work - replacement of electrics, heat and sound insulation.
To eliminate minor problems in the wall part, partial dismantling is used. If the middle section is damaged or repair work is carried out in the ceiling area, the entire panel must be removed.
Types of material and fastening structure
To remove the ceiling yourself, you need to determine what it is made of and how it is attached. Tension covering is made from:
● Polymer film. To dismantle it, you need a heat gun, otherwise you can ruin the canvas.
● Polyester fabrics impregnated with a polyurethane compound to improve properties. The fabric product is removed without preheating the room.
Ceiling mounts are manufactured in the following types:
1. Harpoon. Use only for polyvinyl chloride coatings. A PVC harpoon is attached to the edges of the canvas, which holds it in place. This is a reusable design.
2. Beading. The canvas is inserted into a baguette and inserted into a glazing bead that holds the material in the profile. Suitable for all types of ceilings.
3. Clip-on. Used only for fabric products, fixed using the clothespin principle. It will not be possible to install such a ceiling back to its original form; you will have to order new fabric.
Determine the fastening at the junction of the ceiling and wall. With the harpoon or glazing bead type, an insert made of decorative cord or masking tape is noticeable; with the clip type, there is no plug.