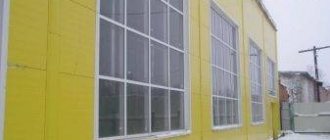
PVC is polyvinyl chloride, or in other words plastic. It is used for finishing bathrooms, bathrooms, balconies, loggias, verandas, office and residential premises.
PVC panel how to glue
Advantages of this material:
- durability - the service life of such panels is about ten years or more,
- resistance to heat and frost,
- moisture resistance,
- resistance to ultraviolet radiation, mechanical damage,
- safety,
- possibility of laying on any surface,
- high sound insulation,
- ease of installation.
When choosing PVC panels, you need to pay attention to their appearance, make sure there are no defects, a rigid and high-quality joining groove.
When asked how to glue decorative PVC panels , builders use several methods:
- fastening with brackets,
- fastening with clamps,
- fastening with nails or self-tapping screws,
- Glue mounting is the best way to do it at home.
Can PVC panels be glued?
Of course, you can, and for this you need to adhere to the following algorithm:
- Prepare the surface for installation, namely, eliminate defects and unevenness using putty,
- Prepare the panels themselves by keeping them at room temperature for at least ten hours, and then degrease them for applying glue,
- Apply glue dotted or dotted on the back side and press it to the wall,
- Install the framing profile and remove all dirt.
The installation method using liquid nails or glue is the fastest and easiest, accessible to those who do not have specialized skills and knowledge.
VIDEO INSTRUCTION
Often the installation of panels is impossible without lathing.
Option 5. Alternative.
Experts advise not to cover penoplex or polystyrene foam directly with PVC panels. It will be much better, from a practical and environmental point of view, if you apply plaster or drywall first - and then plastic.
The fact is that even with the most careful handling, plastic glued to polystyrene foam or polystyrene foam will not last long. Then the insulating materials with PVC panels will have to be torn off along with pieces of the wall, leveled, etc.
You can attach plastic to drywall using self-tapping screws or glue (liquid nails).
How to install a plastic economy panel on drywall
What glue to use to glue PVC panels
On a dry and flat surface, you can install panels without staples and screws directly on the glue. But this option is suitable for lightweight materials. Liquid nails and special compounds are suitable for the job.
High-quality adhesive composition for PVC panels has the following properties:
- after drying it becomes transparent, forms a film,
- gives a strong seam,
- not afraid of moisture, cold, heat, temperature changes,
- durable,
- sets quickly.
We recommend the following options:
- Universal adhesive for PVC Kleyberit 636. It contains synthetic resins, it is safe, dries quickly, and is not afraid of moisture.
- Adhesive Moment Crystal, which has no color, reliably attaches panels to different surfaces.
- Emfikol 34012A is a viscous, colorless, durable composition designed to work specifically with PVC.
- MitreFix is moisture resistant, transparent, and has a strong seam.
If you don’t know how to glue PVC wall panels, ask a consultant at a hardware store for help, and he will help you choose a composition that suits your purposes.
To install panels using lathing, you need:
- dowel-nails,
- hacksaw for metal or wood,
- miter box for fitting panels,
- level to control the position of the panels,
- drill,
- furniture stapler, screwdriver, hammer, nails.
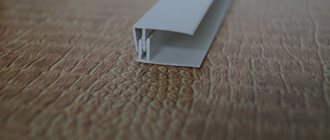
Profiles and plinths are used as framing materials.
First you need to carry out a calculation and determine how many panels and slats are required.
- Their length should be equal to the height of the room.
- The calculation is made using the formula: wall length/panel width.
- Additionally, the number of slats is calculated.
- They are placed perpendicular to the panels, and the minimum cross-section is 20x20 cm, the distance between them should be no more than 50 cm. That is, to calculate how many beams are required, you need to divide the height of the room by 70, and take into account that the floor and ceiling should have each beam .
- When laying the sheathing, it is important to remember that the beams must be positioned exactly either horizontally or vertically. To do this, use a level and a tape measure, which are used to mark the wall with a pencil. To ensure that the wooden sheathing does not deteriorate from moisture, it is treated with special means, or instead of wood, a galvanized profile is often used.
- The slats are attached to the wall with dowel nails, and corners are installed in the corners. The finishing profile is mounted to the bottom and top rails on the brackets.
- When laying on the sheathing, the panels themselves begin to be mounted from the bottom corner on the left. The first panel is the most important; it must be positioned strictly vertically. To secure the sheet, clamps are used - metal holders that are fastened with nails to the sheathing. Next, the panels are attached to the groove with the previous one.
How to glue plastic panels to the wall
The process of gluing PVC boards is quite simple and can be done independently. Preparatory work and the quality of the glue play a big role here. This is what will ensure that the finish is firmly attached.
First, you should thoroughly clean the walls of dirt, paint, and the like. The surface should be as smooth as possible, since small pits and scratches can significantly reduce the bond strength. If there are defects on the wall, then they must be thoroughly puttied. At the end of the work, it is necessary to coat the surface with a primer and allow the wall to dry.
Before starting work, PVC panels must be cut from the front side so that everything turns out neatly. Fastening is done from a corner or door. The glue itself is applied in dots or dotted lines. If liquid nails are used, then it is better to apply a mesh to the inner surface of the slab. After this, the plate is pressed firmly against the wall; during operation, the panel should not bend too much.
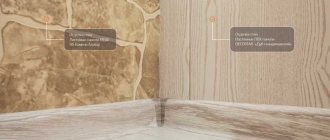
If there are any joints after gluing, it is better to treat them with silicone sealant. Only after finishing the work can the protective film be removed from the material. To make the room look good, you can install ceiling and floor skirting boards.
Carefully and tightly glued PVC panels will decorate the bathroom for many years and protect the walls from excess moisture.
Is it possible to glue PVC panels to the wall using polyurethane foam?
Types of materials
Work can be performed using the following materials:
- Drywall. For production, GVLV brand slabs are used - this is a moisture-resistant plasterboard. Installation can be carried out in several ways: mounted on glue, putty, polyurethane foam, or mounted on a frame structure;
For the installation of slopes, moisture-resistant plasterboard and plastic panels are used. They have a pleasant glossy surface that harmonizes with the profile of the PVC window. Fastening can also be carried out by fixing it with glue, foam or using modern material - liquid plastic ;
Plastic panels MDF panels. They are not used very often for the manufacture of slopes due to the fact that it is not easy to choose the appropriate appearance of the panels so that they are combined with the profile material;
The use of MDF when constructing slopes is rarely used. Sandwich panels. They are used to install insulated surfaces of window niches;
Sandwich panels are used to install insulated slopes
- Plaster. The most inexpensive and traditional material. Most often used for outdoor work. To work with this material, you must have certain professional skills to do the job well.
Is it possible to glue...
Such questions arise for the reason that polyurethane foam is sold at a more affordable cost . It is possible to glue insulation boards with polyurethane foam, but the material fixed in this way will not be able to withstand significant loads on the openings . to use mounting compounds as an alternative to glue for the following reasons:
- the adhesive foam contains special additives that improve adhesion, so the materials are fixed much more efficiently and with better quality;
- polyurethane foam has a high expansion rate , which is a negative characteristic for an adhesive material.
Axton professional mounting foam, 750 ml. Photo by Leroy Merlin
Thus, it is not recommended to save on building materials by replacing glue with foam. Since this may have negative consequences that will arise after some time. Peeling of the thermal insulation layer or other problems may occur As a result, each product must be used strictly for its intended purpose. However, there are situations when installation on foam is possible. In addition, there is interest in work of this type. Therefore, it is necessary to consider the sequence of work.
... plasterboard, how to glue it to the wall
The classic way to attach plasterboard sheets is to attach them to an assembled frame of profiles and guides. Fixation is carried out using ordinary self-tapping screws, the tool used is a drill. It is advisable to use polyurethane foam to fix gypsum board sheets in several situations:
Professional mounting foam MAKROFLEX 750 ml. Stroylandia Photos
Prompt installation required. Final setting occurs within several hours, which is significantly less than that of putty mixtures.
Small work area. Laying drywall on foam is not recommended if the number of gypsum board sheets placed on one surface exceeds eight pieces. Since fitting the elements is the most difficult part of the work.
A small number of small-sized plots. Blank walls are recommended as a base for fixing drywall to mounting foam. The presence of window and door openings complicates the work process. Small-sized elements are difficult to position in a single plane, which leads to the need to form an additional plaster layer.
Minor unevenness of the base. Installation can be carried out with surface defects with differences of no more than 30-50 mm.
Saving room space. Foam fixation minimizes space loss, which is especially important in small apartments and rooms.
Cheap work. The cost of installation with profiles and guides is significantly higher than the cost of performing work with foam.
When choosing polyurethane foam, it is recommended to pay special attention to products in the middle price segment. It is better to choose a composition from a well-known brand/manufacturer, which eliminates the purchase of low-quality products. The optimal solution is a composition with a low expansion coefficient.
Polyurethane foam TYTAN Professional Lexy 60 all-season 750 ml. Photo Petrovich
The installation process is not particularly difficult. Regardless of the installation technology, work begins with preparing the base . The surface is cleaned of old coating , dust and dirt. It is recommended to remove the plaster layer, if any, to eliminate the possibility of collapse. Gaps and cracks need to be covered . To level a through defect, it is necessary to make every effort to prevent the appearance of cold bridges. Areas damaged by fungus and mold are cleaned and treated with special products. Applying a primer improves adhesion, which is especially important for concrete bases. After the preparatory work has been completed, you can begin the main process. There are two technologies:
1) Applying foam to the sheet and then attaching it to the base . This technology is suitable for working with flat surfaces. The step-by-step instructions are as follows:
- the foam is applied evenly along the perimeter of the sheet with a distance of 20-30 mm from the edge, and then with zigzag movements on the remaining surface of the drywall, left for 10-15 minutes; for working with various materials there is a general technology for applying the composition; standard recommendations will allow you to obtain a high-quality result;
- The gypsum board is carefully lifted, placed on the base and fixed;
- using a level, leveling is carried out;
- before fixing the drywall, supports are installed;
- the rest of the surface is processed in the same way.
Mounting foam MACROFLEX WhiteTeq professional 750 ml. Photo by Maxidom
To attach drywall to a base with defects, it is necessary to use a second technology, the implementation of which takes more time. To implement it you need:
- holes are drilled in the sheets (9-12 pieces at an equal distance from each other) for self-tapping screws;
- the location points of the holes are transferred to the base, in which recesses for plastic plugs are also drilled, self-tapping screws will be screwed into them;
- the drywall is placed in place and secured with self-tapping screws;
- adjusting the depth of the screws allows you to achieve the required position of the sheet;
- next to the existing holes, others are formed, at a distance of 50-80 mm, through which the mounting foam is CAREFULLY introduced into the space between the base and the gypsum board.
…wallpaper
Wallpaper can be glued to polyurethane foam, but to do this it is necessary to trim the hardened polyurethane composition well to obtain a smooth surface . Or it is possible to repair surface defects with plaster. Then it is recommended to putty the surface, sand it and wallpaper it. The use of polyurethane foam does not make the work easier and does not provide any financial benefits, so it is recommended to adhere to traditional technology for working with wallpaper.
Professional mounting foam TECHNONICOL 65 MAXIMUM all-season 1000 ml. Photo Petrovich
...tiles
Ceramic tiles and tiles can be fixed using polyurethane foam. Even polyurethane foam with a low expansion coefficient increases in volume, albeit slightly, as a result the quality of the cladding will be poor. In addition, finishing materials have quite a significant weight (especially in comparison with plasterboard), so there is a high probability of collapse.
...other materials
1) Plastic panels/PVC panels. The finishing material can be securely fixed to the mounting foam. But this method of fastening has a significant disadvantage. As the foam dries and hardens, it expands in volume. As a result, the panels fixed in the required way will “lead” after some time (8-12 hours). The treated surface will acquire a wavy relief. Thus, it is recommended to use special glue or liquid nails to obtain a quality result.
2) MDF panels. Fixing MDF panels with mounting foam will lead to a similar result. It is almost impossible to achieve an even coating. Therefore, for an even base, it is recommended to use liquid nails and foam adhesive. For surfaces with defects, the technology of lathing formation is suitable.
3) Penoplex. To fix penoplex to the wall, it is recommended to use foam adhesive. But the option with polyurethane foam also has a right to exist. It is only necessary to duplicate the fastening to the base, for example, foam and mushroom dowels.
4) Foam plastic. In this case, in addition to the standard problem with increasing the composition in volume, another one arises - the foam melts the foam, which guarantees the reliability of the fixation.
Thus, high adhesion to many building materials allows the use of polyurethane foam as an adhesive . But there are many nuances and there is a high probability of problems arising . The main difficulty is obtaining an uneven coating. It can be solved by applying foam of the same volume to all elements of finishing materials, but this is problematic. Therefore, it is recommended to use special means for fixing different types of facing materials. Purchasing polyurethane foam will allow you to save only at the initial stage. Then the work will need to be redone.
Mounting method on polyurethane foam
You can glue the slopes to the windows using polyurethane foam. This is a universal material with a high degree of adhesion. How to glue plasterboard slopes in this way is shown below.
- On the window opening, the width and depth are measured from above. On the sides, the height is measured twice - at the window and at the wall;
At the side openings, the external and internal heights are measured. In accordance with the obtained dimensions, details are drawn on a sheet of drywall;
Marking the part Using a construction knife, cut out the necessary parts;
Cutting parts The polyurethane foam is applied to the slope, the plasterboard part is pressed for a few seconds, then it is separated from the wall and wait until the foam expands again . Then the part is put back and fixed in the required position. In this case, you can use self-tapping screws, which are removed after the polyurethane foam has dried;
The part is glued using polyurethane foam. Metal corners with perforations are installed on the plasterboard corners;
The corners of the slopes are covered with perforated corners. The corners are finished with putty and left until completely dry;
Finishing corners with putty At the final stage, the surface is painted.
Slope painting
Is it possible to use polyurethane foam as glue?
Before answering the question posed, let’s remember what polyurethane foam is. This is a polyurethane foam sealant consisting of main and auxiliary components. The main ones include prepolymers:
- methylene diphenyl diisocyanate (MDI);
- group of polyols.
Under the influence of oxygen, prepolymers polymerize with expansion. Increasing in volume, the mass fills all the voids in space. Gas (a mixture of propane and butane) is pumped into the cylinder, which pushes the contents of the cylinder out.
Prepolymers also contain auxiliary substances. Their composition depends on the manufacturers:
- catalysts - to accelerate polymerization;
- blowing agents – provide prepolymers with a foamy structure;
- stabilizers - prevent the destruction of the resulting polymers.
Polyurethane foam has a high degree of adhesion with most building materials that have a rough surface. However, polyvinyl chloride (PVC) panels have a smooth surface and there is nothing for the foam to catch on.
Why should you choose plastic products?
Plastic is the most common and versatile material.
Plastic slopes are most often installed
This is due to its performance characteristics and ease of installation. The advantages of plastic slopes include:
- Easy to care for the surface - just wipe the plastic with a cloth and soapy water;
- High-quality plastic does not fade when exposed to sunlight;
- Plastic looks best combined with the profile surface of plastic windows;
- The service life of these products is calculated in decades;
- For plastic slopes, when insulating them, you can use mineral wool. In this case, heat loss through the window structure is reduced and the effect of window fogging is eliminated;
- The moisture resistance of the plastic is obvious, so it does not collapse under the influence of condensation;
- Simple installation - the parts just need to be treated with adhesive and fixed to the surface of the base.
How to treat after pruning
In all of the previously listed technologies, finishing materials serve as protection for polyurethane foam from the harmful effects of ultraviolet radiation. However, when using foam for its intended purpose, i.e. For the installation of structures, it is necessary to carry out work to protect the seams . For this, paint and varnish products, mounting tape, cement-sand mortar, and putty are used.
Ready putty TURY moisture resistant 1.7 kg. Photo by Maxidom
Is it possible to putty
You can putty the installation seams. To do this, you need to choose a high-quality putty. The mixture is prepared in accordance with the manufacturer's recommendations indicated on the packaging. The mixture is applied perpendicular to the seam , which ensures dense filling of cracks and voids. Before applying the putty, it is necessary to remove excess composition and go deeper into the seam, leaving room for the putty mixture. No sanding required. Then priming is performed, putty (starting and finishing) is applied in a thin layer. To ensure more reliable protection, it is recommended to paint the foam.
What is liquid plastic
Liquid plastic has recently appeared on the construction market. It has found application in many areas, including the installation of plastic slopes.
Liquid plastic is used for gluing plastic slopes
Liquid plastic is a type of modern sealant that can be used as glue when attaching plastic slopes. The content of liquid PVC in its base gives this material many positive qualities.
Mode of application
Using this glue, you can guarantee strong adhesion between the material and the surface.
Using liquid plastic when processing joints and seams, you can be sure that it will never turn yellow, as happens with silicone analogues. This ensures a neat appearance of the window opening.
When temperature changes indoors, plastic panels secured with silicone may lose their joint tightness. And the panels, placed on glue in the form of liquid plastic, will stay in place for many years.
When working with this material, it is important to consider that it hardens in one minute . This is the interval during which it is necessary to apply it and distribute it over the surface. You need to work quickly and efficiently the first time.
It is also worth considering that liquid plastic is quite toxic due to the chemical reaction that occurs, so when working with it you must use a respirator and ensure a flow of fresh air into the room.
It should be noted that after liquid PVC-based glue dries, it will become absolutely harmless to the environment and people.
Positive qualities of liquid plastic
The appearance of this modern material did not go unnoticed by specialists involved in the installation of metal-plastic windows. For them, the question of how to glue plastic slopes has disappeared forever. Liquid plastic is characterized by the following positive qualities:
- When processing joints, the highest degree of sealing is achieved;
- It cannot be washed off with water, like its silicone counterpart;
- It does not turn yellow over time, does not emit or absorb foreign odors;
- The material does not change its qualities even after 10 years;
- It is moisture resistant;
- Does not rot or become moldy;
- Does not collapse or fade when exposed to sunlight;
- Resistant to mechanical stress;
- Has an affordable price.
If you glue the slope onto liquid plastic, you will get a neat monolithic structure.
Liquid Nails
Probably no repair can be done without this fastener. This product has also proven itself well in finishing work using plastic panels. Liquid nails are very easy to use, and they do an excellent job of attaching polyvinyl chloride to a wall or sheathing. But when purchasing, you need to carefully choose the right composition. Some products are too strong and their use may cause the plastic surface to swell.
Among the liquid nails that are usually used for gluing PVC finishing materials are the following:
- Liquid nails 601. They can be used when working with different types of materials, including PVC. The product dries within 10 minutes, which gives time to correct mistakes if the slab was attached unevenly. However, some craftsmen do not recommend using this composition when renovating bathrooms and toilets, since it has insufficient moisture resistance.
- Liquid nails 901. This product can be used both for interior decoration and for exterior work. Its main advantages are versatility, durability and strength. This composition is capable of holding even heavy coatings.
- Liquid nails 915. This substance is ideal for repairs in the bathroom or other rooms where there is high humidity. The composition prevents water from penetrating the wall surface, which protects the room from mold and other troubles.
In general, the use of such funds is quite justified. Perhaps there will be some subtleties when installing PVC plates. It is better to read the instructions in advance so that the polyvinyl chloride is firmly attached to the wall surface.
Installation of PVC slopes using polyurethane foam
Anyone can install window slopes from sandwich panels with their own hands. Such slopes are good because they are easy to install yourself, they do not crack, do not get wet, do not fade, mold and mildew do not develop on them, they are warm, easy to clean, and sandwich panels are affordable.
The technology for installing plastic slopes from sandwich panels is quite simple.
We measure the height of the slope (the distance from the window sill to the top edge of the window opening), cut the sandwich panel according to this distance.
Types of wall panels
According to implementation, the main types are divided:
Rack and pinion
The most common type. Externally they look like boards of different lengths (up to 3 meters) and widths (up to 500 mm). The “narrowest” - up to 110 mm wide - have a colloquial name: “plastic lining”. The color range includes hundreds of colors and is constantly updated.
Tile, “under tile”
Made in the form of rectangular sheets resembling tiles with dimensions:
- width 200...500mm;
- length 500...1000mm;
Small sizes allow you to lay the panels in a vertical, horizontal, checkerboard pattern or give the general direction a slope. In addition to traditional “tiled” designs, various fantasy designs are used, for example, in the form of large panels depicting parts of the city landscape.
Sheet structures
They are sheets with a width of up to 1220mm and a length of up to 3000mm. Due to their size, they are very convenient for installation - they allow you to immediately cover a significant area. At the same time, this type of panel has a small design palette.
Types of foam material
Professional
The choice of foam is varied. There are two types:
- professional;
- household
Professional ones always come with a nozzle in the form of a pistol. It is used more often by masters.
Household
If a nozzle (a thin plastic tube) is attached to the cylinder, then this is a household type.
How household foam differs from professional foam:
- The first difference is volume. And while manufacturers offer cylinders with a capacity of about 300 ml for everyday use, professional ones already sell cylinders with a capacity of 750 ml or more.
- The amount of mixture leaving the container. The household version, like an aerosol, does not come out completely; some of the material remains in the container. Because of this, you will have to buy additional material, which means additional expenses. Therefore, it is better to buy a professional one, since the cylinder is used almost to the end, the costs are minimal.
- The third indicator in the differences between these two types is the coefficient of secondary expansion.
For household foam, it is high: before it dries completely, it increases in volume up to two times, while professional foam practically does not change in size. In the case of home installation of slopes, it is better to use one with a low coefficient, in order to later prevent distortion of the surface. In such cases, only professionals risk using household foam. When working, they fill the seams by a third, knowing that, having increased in size, the mixture will fill the entire space and will not damage the geometry of the surfaces adjacent to the slopes. - The shrinkage of household foam is about 5–7%, while for professional foam this figure reaches 0.3%.
- If you buy for one-time use, then it is more logical to buy a household one - it will be cheaper. Because of the gun, without which it is impossible to use professional foam, the cost of such a cylinder increases significantly. After each use, the gun nozzle needs to be cleaned with a special solution.
- Their main difference is that the household version is more suitable for single jobs that do not set themselves the goal of accurately calculating the dosage. And the professional one is distinguished by the ability to foam with the highest precision, which gives the best sealing result.
Classification by seasonality
Any foam has its own temperature regime for use. Therefore, before purchasing, the temperature inside or outside the room is taken into account, depending on where the work is performed. Manufacturers indicate this parameter on the cans. There are three varieties:
- Summer (5–35 °C).
- Winter (from -10 to -35 °C).
- All-season (from -10 to +35 °C).
It is important to maintain temperature conditions. But if you do not adhere to it, this will affect the characteristics of the foam itself, its hardening time, and the density of the seam. The expansion coefficient and the quality of all work depend on temperature.