Select the node of interest from the quick menu:
1.1.
Base design 1.2. Base design
1.3. Base design
1.4. Base design
2.1. Joint of panels, horizontal installation (on a metal stand and on a reinforced concrete column)
2.2. Joint of panels (on a reinforced concrete column through a half-timbered structure and with vertical installation)
2.3. Joint of panels (different thicknesses)
2.4. Panel joint (expansion joint)
3.1. Corner joint of panels (outer corner, horizontal installation)
3.2. Corner joint of panels (outer corner, vertical installation)
3.3. Corner joint of panels (outer corner, vertical installation)
3.4. Corner joint of panels (internal corner)
4. Panel frame
5.1. Window/door frame (upper section)
5.2. Window frame (lower section)
5.3. Window/door frame (side section)
6.1. Framing the gate opening (sectional doors)
6.2. Framing the gate opening (sectional doors)
6.3. Framing the gate opening (swing gates)
Assemblies of roofing sandwich panels.
7.1. Parapet (adjacent to wall sandwich panels)
7.2. Parapet (ridge connection of roofing sandwich panels to wall sandwich panels)
7.3. Parapet (end longitudinal connection of roofing sandwich panels to an existing wall)
7.4. Parapet (ridge connection of roofing sandwich panels to an existing wall)
8.1. Roof eaves, gutter.
8.2. Eaves roof overhang.
8.3. Joint of panels along the length (extension of panels).
9.1. Roof overhang (ridge of a pitched roof).
9.2. Roof overhang (ridge of a pitched roof).
9.3. End overhang of a roofing sandwich panel (wind strip).
9.4. The end overhang of a roofing sandwich panel (wind strip) with the overhang of the roofing panel.
9.5. End overhang of a roofing sandwich panel, expansion joint.
10. Roof ridge.
I hereby, acting freely, of my own free will and in my own interests, express my consent to the processing by the Limited Liability Company "TD SteelPanel" (website https://steelpan.ru/, INN 7722358616, OGRN 1167746283660, location: 111020, Moscow , Yuryevsky lane, house 11, office 45) my personal data: last name, first name, patronymic, place of residence (city, region), telephone numbers, email addresses (e-mail), other data received from me, including including electronic copies of documents.
TD SteelPanel LLC observes appropriate measures to protect confidential information received from persons who sent personal data on the website https://steelpan.ru/, regardless of the existence of a contractual relationship, does not send and does not intend to send advertising materials to such persons.
I am also informed that in addition to the usual precautions taken to protect confidential information, TD SteelPanel LLC, at the request of the applicant, is ready to take enhanced measures to protect confidential information.
Shaped elements of any colors in our catalog
The color range of shaped elements sold by our company matches the colors of the panels that are presented in our catalog, which allows you to choose the ideal option for each specific case, and the prices we offer for shaped elements for sandwich panels will appeal to every customer.
Our specialists will help you calculate the required number of shaped elements and ensure their delivery to your site in the shortest possible time.
Layout of the main components of sandwich panels
* Note on the diagrams: dimensions A and B are determined by the project; The dimensions in the drawing are recommended for panels with a thickness of 120 mm. The arrow indicates the painted surface of the panel.
Node 1.
Corner connection of panels.
External corner. is used for the external corner junction of the panels
, which covers the edges at the joints of the external corners
Node 2.
Corner connection of panels.
Inner corner. is used for the internal corner junction of the panels
, which covers the edges at the joints of the internal corners
Node 3.
Connecting panels to the plinth.
Butt jointing of the foundation. Shaped element - ebb
, used to frame the base of the building
Node 4.
Connecting panels to the plinth.
The junction of the foundation with a protrusion. Shaped element - ebb
, used to frame the base of the building
Node 5.
Joining wall panels.
Vertical installation. Shaped element for butt and intermediate fastening of panels during vertical installation - flashing
Node 6.
Joining wall panels.
Horizontal installation. Shaped element for butt and intermediate fastening of panels for horizontal installation - flashing
Node 7
. Connection of roofing panels at the ridge. External shaped element for framing the ridge
Node 8
. Joining roof panels. It can be carried out without a flashing due to the locking features of the roofing panels.
Node 9
.
Connection of wall and roof panels. Shaped elements for parapet framing
Node 10.
Connection of wall and roof panels.
External shaped element for joining the parapet with the roof
Shaped element for joining the wall panel with the roof
Node 11.
Connection of wall and roof panels.
Shaped element for joining wall and roof panels
Unit 12.
Connection of wall and roof panels.
Shaped element for framing the cantilever overhang of the roof panel
Unit 13
.
Connection of wall and roof panels. Shaped element for framing the cantilever overhang of the roof panel
Unit 14
.
Connection of wall and roof panels. Shaped element for framing the cantilever overhang of the roofing panel
Unit 15
.
Connection of wall and roof panels. Shaped element for sealing the roof panel
Unit 16
.
Fastening the window block. Shaped element for sealing a wall panel
Shaped element for framing a window block
Node 17
.
Fastening the window block. Shaped elements for framing a window block
Our specialists will help you calculate the required number of shaped elements and deliver them to the facility under construction in the shortest possible time.
Shaped elements are given great importance in construction and finishing when installing structures made from sandwich panels. They act as joints at corners or as a frame for base sandwich panels. These products are also used as wall units.
How to install sandwich panels for windows - the secrets of warm and beautiful slopes
Window sandwich panels are a special three-layer material for installing slopes. With their help, you can not only beautifully design a window opening, but also make it as warm and dry as possible, the only thing is that for this you need to follow a certain installation technology. Therefore, below I will tell you in detail how to make window slopes from sandwich panels with your own hands.
Sandwich panel slopes
Results
If you come to the conclusion that this is what you need, feel free to get down to business. Recently, plasterboard has become popular, since a large number of structures can be made from it, including slopes. During installation you may encounter difficulties, but there are far fewer of them than in the version with plaster. I would like to note in advance the fact that installation of slopes is not a type of service for which the cost is so high that it is better to save money. For this reason, many people try to hire specialists who will save you time and materials. All you have to do is enjoy the beautiful view with cleanliness and minimal costs. But since you still need to follow the masters, all the knowledge from the article will definitely be useful to you.
Share the post “How to properly install slopes on plastic windows with your own hands - Review + Video” by copying the link: https://kaksdelatsvoimirukami.ru/kak-pravilno-vypolnit-ustanovku-otkosov-na-plastikovye-okna-svoimi-rukami-obzor -video/
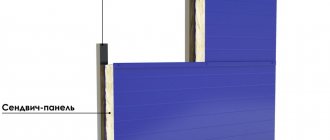
A few words about sandwich panels
Sandwich panels for window slopes consist of two plastic sheets, between which there is insulation. The latter can be used:
- polyurethane foam;
- extruded polystyrene foam;
- free foam plastic.
Thanks to the presence of insulation, the amount of heat loss through the window opening is reduced. As for the plastic itself, it comes in a variety of colors. This allows you to select panels for any window.
Many people believe that sandwich panels are intended for plastic windows, however, they can also be used for wooden double-glazed windows. Thanks to this finish they will not freeze.
Another advantage of this solution is that windows in sandwich panels do not fog up (provided there is normal indoor humidity). In addition, the material is easy to install, as you can see below, and also does not require additional finishing, which is also a big advantage.
Thus, finishing sandwich windows with panels is one of the best solutions.
I would like to note that there are also metal sandwich panels, which are often used for the construction of all kinds of sheds, hangars, etc. Installing PVC windows in sandwich panels is associated with a number of difficulties.
Most often, for this purpose, the opening is sheathed with a profile or board (if the room is heated), and only after that the windows are installed in a sandwich panel. However, this is a topic for another article, which we will talk about next time.
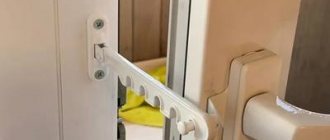
To simplify the installation of windows in sandwich panels, use special fasteners
After the window is installed in a sandwich panel, the foamed area on the outside must be immediately hidden with platbands, otherwise the foam will quickly turn into dust under the influence of sunlight.
Further actions
All excess gaps must be filled and leveled.
Excess acrylic must be removed with a damp cloth or sponge. This must be done carefully until the surface is completely clean. Manipulation is carried out in small areas. The acrylic should not be allowed to harden, otherwise there will be problems with its removal. It is more convenient to seal cracks immediately. The horizontal slope panel is processed first. After this there are joints, then they move downwards. First close the gaps on one side, then on the opposite. Lastly, the joints with the window sill are processed. It takes 12 to 24 hours to dry, depending on the characteristics of the sealant. If the gaps are large, the acrylic may be pulled into the seam. All these areas must be worked out again using the same method. After the second layer has dried, if there are unevenness and roughness, you can smooth out these defects with fine-grained sandpaper, folding it in half. It is recommended to carefully level the materials while they are gray, otherwise the plastic may suffer mechanical damage.
The slopes can be considered installed. They should be puttied when the final polymerization of the foam occurs. Their surface should be flat relative to the plane of the walls. After this, the protective blue film is removed.
Panels are considered the most unreliable material for installing plastic slopes. Even wall ones are easily pressed through, and their front layer is imperfect. It is enough to shine light on them, and the jumpers will be immediately visible. This is not observed in plastic window sills and sandwich panels.
Installation technology
The process of installing slopes consists of several stages:
Main stages of installation
It should be noted that finishing the slopes of plastic windows with sandwich panels and wooden ones is done in the same way. Next I will tell you in detail. how work is carried out at each of these stages.
An example of leveling a window opening with wooden slats
Surface preparation
Before. How to install sandwich panels on windows, you must prepare the surface. This is done as follows:
- First of all, level the window opening. To do this, remove old pieces of plaster and other irregularities. In some cases, to level the opening, wooden slats are installed around the perimeter using self-tapping screws or even dowel nails. When installing the slats, be sure to use a building level to ensure that the window opening is level ;
- you also need to trim the mounting foam between the double-glazed window and the window opening, which may interfere with further work;
- then the opening must be cleaned of dust. To do this, vacuum the surface or wipe with a damp cloth.
Now that the opening is prepared, you can proceed directly to installation.
Installation of the starting profile
Installing window slopes from sandwich panels involves installing a U-shaped profile around the perimeter of the window. This work is carried out in the following sequence:
- First of all, measure the window frame around the perimeter;
- then cut the profile into strips of the required length. To do this, you can use a mounting knife or special scissors;
- Now, using a building level, mark the location of the profile on the window frame . This is necessary so that the vertical guides are positioned strictly vertically, and the horizontal guides, respectively, horizontally;
Example of mounting a starting profile
- Now attach the guides to the window frame according to the markings using self-tapping screws. The latter should be located in increments of about 20 centimeters.
This completes the installation process of the guides.
Cutting is a very important stage, so the work must be done carefully and carefully . The instructions look like this:
- First of all, measure the outer sides of the window opening;
- after that, measure the depth of the opening on each side in several places;
- Now, according to the data obtained, you need to apply markings on the panels, taking into account the fact that their inner ends, i.e. adjacent to the glass unit must correspond to the length of the guides. To simplify this task, you can use a special angle meter (small), which will allow you to measure the angles of the opening, and then use it as a template for marking;
- Now you need to cut out the blanks according to the markings. To do this, you can use a jigsaw, a mounting knife, or even a hacksaw.
Varieties
When renovating an apartment in a new building or replacing windows, you will have to choose how to finish the openings after installing modern structures with double-glazed windows.
Window slopes can be finished using the following materials:
- plasters;
- drywall;
- gypsum fiber;
- plastic panels.
What materials are most often used for installing slopes?
There are three most commonly used methods of giving slopes an aesthetic appearance, each of them is good in its own way and can be used in combination with insulating material. So, PVC panels can be installed on window slopes, plasterboard can be glued or fixed to the sheathing, or the surface can be leveled with a plaster and putty mixture.
Slopes made of PVC panels
For finishing using this technology, plastic lining and auxiliary fittings are used. They help to hide the edges of the panels at the junctions of horizontal and vertical surfaces, as well as at the lines where they join the window frame and at the outer corners of the slopes.
Slopes made of plastic panels look very nice
In addition to the usual PVC lining, sandwich panels specially manufactured for this purpose are used for cladding, which consist of layers of plastic and foamed polystyrene. This material will facilitate installation, since you will not have to separately adjust and install the insulating material. In addition, this approach also often allows you to do without some elements of fittings.
Sandwich panels perform both decorative and insulating functions
Like regular lining, sandwich panels are great for decorating slopes around plastic windows, especially since, if desired, you can choose the desired PVC color that will be in full harmony with the shade of the window frame.
It is quite possible to install plastic slopes yourself, without resorting to the help of craftsmen - you just need to study the installation instructions and scrupulously follow them during the work.
Plastered slopes
This finishing method can be called traditional. High-quality surfaces will last a long time without losing their neat appearance. However, it should be noted that without a layer of insulating material, plaster cannot become an effective barrier to the cold coming from the window opening. The disadvantages of this method include the labor intensity and duration of arrangement, since the solution is applied in several layers, each of which must dry well. In addition, plastering work requires certain experience in its implementation, and without it, it is quite possible to ruin the surface, wasting time and money.
The old proven method of plastering slopes does not lose its relevance
The process of finishing slopes with plaster mixtures is quite “dirty”, and since it takes a lot of time (sometimes it takes from one and a half to two weeks), the room where the work is being carried out will need to be cleaned daily or not used at all.
Plasterboard slopes
Often, apartment and house owners prefer to decorate window slopes with plasterboard. This material is easy to install, it can be used together with insulation, the sheathing is quite durable and perfectly levels surfaces. In essence, drywall is dry plaster, but its installation is much faster than the “wet” version. This method does not cause large pollution in the room during work and does not require much experience to perform it. It is enough to follow the already tested instructions to carry out the finishing carefully and correctly.
Drywall slopes are very convenient for installation work.
Today, several types of drywall are produced, and one of them (GKLV, greenish in color) can withstand high humidity - it should be given preference for the design of slopes. Difficulties during the installation process can be caused not by the installation of the material itself, but by its subsequent finishing for applying a decorative coating - this is a primer and putty. Without these works, “dry plaster” can quickly become unusable, since it has a rather fragile structural structure and can be used for a long time only when covering the cuts and finishing the surfaces.
Installation of sandwich panels
Hello, friends, in the article installation of sandwich panels you will learn how and how to install sandwich panels, what tools are used, installation rules, my story of how we installed the panels for the first time at a construction site. I will provide a technological album for downloading on the installation of sandwich panels with assemblies of windows, doors, roof ridge and much more.
installation of sandwich panels
In the article on installation of metal structures, I promised that I would write an article on this topic and provide an album for downloading on panel installation units.
Work on the installation of sandwich panels begins, after the installation of the building's metal structures, the base is laid out around the entire perimeter, the panels and fasteners are supplied (delivery and acceptance to the construction site) for the entire building. What a plinth should be like and how it is made can be read in the article “Construction of a plinth.”
The installation of metal structures is completed by applying an anti-corrosion coating (cleaning and painting) to all welded joints and checking the geometric dimensions, verticality, and flatness of the frame. The construction of the plinth ends with the laying of waterproofing over it.
The supply of sandwich panels begins long before their installation, during the installation of metal structures and the construction of the base. The main thing is to prepare the storage location; on uneven ground, the panels bend under their weight and become unusable.
Panels are ordered at the factory based on the drawings of the architectural part of the AR according to the layout, which indicate the dimensions, location of each panel and their color. Panels are delivered to the construction site on pallets with insert sheets, which indicate the object, volume in square meters, type (wall or roofing) and information about the manufacturer.
Layout drawing of sandwich panels
What does a window opening consist of?
In a building's design, the space for a window is called a window opening.
During construction, to save time, the installation of windows is carried out after the construction of the main load-bearing structures of the building. For houses built using monolithic frame technology, the insertion of frames is done after the building is completely constructed. Before installing the double-glazed window, the opening looks like this:
- below there is solid brickwork 50-70 cm wide;
- on both sides of the opening there is a brick wall;
- There is a concrete floor beam at the top.
On both sides of the opening, there is a small protrusion of brickwork on the outside. The same protrusion is also present on the concrete beam located above it. This design allows you to insert the frame and make it securely fixed.
The supporting frame of the glass unit is inserted from the inside of the opening. It is 4-5 cm wider and higher in size than the outer size. This allows you to securely fix the frame during installation and ensure a tight fit of the box to the brickwork.
During installation, the structure is first fixed using wedges, then fastened with anchor bolts. And after this, the voids are sealed with mounting foam, which securely fixes the window to the wall.
After installing a metal-plastic window, the inside of the opening - the window slopes - remains unfinished.
The need for interior decoration is not only an aesthetic issue. Having untreated brickwork inside an apartment is not entirely pleasant. Yes, and it’s never superfluous to insulate the window. A window, even with a three-chamber double-glazed window, will constantly fog up due to cold bridges formed along the entire perimeter of the opening.
Start of installation of sandwich panels.
When everything is ready and equipped, the installation order will be determined. Depending on the size of the building, the panels can be mounted in a horizontal or vertical position.
Sandwich panel tape
Before installing the panel on the columns and crossbars, special self-adhesive tapes are glued at the points of contact. The tapes reduce vibration and ensure a tight fit of the panels to the building structures.
The panels are secured with special self-tapping screws made of carbon or stainless steel with a seal, with a metal drill if they are attached to metal structures.
If the building frame is made of wood, then the panel is pre-drilled and secured with wood screws. They are attached to the concrete with special dowels after pre-drilling the panels and concrete structures. The length of the self-tapping screws is selected based on the thickness of the panels.
If the panel is 50 mm thick, then use a 75 mm screw or a 200 mm panel then use a 240 mm screw.
Installation of sandwich panels begins from the corners of the building. The panels are mounted using special gripping clamps. Clamp is a special screw grip with rubber-coated jaws, with loops for lifting by crane.
Traverses with a vacuum grip are also used to lift the panels. If the panel is not large or heavy, it can be lifted and secured manually. The panels are mounted taking into account all the technological holes specified in the project.
Installation of roofing sandwich panels
Openings for windows, doors, utility networks are marked and cut out on the ground. In this case, the proverb “measure seven times and cut once” is very useful; panels cost from 1,500 rubles per 1 m2 and if they are not cut correctly, then in most cases you will not be able to install it anywhere.
Mark the holes on the sandwich on both sides and cut it with an electric jigsaw with metal files. When cutting with a grinder and a metal cutting wheel, the edges on the panel turn out torn. Screwdrivers are also used to fasten panels with screws to the building structure. The equipment used is a crane and a telescopic tower, which work in pairs.
How to measure a plastic window.
Any replacement of windows begins with determining the size of the window unit. For this stage, it is better to call a measurer who has the necessary experience in this matter. Basically, measuring services from window manufacturers are free. But if you decide to take measurements yourself, then you need to know that there are two types of window openings. And the window is measured differently for them. Therefore, before taking measurements, you need to remove the plaster from the window opening and determine what kind of window opening you have.
Dismantling old plaster is also necessary to increase the accuracy of measurements.
The first type of window opening is a quarter window. A quarter is a special protrusion on the window opening, against which the window frame is pressed during installation. This protrusion is located closer to the street, and the window frame from the inside of the room is pressed against it.
Picture 1.
Determine the internal width of the window opening: C = B1 + A + B2
Determine the height of the window opening. To do this, you need to measure the dimension H from the ebb at the point of contact with the frame (point M) to the upper quarter. Using a feeler gauge, take several control measurements of the upper quarter (size B3) (Fig. 2).
The height of the window opening will be equal to: U = H + B3
The second type of window opening is a regular rectangular opening. It's a little easier to take measurements here. Don't forget to remove the layer of plaster before taking measurements.
Window block width = A – (2 × 20) mm, where 20 mm is the optimal installation gap (Fig. 4)
Height of the window block: = H – 25 mm (Fig. 5).
The last stage in the measurements is measuring the low tide and window sill.
Window sill length = window opening width + 200mm. In the case of an opening with quarters, this is C+200mm. In the case of a regular opening, this is A+200.
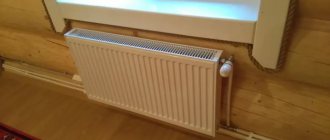
The width of the window sill should be such that its edge overlaps the heating radiator located under the window by approximately 70%. The window sill should not completely cover the battery. Warm air from the battery should rise freely along the window.
Length of ebb = maximum width of window opening on the street side +100mm.
Completion of the installation of sandwich panels
After installing the panels, preparatory work begins for the installation of windows and doors. Windows and doors are not attached to the panels themselves, but to metal plates welded to the columns or crossbars of the building. After this, windows and doors are installed and the final stage is the installation of shaped elements.
Window fastening unit to sandwich panels
Before installing the shaped parts, all empty cracks are filled with polyurethane foam. Shaped elements consist of strips, window sills, ebbs, external corners, cornices.
Installation of vertical flashings will be inserted from the bottom up, so that the whips are located along the flow of water to prevent it from getting inside. The shaped elements are fastened with self-tapping screws and the joints are sealed with sealants. How to properly seal and the consequences of poor quality work can be found in this article.
Instructions on how to do it and where to start
All you need to do is know the theory and follow the instructions for everything to work out as it should! Prepare panels, tape measure, liquid plastic, knife, self-tapping screws, screwdriver, drill, profile type F and P. Let's get to work, clean the surface of old plaster and dusty surface. Profile P is the starting one; it is attached horizontally and vertically. Profile F is a platband; its shape is the same as the starting one, but it has a wide stripe in the design, which is used to cover the installation seams. The main thing is to trim correctly, without gaps or gaps.
First, the side blocks are cut and mounted in the groove, then the top. Factory components are used for joining and external decorative finishing. After the top profile is installed, the outermost starting profile is attached.
Sealing will not hurt; it will serve as a reliable additional fastening. Use polyurethane-based sealant for these purposes. All blocks for installation are cut exclusively at right angles, otherwise cracks will form in the corners, which will allow air to enter the room, which means that there will be a draft in the room.
If necessary, use thermal insulation materials, they are placed inside the structure; these can be mineral wool or polystyrene foam.
My experience in installing sandwich panels
Everyone has ever had to do something for the first time. This was the case with my editing work. It seems like you read all the instructions, study the drawings, and still, while working, you wonder if you’re doing it right. This is because you don’t know what result to expect.
The article “My Construction Site 3” describes the beginning of my next shift at a construction site and my first acquaintance with the installation of sandwich panels and their dismantling. At this checkpoint facility, sandwich panels were installed and dismantled 5 times.
The panels are installed once, as they break easily and the insulation peels off. The appearance of these panels has deteriorated greatly after repeated installations.
The first mistakes did not check the geometry of the metal structures. During the installation of the panels, the corners turned out to be uneven; I had to cut some panels lengthwise and large gaps.
Due to non-compliance with the diagonals of the building frame, the roofing panels had to be cut, since the joints and exits along the edges of the building panels did not match.
How to choose finishing material for slopes?
So, one of the very first ways to finish slopes is to plaster them. Its advantages include relative savings and the ability to make a fairly thin layer, but keep in mind that you will have to work hard. To make the surface perfectly smooth, you need to have some skills. Yes, and you need to work with a solution, so you can’t avoid dirt.
Another option is drywall. It also has a number of advantages, such as speed of installation, low cost and versatility. Disadvantages include fear of moisture and relatively low strength. Difficulties may arise during installation, especially if you are doing it for the first time, and over time such slopes should be repainted.
How to install sandwich panels for windows - the secrets of warm and beautiful slopes
Window sandwich panels are a special three-layer material for installing slopes. With their help, you can not only beautifully design a window opening, but also make it as warm and dry as possible, the only thing is that for this you need to follow a certain installation technology. Therefore, below I will tell you in detail how to make window slopes from sandwich panels with your own hands.
Sandwich panel slopes
Tools and materials
When carrying out installation work on lining window slopes with thermal insulation panels, a standard set of construction tools is required, which is present in every house where the owner prefers to carry out arrangement and minor repairs with his own hands:
- Tape measure or long metal ruler.
- A sharp knife, preferably a specialized construction knife.
- Short self-tapping screws of small diameter.
- Screwdriver, drill or screwdriver.
- Liquid plastic.
Building materials:
- Sandwich panels.
- Starting profiles P and F.
It is necessary to purchase building materials after carefully calculating the required quantity. Many stores provide the service of cutting thermal profile strips to the required size. With a small amount of work, this can significantly reduce costs.
A few words about sandwich panels
Sandwich panels for window slopes consist of two plastic sheets, between which there is insulation. The latter can be used:
- polyurethane foam;
- extruded polystyrene foam;
- free foam plastic.
Thanks to the presence of insulation, the amount of heat loss through the window opening is reduced. As for the plastic itself, it comes in a variety of colors. This allows you to select panels for any window.
Many people believe that sandwich panels are intended for plastic windows, however, they can also be used for wooden double-glazed windows. Thanks to this finish they will not freeze.
Another advantage of this solution is that windows in sandwich panels do not fog up (provided there is normal indoor humidity). In addition, the material is easy to install, as you can see below, and also does not require additional finishing, which is also a big advantage.
Thus, finishing sandwich windows with panels is one of the best solutions.
I would like to note that there are also metal sandwich panels, which are often used for the construction of all kinds of sheds, hangars, etc. Installing PVC windows in sandwich panels is associated with a number of difficulties.
Most often, for this purpose, the opening is sheathed with a profile or board (if the room is heated), and only after that the windows are installed in a sandwich panel. However, this is a topic for another article, which we will talk about next time.
To simplify the installation of windows in sandwich panels, use special fasteners
After the window is installed in a sandwich panel, the foamed area on the outside must be immediately hidden with platbands, otherwise the foam will quickly turn into dust under the influence of sunlight.
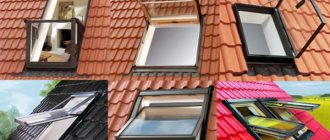
Installation features and types of building structures
Ready-made material can be purchased in the store. Sandwich panels are available in several types: wall, roofing and phased assembly models. Wall panels are most often used in construction. Their light weight does not put pressure on the foundation of the building. When using panels in roof roofing, specially designed roofing panels are used.
The filler between the sheets is based on a mineral slab. Sandwich panels of phased assembly are a structure designed to be mounted on a building frame. Such structures are neither durable nor have a low chance of fire.
One of the important components of the panel is durable polyurethane adhesive. It comes in two types: one-component and two-component. One-component adhesive hardens upon contact with air, while two-component adhesive hardens due to a chemical reaction between its two components. It is more durable than one-component adhesive. The life of quick-drying glue can be extended by lowering the room temperature.
The following can be used as an insulation layer for sandwich panels:
- mineral wool;
- polyurethane foam;
- expanded polystyrene;
- polypropylene;
- polyisocyanurate;
- fiberglass.
The following can be used as frame sheet material:
- aluminum and zinc alloy;
- Cink Steel;
- drywall;
- hard plastic;
- polyester;
- polydifluorionad;
- pural;
- oriented strand board;
- tree;
- fibreboard.
The panels are often used in the renovation of city apartments. They can serve as the inner walls of a window opening for new plastic windows. Such panels are extremely useful for thermal insulation and sound insulation of the apartment, and also do not allow air to blow through.
Installation technology
The process of installing slopes consists of several stages:
Main stages of installation
It should be noted that finishing the slopes of plastic windows with sandwich panels and wooden ones is done in the same way. Next I will tell you in detail. how work is carried out at each of these stages.
An example of leveling a window opening with wooden slats
Surface preparation
Before. How to install sandwich panels on windows, you must prepare the surface. This is done as follows:
- First of all, level the window opening. To do this, remove old pieces of plaster and other irregularities. In some cases, to level the opening, wooden slats are installed around the perimeter using self-tapping screws or even dowel nails. When installing the slats, be sure to use a building level to ensure that the window opening is level ;
- you also need to trim the mounting foam between the double-glazed window and the window opening, which may interfere with further work;
- then the opening must be cleaned of dust. To do this, vacuum the surface or wipe with a damp cloth.
Now that the opening is prepared, you can proceed directly to installation.
Installation of the starting profile
Installing window slopes from sandwich panels involves installing a U-shaped profile around the perimeter of the window. This work is carried out in the following sequence:
- First of all, measure the window frame around the perimeter;
- then cut the profile into strips of the required length. To do this, you can use a mounting knife or special scissors;
- Now, using a building level, mark the location of the profile on the window frame . This is necessary so that the vertical guides are positioned strictly vertically, and the horizontal guides, respectively, horizontally;
Example of mounting a starting profile
- Now attach the guides to the window frame according to the markings using self-tapping screws. The latter should be located in increments of about 20 centimeters.
This completes the installation process of the guides.
Cutting is a very important stage, so the work must be done carefully and carefully . The instructions look like this:
- First of all, measure the outer sides of the window opening;
- after that, measure the depth of the opening on each side in several places;
- Now, according to the data obtained, you need to apply markings on the panels, taking into account the fact that their inner ends, i.e. adjacent to the glass unit must correspond to the length of the guides. To simplify this task, you can use a special angle meter (small), which will allow you to measure the angles of the opening, and then use it as a template for marking;
- Now you need to cut out the blanks according to the markings. To do this, you can use a jigsaw, a mounting knife, or even a hacksaw.
There is low-quality material on the market that quickly turns yellow in the sun and even cracks. Therefore, it is advisable to make a purchase at a large hardware store. However, keep in mind that the price per panel starts from
600 rubles per m2.
When all three blanks are ready, you can begin their installation.
Foaming the space between the workpiece and the opening
Installation of slopes
At the final stage, slopes from sandwich panels are installed on the windows. This is done as follows:
- Begin installation by installing the upper slope. To do this, insert the workpiece into the guide;
- now fill the space between the panel and the window opening with polyurethane foam, as shown in the photo above;
- Next, you need to fix the part in a horizontal position. To do this, use masking tape, which should be glued onto it in strips with a twist on the walls;
- then vertical slopes are installed according to the same scheme;
In the photo - gluing the corners
- then PVC corners should be installed around the perimeter of the window opening, which will give the slopes a finished look and hide the cracks.
The thickness of the material varies from 6 to 32 mm. The thicker they are, the correspondingly higher their thermal insulation qualities.
It should be noted that there is another way to install slopes. It consists of using an F-shaped profile, which is attached to the walls along the perimeter of the opening . In this case, the slope is inserted between the two tails of the profile; otherwise, the work is carried out according to the scheme described above.
Plastic slopes
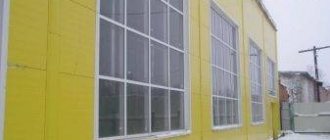
This option is not common, but has a right to life. The use of plastic slopes makes it possible to complete the production of slopes in one day. We do not recommend doing them for one reason - the service life of plastic slopes is approximately 15 years, do you really want to do construction work again after this time? The slopes are made of plastic panels for external work; the color and texture must be in harmony with the appearance of the facade walls of the building.
Slope finishing
A supporting frame must be made for plastic slopes. It can be made from rolled metal or wooden slats. There is no fundamental difference, lumber is reliably protected from the effects of precipitation, the service life is the same as that of metal. We will consider making the simplest version of the frame - from wooden slats.
Installation of plastic slopes
Step 1. Select slats of the required length and thickness. They must fit into the space between the wall and the window frame. If necessary, straighten the wall surface a little or reduce the thickness of the slats in some places. The slats need to be fixed along the perimeter of the slope: below and above and on both sides of the opening. If the plastic windows are large, then install several additional slats on all planes. Pre-fix them with liquid nails, and fill the cracks with polyurethane foam. After the foam has hardened, the slats can be fixed to the wall with several dowels to increase stability. But it is not necessary to do this, the frame will hold very firmly anyway. The foam that appears after hardening will be cut off.
Installation of wooden guides
We tighten the screws and recess the caps to the depth of the middle of the rail
We align the guides so that they are strictly parallel to the frame
Step 2. Install guide boards on the walls on top and on both sides of the opening. How this is done is described above.
Step 3. Replace the drip frame. The installation technology depends on the type of product.
Step 4: Check the position of the wood frame. All slats should lie in the same plane, side, bottom and top slopes at an angle. Maintain the verticality of the side slopes.
Step 5. Take exact measurements, prepare plastic panels and decorative corners.
Step 6. Measure and cut each panel separately. You can trim with a mounting knife, electric jigsaw or grinder. It is best to do this operation on a machine for cutting ceramic tiles - the angle is precisely adjusted, the cut is perfectly smooth, “factory-made”.
Step 7. Fix the plastic slopes with a stapler, small nails or self-tapping screws in the place provided by the manufacturer. Press the panels tightly, leaving no gaps. If the window is large, then the slope is additionally glued to the wooden transverse slats with liquid nails.
Fixing the panel with a stapler
Step 8. Cover the corners with decorative corners and secure them with liquid nails. Cut the corners at the joints at an angle of 45°.
The corners should be filed with a special hacksaw with a fine tooth.
This option for making slopes is best used if the entire house is decorated with plastic panels. Even while finishing the walls, consider the possibility of making a frame for slopes.
Sandwich panel assemblies - Technical solutions
Instructions for handling and installation of panels.
- n
- 1) It is prohibited to transport several packages at the same time on the construction site.
- 2) It is prohibited to transport bundles longer than 6 m using a forklift. With such a pack length, the spread of the forks of the loader should be at least 1.7 m. (damping pads must be provided between the bottom sheet in the bundle and the forks of the loader)
- 3) It is prohibited to use steel slings and chains to unload and move panel packages.
- 4) When moving panels less than 3.5 m long, the distance between textile slings is taken equal to 2/3 of the length of the package.
- 5) To move packages 6m or more in length, it is necessary to use a traverse equipped with textile slings.
- 6) Panels in bags should be stored in their original packaging indoors or under a shelter. (Short-term storage of packages in the open air is allowed, provided that the original packaging is intact and the packages are protected from precipitation with waterproof material with the ability to ventilate the packages.)
- 7) When storing, bags must be placed on pads on a hard, level surface. When storing in multi-tiers, the linings must be oriented in the same vertical direction relative to the linings of the bottom panel. The height of the stack should not exceed 2.5 m.
- For natural drainage of surface water, the slope of the storage area must be at least 3%. The bags are also installed with a slope to ensure water drainage.
- 9) Manipulations with individual panels, depending on their size and weight, are allowed to be carried out in the following ways: -mechanized using special mounting devices) - may be recommended by the manufacturer. - manually and using textile slings - using special equipment with vacuum suction cups.
- 10) When moving panels, care must be taken to avoid significant deflection. Otherwise, it can lead to deformation of the locks and loose fit of the panels during installation.
- 11) It is prohibited to use angle grinders (grinders) for cutting panels.
- 12) It is necessary to use safety gaskets between the slats to prevent damage to the finishing layer.
- 13) Installation is not recommended in rainy weather or when wind speeds exceed 8 meters per second.
- 14) After installation is completed, the protective film is removed from the panels.
- 15) It is forbidden to walk on the panels!
- 16) In order to avoid scratches on the panels, the removal of each top panel from the stack for subsequent installation is carried out by shifting it so that the transverse ends of the panel being shifted and the one below it are parallel. Shifting the panels relative to each other along the longitudinal axis of the panels is PROHIBITED.
- 17) To avoid tearing off the metal coverings of the panels from the insulation, removing panels from the stack manually (as well as carrying them manually) by lifting the panel by its upper metal skin is strictly PROHIBITED.
- 18) Impacts on panels during installation, installation of fasteners, sealing of joints and junctions are NOT allowed.
- 19) Attaching ladders, industrial wiring, process equipment and fittings to panels is NOT allowed.
- 20) The surface of steel sheets of panels should be cleaned using detergents that do not damage the protective coatings of the sheets.
- 21) It is not allowed to use sand, alkalis and other substances that can damage the protective coatings of metal sheets to clean and wash the surface of the panels.
If the above requirements are not met, claims will not be accepted!
How to cut the right size
When starting renovation work, every builder is faced with the main task - correct measuring measures. After all, the integrity of the structure and its attractive appearance will depend on the quality of the selected dimensions and finished cut sheets. Therefore, SIP plates should be prepared as follows:
- First you need to prepare the surface for installing slopes, level the walls, cut off excess installation materials after installing the window or doors;
- Then the stage of measurements and transfer of data to layers of construction products is carried out.
- Measuring work must be carried out in stages, first at the top, from corner to corner and depth, then using devices for cutting SIP panels (a jigsaw is quite suitable), cut off the required size of the plate.
- Using a building level, you need to attach the finished sandwich panel to the future slope and see whether the product fits tightly to the wall, at the right angle or not.
- If everything is done correctly, the same manipulations are performed with the side walls and the bottom (if necessary) of the opening.
- When transferring slope width data to a multi-layer building sheet, 10 mm must be added to this indicator. This is necessary for high-quality pairing of the product with the window frame.
Important to remember! In order for the slope structure to have a beautiful, holistic appearance, sandwich panel plates should be cut to strictly measured widths so that the plates do not protrude beyond the edges of the walls. In this case, after finishing, the wall will smoothly transition into the constructed slope
Also, when carrying out measuring activities, the possible unevenness of the walls should be taken into account, so measurements should be taken from the top, middle and bottom of the wall (or, respectively, in several sections of the upper and lower strips of the window and door opening).
Assemblies of wall sandwich panels
Stable installation of sandwich panels is ensured by preliminary assembly of the supporting frame or the presence of existing building structures for fastening sandwich panels and distributing weight loads. The wall sandwich panels themselves, used as fencing, are not designed to be used as load-bearing structures.
The supporting frame of the building can be assembled from shaped metal or wooden beams. The foundation of the building, depending on the type of soil, can be strip, slab or with a grillage on driven piles. The method of assembling sandwich panels depends on the presence of the base part and the width of the supporting strip of the foundation structure.
Installation of wall panels on foundation structures
Sandwich panel units can be installed supported on the foundation or fixed to it with a side connection. In places of support installation on the plinth, the presence of thermal insulation or wooden beams is provided, as well as ebbs from additional elements that are laid along the entire perimeter of the building.
When hanging panels, two corners are fixed to the base part of the foundation. One serves as a load-bearing support, and the second holds the panel in a vertical position. A strip of sealing material is provided between the base and the sandwich panel. Protection from the adverse effects of precipitation is provided by installing low-tide extensions along the entire adjoining line.
Assembling the wall structure
Installation of sandwich panel assemblies can be carried out with external or internal arrangement of parts of the supporting frame. In each case, all end sections must be protected with a waterproofing layer and metal extensions of the appropriate profile.
The sandwich panels are fastened to the supporting frame using long self-tapping screws with washers on rubber gaskets. The joints between the sheets must provide additional thermal insulation and a waterproofing gasket.
Ordinary and corner joints are covered with additional elements for protection from atmospheric influences. The best fastening option is to match the supporting frame element with the joint between the sandwich panels, since in this case additional sealing of the joint is provided.
Installing panels horizontally
First, you need to secure the panel from below, for which a profile or corner is attached to the bottom of the frame or wall. In the case of a concrete foundation, anchors are used that are attached at a distance of 500-600 mm from each other; for wood, self-tapping screws are used with a pitch of 500 mm. The holes in the guides are pre-drilled. Installation of guides should be done level; it is advisable to lay sealant between the concrete, guide and panels.
As insulation between the foundation and the panels, you can use insulation, the strip of which has a width equal to the width of the panel and a height of 20 mm. Such insulation can be rolled out on the foundation or placed in the groove of the product.
Before installing the panels on a wooden or concrete frame, it is necessary to drill them into the places where the fasteners are installed. It is necessary to glue a sealing tape to the frame columns in their center. If the column is intermediate, you need to glue one tape, in the places of the knot - 2 pieces, placing it no closer than 30 mm from the edge of the sandwich.
The panels are installed using a lifting mechanism and clamps. The clamps are designed for panels with a thickness of 100 mm and a width of 6 m. If the panel thickness is more than 100 mm and the width exceeds 4.5 m, two clamps must be used. The installed panel must press the insulation with its own weight. Clamps must be used to press the panels without compromising the integrity of their coating to the columns. Afterwards, you need to check the accuracy of the installation using a level.
Assemblies of roofing sandwich panels
The design of sandwich panel assemblies always provides for the presence of waterproofing gaskets, thermal insulation and a protective coating with an additional element. In this case, each joint must be protected by installing an additional element made of sheet steel. The panels themselves are secured to part of the supporting frame made of shaped metal using long self-tapping screws with washers on rubber gaskets.
Two types of joints during installation
Depending on the accepted type of roof slope and the presence of overhangs, the insulation of joints at junctions with wall elements can be simple or reinforced. Simple protection of joints during the assembly of sandwich panels involves laying a sealing tape over the mineral wool insulation. With reinforced insulation, a waterproofing layer is located in the upper space of the joint.
Ridge extensions are installed after attaching the sandwich panel to the supporting structures, sealing the joint with thermal insulation and covering it with insulating tape. The ridge itself is fixed using self-tapping screws to the metal panel.
Construction of roof expansion joints
When installing a large roof area, it is necessary to provide special seams to compensate for thermal expansion during heating and cooling of structures.
In these places, a gap of 30-40 mm is left between the panels, which is covered by a structure consisting of a supporting additional element, mineral wool filler and an overlapping element capable of changing shape under tension and compression.
Roof overhang units
When installing overhangs, the ends of the sandwich panel units must be reliably insulated from possible exposure to moisture. This is done using tape and installing extensions of the appropriate shape, which depends on the thickness of the panel.
At the upper part of the end of the panel it is necessary to install a special seal that will completely block the possibility of water access during precipitation. All fastening of sandwich panels in this unit is carried out using self-tapping screws with rubber seals.
The installation of protective panels when installing sandwich panels is carried out not only from the outside, but also from the inside of the building.
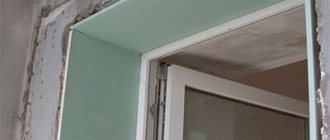
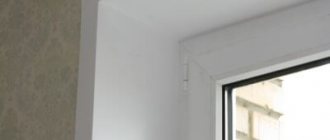
Warm slopes made of sandwich panels
When finishing slopes, sandwich panels are used, thanks to this you get slopes made of a single sheet, which gives a more aesthetic appearance to your window, and “warm” sandwich panels with filling will not allow the cold to penetrate through the side parts of the window opening, which makes your window even warmer .
Internal slopes are the inner part of the window opening. The need to finish the slopes arises due to the violation of the integrity of the existing slopes after dismantling the old window blocks, and also due to the fact that the thickness of the new PVC windows is less than the thickness of the wooden windows installed during the construction of the building. In this regard, on the internal slopes along the perimeter of the window there remains an untreated strip (5-30 cm), which needs to be covered and sealed with something.
Window slopes can be:
Plasterboard
A more modern option is to install plasterboard slopes, but the complexity of the work in this case increases. In addition, the installation of such structures will take a lot of time, and they can only be used in rooms with low air humidity, since drywall is destroyed under the influence of moisture.
Plastic
The most reliable, durable and least labor-intensive is the installation of slopes from sandwich panels 10 millimeters thick. Such structures have many advantages over plaster and plasterboard, among which we can especially highlight the fact that plastic slopes are very warm, undemanding in maintenance, the material does not lose its aesthetic and mechanical properties during operation, and can be easily washed. And if we take into account the fact that they are made from the same material as the window profile (polyvinyl chloride), the reaction of window structures and sandwich panels to changes in temperature conditions is exactly the same, so cracks and other deformations will never appear in plastic slopes. Replacing slopes with plastic ones takes only a few hours, but their service life exceeds 15 years.
We recommend that you install slopes for plastic windows made of sandwich panels.
This material is called so because it consists of two layers of plastic and a layer of insulation between them. The surface of the panel does not require further finishing or painting; the material cuts perfectly without leaving dust, is scratch-resistant and is easy to clean with ordinary detergents. This is the most economical type of finishing window slopes, requiring neither special care nor serious cleaning after work. The entire installation procedure takes about 1.5-3 hours.
Advantages of finishing slopes with sandwich panels:
- Perfectly flat surface
- Increased level of sound insulation
- Reduced heat loss
- After installation, there is no need to remove mountains of garbage
- Plastic panels do not need to be painted; the slopes are ready immediately after installation
- The sandwich is quite resistant to stains and scratches
- Sandwich slopes do not need to be additionally insulated, since the material contains an internal insulating layer
- Slopes are easy to clean with regular cleaning solutions
- Installation takes no more than 3 hours
- The cost is no more than other finishing options, or even lower.
Properly installed slopes are not afraid of even the most severe frosts; condensation does not fall on them, while at the same time increasing the heat and sound insulation characteristics of the window opening.
Finishing the slopes is the final stage when installing plastic windows. Of course, if you are installing a new modern euro-window, then the slopes (the frame around its perimeter) should also look flawless and please the eye.