A comb stopper is an auxiliary fitting that facilitates and increases comfort when using a window.
Only a safe modification with the principle of a tie-clamp can be called child protection. But all types of toothed ventilator clamps significantly increase optionality: a slightly open sash in modern window systems can only be secured in one or two positions, and with this device a large range of such positions is available.
The comb is a strip with cutouts attached to the impost, which can be folded back and lowered onto the response on the sash in the form of a pin (hook), which limits its opening. There is also a variety not with cutouts, but with a series of recesses with a principle similar to a tie-clamp. Let's consider the types of limiting combs for windows, the principle of their operation, how to choose and install them yourself.
What is a comb?
A conventional comb-limiter is a thin strip 9–15 cm long with several arcuate cutouts that engage with a mating part in the form of a plate with a mushroom-shaped protrusion, which is fixed to the sash. The product resembles a comb, hence the name.
A modification of the comb for safe ventilation is a strip not with through cutouts, but with recesses, the counter part is a frame with a tongue. This device works on the principle of a clamp. The bar can be moved only when the hook is in a certain position, so this type is also classified as child protection.
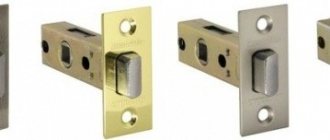
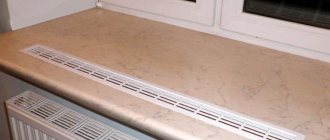
In the photo there is a comb limiter:
The device has been known since Soviet times, and if we consider the principle, it has been used since ancient times: in fact, it is an improved hook-hook.
Design and operating principle of the ventilator comb:
- A plank with arched recesses along its length. One end of it is fixed movably (but only up/down movement is possible) on a bracket fixed to the impost with self-tapping screws.
- The counter part is a plate (stand, sole) with a mushroom-shaped protrusion, fixed opposite the previous part on the sash. It is on this that the toothed plate is thrown with its notches.
- In a safe ventilator, the bar has not cutouts, but recesses and moves in a counter frame with a stopper tongue located in a special position. If the device is not needed, the hook can be moved into the technical groove, then the strip will move freely or it can be removed from this unit.
Kinds
Types of limiter combs:
- Serrated:
- The hook is located on the sole with cutouts for the base of the handle, where it is inserted.
- Fused pin. The hook is placed on the specified element, at its end.
- By design:
- Toothed, for normal ventilation. With cutouts, the stripe resembles a comb. The counter part is a bracket with a mushroom-shaped pin;
- For safe ventilation. With the principle of a tie-clamp. The plate does not have through cutouts, but rectangular recesses into which the protrusion-hook of the mating part in the form of a rectangular frame fits.
- By material:
- Completely made of plastic.
- All metal The product can be made of zinc, brass, copper, etc., but is usually aluminum or steel.
- A plastic bar with a metal bracket and the same answer, or it can be made of plastic.
- The fastener connecting the bar to its sole is usually always metal, the same hook, it can also be rubberized.
From a safety standpoint, combs have the same two main design types:
- for safe ventilation, with the principle of a tie-clamp, this is a child protection;
- gear, for normal ventilation.
The following shows what a float is:
Varieties of design and fastening of conventional combs:
- a sole with a hook for a regular handle and a long rectangular one - for brackets with pins in the form of plates, like those of aluminum windows;
- with more pronounced and hook-shaped teeth;
- with a hook or sleeve for fixing into the weld;
- with a plate-sole, but for fastening not under the handle, but on the front part of the profile.
You can find some modifications on the market, but these are more flexible limiter cables rather than combs, for example, these:
Adjusting the hinges
The upper hinge is responsible for adjusting the upper sash of the window to the right/left. To adjust the top hinge, you need to open the window and find a special bracket with an adjustment screw in the upper corner. By moving the hexagon clockwise we move the sash to the right, counterclockwise to the left.
Do not forget to constantly check how the window closes as you work. In order to return the sash to the desired position, sometimes a shift of 1 mm is enough.
The lower hinge is responsible for the movement of the sash in three planes at once: moving the entire sash down/up, the bottom of the sash to the right/left, and regulates the pressure of the sash to the frame (this function is not provided on all plastic windows).
Purposes of use
The device in question is extremely simple, but very functional. The main, primary task for all varieties is the following: Often, with plastic and similar complex window systems with chambers in the glazing, the sashes, when opened, can be firmly fixed in only two positions: ventilation and micro-ventilation.
In other cases, the canvas will dangle freely, that is, it will spontaneously slam shut when there is a gust of wind. There is always a need to adjust the sash with fixation to a larger or smaller gap in a significant range than that provided by the optional design.
The problem will be solved by a comb that holds the sash in several positions. You can set several convenient positions. When airing, too much cold air will not penetrate or, on the contrary, it will be possible to increase the volume of flow, and this can be done with the canvas fixed, without the risk of it slamming from a draft and for other reasons.
The comb can also perform a protective function against children :
- For a conventional toothed plate that regulates the opening gap of the sash, this property is extremely low. It can only be called a child protection with a stretch - the principle of operation is so simple that it will not be difficult for a child to understand it. However, if the rail is thrown, then under the weight of the canvas it is fixed quite firmly and it is not so easy to throw it aside on purpose or accidentally.
- For the clamp bar, along with limiting the gap, this aspect is the main one: you can move the sash only by placing the plug in a certain position. That is why its second name is a comb for safe ventilation.
Purpose of the window lock
A window restrictor controls the flow of air into the room and holds the sash in the selected position. The bar sets a fixed opening gap in the range of 1-10 cm.
Sash blocker
Tasks of the window sash stop:
- Air supply adjustment. The required ventilation intensity is set in the room - the air flow circulates in a certain volume through a fixed slot.
- Safety. The bar blocks the position of the window - it will not allow it to open wider than the specified level. This is very important for families with small children and pets.
- Preventing drafts. The mechanism keeps the sash from suddenly swinging open. Thanks to this, the likelihood of unexpected drafts is reduced. In addition, there is no risk that nearby objects, flowerpots and expensive double-glazed windows will be damaged by abruptly opening the window.
For your information. Poor room ventilation is one of the main reasons why windows on the balcony and in rooms sweat.
What windows is it suitable for?
The toothed locking bar is suitable for all swing and/or tilt windows without exception. But there are features and nuances regarding fastening for some systems.
In bevel systems
Frame systems (only rotary, cannot be folding) are a structure without an impost - a vertical riser-separator that serves as a counter part for the hooks (handle tongue) of the sash. That is, here the role of this element is played by the end of one canvas, and the response is on the second.
There is an opinion that the comb is not suitable for casement windows. This is wrong. The rail can just as easily be fixed on the sash that acts as an impost, and the sash on the adjacent one. Only if the sole has a pin under the handle, then it must be turned over so that the protrusion rises and does not extend between the sashes. Models with simple fastening plates (not under a bracket) with a hook attached to the front of the profile are also suitable.
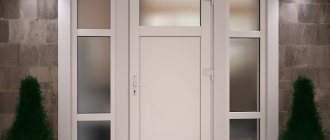
You can also fix the pin on the overlay, but you need to choose one in the form of a plate-hook so that it fits between the sashes. However, in the photo below we see that there are modifications for pinned doors: the hook is mounted where the pins are, and it is mushroom-shaped.
The comb can be attached to the bottom or top directly to the main frame, which makes it possible to more conveniently use them on pole and transom systems:
For transom systems (horizontal suspension)
The fanlight sash opens by turning up/down. That is, the user pulls it towards himself with a rotation in the indicated directions, vertically.
The gear retainer on transoms
is usually placed on the side and the hook is not placed under the handle for logical reasons; this arrangement is determined by the peculiarities of the structural position and movement of the sash.
For what designs is it not suitable?
The comb is not suitable for sliding systems. You can install it on the side of the frame. But there is no point in dodging - there are more convenient options that allow you to adjust the gap in the entire possible range.
For example , a blocker screwed like a clamp onto the wall of the lower or upper groove, which can be simply and quickly removed and rearranged to another location along its entire length. Moreover, it does not need to be secured with self-tapping screws, that is, the integrity of the profile will not be compromised.
However, there is also a semblance of a comb for sliding systems:
Item characteristics
If we consider for which windows and requests a gear opening gap adjuster is suitable, then there are the following recommendations:
- For ordinary windows: under the handle or, if preference is given to a more discreet installation of the pin or in another place, on the overlap. In the latter case, the hook will have the appearance of a mushroom-shaped protrusion or a hook-plate. It must be said that if the sash is heavy, then it is advisable to fasten it under a bracket.
- For bevel systems:
- Models with a small flat hook, which will not interfere if installed between the sashes, and with a hook attached to the harness (we discussed the features in the photo above).
- The same standard parts with a hook under the handle, but turn it over so that the protrusion with the fungus rises and does not extend between the sashes; accordingly, it will not interfere with closing, since the shutter blades are adjacent to each other and it is difficult to push anything between them.
- A modification is suitable, the pin of which can be placed on the front part of the profile (there are those with a simple plate for fasteners). But elements placed on the float will not be suitable, as they will interfere with the covering of the canvas.
- A safe modification is suitable, since its part with the tongue is attached without going between the sashes.
- For protection from children or if you liked the appearance of the design and its operating principle - comb-clamps.
- The color of the products is usually white , gray, bronze, brown, black, green. Therefore, you can choose a detail that does not contrast with the shades of the profile. If necessary, the part can be painted independently to suit any requests.
There is a separate version for aluminum windows and for handles with pin plates:
Tips for using the blocker
Restrictors do not require special care. Periodically it is necessary to tighten the fasteners and check the reliability and integrity of the comb. If necessary, you can replace the window retainer.
It is not advisable to use the comb in frosty weather; during heavy gusts of wind or heavy rain, you must close the windows in a timely manner and do not load the blocker. This is explained by significant pressure on the sash and the latch itself, which cannot always withstand it.
Using a Window Stopper
Read about other methods of micro-ventilation in our review.
How to choose the right one?
For wooden windows and heavy sashes, there is a risk of loosening and tearing out fasteners during strong, frequent gusts of wind. In such cases, it is advisable to select a mount that fits the handle and has at least two screws.
The problem is solved to a greater extent when the pin is not installed in the overlap and not an ordinary window is formed, but a system with a double-glazed window, that is, the screws go into the reinforcing insert of the profile, which enhances the fixation.
The risk of tearing out and loosening is increased since the product can only move up/down. The risk will be reduced if you choose a metal comb - it is more elastic, that is, it bends a few millimeters to the sides, slightly compensating for the load.
Selection of size and material:
- Metal products are, of course, the best. In addition to the obvious advantages, they spring better under lateral loads, and loosening of fasteners is reduced.
- If you choose a model with a rubberized hook, rattling will be eliminated. It is necessary to check that the pin fits tightly into the cutouts so that it does not “walk” in them, otherwise, in addition to the increased risk of the screws coming loose, there will be extraneous sounds.
- If you buy a model for a handle, then you need to pay attention to whether its sole with a hook will fit into the base of the bracket, since the latter may be thicker or have pins in the form of plates (for aluminum windows).
There are many sizes - since such products are not particularly standardized in width, height, etc.
We are primarily interested in what maximum/minimum width the sash can be moved to and how many positions there are in this range. According to the last parameter, the cutouts can be from 1 to 7, maybe more, but such products are found less frequently. The most popular regular bar with 5 notches.
What to look for when choosing:
- Type of strap: regular or clamp-shaped (for children).
- Range and number of possible sash positions.
- Material. The metal strip is more reliable.
- Fastening. We have already discussed this parameter. Let us briefly remind you: fixing it under the handle is more reliable, but does not allow you to place the product anywhere, and if the sash is heavy, then you need to choose a standard size for at least 2 self-tapping screws.
Examples of the number of notches, the pitch between them and the length of the slats:
- Plastic models. For example, a plate with 4 cutouts. Usually it is about 9 cm in length, the step of positions (we count to the hook, the length of which also varies in the cases below):
- hook (length 1.6 cm) under the handle: 24, 44, 64, 84 mm;
- pin (length 2.1 cm) on the surface: 40, 60, 80, 100 mm;
- Metal:
- distance 57, 77,100, 121 mm or 24, 40, 58, 73, 87 mm.
- pin length 1.1 cm or 1 cm (plates made of metal are thinner, respectively, this figure will decrease;
- If we talk about children's clamp-type combs, then the maximum gap of the bar with 12 positions with a step between them of 8 mm is approximately 10 cm, the minimum is 5 mm (the length of the bar itself is about 14 cm).
Plastic comb
It looks like a device consisting of two elements: a retainer and the comb itself (a bar with teeth). The latch is installed on the movable window sash, and the comb is installed on the frame, which does not move. The price for such a limiter is more than affordable.
The instructions for use indicate that it is necessary to select the desired volume of air that will flow into the gap between the frame and the window. The strip is attached to the protruding pin of the latch, and the gap will not change until the window is closed or the position of the comb is changed. The gap obtained using the strip is usually 10-70 mm, but these figures may vary slightly among different manufacturers.
Plastic comb
Is it possible to make a part with your own hands?
It is difficult to make a safe clamp-like comb yourself - you need to cut out non-through cutouts in a strip of metal, that is, create a relief, and also create a technologically advanced groove and counter with a special location of the pin.
But you can easily create a classic comb with your own hands from scrap materials. You will only need pieces of tin or thick plastic that can be taken from the bodies of broken household appliances, children's toys, etc., thick wire, self-tapping screws, bolts with nuts and washers, nails.
Options:
- Take any metal strip, fit it with a hacksaw, and use it to cut out the notches.
Use a metal drill to make a hole at the end. Take two small square pieces of tin, bend each one into an L shape, and do the same at the two ends of each. Clamp the bar between the plates, insert a bolt with a nut and washer into the hole, and tighten loosely. Secure the L-shaped segments to the frame with self-tapping screws. As a hook, you can use a screw wrapped in electrical tape, screwed into the weld, etc. You can also cut a plate from a piece of tin in a similar way with a handle attached, and screw a bolt instead of a pin. - Fit the rail with a hacksaw or metal scissors, and instead of cutouts, make holes with a drill. Make the bracket and the mating part as shown in the diagram below.
- A plate with cutouts can also be constructed from a piece of plastic, taken, for example, from the same unnecessary household appliances, children's toys, and holes or recesses can be made in it with a soldering iron.
- The most elementary option is the so-called rustic limiter: a simple hook with a counter ring. Can be made from nails or thick wire.
Metal comb
The operating principle of a metal comb is similar to that of a plastic one. The advantages include greater strength, and the disadvantages are higher cost and color restrictions. Metal, not covered with anything on top, will undoubtedly stand out against the background of the window.
In order to install a comb limiter, you do not need to have any special skills; it is enough to be able to screw a self-tapping screw into the frame and into the window sash.
How to install a window stop yourself?
Metal window stop
How to put it on a window?
Let's consider several options for mounting the retaining rail, depending on the design of the handle and the product itself.
Under the handle with pin plates
Aluminum windows often have specially designed handles with one or two flat pins. If the hook is chosen not for fusion, then there will be no problems , but for the product under the bracket there are special features and they relate specifically to the part with the rod.
We open the window, look at what kind of screws the handle is attached to, often they have hex heads (4 or 6). Unscrew and remove the bracket.
The handle must be removed as completely as possible without separating its parts. We must make sure that it does not fall and the mechanism does not fly apart. Otherwise, it will be very difficult to assemble the bracket.
Place the part of the comb with the pin as shown in the photo.
We mount the handle back. It is important that it is in the same position as when dismantling . Its plate-pins must be used to get into the corresponding segments of the fittings, for which we open the window slightly, move it, and make a joint. We screw the handle, do not tighten the screws all the way - first we align the plate-sole.
Next we install the part with the toothed strip.
It is necessary to make a small gap (5 mm) between the vertical end of the sash and the fixed gear strip so that the leaf does not rub against it when opening.
The rail with notches must also be installed so that in a horizontal position it is several mm higher , that is, not too low, otherwise the risk of spontaneous uncoupling during gusts of wind will increase.
But if the strip has recesses in the form of hook-shaped teeth (the risk of disengagement is leveled), then the height of the bracket placement can be made more significant, but you must remember that this reduces the set gaps, and the first cutout may not reach the pin at all. However, sometimes they do this if possible positions need to be adjusted.
We use 3.9x16 mm self-tapping screws for metal, drill-tip. There are some with plastic caps to hide the heads. With the placement we described, the first position will create a gap similar to the position for micro-ventilation. If it is already included in the optional accessories, then it can be ignored.
How to install on regular frames and overlay?
Before proceeding with the installation of the comb limiter, in all cases, regardless of its modification, it is necessary to check whether the sash is configured correctly and whether there are any distortions or overhangs. Minor features, for example, strong or weak clamping are not significant, but a noticeable incorrect position or broken frame geometry can lead to the fact that after eliminating these shortcomings there will be no reliable grip and the product will bend.
Let's start by installing the part with the pin, under the handle .
In a PVC window it is easier to remove than in aluminum structures - just fold back the cover and unscrew the two screws at its base. We take the part with the hook, place it in the sole of the handle so that the pin and screws fit into its cutouts (do not remove them when unscrewing). We insert the bracket with this part into its place, do not tighten the screws all the way, correct the distortions, tighten the fastening, and cover it with a decorative trim.
Installation of the strip with cutouts : apply it to the installation site, mark with a pencil the places of the screws (through the holes in the sole). The metal bushing of the bracket should be slightly above or directly opposite the pin.
We use galvanized (black rust) self-tapping screws 11 mm long. We place the base of the bracket equal to the end of the overlap or retreat a few mm. Before screwing in the second screw, we check how the product works in all positions.
Fastening the pin into the weld
For example, the part with a pin for Roto swing handles with a special rosette will protrude, which reduces the aesthetics. And also this segment cannot be installed on large brackets of balcony complexes. In this and similar cases, you can use a model with a mating part installed on the surface.
The place can be anywhere, not just near the handle, but if they are mounted near it, then you need to be careful not to get into its bolts. The fusion hook is usually a plastic cap into which a self-tapping screw is inserted.
We make markings - the installation location is in the center of the end of the overlay. We drill through the hole in the cap with a double drill, attach this cylinder and secure it with a self-tapping screw. Then we make markings for the second part on the impost: we throw it over the pin, place the sole just above it, and put marks through the places for the screws.
Make sure that the bottom of the rail does not rest against the bushing when closing the window. We fix one bolt. We check the work to see if the product interferes with the closing/opening of the sash. We tighten the second screw.
Installation of a clamp-like, child-proof comb
The safety stop can be installed anywhere ; the part with the tongue does not fit under the handle. We chose a location slightly above the bracket. There is no need to drill, since the screws have a drill-like part. The part with the pin in this modification is attached to the front part of the sash frame.
A toothed stop with the principle of a tie-clamp can be used instead of a child lock.
In this case, there is a nuance: make sure that the part shown in the second photo slightly fits into two small protrusions on the answer. We attach this segment, put marks through the holes for the screws.
We fasten the first screw, check whether the bar is level, whether everything works well, and fix the second fastener. The photo shows how the top of the element in the lowered state relates to the response.
Possible difficulties and errors
Frequent miscalculations and shortcomings when installing limiter combs on windows:
- One of the parts is placed crookedly, is too far away from the answer, or protrudes so that the sash touches it. First, place the part with the pin, then lay it in place without fastening the plank, make marks through the holes for the screws. This makes it convenient to set the correct position.
- When installing a safety comb, they do not take into account whether it is placed on a window or on a balcony door - this is a mistake (we mentioned the difference in installation above).
- Incorrect relationship between the seats, for example, when fixing the bushing into the weld, it rests against the base of the counter.
- A modification was supplied with a small hook-hook for one self-tapping screw on a heavy sash. This will increase the risk of this part becoming loose and being pulled out. For large masses, you should select products with soles for at least 2 screws (these are even available in fusion, as in the photo below).
Additional installation video tutorials
Installation procedure for three types of combs:
Installation instructions for the Penkid child lock. This universal device is also used to protect window and door structures from burglary:
Installation of the GIESSE FRIZ aluminum clamp:
Blocking window openings is a convenient and practical solution for ventilating a room. Some models perform an additional task - they prevent children from opening the doors. Installing a limiter on plastic windows does not present any difficulties. The entire process takes about one to two hours and does not require expensive construction tools.
YOU MAY ALSO BE INTERESTED
Pros and cons of this method of protection
General advantages:
- low cost, simplicity and at the same time full efficiency;
- for any windows, there is even something similar for sliding systems;
- easy installation;
- a large number of modes;
- Simple algorithm of operation, convenient and fast control.
Advantages of a safety comb:
- can be used instead of a child lock - it will be difficult for a child to understand the operating algorithm, of course, if he does not first observe how the device operates in the hands of adults;
- many more positions.
Flaws:
- The fastening violates the integrity of the profile. However, this is typical for most such devices.
- In strong gusts of wind, heavy doors may tear out the fasteners or cause them to become loose.
- Quite noticeable, although hidden near the surface.
- The downside of a regular (not safe) comb is that it cannot serve as protection against children.
Popular manufacturers of window clamps
The quality of the limiters is largely determined by the manufacturer. The following brands have earned a positive reputation among users:
- Penkid. A Turkish company specializing in the production of steel window opening limiters with a cable. Metal models can withstand a load of 550 kg, the length of the cable is 200 mm. The blocker cannot be broken or cut with a knife.
- Roto. German quality - the manufacturer provides a ten-year guarantee on some window fasteners. Metal models are reinforced with multi-layer anti-corrosion protection, plastic ones are made of safe polymers.
- Rehau. Window fittings from a German brand are characterized by reliability and long service life.
- Vorne. Turkish products are a balance of good quality and affordable cost. Buyers praise the limiters for their durability. One of the disadvantages is the tendency of plastic blockers to lose their original whiteness over time.
- "Bertha". Offer from a domestic manufacturer. Budget series products with good performance characteristics.
- Ikea. Window safety systems for children. Products of the “Patrol” series are equipped with double clamps and the required number of screws. An important advantage of the models is versatility. The clamps are suitable for plastic and wooden structures. The limiter can be installed on sliding sashes.
Ikea window blocker
Palladium sells decent products. The domestic company is engaged in the development and sale of window fittings. Metal stops have a high level of protection against thieves. Cable locks come complete with a key - a child lock.