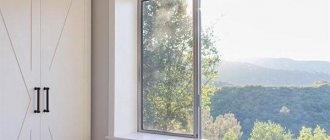
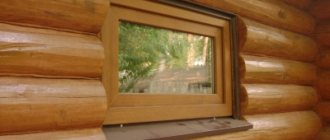
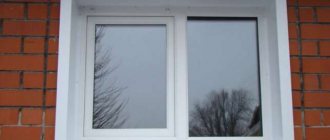
Owners of apartments or houses have to deal with replacing old, crumbling wooden windows that let the cold in with new plastic windows. These will not only update the interior, but also provide thermal insulation of a house or apartment. It is important to provide high-quality finishing of the slopes. Even a person who has no experience in this matter can make beautiful slopes. Later in the article we will describe in detail how to perform this procedure, and also provide a video for clarity.
Types of finishes for work
A variety of materials allows you to independently finish slopes in several ways:
- plastic panels;
- gypsum fiber or drywall;
- tree;
- MDF;
- sandwich panel;
- plaster.
Benefits of overlays
You can purchase and install an overlay not only for the restoration of a window sill, but also in cases where you simply want to update the decor in the room or completely change the color scheme of the interior. Made from the same material as the window itself, the linings look organic with plastic structures, and the profiled edge and special plugs allow you to hide unevenness and other shortcomings of a PVC window sill that has become unusable.
The use of overlays provides the consumer with many advantages:
- quick (about 45 minutes), uncomplicated installation using construction adhesive allows you to complete the entire procedure yourself, without the involvement of professional installers;
- You can change the color scheme of the window sill at will at any frequency (tired of the color, change the wallpaper);
- the linings are easy to maintain and, like a regular plastic window sill, can be washed with special cleaning agents;
- low price category: a white lining costs from 300 rubles/m2, and a colored one from 1300 rubles/m2, while the price of a whole window sill starts from 1000 rubles. and from 3000 rub. respectively.
Installation is carried out on top of the old window element. You cannot use the trim instead of a window sill.
Properties of plastic panels
The most common are plastic slopes. Their types:
- Sandwich panels . They consist of plastic plates with foamed polystyrene and stiffening ribs inside. Expanded polystyrene, mineral wool or foam plastic are also used as a layer. Do not require additional thermal insulation. Find out more about how to make slopes from sandwich panels here.
- Panelit . Plastic panel of cellular structure with air capsules inside for additional thermal insulation. Inexpensive, effective option for finishing slopes.
- Ceiling panels made of polyvinyl chloride (PVC panels) consist of two plates connected by stiffening ribs that enhance strength. The material is resistant to moisture, ultraviolet radiation and chemicals, and has a long service life. Six-meter sheets with a thickness of 0.5 to 1.2 cm are best suited. Read about how to install PVC slopes here.
- Sheet plastic . Durable and lightweight high quality material used everywhere.
The panels are made in different colors. There are varnished, laminated, plain, imitating natural materials.
Attention
Such slopes are combined with the material from which the window is made: a single design is created that fits any interior. It is only necessary to cover the installation seam that appears after installing the double-glazed window from moisture and sunlight.
The simplicity and lightness of the material allows you to design the slopes yourself , without the help of craftsmen. There is almost no construction waste during installation.
The same rate of thermal expansion during temperature changes prevents the formation of cracks.
Plastic products do not require additional painting; care consists of regular washing with detergent. Not affected by adverse weather conditions or ultraviolet rays.
Furniture Blog
Quality Furniture BY
How to resolve the conflict between the countertop and the window sill on the same level?
How to resolve the conflict between the countertop and the window sill? The window sill is hollow plastic, 30 mm thick, the table top is 38 mm. There will be furniture bodies up to the window sill. Is it possible to mill the tabletop from below so that the window sill “fits” into it? How to seal it then? What are the consequences of such a decision?
Next is a photo of the window sill. Let me clarify that its lower edge is at a height of 830mm, and its upper edge is 860mm. Considering my height (160cm), the level of the working area (read tabletop) cannot be raised above 860-870mm.
Here you can see that if you cut the window sill to fit the tabletop, there will be an ugly hole.
And here you can see how much the tabletop will overlap the window sill.
In general, this is real. Ideally, it is better to change the window sill, making it from the same post-forming material, but as I understand it, the window has already been replaced before, and it is tightly clogged. Cutting a hollow window sill along the length to the depth of the tabletop is also unsightly. Making a cut with a router to a depth of 145 mm towards the corner of the room from the rounding of the tabletop and removing 30 mm of the thickness of the tabletop 65 mm from the window is difficult: you need a good long cutter (expensive), various fasteners to fix the tabletop, a lightweight router. Anything can be done, but the risk is great. I would try, but I doubt that at your request they will agree to do this in production.
There is another solution. Order this recess to be made on a cutting machine. It is used to saw the material of your kitchen. I ordered something similar when I assembled the double sided drawers. The groove in the sidewalls is designed for 16 mm chipboard, and I am working with 18 mm. The bottom of the box had to be made of 18 16 along the edges to a width of 2 cm on each side.
The following is done: The saw extends above the carriage to the height that needs to be removed. In your case 30 mm. You need to drive it in such a way that the saw teeth meet the front side of the postforming. It is not necessary to drive the entire depth of the tabletop (600 mm), but it is easier for sawers. In your case, 160 - 200 millimeters is enough. Since the thickness of the saw is 3 mm, your tabletop will have to be driven on the carriage along the saw step by step 22 times (65/3). It would cost me 22*0.6*0.3 = $4. If you do it carefully, everything will work out. Then sand the recess, preferably with a drill attachment.
As for sealing, use silicone caulk (transparent). Apply it to the entire surface of the recess with a layer of 2-3 mm, immediately before finishing and final installation of the countertop. After installing the countertop, carefully wipe off any excess that comes out from under it with a dry cloth. I think everything will work out.
Why can’t you use a router in the same way as you suggest using a format machine? Place the tabletop face down, set the router to 30mm and select stripes from the edge? Just how should the cutter go into the plastic so that there are no chips? Should the knife be on the plastic side? Are there any restrictions on the width/diameter of the cutter?
Julia, I am not aware of your capabilities. But always, when I try to do something that I do for the first time, I test it on waste. There are a lot of milling cutters, that’s why there are concerns. And the main thing is fixing the part. Having worked with a router for 7 years, I cannot tell you that a router in your case is better than a format machine. There are fewer surprises with the formatter. The cutter should not break out the plastic, so it should move towards the plastic. You understand that they make 20 thousand revolutions per minute in the opposite direction. If you lived in Minsk, I would conduct experiments with you, but, theoretically, I cannot mislead you. The formatter method seems to me optimal, and therefore cheap. $4 is not 200 (the cost of a German cutter). A hand cutter has an average speed of 20,000 rpm. Without reliable fixation, there is a risk of damaging the material. It is better not to do such manipulations manually. Everything is easier on the machine. They will set up a ruler, secure the tabletop with clamps, and run it once. Then they will install the ruler with an offset of 3 millimeters, lower the locking lever and run it again. Then a couple dozen more times, and that’s it. It couldn't be simpler. I have been working with a hand milling machine for a long time and have conducted various experiments. Therefore, he must give qualified advice, and not engage in amateur activities.
Article rating:
How to trim a window sill with plastic Link to main publication
Related publications
- Lawn on the windowsill
Advantages and disadvantages
Advantages of plastic finishing:
- environmental friendliness;
- durability;
- giving a neat appearance;
- variety of choice;
- reliable adhesion to the window frame;
- perfectly flat surface;
- heat and sound insulating properties;
- reasonable price;
- high installation speed;
- possibility of self-installation;
- no additional steps are required to level the surface of the opening after dismantling the old windows;
- moisture resistance;
- ease of use;
- Possibility of use on arched structures;
- preventing fogging and freezing of windows;
- a small amount of dust, dirt after installation.
Among the shortcomings are noted:
- tendency to mechanical damage;
- poor quality of additional elements;
- inability to replace part of the panel if damaged.
Coloring of cladding
Apply paint to the slopes and window sill in the same way as stain. First prime the wood and then paint it in two or three coats. Before applying the next layer, wait until the previous one has dried. It is imperative to follow this rule when painting window cladding. Otherwise, the new layer of paint (especially in vertical areas) will slide down in “waves.”
After the paint has dried, the work on finishing the window sill can be considered complete. Finish the other windows in the room in the same way. As a result, your room will look much more attractive than before.
Found a violation? Report content
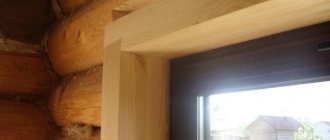
Manufacturing and installation
Important
Technological measures for measuring, installing, and adjusting plastic windows are carried out by special teams, which gives the customer the right to a guarantee.
Installation of slopes, if tools are available, is carried out independently, at the request of the window owner. Work begins 36 hours after installing the double-glazed windows - this is the time required for the polyurethane foam to harden.
First, preparatory work is carried out to clean the surface from dust , remnants of polyurethane foam, and other debris. The protective film applied to the profile is removed. If you do this after installation, pieces of film may remain on the profile and ruin the appearance of the window opening.
Start profile
They produce two types of starting profiles - L and F-profiles.
To install plastic panels, it is best to use a universal L-profile, suitable for both sandwich panels and PVC (how to make slopes from sandwich panels and PVC?). If the window opening does not protrude beyond the dimensions of the installed frame, the wooden beam is not installed. Then the starting profile is attached directly to the frame, based on the line marked by the level:
- Start from the top of the opening, then move to the vertical planes. The side starting strips are screwed to the top from below so that the narrow side of the profile faces inside the window, and the wide side faces the walls.
- The starts are screwed with self-tapping screws exactly in the center, without tilting, with a distance of 15–20 cm from each other. You can attach the starting profile to the frame with “liquid nails”, applying them in a wavy line over the entire surface of the starting surface.
- Excess glue is immediately wiped off: after drying it will be more difficult to remove from the profile.
It is not recommended to use “liquid nails” to secure the start: they will peel off over time, and the windows will have to be dismantled. - The side and bottom launches are connected to each other at an angle of 45 degrees, the space is filled with liquid plastic.
- The joints between the top and side strips are masked with sealant. This makes the seams look more aesthetically pleasing.
Fastening the slats
Attention
If the width of the window opening extends beyond the frame, a wooden strip is secured with self-tapping screws inside the window opening (except for the window sill).
This will strengthen the corner and install fitting profiles:
- The starting profile is attached to the plank using a construction stapler. At the same time it is pressed against the frame.
- Then the same wooden strip is mounted along the outer edge of the window opening, and the side panels are inserted.
- They begin to install the top panel: they bend it slightly from the upper slope, blow it with a small amount of foam and press it against the opening. Fix with tape until the foam hardens completely.
Uncover
An important step in installation is cutting the material. It is performed in two ways: by cutting out the material itself or using a stencil. When taking measurements, take into account the thickness of the elements, leaving 10 mm for insertion into the groove.
The opening is measured in two places : at the top and bottom along the width of the vertical plane, as well as its length. The width of the upper opening is measured horizontally, and the depth along the edges.
- Cut the plastic with a jigsaw or a hacksaw.
- The resulting burrs and minor irregularities are removed with sandpaper.
- The underside of the double-sided plastic is sanded.
- A preliminary fitting of the panels is done to identify errors in measurements.
Installation
When parts of the future slopes are ready, installation begins. Start from the top horizontal part :
- The prepared pieces of plastic are inserted into the grooves of the starting profile, but for this they bend it a little.
- The space between the panels and the wall is filled with polyurethane foam, carefully monitoring the dosage (read about the secrets of working with polyurethane foam when installing slopes in this article). Excess will deform the material.
- Maintaining parallelism, monitoring the vertical arrangement of parts, proceed to installing the side panels in the same way.
- For fixation, spacers are placed, the edges are attached with tape to the wall.
Final finishing
- A day later, two people remove the spacers and tape, and place a corner on the slopes. They fix it with silicone. F-profile is suitable as platbands.
- Measure along the outer perimeter of the window and cut it off.
- In areas of contact with the screw heads, the internal profile strip is cut out.
- Then the profile is pressed tightly against the end of the plastic and fixed with silicone.
- The final stage is sealing the seams. Sealing the joints is necessary: it ensures the joints are waterproof. White sealant or silicone is applied with a special gun, the excess is immediately removed with the remainder of the plastic.
More nuances about the peculiarities of working with plastic panels when installing slopes are described here, and everything about the procedure for installing slopes from plastic panels or other materials is described in another article.
Ways to solve the problem
Let's break down the options for restoring PVC window sills into categories depending on the use of the material used.
Important! Before you repair a plastic window sill with your own hands, the surface must be cleaned of dirt, degreased with alcohol and dried.
Chemical cleaners
It is known that the plastic surfaces of windows and window sills are covered with an invisible or decorative film that performs a protective function. If handled carelessly, it will become scuffed and yellowed. To eliminate such minor defects, you can completely restore the part using laminate wax or a special solvent-based Cosmofen cleaner.
Small stains and abrasions can be removed with a special cleaner Cosmofen
If the window sill is completely yellowed, it is better to apply the composition to its entire surface. It will dissolve the top yellowed layer and the plastic will become as good as new. This will complete the restoration of the window sill.
Special putty
The use of a specialized mixture such as Fenoplast or Reparaturset to seal small defects is a very popular method today. In stores it is sold in powder form complete with a spatula and measuring cup. Preparing the putty according to the instructions is not difficult. After use, this mixture acquires properties close to PVC and easily covers gaps, be it a crack or a scratch. To dilute the two-component mixture, experienced specialists use not water, but a primer for deeper penetration, which helps to obtain a fairly durable coating.
You can use putty to repair small scratches and cracks.
Immediately after preparing the composition you should:
- Apply putty to the surface.
- Carefully repair the scratch and smooth it out.
- Wait 10-15 minutes. until completely dry.
- Sand with sandpaper.
- Polish with Fenosol S5 “UVA”.
To understand what it will look like to repair a plastic window sill with your own hands using putty, you need to start with more inconspicuous places.
Liquid plastic
If you don't know how to remove scratches from a plastic window sill, use liquid plastic. This material is absolutely indispensable for repairing deep scratches and large dents. It allows you to restore even the most advanced deformation.
To correct deep defects in the window sill, liquid plastic is used
With a ready-made composition such as Cosmofen Plus, all the recesses on the plastic window sill are sealed until a smooth surface is obtained. After this, you need to see how the cracks being repaired and the patch will differ from the overall texture of the plate. Therefore, it can additionally be covered with self-adhesive decorative film.
Laminated Film
This is a fairly simple and affordable option for restoring the surface of plastic windows with numerous defects. A wide variety of colors and a choice of assortments to imitate various textures (wood, stone, Russian pattern, etc.) make this product very popular even when restoration of the plastic window sill is not required.
Using laminated film you can update an old window sill
To use the film you should:
- Apply putty mixture.
- Use sandpaper to remove any bulges.
- Cut the film to the required size with a margin of 2-3 cm at the edges.
- Gently spread it over the surface with a towel.
- Remove any air bubbles that have formed by piercing them with a needle and level the surface.
- Glue the film in hard-to-reach places using a hairdryer, which will make it more elastic.
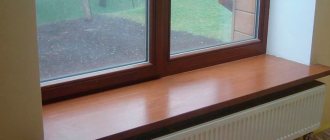
How to install a plastic window sill on windows?
The window sill is installed in grooves 2–3 cm deep made in the wall; this is taken into account when taking measurements. They are sawed with a grinder, or, in extreme cases, with a jigsaw . It is not recommended to cut a window sill with a hacksaw.
- Linings are laid between the window sill slab and the base. Place it at the level of the window, making a slight slope to prevent condensation from accumulating at the base of the frame. To do this, the outer edge of the slab is tilted down a couple of degrees, adjusting the position of the window sill with wooden wedges or plastic elements. The correct slope is checked with a level.
- When the window sill is correctly positioned, begin its installation. Most often, polyurethane foam is used, which needs to be warmed up a little before use. The window sill board is inserted into the grooves and pushed in until it stops. The space between the slab and the base is filled with foam, and to strengthen the position of the window sill, heavy objects, such as bricks, are placed on it. It will take 2-3 days to harden.
A few more ways to install a window sill:
- Using self-tapping screws . Hardware is inserted into the holes made in the window frame, and the joints are lubricated with sealant. Then the window sill is driven under the glass unit and screwed. The remaining space is blown out with foam. Weights are installed for fixation.
- Spring clips . They are fastened with self-tapping screws to the stand profile, then the plate is inserted into the groove between the bracket and the frame.
Below we offer a visual video of the window sill installation process:
To install plastic slopes, it is not necessary to contact craftsmen, whose services are usually expensive. If you have the tools and accurate measurements, you can create slopes or install a window sill with your own hands.
Application of decorative plaster
When renovating a house, you can’t do without using high-quality finishing materials.
Most often, interior decorative plaster is used to seal walls. This material helps create characteristic slopes on the windows, making them unusual and elegant. Decorative plaster includes fillers of different fractions and origins - this may include natural wood fibers or stone chips with artificial granules of different sizes. Decorative plaster is used as a finishing layer, thereby creating a special textured surface or an expressive pattern, using the example of Venetian plaster.
Decorative plaster, used for finishing slopes inside with your own hands, has the following characteristics:
The gloss also fades
In addition to its direct purpose, the window sill is used by households for many other purposes:
- as a desk or kitchen table;
- bench;
- additional shelf;
- greenhouse.
The white decorative surface attracts children as an object for creativity.
There are often cases of a window sill being close to a central heating radiator, as a result of which the plastic can become deformed or even catch fire. It does not tolerate too aggressive household chemicals and turns yellow if the window faces the sunny side. All this turns a beautiful piece of furniture into something that causes pity and irritation.
There are two ways to solve the problem: complete replacement and update.