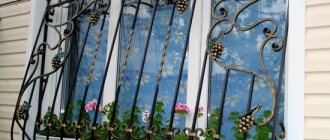
Arched corners are used for finishing rooms. They have two main functions:
- decorative;
- protection of corners from damage.
Arches, as an element of architecture, appeared in ancient times for one reason: there were no reinforced concrete beams, and wooden lintels did not last long. Recently, the fashion for decorating doorways with arches has returned. Plastic corners protect sharp edges from accidental damage, abrasion and from people passing by.
Types of corners for finishing arches
According to the place of use, corners are divided into:
- those that are installed on plaster;
- corners that are glued under the plaster.
The first ones have a wider range: they are made of different materials and can be of almost any color. The latter have special holes for better adhesion to the surface. They come in both metal and plastic.
Functions of corners:
- alignment of external arched corners;
- protection of corners from accidental damage;
- surface decoration.
Wallpaper tends to peel off from the base over time. A doorway trimmed with decorative corners will hold them on the wall and also give the room a finished look.
Perforated corner for strengthening corners and slopes.
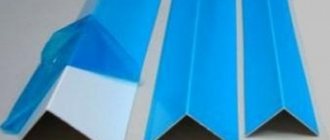
Materials for making plastic corners
If we classify products by material, then there are two types of corners for arches:
- metal;
- plastic.
Metal ones are only perforated for plaster. They serve to strengthen and prepare external corners for final finishing. They have to be cut when used.
On curved surfaces, when a perforated corner metal profile is bent, bumps appear, and the round arch becomes polygonal. Therefore, when strengthening openings, a plastic perforated corner profile is used. It is attached with glue or screwed to the wall.
Perforated corners are made from plastic for finishing corners and slopes. They are flexible and inexpensive. Products are made of PVC or polyurethane. They hold their shape well when bent. The corners are so soft that they can be used to finish curved surfaces with a minimum radius. Also, products made from PVC and polyurethane plastic are more durable and do not fade.
What it is?
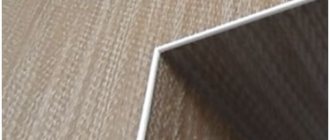
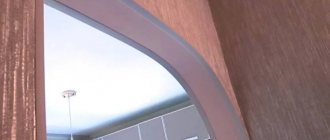
Before we talk about how to glue arched corners, it is worth finding out what kind of part it is and what it is intended for. So, a corner for arches is an element designed for the design of curved structures. They are easy to bend, so corners can be used for an arch or other curved structure of any size and shape.
Advice! Arched corners are used not only when finishing arches, but also when creating complex suspended ceilings and other plasterboard structures.
Methods for installing arched corners
Installation begins with surface preparation. Regardless of what the arch is made of (brick, drywall or other materials), the preparatory stage must first be carried out. It is also necessary to strengthen the surface of the opening before gluing the decorative corners. Let's look at how to glue a plastic corner to an arch in two situations:
- In a new building, where the walls are only plastered and not finished with anything;
- In a residential building with finished walls (painted, wallpapered).
Methods for installing arched corners
Methods for installing arched corners
Methods for installing arched corners
In the first case, the scope of work is small, it can be easily completed even by novice builders:
- Products are attached to brick walls with plaster or quick-drying putty.
- The corner is screwed to the drywall with screws, glued with liquid nails or placed on gypsum putty.
- At the next stage, the installation site is plastered, sanded, painted or wallpapered. After this, decorative protective corners are installed.
In the second case, when the opening has already been made and the wallpaper is pasted, more complex work has to be carried out. Procedure:
- First, you need to carefully draw a parallel line on both sides of the arch the width of the perforated corner. To do this, you can make a template from a plank.
- Remove excess plaster from both sides of the corner with a putty knife.
- Secure the perforated corner using one of the above methods (with nails or glue).
- Putty and level the walls in one plane.
- After puttying work, check the plane with a straight, long ruler or slat. There should be no gaps between it and the wall.
If the plane is level, proceed with the sticker.
If the walls are crooked, the corners will need to be spread out.
Nuances you need to know about:
- To fix the perforated profile in the opening, prepare spacers from wooden planks.
- First, the upper part (along an arc) of the profile corner is installed and the places at the lower points are marked with a pencil on the wall.
- Then the lower pieces of the corners on the right and left are installed and fixed.
- After the lower profiles are secured, the upper part is installed. Due to the elasticity of the plastic, the profile will press against the base and will not fall.
- Another fixing option is to glue a corner to the wall with masking tape, if the wall surface allows this.
If in some places the perforated corner moves away from the surface, press it and fix it with a self-tapping screw, and only then treat it with putty. If the screw is sticking out above the surface, ignore it. After the putty has set, you can unscrew it and seal the hole.
Fastening
Fastening decorative elements
If you decide not to install an interior door and make a semicircular opening (see Arched openings), then you need to “ennoble” it - attach an arched decorative corner along the entire contour.
There are several ways to do this:
- Glue it with glue.
- Secure with self-tapping screws.
- Pin with nails without heads.
Let's look at each of these methods in more detail. Most often, PVC elements are glued to the wall using glue. For example, for liquid nails or Titanium.
You should know! No need to use liquid nails for heavy structures! They may contain solvents that can corrode plastic. The best option is Express Decor glue.
Before you start gluing the corners to the surface, you should prepare it:
- First of all, you need to clean it from dirt and dust.
You should know! Do not under any circumstances stick plastic corners onto wallpaper. Even if the latter are firmly attached to the wall.
- All loose materials must be removed.
- If you already have wallpaper glued, then remove it from the place where the corner will be glued as follows: attach it tightly to the “native” place and mark its edge on both sides with a pencil. Then remove and carefully use a sharp utility knife to trim and remove the wallpaper.
Now you can start gluing. If you decide to use liquid nails, it is better to take them in a tube (under a gun). It will be more convenient to apply glue from such packaging. Also buy the gun itself.
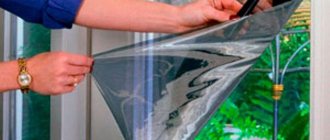
How to glue a flexible corner onto an arch
Before you start gluing, you need to accurately measure the opening and the length of the corner. Measure the perimeter of the opening from the baseboard with a margin of 2-3 cm on each edge (just in case). Please note that the perimeter of the opening will be at least 5 meters, and corners longer than 3 meters are not sold. Thus, it will not be possible to cover it with one piece. To begin, attach the flexible corner to the arch and start marking from top to bottom.
Plastic protective corners.
The lower ends of the corner should be at the same distance from the floor. You can level them with a water level. If it is not there, then take marks from the floor. We will assume that it is horizontal. Even if he is not, the human eye will not be able to perceive it. The seam between the corners will be visible in any case: if one end is lower than the other, then aesthetically this design will lose.
How to glue a flexible corner onto an arch
How to glue a flexible corner onto an arch
How to glue a flexible corner onto an arch
How to glue a flexible corner onto an arch
What and how to glue plastic corners to the corners of the walls?
For this purpose, liquid nails or other universal PVC glue are used. There is nothing complicated in the process itself. First, apply a continuous line of glue about 5 mm wide on one side and spread it over the entire plane of the corner with a spatula or other available material. Repeat the procedure on the other side. Wait about 5 minutes and press it firmly against the wall. Secure the first part of the decorative corner with tape. Please note that soft pads must be placed under the spacers: fabric, polystyrene foam, polyurethane sponges or other available materials. If you forget to do this, there is a risk of damaging the surface of the decorative corners. While the first part is drying, measure the remaining distance and glue the last pieces of the profile on both sides.
Adhesive for PVC plastic corners.
During gluing, excess glue may be squeezed out and come out. Wipe it immediately with a wet cloth and check the residue after a while. If there are any, use your fingers to roll them into balls and remove them.
Remember that it is better to use a metal square to mark and cut off excess material. It is more accurate than wood.
The working process
If you want to achieve a good result, then you need to have all the necessary materials and tools at hand. We will only discuss the wallpapering stage; you must prepare the surface in advance. The base must be dry and level.
Materials and tools
The following materials are needed for work:
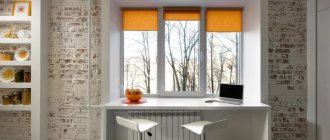
Sometimes the arch is highlighted with wallpaper of a different color. Another option is to paint the surface of the arch; in this case, instead of wallpaper, you will need paint of a certain color.
For an arched structure, if you will paste it separately, it is better to prepare the composition a little thicker than for smooth walls. When cooking, use 10% less water to obtain the desired consistency.
I recommend using a special primer for wallpaper. It not only strengthens the walls, but also paints them white, creating an ideal base for wallpapering.
If the corner is attached under the wallpaper, then a special version of small thickness is used, which has a small protrusion to form the contour of the arch.
Tool for work:
Construction knife. You need a very sharp version with a hard blade 25 mm wide. In addition to the knife, be sure to purchase a set of spare blades. A good option is a tool with segmented blades; they are very rigid and cut very accurately;
A sharp knife allows you to perfectly cut wallpaper along the edge of the arch
Brush for applying glue. You need an option with thick pile to distribute the composition evenly and quickly. The most commonly used is a poplar, but ordinary options with a width of 10 cm or more can also be used;
The Maklovitz brush is very suitable for applying thick wallpaper paste.
Brush for leveling wallpaper. Since the surface of the arch is uneven, using a spatula to press the wallpaper is not very convenient, as it can damage the material. It is much better to use a special brush; it is 30 cm wide and provides quick and convenient leveling even on semicircular surfaces;
A brush is needed to level the wallpaper on the surface, press it and remove excess adhesive.
Scissors. With their help, it is very convenient to make cuts on the edges of the wallpaper when folding it, if the folding technology is used. It is also convenient to use scissors to cut wallpaper sheets into pieces of the desired size.
To work with wallpaper you need comfortable, massive scissors.
The working process
Let's figure out how to paste over a door arch:
You can continue work after the surface has completely dried. This usually takes from 1 to 3 hours.
If the arch is small in width, then it is sealed with two sheets with a joint in the middle.
Some types of wallpaper also require adhesive to be applied to the wall. In this case, the composition is distributed along the base. The instructions on the packaging with the composition will tell you whether this is necessary.
A strip about 20 mm wide is left along the edge
Special precision is not needed, it is important that the protrusion is more or less even along the entire length of the edge
Tools for work
Prepare the following tools and additional materials:
- square;
- stationery knife;
- water level;
- masking tape;
- wooden planks;
- rags to remove excess glue;
- metal scissors or hacksaw.
If there is no square, but only a school ruler, then remember your geometry lessons from high school. Draw a right triangle on anything with sides of 3 and 4 centimeters and a diagonal of 5 centimeters. Or take a school arithmetic notebook and draw a right angle in it, and then transfer all the measurements to the surface. If the amount of work is small, then several cuts can even be made with a hacksaw blade, holding it in your hand.
To ensure an even cut, apply a metal square to the surface. Its side will be a guide and will not allow the hacksaw blade to go to the side. The cut must be strictly perpendicular to the longitudinal axis, otherwise the seam will be visible.
Although arch corners are not a mandatory element of room design, they are recommended to be used in order to give the interior a finished look.
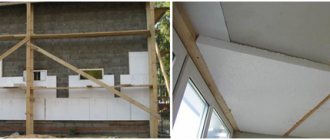
Preparing the opening
At the beginning of work, measure the dimensions of the opening - in case you have to slightly change them. Drywall, putty and other materials are used to change the size or shape; if you plan to do this, then prepare the necessary materials in advance.
Now we need to prepare the surface. Clean the opening from dirt, seal all cracks and degrease the mounting area. Create as smooth and even a surface as possible, preferably by sanding and wiping it.
Before starting finishing work, the surface of the arched opening should be leveled as much as possible.
In cases where the opening is plastered, make sure the surface is smooth. If there are any cracks, chips, or unevenness, remove this layer and apply a new one. Then wait for it to dry completely and clean the surface and sand it.