Home / Installation, repair, maintenance / How to stick film on glass without bubbles?
Decoration of windows, doors, or even car tinting is done using special films. Despite the fact that many consider such work to be complex and can only be done by professionals, there is nothing complicated here and everyone can cope with it if they do everything carefully. The most important point is how to stick the film on glass without bubbles - the main enemies of quality work in this case. To do this, you need a very short list of what you need and a little patience - it may not work out the first time.
Coating features
Basically, everyone knows only the tint film, which appeared a long time ago. However, manufacturers are coming up with more and more options that can not only change the decorative side of the glass, but also serve as reliable protection. Another advantage of this product is the ability to glue the material yourself, which helps to economically upgrade windows and other glass surfaces.
Many are highly durable, practical and sustainable. But to get all these positive properties, you should know how to properly stick the film on glass.
Many are highly durable, practical and sustainable.
Methods of use
Self-adhesive stained glass film with a pattern can be used to decorate any acrylic and glass surfaces in the interior, including tempered glass. Most often, windows and glass inserts in interior and entrance doors are decorated. Materials with UV filters are especially relevant for windows. Stained glass film is used to decorate the doors of sliding wardrobes. This decor is suitable for tempered glass furniture and shower doors. Stained glass film looks impressive on a glass apron above the work surface in the kitchen. The material is also suitable for decorating mirrors.
Decorative film can be used to decorate almost any surface, including varnished and even wooden. It is advisable to pre-coat it with an acrylic primer for leveling.
Even one element decorated with film can refresh the interior and add zest to it.
Under what conditions can it be used?
Before gluing the film material to the glass, you should understand for what reasons the coating can be used. The possibility of coating is not limited to gluing on windows; there are options for other products:
- The adhesive material on the double-glazed window is used for tinting, sun protection and heat insulation, and is used for decorating windows;
- For glass partitions, improves appearance;
- For gluing doors to windows, you can use products with sandblasting or a stained glass look. Thus, you can easily combine the doors with the new interior;
- Material for a sliding wardrobe, you can decorate the cabinet doors with a variety of designs, and it is not necessary to glue them onto glass, perhaps just onto canvas to create an addition to the design;
- A similar simple transformation of glass tables and other surfaces that people want to change without major expense is possible.
The possibility of coating is not limited to gluing on windows.
Material characteristics, advantages and disadvantages
Whether it is worth using self-adhesive or another film for a glass surface can be understood by understanding the characteristics of the material, its pros and cons. The following positive properties of various films are highlighted:
- Helps prevent room heating in hot weather;
- In cold weather, the opposite effect will occur, heat will not escape, the window will retain heat longer;
- Serves as protection against fading of objects from exposure to ultraviolet radiation;
- Does not attract dirt, there is no need to frequently clean the surface, such as curtains;
- The presence of different colors and patterns, which helps to choose the product to suit the interior of the room.
There are also negative sides:
- Some films are thin and fragile, which can lead to defects when installed on a surface;
- If you buy a low-quality film, you may encounter the problem of difficulty in removing it from the surface, which leads to damage to the window itself;
- You need to try hard to glue the material without bubbles.
The presence of different colors and patterns, which helps to choose the product to suit the interior of the room.
Designer tips
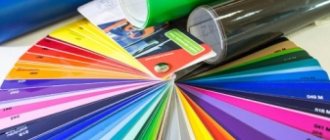
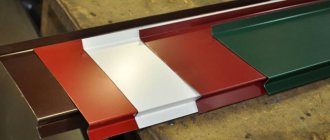
The attractiveness of the designed surface depends not only on the quality of the pasting, but also on the correct choice of self-adhesive film. They come in different strengths and thicknesses, mosaic, with a glossy, matte, mirror surface. There are films with 3D patterns, holographic, and velvet. It is important to skillfully combine texture and ornament with interior items.
Tips to help you:
- Glossy film is great for darkened rooms and adds light thanks to glare.
- Matte self-adhesive will look advantageous in a room with good lighting.
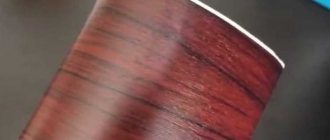
- The velor-like film creates a special coziness and is perfect for the bedroom and living room.
- Mirror can be used in any room. It can visually enlarge the space.
- Holographic film creates an original effect and attracts the main attention. It is better suited for large rooms decorated in soothing colors.
If it’s difficult to decide on a design or you want to bring an original idea to life, you can contact the nearest advertising agency. You can print a picture, photograph, or any ornament you like on white self-adhesive film.
Self-adhesive has a lot of advantages. It protects the surface from grease, plaque, scratches and chips. Self-adhesive film is not afraid of high humidity, it is easy to stick and replace. It is also easy to care for: use a cloth with warm water to clean it. Use the step-by-step instructions to apply the film quickly and efficiently!
Necessary tools for gluing the film
In order not to be distracted from work, you should prepare all the necessary materials and tools in advance; the process should be completed in one go. Then it will be possible to obtain a coating that will not have any flaws. For gluing you will need:
- Roulette;
- An even strip of plastic or wood of appropriate length;
- Sharp stationery knife/scalpel;
- Spray gun;
- Water;
- Liquid soap;
- Lint-free rags;
- Soft spatula;
- Hot air device – hair dryer.
In order not to be distracted from work, you should prepare all the necessary materials and tools in advance.
What is the background for?
An aquarium background is an attractive decorative element that can be purchased at any aquarium store.
It performs several important functions:
- The wall behind the aquarium, which “interrupts” the seascape, is hidden from view. When “diamonds” and “stripes” are visible through the water column, the reservoir looks unnatural.
- Hides electrical wires, sockets, parts of equipment that are located behind the aquarium.
- A correctly selected panorama creates a sense of perspective inside the water tank, visually expanding the space.
- Absorbs light glare, thanks to which the inhabitants of the reservoir feel in an environment close to natural conditions.
- A beautiful background makes the aquarium landscape rich and rich, without taking away space from the fish.
All these functions will work if the background is in harmony with the aquatic environment, and its execution is neat and durable. It is advisable to stick to a marine theme, which depicts aquatic plants, corals and fish. If the aquarium is oversaturated with plants and other decor, it makes sense to choose a monochromatic option.
How to glue stained glass film to glass
If a stained glass type is chosen, it is recommended to proceed in stages to obtain the desired result. How to stick stained glass film on a window will be discussed below. The instructions include preparation, gluing, removing bubbles and the final stage.
If a stained glass type is chosen, it is recommended to proceed in stages to obtain the desired result.
Stage No. 1: preparing the glass surface
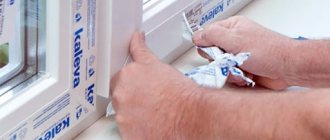
You should prepare a solution of soap and water, which is sprayed over the base. If there are other stickers on the coating, they can be removed with a utility knife; you need to act carefully. Then the window is wiped until dry, and the solution is sprayed again.
You should prepare a solution of soap and water, which is sprayed over the base.
Stage No. 2: film preparation
The surface is measured, and the film is cut according to the obtained parameters, while the film is cut in both width and length by 2.5 centimeters. This distance is necessary to remove the protective coating from the film. It is necessary not to leave a crease on the film product.
The surface is measured and the film is cut according to the obtained parameters.
Stage No. 3: gluing the film onto the glass surface
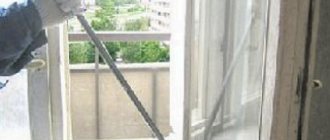
The material should be glued to a damp glass surface, so you can spray it again with a solution of soap. Afterwards, the finished piece of film is taken by the corners and carefully glued to the surface on top; as long as the moisture remains, it is possible to adjust its location.
The material must be glued to a damp glass surface.
Stage No. 4: removing bubbles and remaining water
Now the surface of the self-adhesive film is sprayed and rolled over the coating with a rubber tool to remove all bubbles. It is important to remove everything. In order to avoid the film picking up in corner areas, wipe it with a lint-free cloth.
Water bubbles are not as noticeable as air bubbles, so you should carefully examine the surface.
In order to avoid the film picking up in corner areas, wipe it with a lint-free cloth.
Stage No. 5: final work
To finish how to glue stained glass film, use a scalpel or knife to trim off the excess. A visual inspection of the coating is also carried out to identify the presence of bubbles. Leave the window for 12 hours so that the film sticks well.
Do not touch the material during the drying period - 12 hours.
Leave the window for 12 hours so that the film sticks well.
Installation of self-adhesive stained glass
The first thing to consider is that it will be easier to apply a high-quality design on a horizontal surface. If possible, vertically located glass should be removed.
Glass with sharp corners is processed as follows: the coating is cut on both sides of the corner and slightly tucked inward.
There are several other ways to apply stained glass film:
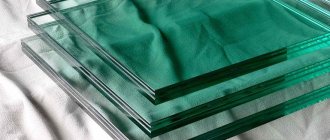
- decorated glass is inserted into a double-glazed window between the existing panes;
- The laminated glass is secured to the surface of the window with a colorless sealant or glue.
So, the glass is positioned horizontally and laid on a flat, hard surface (for example, on a table). Now it needs to be washed. It is not recommended to use chemicals containing abrasives and aggressive components for cleaning. A small amount of them may remain on the glass, which will reduce the performance of the adhesive. It is better to wash windows with warm water and a little soap. This should be done with a lint-free cloth – microfiber.
Dried glass is degreased with ethyl alcohol. It is better not to use other means - acetone, gasoline, white spirit dissolve the material from which the stained glass film is made.
Lay out the canvas with the pattern inward - centimeter markings are applied to the backing, this makes cutting easier. Under the metal ruler, the self-adhesive stained glass film is cut to the required size. It is necessary to cut with a very sharp stationery knife or blade so that there are no burrs.
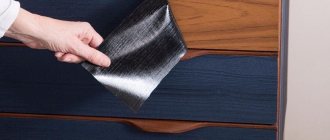
Along the entire length, turn the edge of the canvas to a width of 5-10 cm and apply it to the glass. Using a roller, rubber spatula or damp rag, the self-adhesive film is leveled using movements from the center to the edges.
Gradually remove the backing, gluing the stained glass completely. The remaining bubbles are pierced with a needle and leveled.
Use a spray bottle to apply water with a few drops of liquid soap to the surface of the window. Apply the film, driving out excess moisture and air with a rubber wallpaper roller. This way the glue does not set immediately, making it much easier to eliminate errors.
Removing film coating from glass
The film material is not durable, and after a few years it is necessary to replace it with a new one. To make the process go quickly and without flaws, choose one of the options described below:
- Using a sharp tool, you need to remove the film from the corner, then carefully pull it;
- Heat the surface to 40 degrees and remove the coating;
- Using a product containing ammonia, spray the surface. The substance promotes the removal of the film.
The film material is not durable, and after a few years it is necessary to replace it with a new one.
Rules for caring for windows with laminated glass
When caring for laminated windows, it should be borne in mind that the polymer is much less durable than glass. If handled carelessly, it may be scratched prematurely. The following rules will help extend the service life of the coating:
- during the first week after pasting, do not touch the coating and do not wash it for a month;
- wash glass with mild detergents that do not contain ammonia;
- use only soft sponges and rags;
- do not remove dirt using abrasive powders or wire wool;
- Avoid contact of glass with cutting objects.
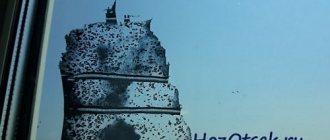
How to hide a crack in glass with stained glass film
If cracks appear on the glass surface, you can cover them with stained glass film. First, adhesive tape is applied to this area on both sides, and then the standard stained glass film is applied, this way it will be possible to quietly eliminate the defect.
If cracks appear on the glass surface, you can cover them with stained glass film.
Common mistakes
Novice craftsmen often make mistakes when gluing film coating. In order not to repeat the mistakes of others, you need to know them. The material cannot be glued to cold glass; the temperature must be at least +5 degrees, but not higher than +40.
You must first get rid of dust in the room; small particles quickly settle on the surface and this will lead to unevenness. Measuring the blade incorrectly can result in a gap that will stand out greatly. Strong tension on the product or poor quality ironing.
You must first get rid of dust in the room; small particles quickly settle on the surface and this will lead to unevenness.
Instructions for iPhone. Glass is more difficult to apply, but it’s easy to get your hands on
My kit came with 3 pieces, but they are often sold one at a time and more expensive.
There is a QR code on the package with a video on how to apply it correctly, but it opens on a semi-accessible Chinese video hosting site with a lot of advertising.
Therefore, I offer my own understandable version. There will be seven steps in total.
1. Remove the old protection, wipe with an alcohol cloth, then dry.
2. Adjusting the film to fit the screen will be the most difficult step, since its dimensions almost coincide with the glass of the device.
The sticker with the number 1 releases the adhesive area, which makes it easier to fix the protection in the correct position.
To make this more convenient, I wrap the fingers of my left hand around the film on three sides and at the same time hold it with my right hands. So the fingertips serve as a guide. Plus I check that there is the same distance from the edge along the entire perimeter.
Leave some air bubbles at this stage. This is not the final cut.
3.don't break it
The white piece will come off on its own and at the same time remove any dust that was on the screen during fitting.
4.
5.
6. Using a card, carefully press the film into the Face ID area so that there are no bubbles left on the edges. Even if they do, don’t worry: over the next 24 hours the air will disperse on its own (which does not happen with glass).
7. Pull the tail and carefully remove the top thin film from the hydrogel. Try to do this slowly so as not to tear off the protection itself.
Ready. The film seems to dissolve into the screen, especially when viewed from a distance of more than 20 cm.
Any small bubbles will go away on their own. For example, this is what the smartphone looked like immediately after application:
And this is what it looks like the next day:
As for skill, I tried hydrogel protection for the first time back in the spring. Then I didn’t understand the instructions and ruined one of them.
Now I have covered half of my friends’ iPhones, and after five times I can do it easily.
One of the benefits is that even if you have any dust left over before application, the rolling method removes them. And the particles stuck under the film are squeezed between the surface and the screen until they become invisible over the next 24 hours.
How to remove self-adhesive film
Remove the film after its service life has expired, having previously warmed the surface or soaked it with special means. Typically, chemicals are chosen that will cope with the removal of glue. These can be solutions for cleaning stoves, tiles, dishwashing, etc. You can use plain hot water with added sugar syrup.
Remove the film after its service life has expired, having previously warmed the surface or soaked it with special means.
The article described in detail how to glue film to glass; the work is not difficult, but it is important to be well prepared. Then the film coating will please the eye and transform the appearance of windows or other glass objects. Afterwards, removal will also not be difficult.
General procedure
Glass tinting occurs using a soap and water solution in the proportion of 3 to 5 drops of washing shampoo per liter of water.
It is necessary to mix this solution thoroughly; it is advisable to use an automatic sprayer.
Then the external glass cleaning is carried out. This must be done not only without fail, but also very efficiently, since the technology requires complete cleanliness of the tinted surface. Any grain of sand may end up being an air bubble.
In this way, you can tint any domestic and foreign cars.
General stages of work:
FIRST STAGE. The glass is cleaned from dust and dirt, as well as degreased. If you are going to tint the windows without removing them, it is advisable, but not necessary, to remove the rubber seals. SECOND PHASE. It consists of making a solution of shampoos or non-aggressive detergents. It needs to be poured into a special spray bottle.
Pay attention to the correct preparation of the solution. Add 5 drops of detergent to 1.5 liters of water and shake the entire mixture vigorously. It is better to pour the resulting solution into a container with a sprayer (sprayer)
THIRD STAGE. Making paper patterns. They will be needed to cut the tint film into the required shape. If you are unsure of your measurements, leave a slight tolerance. They are then easily removed using a cutter. If your hand is already full, then this point can be missed. FOURTH STAGE. Pattern and the tinting process itself
It is better to pour the resulting solution into a container with a sprayer. THIRD STAGE. Making paper patterns. They will be needed to cut the tint film into the required shape. If you are unsure of your measurements, leave a slight tolerance. They are then easily removed using a cutter. If your hand is already full, then this point can be missed. FOURTH STAGE. The pattern and the tinting process itself.