Home — Articles — How to properly stick decorative film on glass: gluing technology
READ THE RULES FOR ACCEPTING ORDERS Please note that orders are accepted for work only if there is a technical specification. Please read what should be indicated in the order:
- Name
- Thickness in mm
- Size in mm
- Necessary processing (ground or polished edge, or bevel XX mm wide)
- If the product has holes, attach a drawing with markings from the base sides to the center of the holes and indicating the diameter of the holes
- For arches or rounded corners, attach a drawing indicating the radius of the rounding
- For trapezoids, triangles, corner cuts - attach a drawing with LINEAR dimensions of the product
- If the product is of irregular shape (different radii, wave on the side, etc.), please apply its template on a hard material, such as hardboard or cardboard. The template must indicate the overall dimensions, sign the corrugated or matte side and the name of the company.
- When ordering a product with UV-gluing, there must be a general view with dimensions, a drawing of the product assembly and detailing
15.12.2015
Service provided
New decorative films for glass Our catalog is constantly updated with new types of films for glass. With its help you can completely transform a room!
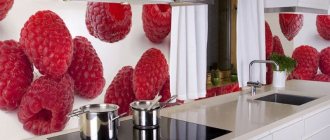
Decorative film will decorate any glass surface, turning ordinary glass into a masterpiece of design art. You can stick the film yourself, but you should be careful and follow a few simple rules.
The decorative film is glued in five stages. You will need the following tools:
- a spray bottle with a soap solution (a dishwashing liquid solution will also work);
- rubber roller (spatula);
- a clean rag for wiping off water;
- stationery knife.
Get these tools ready and you can get to work.
Decorative films for windows. Features of choice and installation subtleties
You can give your interior a unique flavor and uniqueness in various ways. One of them is window decoration. Currently, you can purchase decorative film for windows at any building and finishing materials store. Their range is incredibly rich, and manufacturers offer products that differ significantly, both in their technical characteristics and in price.
In order to confidently make your choice, based not only on the beauty and brightness of the design you like, but subsequently not to be disappointed in the choice, we will tell you in this article about decorative films, their characteristics and ways to decorate windows with your own hands.
Color palette
The color palette of the oracal largely depends on the method of its production. The most popular version - Oracal 641 - has 60 color variations: from transparent to black matte or glossy. Among monochrome options, white or gray colors are also popular. Metallized films are placed in a separate category; there are finishes like gold, silver, and bronze.
Among the casting types you can find oracal with an original surface texture: wood, stone, and other materials. Self-adhesive films in pure bright colors are popular: blue, red, yellow, green. Calm shades - beige, peach, pastel pink - are used in the design of furniture facades.
Coating features
Basically, everyone knows only the tint film, which appeared a long time ago. However, manufacturers are coming up with more and more options that can not only change the decorative side of the glass, but also serve as reliable protection. Another advantage of this product is the ability to glue the material yourself, which helps to economically upgrade windows and other glass surfaces.
Many are highly durable, practical and sustainable. But to get all these positive properties, you should know how to properly stick the film on glass.
Varieties
All types of self-adhesive oracal films can be divided into categories. The main division is made according to the type of coating. Gloss is used in the manufacture of vinyl decorative elements; matte options can be used in auto tuning and other areas. Based on the presence of pigment, transparent and colored films are distinguished. Both options are suitable for printing a variety of images and text on their surface.
Special varieties are focused on narrower applications. For example, reflective or light-diffusing film is successfully used in the advertising industry in the manufacture of light boxes, signs, and display cases with minimal energy consumption. Fluorescent applications are clearly visible on the sides of vehicles, in the beams of headlights - they look brighter under artificial lighting.
Cast
Films of this type are products of increased strength, resistant to stretching. The range of thicknesses here is higher - from 30 to 110 microns, glossiness reaches 80-100 units. The equipment for film production is small-sized, the mixture is prepared in batches, which provides greater opportunities for the production of decorative products with an original texture.
When casting, the PVC mixture is fed directly onto the surface of a special paper that sets the texture. This film can be embossed, textured, matte or glossy. Oracal of this type is well compatible with uneven surfaces and is not afraid of temperature changes. In some cases (for destructible control labels, warranty seals), easily destructible materials are made, but usually their tensile strength is quite high.
Calendered
This category includes all economy-class films made from vinyl chloride resins. They have a thickness of 55–70 microns, shrink when operating temperatures change, and cannot withstand significant stretching. During production, the molten mass of base passes between calender rolls, is drawn, embossed, cooled and wound into rolls. Already at the entrance to a special machine, the width and thickness of the future material are set.
In terms of gloss level, the range of calendered films is 8–60 units. Oracal of this type is not suitable for gluing complex curved surfaces. But it is extremely easy to use and cheap to produce compared to cast analogues.
How to glue self-adhesive film on glass?
Gluing decorative film to glass consists of several technological stages:
- Glass cleaning.
- Cutting the film.
- Pasting.
Let's look at the tools we need to carry out all three stages, as well as each stage separately.
Required equipment:
- Sprayer or spray bottle with soapy water.
- Rubber scraper for glass.
- Dummy knife.
- Raquel.
- Chamois leather, paper towels or lint-free rags.
Important! The film is applied to the glass surface both from the inside and the outside. The choice of application method depends on the type of film and the assigned decoration tasks.
Glass cleaning:
- First, the glass must be thoroughly cleaned of grease, dust and other contaminants. To do this, you can use soapy water or a special glass cleaner.
Important! Dust makes it difficult for the film to stick, and large particles that get under the film can ruin the appearance of the pasted surface. In addition, debris can cause bubbles, tears, and joints to separate.
- Lightly soiled areas can be cleaned with a lint-free cloth or napkin soaked in a solution of water and neutral dishwashing detergent.
Important! It is better not to treat with ordinary soap or hygiene products, since shampoos and soaps contain fats or alkalis, which can affect the durability and quality of adhesion.
- Moisten the fabric moderately to prevent dirt from being transferred from place to place. After cleaning, the surface should be wiped with a dry, lint-free cloth.
Important! Do not allow the cleaner to dry out spontaneously.
- You can complete the cleaning process by treating it with isopropyl alcohol, after which you should also wipe the glass dry.
Important! This completion of the glass cleaning operation cannot be done in all cases. For example, acrylic glass cannot be treated with alcohol. Therefore, always take into account the characteristics of the base material.
- To prevent streaks from forming, you can use a rubber scraper to remove water.
Important! Don't forget to keep your hands clean, as they can leave stains on the cleaned glass.
Cutting film
You should first measure the size of the glass, add 2-3 cm to these parameters on each side, and cut out an element of material from the film according to the obtained dimensions.
Important! By making an allowance on the films, you can compensate for possible errors during gluing.
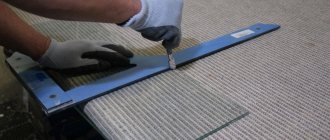
The process of cutting out the film must be done using a metal tape or a breadboard knife.
Important! It is better not to use scissors, as they will not allow you to make an even cut.
Pasting the film
The process of gluing film to glass occurs in three stages.
Stage 1 - preparing the soap solution and applying it:
- Add a few drops of liquid dishwashing detergent to the water. The proportion should be approximately 10 ml of product per 1 liter of water.
- Pour the prepared solution into the spray bottle. You can use the simplest spray bottle.
- Apply soapy water to the surface of the glass. Do not overdo it with the amount of solution, as this can significantly complicate the fixation of the material and prolong the final gluing time. Just a few drops will be enough to reduce adhesion.
Important! In some cases, it is not the glass that is wetted, but the adhesive layer of the film, but this option is considered less convenient.
Stage 2 - separation of the substrate from the film:
- Hook the backing on the corner.
Important! If problems arise with this, then use tape: stick one piece on the film side, the other on the backing side, and release the outer tails of the tape out. Pull the tape by its tails in different directions, the backing will easily come off the film.
- Remove the backing completely. If you have not wet the glass, moisten the adhesive layer of the film with soapy water.
Stage 3 - gluing the film:
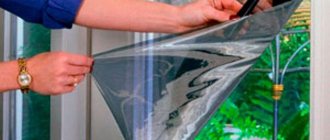
- Take a piece of film and apply it with an adhesive layer to the glass. Place the film in the desired place; soapy water will allow you to do this without any problems.
Important! At the initial stage, you should not try to press the film tightly; it will stick due to diffuse adhesion.
- Spray the outer surface of the film. This will ensure good sliding of the squeegee.
Important! Make sure your squeegee is smooth and free of any burrs. Instead of a squeegee, you can use a regular plastic card.
- You need to start gluing the film from the top edge. Smooth the film horizontally, from the center to the right and left, not reaching the edges of the film approximately 10 cm.
- The last 10 cm should be smoothed from the center to the right and left. Be careful not to form water bubbles.
Important! It is necessary to completely squeeze out the soapy water that is under the film. If bubbles remain, then after gluing the film they will not be able to be squeezed out, and the result will be a defect. If any swelling appears, pierce it with a thin needle, release the air, and carefully smooth the fabric.
- Cut off the excess film around the edges with a breadboard knife.
- Wipe the pasted film dry with a soft, dry cloth.
Important! Stained glass film is a colorful type of self-adhesive. How to glue stained glass film to glass? Yes, on the same principle as regular self-adhesive material.
Necessary tools for gluing the film
| Rice. 3. A spray bottle with soapy water or, if this is not available, a simple sprayer |
| Rice. 4. Rubber glass scraper |
| Rice. 5. Squeegee for smoothing the film |
| Rice. 6. Breadboard knife |
| Rice. 7. Paper towels, chamois or lint-free rags |
Let's start working with self-adhesive film
- The first and most important stage is surface preparation. It can be anything, for example, doors or walls, furniture or glass. The base for pasting must be thoroughly and conscientiously cleaned of any contaminants. An impeccable version of the prepared surface looks like smooth varnished boards. If this is not your option, then a rough, uneven or porous base must be primed with varnish or wallpaper glue.
- cutting the self-adhesive film is the most crucial moment. The convenient scale printed on its reverse side greatly facilitates the cutting process. In order to start work, you need to carefully cut the material into even pieces of the required length, preferably with a margin.
- To avoid mistakes when gluing the film, you must carefully read the recommendations on the protective layer. It shows in detail the stages of working with this material. First of all, you need to separate the protection from the paper. Calmly and carefully apply the decorative design to the base on which you want to glue and press the adhesive edge to the surface. So with your first hand, gradually removing the paper layer, stick the image completely. With your second hand, carefully press down the already pasted part, getting rid of air bubbles.
It is important to remember that if, when gluing the decorative material, you did something wrong, then until the picture has set, you have a chance to do it all over again. After complete attachment, which usually occurs within a few hours, nothing can be done.
Choosing the right material
The main feature of advertising on shop windows is their durability. A good material must withstand any temperature changes, weather conditions, and treatment with household chemicals. As a rule, for the production of advertising they use a durable self-adhesive film, which, moreover, should not come off for a long period.
They mainly use vinyl film - either glossy or matte. It all depends on the personal preferences of the owner of the outlet. For example, if you need to stick an image on the street, then most often a matte material is used so that the sun's rays are not reflected in the gloss. Advertising on windows (residential, retail outlets) is selected individually, depending on the location of the store, the curvature of the surface, the presence of corners and the quality of lighting.
Material for outdoor advertising varies. There is a film that can be easily removed and does not leave traces of glue on glass or plastic, and there are those that can be disposed of with working tools - a spatula, special chemicals, hot air. If you want to save money, you can make a one-sided image. This means that such outdoor advertising cannot be seen while indoors.
Covering the window sill with self-adhesive film
When the preparation is complete, proceed to the process itself.
Prepare for work:
- Selected self-adhesive;
- Knife, scissors;
- Long ruler, tape measure, pencil;
- Rags, sponge, rubber spatula.
The crucial moment is to cut out the film correctly. Ideally, this should be one piece with correctly cut corners and smooth edges. If you are in doubt about the calculations, then first make a pattern on paper and try it on the windowsill.
When cutting, take into account the height of the ends and the slight bend under the window sill board. If everything is perfectly marked, you can transfer the drawing to self-adhesive film. Lay it face down; on the wrong side there is a lined grid with a pitch of 10mm for ease of cutting.
Transfer your pattern to self-adhesive paper, lightly tracing the contours of the pattern on it. If you have a film with an imitation or pattern, then try to orient it so that the pattern is equally symmetrical on opposite slopes.
If there are several windows in the room, it would be correct to cut out canvases that are identical in symmetry. The self-adhesive film for window sills has been cut, the preparation has been completed, and you can begin the main process.
If this is your first time encountering this task, then before laminating the window sills, slightly moisten the base with water or a slightly soapy solution. I'll explain why. Then the film will not stick “tightly” to the surface, and it can be corrected, slightly shifted, eliminating the distortion.
Separate a piece of protective paper from the self-adhesive film by 5-10 centimeters to fix its initial location on the base. Place it on the window sill at its base and begin smoothing from the center to the edges, pressing the film well.
Peel the backing off the film in small sections and stick these sections onto the surface. And so the entire workpiece, the ends and folding under the window sill base. If there is a displacement, correct it, since you glued the film to a damp surface.
Smooth with cloths and a rubber spatula. Inspect the finished product for bubbles. They can be easily eliminated by piercing them with a needle and pressing to release the air. Usually the difficulty arises when you laminate the corners, but since you have everything cut out in advance and cuts are made at the folding points, there should be no problems.
Removing the film
When replacing the film, the question arises of how to quickly remove the self-adhesive film. The simplest method is to wet it several times with hot water, then the adhesive component will soften and easily come away from the base. Using a spatula, start removing the film.
An ordinary hairdryer can come to the rescue, as it heats the surface in a dry way and helps remove the self-adhesive. Warm up the area, and, lifting the film, pull it towards you, then the next area. Remove any remaining adhesive with alcohol or solvent.
This is how simple a self-adhesive film for window sills can transform its design. The main thing is accuracy when working, accuracy in measurements and adherence to sticker technology, then the quality will be at its best.
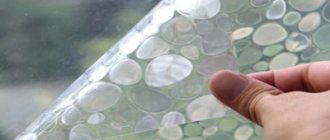
Advantages and disadvantages of stained glass film for windows
The use of stained glass film has a number of advantages, the main of which are:
- availability and low price of the material;
- a huge selection of different color and texture solutions, allowing you to implement almost any design solution for finishing and interior design;
- durability of the finishing coating, reaching 15 years when using high-quality film;
- ease of sticking and subsequent care of the decorative coating;
- possibility of dismantling the glued material;
- high performance characteristics (wide range of withstand temperatures, various protective effects, etc.)
Rice. 7. Option for finishing with stained glass film.
The disadvantages of stained glass films include:
- the material is flammable, so the film should not come into contact with hot objects;
- With all the variety of color options, the film is inferior to natural stained glass, both in durability and in the appearance of the coating.
Reviews (12)
- 5 (2)
- 4 (2)
- 3 (2)
- 2 (4)
- 1 (2)
Already bought this product? Tell me what you think about him.
“Your opinion is important to us!”
- Sorting:
- by date
- by usefulness
- Positive
- Negative
Became three times thinner
The film has become three times thinner compared to previous years. The manufacturer saves on production. Because of this, it is not convenient to glue it even with tape. I ran out of three years' supply, so I decided to buy more. And in the end it turned out that it was something fragile, barely perceptible in the hands. Quality, accordingly, affects both results and expectations
Review of manufacturers
Oracal film is a registered trademark owned by Orafol Europe GmbH. This is the only official manufacturer that has the right to sell products with this name. However, the name itself managed to spread among designers and became a household name. Today, almost any PVC film with an adhesive backing can be unofficially designated as such.
Major brands, in addition to Orafol, include the following companies:
- Japanese 3M;
- Chinese Promo Film;
- Italian Ritrama;
- Dutch Avery Dennison.
All these films can be sold as vinyl. It is worth noting that European manufacturers always focus on the quality and reliability of their products. The average service life of Oracal branded film reaches 3 years with the most intensive use.
Asian brands started production later, but quickly caught up with their competitors. Today, even famous designers use Chinese vinyl products, paying tribute to its diversity and design. As for Orafol, which owns the Oracal trademark, it is a company with international status, headquartered in Berlin. The company dates back to 1808, and has had its current name since 1990. During the 20th century, the company was called Hannalin GK, later VEB Spezialfarben Oranienburg. It has been privately owned since 1991, and a representative office was opened in the United States in 2005.
For a long time the company specialized in the production of printing inks. It began to position itself as a leading manufacturer of film materials for design and advertising after 2011, after the acquisition of the American Reflexite Corporation, which produced ORALITe, Reflexite. Since 2012, ORACAL AS has become part of the Orafol group of companies. Today this division is based in Turkey.
