The installation of plastic windows and sealed entrance doors has led to a change, or rather a deterioration, of the microclimate inside houses. There are two ways to solve the problem: organize efficient ventilation, which is not so cheap, or install a special device, the name of which is a supply valve to the wall. Let's look at this device specifically to understand how it works.
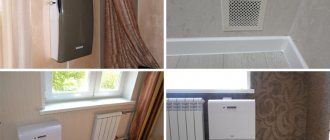
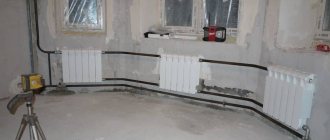
Supply valve in the wall above the battery Source cvc-market.ru
Need for installation
The main purpose of the supply valve is to ensure the flow of air from the street into the interior of the house. Why is this so important:
- If fresh air does not come from the street, the concentration of carbon dioxide in the house will begin to increase. And this will lead to a deterioration in the well-being of the people living in this house.
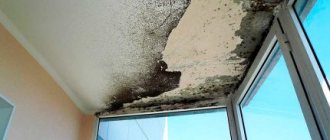
- Reduced air intake from outside creates conditions for increased humidity. And this is the reason for the appearance of colonies of harmful microorganisms in the form of mold and fungi. Accordingly, there is a high probability of developing asthma or allergies. Children, elderly people and family members with low immunity are at increased risk.
- High humidity also negatively affects building structures.
- If the house already has exhaust ventilation and the air flow is limited, then unpleasant odors and harmful substances in the air are poorly removed.
Of course, you can simply occasionally ventilate through the windows, but this is a temporary function that does not provide the proper concentration of fresh supply air.
Today, a window valve is increasingly being used as a means of bringing air in from outside. This is a good alternative. And we’ll also talk about it a little lower.
Supply window valve Source standart40.ru
Efficiency
And this “feature” of the valve is the most important for me: the incoming cold air does not immediately enter the room, but into the warmest zone on top of the radiator. The convection flow from the radiator picks up cold air, they mix, and you do not feel discomfort. This creates a thermal curtain that the cold cannot overcome.
Another advantage of a rectangular supply valve is that it has a larger cross-section than round ones. This means that more filters can be installed there with the same volume of supply air.
Design features and how the supply valve works
Purely structurally, the supply valve is a cylinder in which the filter material is placed. It is covered with decorative grilles on both sides. The cylinder diameter is from 6 to 14 cm. This parameter affects the performance of the device. That is, the more, the more air it passes through itself.
The cylinder itself is made of plastic. The external decorative grille protects the device from the penetration of small animals and birds, as well as from debris. Budget options are plastic, expensive ones are aluminum. Some manufacturers complete the grilles with mosquito nets.
The valve is closed from the inside with a cap. This is a box in which the filter material is installed. The head is closed with a lid. There is a wide variety of heads. With the help of some, you can reduce or increase the supply of incoming air. They can have different shapes, sizes, and locations of holes for air passage.
Design features of the supply valve Source veles24.ru
The cylinder is inserted into a drilled hole in the wall. To prevent noise from the street from penetrating into the house and to prevent the walls from freezing in winter, heat and sound insulation material is placed between the wall and the plastic cylinder. This is usually a cylindrical product.
As you can see, the design is very simple, but very effective. However, it should also be noted that the ventilation valve will be useless if the hood does not work well in the house. After all, the essence of ventilation is both the flow of air and its removal from the premises. Therefore, some tips:
- the hood must be in good condition at all times, even if it is a hole under the ceiling in the bathroom and kitchen;
- Interior doors should have bars or the height of the door leaf should be selected so that there is a gap of 15 mm between its lower edges and the floor.
The hood in the kitchen should work efficiently Source victorborisov.ru
Problem Analysis
So you bought a breather or air purifier. How do you know that it is working and cleaning the air? Without a measuring device - no way.
Before solving a problem, you need to learn how to measure it.
Metrics
I decided to find a device to measure CO2 and air pollution.
Air pollution is most often measured using the PM2.5 metric.
This is the content of particles <= 2.5 microns in size in the air. For comparison, the thickness of a human hair is 50 microns. Why this size? In my opinion, for convenience: particles of this size are the most common and harmful to health. What other metrics did I use?
- PM10 - content of particles <= 10 microns in size. The size was chosen specifically: the natural filters of the nose only retain particles > 10 microns in size.
- HCHO - formaldehyde, emitted, for example, by furniture.
- VOCs are volatile organic compounds found, for example, in exhaust gases.
We do not consider rare metrics - NOx, SO2, CO - since the instruments for measuring them are not widespread.
Below we consider only PM2.5 and CO2.
For CO2, the recommended level indoors is 500-800 ppm, typical outdoor levels are 400-500 ppm.
With PM2.5 it is more difficult. In Australia, by law, the annual average concentration must be no more than 8 μg/m3. In Europe - no more than 25 μg/m3. In the USA - no more than 12 μg/m3. Does this mean that values below the threshold are safe? No. Every 10 µg/m3 of PM2.5 concentration increases the risk of lung cancer by 36% . The only safe level is 0 µg/m3. Read more about health hazards in this article.
I set myself target values for CO2 metrics - 700 ppm, PM2.5 - 8 μg/m3.
Disadvantages of PM2.5 Reduction
Reviews sometimes write that lowering PM2.5 levels relaxes the immune system, but I have not found scientific evidence for this.
Measuring instruments
I bought an Air Quality Pollution Monitor for $130 to measure. But it showed zero PM2.5 levels all the time. I haven't figured out how to calibrate it correctly.
So I bought a separate AirVisual Pro for $270 to measure PM2.5. After a year of using it, I am completely satisfied with it.
The large number on the green background on the left (13) is the US AQI level. In this device it is just a different scale for PM2.5. The small number on the black background on the left (3) is the PM2.5 concentration. On the right is the carbon dioxide level (982).
I took photos of the devices at the same time. It can be seen that AirVisual Pro detects PM2.5, but the first device does not.
Operating principle of the AirVisual Pro device
AirVisual Pro uses a laser to calculate PM2.5. There is a constant flow of air through the device thanks to the fan inside. The laser emits a beam through a stream of air. The beam is reflected from suspended particles in the air. Only that part of the laser radiation that is reflected from the particles reaches the photometer. Thus, the device calculates how much was suspended in the air flow. This mechanism is capable of detecting particles from 0.3 µm to 2.5 µm. The resulting values are calibrated against temperature and humidity.
An infrared lamp is used to calculate CO2. The principle is similar: the lamp emits infrared light into the air stream. Carbon dioxide particles absorb it, so not all the light reaches the detector of the final radiation. The carbon dioxide content is calculated from the fraction of light that reaches it.
Read more about the AirVisual Pro device here.
We measure the air
With CO2, everything is easy: we close the windows, go to bed with my wife, and after a couple of hours the level of carbon dioxide rises from 600 to 1200 ppm. I wake up at ~1300ppm. With the windows slightly open, it’s cold, noisy and ~600ppm.
Volunteers with AirVisual Pro instruments share PM2.5 data. This data is collected on a map here, and there is also such a map. Typical PM2.5 levels in my area are 12 µg/m3 or 50 US AQI. On weekends there are often spikes in PM2.5 levels up to 20-30 μg/m3 - most likely these are emissions from enterprises.
Inside my apartment the PM2.5 level is 10-20% lower than outside at the same time. Why? I don't know, maybe there is a device error.
How else were PM2.5 measurements useful to me?
- When my wife and I were choosing an apartment, we went with the device. If the environment is important to you, this is an objective way to measure it. In articles “The 10 cleanest areas of the city” there is often bullshit.
- When turning on the humidifier, we noticed that the PM2.5 readings were rising sharply. It turned out that ultrasonic humidifiers should only be filled with distilled water. Otherwise, the humidifier will release impurities from the water into the air. This is harmful to health, so we no longer use an ultrasonic humidifier.
- When we iron clothes, PM2.5 levels rise. There is research on this topic. It’s not clear what to do about this, but we know that the procedure is harmful to health
I realized that there were definitely problems in my area and my apartment. The air is dirty and CO2 accumulates quickly.
Advantages and disadvantages
The main advantage of the valve is that it can be used to easily increase the efficiency of the ventilation system. In this case, minimal funds are invested. The device itself is inexpensive, and its installation is just a matter of drilling a hole in the wall where the device is installed.
And other benefits:
- If we compare a wall-mounted supply ventilation valve with a window valve, it is many times more efficient and powerful. Its productivity varies between 60-70 m³/h. This is a serious indicator.
- There is no need to open windows. That is, the service life of the latter’s fittings, and therefore the window structures themselves, increases.
- Air from the street, passing through the filter, becomes cleaner. Dust will not pass through the valve, which means that the rooms will be much cleaner than if the rooms were ventilated through the windows.
- There is always the ability to regulate the incoming air flow. That is, you can adjust it taking into account the size of the room and the entire house, as well as taking into account the season.
- Air exchange through the valve is not accompanied by heat losses compared to window ventilation.
- The device operates offline. It doesn't require any energy.
The air flow is regulated by a damper Source pbs.twimg.com
See also: Catalog of companies that specialize in the installation of ventilation and air conditioning systems.
As for the shortcomings, they primarily relate to incorrect installation. And although manufacturers describe this process in detail in their instructions, home craftsmen manage to do something wrong. That's why:
- A hole in the wall reduces the strength of the supporting structure. The risk of loss of integrity is negligible.
- If the installation is carried out incorrectly, there is a high probability that the wall where the valve is installed will freeze.
- In severe frosts, cold air may leak through the device.
- The cylinder installed inside the wall becomes clogged with dust over time. It will have to be removed periodically.
It is believed that the supply valve is a source of penetration of cold air into the rooms from the outside, which reduces the temperature inside the house. If you install it in the wrong place, this can happen. Therefore, most often the device is mounted in the wall between the window sill and the heating radiator. That is, cold air entering the house is immediately heated by the heat of the heating system radiator. Of course, no one forbids installing the valve in some other place, but under the window is an ideal area.
It is better to carry out installation above the heating radiator Source strojdvor.ru
Average prices in the Russian Federation
Currently, there are several large companies operating in the Russian Federation that produce and sell supply window systems. Average prices for products in the category under consideration :
- Aereco EMM 25 – 35 m3/h – from 3500 – 3700 rub.
- Air Box Eco with built-in filter – from 900 rub.
- Air Box Comfort, overhead design - from 450 - 500 rubles.
- Norvind Classic, with adjustable damper and deflector - from 1800 - 2000 rubles.
- Ventec VT 501, with automatic adjustment – from 800 – 850 rubles.
The prices listed above may vary slightly depending on the region of sale, the internal policy of the official dealer, the need for installation and seasonality.
Selection rules
Before purchasing an exhaust ventilation valve for the wall, you need to determine the cubic capacity of the house in which natural ventilation is organized. Based on this, the diameter of the valve is selected, and accordingly its performance, as well as the number of installed devices.
In addition to performance, it is necessary to take into account the permissible operating temperature, cylinder length, and control method. All these parameters may be different for different manufacturers. And this will need to be taken into account.
For example, the average productivity is 40 m³/h. Taking into account the volume of the house and the number of people living in it, the brand of the device is selected. Some manufacturers are required to indicate the operating temperature range in the product data sheet. And if such a parameter is specified, then you should not violate it.
The length of the cylinder is determined by the thickness of the wall into which it is installed. As for the control method, supply units are presented on the market in the form of devices with manual or automatic control. The latter are the same valves, inside of which a hygrostat is installed - a device that monitors the humidity of the air inside the house. You only need to set the required humidity on the panel, the hygrostat itself will not only monitor it, but also issue commands to open or close the damper.
The performance of the inlet depends on its diameter Source 4shop.ru
Comment
All described problems with Minibox Home-350 ventilation:
- are subjective, and their presence is only my opinion: if only because I cannot guarantee the performance of my device for measuring pm2.5. In addition, the measurements were made with a difference of minutes or hours between each other, which already makes all experiments inaccurate.
- Applies to my installation only; other customers may not have them.
Everything described in the article is my personal opinion. All statements about products and companies are my value judgments and not facts.
If there is no ventilation system in the house
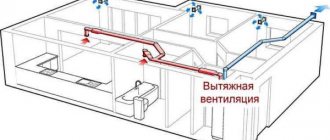
What is ventilation - it is a system consisting of two holes. Air from outside enters one, polluted and humid air exits into the other. Air exchange occurs, which is the key to the health of people living in the house. If exhaust ventilation in the house was installed during construction, then installing a supply valve solves all problems.
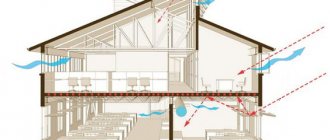
What if there is no such ventilation? Then you will have to create it. To do this, a supply and exhaust ventilation valve is installed in the wall, the latter is mounted under the ceiling. In this case, both devices are installed on opposite walls to create an air flow from bottom to top and diagonally across the room. That is, the process of natural ventilation follows the laws of physics, where warm air rises to the ceiling and creates pressure there. And cold air from the street comes in from below. It turns out to be a kind of draft that is not felt.
Today, manufacturers offer exhaust valves with a forced air exhaust system. Simply install a small fan in the cylinder, which turns on when necessary to quickly ventilate the room. Some models are equipped with a relay that can be used to regulate the speed of rotation of the fan blades. That is, air extraction can be organized in intensive mode or in weak mode.
Exhaust valve in the wall Source yandex.net
How to embed a grille into a window sill: instructions
Installing a plastic grille into a plastic or chipboard window sill is quite simple and anyone who knows how to work with a grinder and a jigsaw can handle this process. In this case, the scope of work will be approximately as follows:
Make markings on the window sill - circle the bottom of the grille with a pencil. To make the lines even, correct them using a regular school ruler. Using a grinder or jigsaw, make cuts along the marked lines. Remove the cut out portion of the window sill. Use sandpaper to sand the cut areas, removing sharp burrs.
Carry out the work carefully, without scratching the window sill board itself. Insert the grille into the slots so that the blinds “open” towards the window frame and warm air is directed onto the glass. The grille can be glued with polymer glue. But, in order not to complicate its care, it is recommended not to strengthen it in this way.
Such installation is not mandatory and therefore its implementation depends on the preferences of the customer. Before final installation of the ventilation grille, collect dust from cutting holes with a vacuum cleaner.
You can install a ventilation grille in a window sill made of plastic or wood with your own hands. Stone, concrete and other window sills are best left to qualified specialists.
Installation of the supply valve
Installing the device is a dusty and noisy process, because you have to check the wall. To do this you will need a diamond bit and a hammer drill. The craftsmen use a special tool – a diamond drilling rig.
The hole drilled in the wall must be cleaned of dust, for which a vacuum cleaner is used. Then the insulating material is inserted into the hole. Usually, today they use shells made of mineral wool or polyurethane, which are sold in 1 m lengths. They are simply cut to fit the width of the wall.
Note! The diameter of the diamond crown is selected to match the diameter of the insulation.
Next, the valve cylinder is inserted into the shell. From the outside, a decorative grille is attached to the wall with self-tapping screws and plastic dowels. With an internal head with filter material.
Problems
Problem #1 . CO2 levels affect my productivity. I have plastic windows in my apartment, so when the windows are closed, the CO2 level rises to unproductive levels within 2 hours. Opening the windows is drafty, cold and noisy, we needed a better solution.
Problem #2 . Moscow has dirty air: it negatively affects health. I am at home at least 10 hours a day. Therefore, the air in the apartment needs to be purified.
Window supply valve
As promised above, we will give a little information about the ventilation valve for plastic windows. Let's start with the fact that the tightness of plastic windows has led to big problems. Many manufacturers immediately responded to consumer demands. So, various devices began to be inserted into window frames, through which air began to flow into the rooms. Eg:
- ventilated profiles began to be used;
- limiters for opening frames and transoms were installed;
- seals with partial air permeability through them were used;
- glazing beads were installed, the design of which included an opening valve.
Opening limiter for plastic window frames Source www.ufa-okoshko.ru
Window supply valves have gained great popularity among consumers due to their high air exchange efficiency. They are presented in three types on the market:
- Folded. This device cuts into the window frame. That is, the installation can be carried out on the existing window structure without changing other parts or elements. This variety has one drawback - low productivity up to 5 m³/hour. But these are the cheapest valves.
- Slotted. These models are installed in the gap between the frame and the sash. This is what complicates the installation process. Otherwise, the devices are better than folded ones due to more efficient air exchange - up to 20 m³/h. The size of the inlets is limited only by the length of the gap.
- Invoices. These supply valves are installed on plastic windows during the installation of double-glazed windows. And on the one hand this is a minus. Another negative side is that the devices transmit a lot of noise, so they are not recommended for installation in homes. But the devices have high productivity - up to 100 m³/h. They can be installed in both fixed and opening windows.
Adjustment
Adjusting the supply valve after its installation, or when changing seasons, is necessary to adjust the thermal characteristics of the enclosing structure, as well as to change the intensity of the air flow entering the room.
Automatic
The design of such a valve is based on a flexible petal , which automatically bends or closes when the humidity level in the room changes. Manual adjustment of such a product is possible, and is performed in cases where the technical characteristics of the product do not meet the requirements for the room or the wishes of the user.
To calibrate the automatic valve, you will need to dismantle the protective casing and then bend the movable flap of the equipment.
Manual
It is considered the most reliable way to change the intensity of air flow. To perform the procedure, you need to follow the technological map :
- Adjusting the position of the louvre grille.
- Setting the locking valve to the most comfortable position.
- Changing the position of the internal blocking flap, which is responsible for the internal cross-sectional area of the product.
When manually adjusting, it is important to constantly monitor the air temperature outside, since the consumer may accidentally allow the room to become overcooled, which will affect the microclimate and heating costs.
Rating of the best models for ensuring high-quality ventilation
10KP Era D100
An economical option from a Russian manufacturer. The design is easily installed on the window, using a minimal set of tools. The kit includes a high-quality filter and a noise-insulating element. The valve design allows you to control the intensity of air flow.
The average cost is 780 rubles.
10KP Era D100
Advantages:
- Efficiency;
- Does not form condensation;
- The filter prevents the penetration of dust and insects;
- Convenient installation;
- Easy adjustment;
- High-quality air exchange.
Flaws:
- Not found.
DomVent Norvind City
A device with in-wall installation that will help organize proper ventilation of the room. Productivity – 30 m3/hour. No wall drilling required for installation. The fastening is carried out to the bottom of the window sill, after which it is foamed to ensure better sealing. The filter used is G3. Recommended operating temperature -40…+80 degrees. The weight of the device is 1250 grams. The manufacturer provides a 5-year warranty on the product.
Sold at a price of 2,470 rubles.
DomVent Norvind City
Advantages:
- High quality filter;
- Does not impair sound insulation properties;
- No heat loss;
- Good performance;
- Installation without drilling.
Flaws:
- High price.
Ventec VT 601
An excellent budget option from a Polish manufacturer that will last over 7 years. The design capacity is 25 m3 per hour. It is recommended to use the valve in places with little noise. The peculiarity of the product is that after the influx, the air is directed to the ceiling, which eliminates the occurrence of drafts. A special mesh is installed on the visor, which prevents the penetration of insects.
The average cost is 670 rubles.
Ventec VT 601
Advantages:
- Low price;
- Stable air flow;
- Universal valve length;
- Mesh on the visor;
- Three regulation doors;
- The incoming air does not create a draft.
Flaws:
- Not detected.
What is taken into account during installation?
For efficient operation, not only the temperature difference, room features, etc., but also the correct installation are taken into account. Installation should only be carried out by a person who knows all aspects or is familiar with the basics. If the user has no experience in this area, then it is not recommended to assemble the product yourself, despite the ease of work. After all, to carry out this process, you must carefully follow the requirements and carry out each step in accordance with the instructions. For example, to install a slot valve you will need:
- Remove the small piece of seal that is present on the frame. A specific value is deleted; the entire upper seal cannot be removed unless required by the design of the device.
- A new sealing element is installed, which is several times thinner;
- Self-tapping screws are used to secure the equipment.
Professionals can perform installation in a different way. Pull out the old glass and install a new one, which will be smaller. In the place where the gap is formed, an inlet structure is installed. This method requires a lot of money, so it is used only when a person plans to completely replace the windows.


