One of the popular finishing options for ceilings are tension structures. They are easy to install and subsequently maintain. With their help, it is possible to create a real work of art indoors. Stretch ceilings also have a number of other advantages that set them apart from other options.
One of the main features of stretch fabric is its wide design possibilities. Tensile structures allow you to realize almost everything that is planned. Various lighting options complement the design idea. With their help, a special atmosphere is created in the room. In order to install the lamps, you need to make holes in the suspended ceiling. This can be done even when the structure is already tensioned.
Installing a chandelier on a suspended ceiling
Is it possible to make a hole in a suspended ceiling after installation?
The chandelier, spotlights and curtain rods are installed after installing the tension structure. But they are attached not to the canvas, but to mortgages or directly to the base floor. To fix it, you need to make holes in the tension surface. This is done after installation.
The exception is pipe bypass, in which case the holes are cut before the fabric is stretched.
The cutouts can be of different sizes: very small for self-tapping screws, larger ones for spotlights or fire detectors, and large ones for chandeliers. And here concerns arise, since you need to make a hole without damaging the suspended ceiling. The technology depends on the material of the canvas.
For stretch ceilings, synthetic fabric with protective impregnation or polyvinyl chloride film is used. The canvases differ not only in appearance, but also in the properties and features of working with them:
- PVC film is a fragile material; it easily comes apart even from a small cut, especially when stretched. The result is a wide, irregularly shaped gap. And near the round holes it stretches out and becomes thinner. As a result, the PVC fabric loses its properties. In particular, it begins to let water through and therefore does not save the situation in the event of a flood. Therefore, before making a hole, the material is strengthened in the right place.
- Fabric fabric is denser and more durable. It is more difficult to accidentally cut or perforate it and reinforcement is not required. Simply cut a hole in the fabric with a sharp knife without any additional steps. The structure of the material will not allow it to separate.
Source
Types of paintings
Considering that this type of finish is one of the most expensive of all existing options, the possibility of self-repair if it is damaged is of interest to many. There are cases in which everything is not so scary and a minor cut or tear can be repaired on your own so that the location of the damage will not be noticeable and will not in any way affect the further operation of the coating.
PVC film
To begin with, it is recommended to understand what suspended ceilings are. PVC film is often used for their production. To carry out high-quality repairs and generally about its feasibility or possibility of application, it is necessary to know about the structure of the material and its thickness.
The film is varied and allows you to create canvases of any shade
PVC for the ceiling has a uniform structure over the entire area of an elastic, durable fabric with a thickness of 0.12 - 0.2 mm. Externally, the ceiling can be glossy or matte. Another variety is satin fabric, made using a special technology based on PVC, which outwardly imitates the fabric of the same name. The difference lies in the soft, radiant pearlescent luster and ability to diffuse reflected light.
Fabric material
Fabric ceiling is another type of tension covering. Essentially, it is a polymer (PVC) impregnated polyester support canvas. The reinforcing base makes it less elastic, but more resistant to mechanical stress.
The advantage of fabric over PVC film is its ability to “breathe”. Although, on the other hand, the film does a better job of retaining water in the event of a leak from the upper floor.
PVC can withstand significant pressure
Table 1. Comparison of materials
| Type of canvas material | pros | Minuses |
| PVC film | withstands pressure from a significant volume of water for a long time; the surface is easy to clean; is antistatic; does not burn; can be glossy or matte; does not accumulate dust. | cracks when the air temperature drops, so it cannot be used in unheated rooms; vulnerable to mechanical stress; presence of a joining seam; complex repair. |
| Fabric | provides natural air circulation; not afraid of temperature changes; resistant to mechanical stress; seamless coating; simple repair. | low moisture resistance; does not protect against flooding; cannot withstand severe pressure due to low elasticity; difficult care; only matte surface; small selection of shades. |
How to make a hole in a suspended ceiling: several simple options
Hole in suspended ceiling
How to make a hole in a suspended ceiling? This question is very often asked not only by owners of already installed stretch ceilings, but also by those who are just planning to make such a ceiling at home. After all, this type of ceiling finishing came to us relatively recently, and not many people know about all the details of its installation and maintenance. This article is intended to shed light on some of these details, or rather to tell how holes are made in the stretch ceiling film.
Models
There are several models of craft cabinets on the market.
Suspension
The cabinet has small dimensions and is hung on the wall. The door usually folds down, forming a convenient desk for work, similar to a secretary. Inside there are trays and drawers where you can put all the necessary materials for needlework. The convenience of this model lies in the fact that such a cabinet can be placed in any room of your home.
The facade can be matched to the main furniture of the room, and it will not stand out from the general style of the room. When closed, craft materials will not be visible, and the room will be in absolute order.
Floor
This furniture attribute requires a large area for its installation. Outwardly, it looks like a regular wardrobe, but when you open it, you get a whole organizer where you can place a huge amount of material, laying it out for convenience on various shelves and trays. It can be either small in size, for example, the size of a desk, or occupy the entire height of the room.
Very often, such cabinets are made to order by needlewomen so that they can have the functionality that is needed specifically for your activity. After all, the needs for filling such furniture, for example, for machine sewing and knitting, differ significantly. Typically, shelves in such cabinets are placed not only on the wall, but also on the doors. An interesting model is the matryoshka wardrobe. Its doors have wheels, and in addition to the fact that they fold out, the facades have another turn.
Built-in
A craft closet can also be an entire pantry. For such an attribute, you need to allocate several square meters of space and make a built-in structure. Externally, such a cabinet is very similar to a dressing room and can be corner, L-shaped or straight. Its shape depends on the layout of your room. The table here can be either folding or stationary. And the content depends only on your wishes.
How to make holes for lamps during installation
Those who see a suspended ceiling for the first time have a question: how does the lamp stay there and why does the canvas under it not sag . The answer is quite simple - before stretching the film and installing the lamps, mortgages are installed, to which the lamps are attached (read how to repair a ceiling).
And if you decide to make a suspended ceiling yourself, or you are simply interested in learning the technology for making holes in a suspended ceiling, we will try to describe this process in as much detail as possible:
- You should start by marking the places on the ceiling where the lamps will be installed in the future.
- The next step will be the installation of the markings themselves. You can buy ready-made mortgages in the store, but this is not necessary. You can make them quite easily yourself.
To do this, you need to cut rings from plastic 5-10 millimeters thick and secure them to the main ceiling using plasterboard hangers. The diameter of the ring must match the size of the lamp, so all lighting fixtures should be purchased in advance .
- Next, all installed rings are adjusted in height by bending the hangers. They should all be at the same level, or rather at the level of the film, which will be stretched subsequently.
- We supply wiring to all lamps.
Tip: It is recommended to install all the lamps and turn them on immediately after installing the mortgages. At this stage, it is still possible to add, remove or change the placement of lamps (see below on how to paint the ceiling plinth). It will be impossible to do this after stretching the canvas and cutting holes.
Ceiling with installed fixtures for lamps
- The ceiling fabric is stretched. Then you need to find by touch the places where the mortgages are installed and mark them with a marker on the film.
- A ring is cut out of thin plastic, the size of which should match the size of the hole for the lamp.
Cutting a ring out of plastic
- You can also buy ready-made rings made of special thermoplastic in the store, which will greatly simplify your task.
Errors when piping
The operation must be carried out carefully, slowly, with clean hands.
The main mistakes that result in an unsightly hole, wrinkles, creases, cracks or damage to the coating are:
Incorrect measurements and calculations; fabric shrinkage was not taken into account. It may not be enough for the contour, or deformations will appear. It is necessary to carefully measure distances, diameters, and take into account shrinkage.
The hole does not match the pipe diameter. When making or purchasing a plastic rim, you need to leave a margin of 1...2 mm for a loose fit of the part.
Carrying out the incision by weight. The result is a crooked, ugly joint line, which must then be masked.
Melting of the canvas due to insufficient thermal insulation of the chimney or heating pipe. This leads to a change in color and deformation of the coating at the point of contact with the hot surface.
Careless work with a gas gun is dangerous not only when bypassing a pipe. This is one of the factors that can ruin the result of the entire work or even cause a fire.
It is necessary to follow the technology of work production.
Careless cutting of PVC film where the pipe passes. This can be avoided by gluing a reinforcing plate in advance.
If the ceiling is already installed
If the ceiling is already installed and there is a need to make a hole, do not be discouraged, because this is also a completely solvable problem. But for such work, we advise you to contact the company that installed your ceiling, because if you do it yourself, the warranty for both the work and the canvas disappears.
If the warranty period has already expired, or the suspended ceiling was installed independently, then you can use our advice:
Important: When cutting any holes in the film, it must be reinforced with plastic rings, otherwise it will tear.
Option 1
You decide to install additional lamps or a chandelier.
When installing lamps, the canvas must be removed from the ceiling and the mountings must be installed under the spotlights. Then, the film is stretched again. After gluing the plastic thermal rings in the specified places, holes for the lamps are cut out in the canvas.
An exception is installing a chandelier on a hook. In this case, it is not necessary to dismantle the film. You just need to cut a hole along the inner perimeter of the glued ring and fix the hook on which the chandelier will hang to the main ceiling. This hole should be sufficient for normal installation of the hook.
Option 2
It is necessary to make a hole in the suspended ceiling to drain water after flooding.
If you are unlucky and your ceiling was damaged by flooding from neighbors above, do not be upset. If there are lamps or chandeliers on the ceiling, there is no need to make any additional holes. Simply turn off the power to the room and use a hose to drain the water from the ceiling through the hole for the lamp. If there are no such holes, you can simply pull the edge of the canvas out of the baguette and remove the water. After this, the film should stretch itself and acquire its original appearance.
Please note: when PVC film is flooded with hot water (more than 65 degrees Celsius), the canvas stretches and becomes unusable. A complete replacement of the canvas will be required, because it will no longer be possible to stretch it.
Option 3
Opening for access to electrical boxes and other communications.
If you need periodic access to communications that are located above the film, then constantly removing the film is not a good solution. In this case, it is better to make a small “window”. To do this, you will need to cut out a frame from plastic 3-5 millimeters thick of the shape we need. The frame does not have to be round; it can be square, triangular, rectangular and other shapes. This frame is glued to the film, and then a hole is cut along the inner perimeter of the frame.
It is very important to note that such a hole should be secured to the ceiling using a piece of wire or fishing line - otherwise, the canvas will begin to sag due to the weight of the plastic (see How to paint a ceiling plinth).
Making a hole in a suspended ceiling is quite simple, the main thing to remember is that this should be done carefully, carefully measuring everything . Don’t forget the very useful saying in construction: “measure twice, cut once” and you will succeed.
Source
First way
This method of mounting the ring is simple, since in this case the ring will be installed on the outside of the stretch ceiling.
In this case, you can install the ring in two ways:
- The first method is best suited for seamless white fabrics - most often it is white plastic that is selected for the ring. In this case, the ceiling is completely filled so that on each side the distance to the pipe is about 20 cm. The canvas is cut right in the middle of the pipe, inserted into a baguette, after which the ring is threaded through the canvas and glued to the ceiling.
- If the ceiling is colored, then before installation the ring must be covered with a material identical to that from which the canvas is made.
This design is a little more convenient because, firstly, the ring is installed much more evenly, and secondly, the chance of making a mistake due to the fact that the pipes are removed too far from the wall or are seriously inclined relative to it is significantly reduced. In addition, this method is really a very simple solution to how to bypass pipes with a suspended ceiling.
Is it possible to make holes in a suspended ceiling?
Sooner or later, the lucky owners of fabric or film decor will definitely have a situation where they need to make a hole in the stretch ceiling. There can be any number of reasons for performing an operation that is unsafe for the canvas. Starting from accidental damage to the film to the need to cut mounting holes in the suspended ceiling for installing a lamp.
On a symmetrical cut, the fabric practically does not tear
For what
There are many situations when you need to cut an opening in a tensile structure.
From the banal installation of a chandelier to partial repair of the canvas by installing a lighting fixture at the site of a break. True, in this case, you will already have a hole in the film. Another common situation is that you are installing a structure with your own hands and you need to do everything yourself - install lighting devices, wrap heating pipes and other communications with a stretched covering. It is impossible to do without technological openings here. Therefore, you will have to make holes and it is better to do everything right.
Is it possible to make holes in a suspended ceiling?
For fabric panels, the problem of cutting a hole is not as critical as for PVC. Still, the canvas has a reinforcing layer, and if you make a hole in the ceiling, then the maximum decorative coating will lose its original appearance. It is clear that stretched polyvinyl chloride film is not the best material for experimenting with punctures and cuts, but sometimes it is simply necessary to make a hole in the stretch ceiling for a self-tapping screw to attach a lamp or hanging decor.
What can you expect from an accidentally punctured hole in the ceiling:
- If the fabric is not tensioned correctly, there are local zones of constriction and ripples, then the hole is very likely to turn into a long hole or rupture line;
- The second option may be more dangerous. If you cut a hole in a suspended ceiling with a sharp and flat blade, for example, a stationery knife or scissors, then the film or even fabric is guaranteed to be torn in length to the nearest obstacle.
External mount
Without this work, the ceiling covering in the area where the pipes pass will not only look unsightly, but may also tear when the panel is tensioned.
And if you need to bypass the element of a gas water heater, then the ceiling material may well quickly become unusable, given the high temperature in the heater pipe.
This is done in various ways, the choice of a specific method is determined by such factors as:
- tension material design;
- PVC film or fabric is used to construct a suspended structure;
- location of pipes and their number;
- the ability to make pipe covering elements with your own hands if there are no similar parts on sale that are suitable in size for your pipes.
What tools are needed to make a hole in a suspended ceiling with your own hands?
In order to make a hole, it is important to choose the right PVC glue. Not for patching and repairing, just for making a hole or hole, the size of the hole depends on the task at hand.
To work on a suspended ceiling you can use:
- Ruler, tape measure, marking marker;
- Scissors or a sharp knife, either a stationery knife or a regular knife with a blade width of no more than 10 mm;
- Syringe with needle;
- Hammer and automotive perforation tube for making silicone and rubber gaskets;
- Screwdriver with chuck for the smallest drills 1-3 mm.
Consumables for large holes on a suspended ceiling will require heat-shrinkable rings, pieces of thin PVC plastic, in some cases you can use a polyvinyl chloride tube with a diameter of 6 mm.
Without glue, the material cannot be cut
Required knowledge
First you need to find out how the ceiling will react to a puncture. It all depends on what type of stretch ceiling is used in your case, that is:
- polyvinyl chloride fabric,
- vinyl.
Option 1.
As a rule, difficulties with punctures and cutting arise with polyvinyl chloride film sheets. The fact is that polyester is “afraid” of punctures. But if the fabric is properly tensioned, then after the puncture it will not unravel.
Official instructions from some manufacturers inform us that the material allows you to safely install lamps without fear that the hole will spread further. Therefore, you can also screw in a self-tapping screw without fear.
Keep in mind that luminaires in tension systems are mounted in specially prepared places. There should be a solid platform where screws or other fasteners will be screwed in. If there is a need to install additional lighting fixtures, which was not initially planned, you will have to remove the canvas and then install a platform for screwing in the fasteners. No other way.
Option #2.
With vinyl films the situation is somewhat different. Here a puncture/cut will render most of the fabric unusable. Therefore, all holes in it are made using special technology. Its essence is to strengthen the material around the work area - an o-ring seal is glued.
To do this, you can use both factory-made and homemade plastic rings, and glue suitable for PVC. Now let's talk about how to prevent unintentional tearing and keep the ceiling looking attractive.
How to cut a hole in a suspended ceiling
It is not difficult to make a hole of the required size in the ceiling decor. The hole can be cut without much effort using sharp scissors. To do this, the material is laid out on the table, marked and a hole of the desired size and shape is cut out. It is more difficult to make a window in a tension fabric that is already installed on the ceiling frame. The material springs and bends, so you may not get an even cut line.
Therefore, if you plan to make holes in PVC film or fabric, even before installing it under the panel, install a backfill made of timber or plywood, and the panel itself is sealed on the back side with a piece of plastic. Such preparation will provide a fulcrum when working with a knife and will protect against accidental rupture of the tension film when making a cut.
How to make a hole in a suspended ceiling for a chandelier
Sticking embedded sheets of plastic often leads to the appearance of “bumps” and folds on the canvas, so experts do not particularly favor the use of additional stickers. To install pendant lamps such as chandeliers or bell lamps, special transition elements in the form of edge rings are used.
The glue sets in a few seconds
Typically, a chandelier requires a hole measuring 60-70 mm, but this is not the limit; using 300-450 mm rings it is quite possible to make a large hole in a stretch ceiling.
The large size of the lamp is clearly not a hindrance
The process of making the through hole itself is as follows:
- A ring is glued in the center of the future hole; you need to hold it for 10-15 seconds at most so that the overlay firmly adheres to the surface of the ceiling;
- Using a sharp blade, we cut the inner sector in the direction from the center to the periphery into 4-6 petals, bending the edges inward;
- If a spotlight is installed, then the edges need to be cut off, and another safety ring is glued on the back side. The canvas appears to be sandwiched between two glued parts.
We glue the ring to the embedded block or mounting adapter. This is done in order to minimize the load on the ring from the stretched tension fabric.
The ring holds the canvas firmly
If you need to equip an inspection hole or hatch in the ceiling finish, then the hole cutting pattern will be somewhat more complicated. Firstly, the perimeter of the future hole is sealed with tape according to the markings. Secondly, the film or canvas is cut with a knife, scissors or scalpel with an allowance on the inside of at least 20 mm. Next, a plywood box is installed in the cut-out opening, which is attached to the ceiling with a steel profile. To fix the edges of the panel, a corner baguette profile is stuffed along the end of the plywood. All that remains is to secure the edge of the stretch ceiling and secure it with a glazing bead.
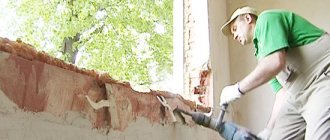
How to make holes in a suspended ceiling for a pipe
Any apartment has at least two or three water heating riser pipes. As a rule, they pass at a short distance from the wall and frame, so the process of making a passage hole looks much simpler than in the case of a chandelier.
Second way
The second method, which allows you to combine a suspended ceiling and heating pipes, involves installing a ring under the canvas, for which you must perform the following steps:
- First you need to warm up the part of the canvas that will be tucked near the pipe;
- Next, the heated fabric is stretched manually, after which the middle of the pipe is marked on the harpoon;
- You need to place a fairly hard object under the place that will be glued, and then apply glue;
- The harpoon mark is aligned with the cut, after which a ring is glued at a distance of 0.5 cm;
- The ring needs to be held for a few seconds until the glue completely hardens;
- Next, using a sharp knife, you need to cut out part of the canvas along with the harpoon along the cutting line, and the hole in which the pipe will be is cut with a cross, after which the resulting edges are folded inward and glued;
- A ring with glued material is put on the pipe;
- A “lock” is cut out of plastic, which must be glued with the back side to the cut of the ring, and the harpoon is connected with glue and a small piece of cloth;
- The fabric is stretched from the corner closest to the pipe.
This method is quite effective, but it is only suitable for PVC ceilings.
Conclusion
Piping pipes for suspended ceilings is quite simple. In this matter, the main thing is to think through all your actions in advance, prepare well and carry out each step competently.
Advice from professionals
One of the ways to make a hole in a suspended ceiling is used for cases where the ceiling covering has several inserts and a large number of lamps. In this case, professionals recommend using simple inserts made from a regular polyvinyl chloride tube with a diameter of 4-6 mm.
They can be easily found at hardware stores and are used for watering systems and food transfer systems. In fact, you just need to cut a piece of tube 5-10 mm long, it will serve as a connecting ring, only of a very small size.
The area under the hole in the ceiling is sealed with tape. Next, using a tubular punch, a hole equal to the diameter of the tube is punched in the film. A homemade sleeve is glued into the hole with “Tsiacrine”, and after 5-6 minutes the tape is removed. The protruding part of the tube must be cut off with a blade. After 10-15 minutes you can install the lamp.
Cutout with plastic gasket
Now let's figure out how to make a slot in the canvas. We will start with a plastic gasket, which will serve as a kind of bandage and will not allow our panel to crawl, in addition, in this case, the design of the slot will become elastic and neat in appearance.
- We take plastic 1–2 mm thick and make a square out of it, slightly larger than the designated pipe.
- In the middle we also make a hole with a margin, wider than the pipe (6–7 mm) - the bandage is ready.
- We stretch the panel throughout the room, not reaching 20–25 cm from the pipe, cut it in the middle of the pipe and tuck it behind the baguette.
- We thread our gasket into the pipe and glue it to the material.
- Cut off a piece of material and mask the ring.
- We hide the edges inside the structure.
This option is easy to implement, even if the pipe runs far from the wall. There is a slightly more complicated version of the cutout for the pipe - the gasket is hidden inside the ceiling covering:
We install the bandage gasket inside the ceiling. Before filling the material into the baguette profile, we warm up the part where the pipe should be
Carefully pull the heated piece towards the pipe using a “harpoon”. Carefully mark the center of the pipe
In place of gluing, we make a backing from a smooth and hard material, lubricate it with glue, align the cut with the markings on the harpoon, glue our ring and release the harpoon profile. Press and hold the O-ring for 20–25 seconds. Using a mounting knife, we cut the tension material to the size of the ring. We cut the pocket for the pipe crosswise. The sectors resulting from this procedure are folded inward and glued. We put the fabric with the ring on a pipe made of the same plastic, make a lock and fasten it on the other side of the ring. In this case, the harpoon is glued together with a piece of cloth. We stretch the material.
The option is, of course, interesting, but it is only suitable for ceilings made of PVC film. In the case where there are two pipes and they are located next to each other, there is only one ring. It's the same process, just a little more complicated.
Now that we have dealt with the question “Is it possible to make a slot for a pipe in the canvas with your own hands?”, Let’s proceed to the cutouts for lighting fixtures.
General recommendations for room lighting
Various types of devices are used for lighting. More traditional - chandeliers. According to the method of fastening, they are divided into suspended and overhead. The first are mounted on a hook, and the second - on a bar.
Chandeliers also differ in the following parameters:
- size and number of lampshades;
- shape (stretched down or flatter);
- direction of the horns (look at the ceiling, towards the walls or floor);
- material (metal, glass, crystal, fabric, wood and their combinations);
- colors and styles (classic or more modern).
Another type of lighting fixtures is spotlights. They are smaller than chandeliers in size and beam angle, so they are often used in groups. Depending on the type of fastening, there are overhead and recessed into the ceiling. Some have a rotating mechanism (hinge or flexible rod) that allows you to change the angle of inclination. Such devices are called spots.
Spotlights of all types can be combined with chandeliers or used separately. They also differ in shape, color, materials and design. Some overhead models even have pendants, just like chandeliers.
When planning lighting, take into account that it is divided into different types with their own requirements for each:
- general - unites the entire room, maintains an average level of illumination;
- additional - increases brightness where it is needed (in the work area, for reading, etc.);
- accent - highlights interior items, works of art, etc.
The chandelier is intended for general lighting. Point devices, depending on the number and location, are capable of performing all tasks. But for additional and accent lighting, other types are also used - table lamps, wall sconces, LED strips.
Spotlights have a limited distribution angle of the luminous flux; this must be taken into account when planning the location. In work areas, lighting should be placed in such a way that the light is not blocked by the human body.
Spotlights and overhead chandeliers are attached to the platform, which is installed in advance. After installing the canvas, a hole is cut in it, having previously strengthened the PVC film with a thermal ring, and the device is installed. Therefore, the location of the lamps on the ceiling must be planned in advance.
There are several types of light bulbs on sale:
- incandescent lamps;
- halogen;
- luminescent (energy saving);
- LED
With suspended ceilings, it is advisable to use the last two types. Halogen and incandescent lamps get very hot and can damage the canvas. Only low-power ones can be installed (no more than 40 W for film ceilings and 60 for fabric ceilings).
It is also important to ensure that the body does not overheat and tear the fabric. Because of this, lamps with a metal base or sharp corners cannot be used.
And the distance from the chandelier to the film should be at least 20 cm (and if the lampshades are directed upwards, then 30 cm).
Slots for other purposes
A hole for draining water will come in handy in case the neighbors upstairs flood. The stretch ceiling can withstand several dozen liters of water, but it will have to be drained. How to do this without getting wet and soaking the whole apartment? It is necessary to provide in advance a special hole that closes hermetically. You can attach a lid or a thin hose, the end of which is closed with a plug. The location for attaching the hose must be chosen so that the structure is not visible from the room.
In case of flooding, it will be enough to open the end of the hose and drain the water into a substitute container. If this is not done, in the event of an unpleasant incident, you can pour out the water by tearing off the lamp. This is not very convenient, since the participants in the process end up getting drenched.
Immediately after flooding, before performing any manipulations with the lamps, you need to turn off the power to the room!
A simpler option for those who did not take care of creating holes in advance is to drain the water over the edge of the panel. To do this, you need to unfasten the film near the ceiling plinth, carefully bend it back and drain the water into a substitute container.
Another method is for cutting the holes that are needed to gain access to the wiring section located behind the canvas. First you need to cut out a neat frame from thin transparent plastic. The strips can be up to 5 mm wide - this is enough for the structure to stick and prevent the fabric from tearing. The form is arbitrary. Apply glue to the frame and attach it in the right place.
When the figure is securely fixed, cut out the canvas inside.
How to protect the ceiling from fire?
Before starting work, you need to familiarize yourself with SNiP 41-01-2003 “Heating, ventilation and air conditioning”. These building codes regulate the design of heating and ventilation systems. The text of SNiP indicates the distance from the outer surfaces of the pipes to the floor and roof elements. The distance from the roof elements to the pipes must be additionally protected with materials that are not flammable. Therefore, when creating a passage through the ceiling of the bathhouse, a sufficient distance must be provided from the hot surface of the pipe to the ceiling structures
It is worth paying attention to the fact that during construction many people prefer metal pipes. Therefore, you should familiarize yourself with Appendix K of the above-mentioned SNiP, which indicates the minimum distances from parts of the furnace and pipes:
| Furnace wall thickness, mm | Retreat | Distance from the outer surface of the stove or smoke duct (pipe) to the wall or partition, mm | |
| not protected from fire | protected from fire (in accordance with 6.6.23 b) | ||
| 120 | Open | 260 | 200 |
| 120 | Closed | 320 | 260 |
| 65 | Open | 320 | 260 |
| 65 | Closed | 500 | 380 |
| Notes: 1 For walls with a fire resistance limit of REI 60 or more and a flame spread limit of 0 cm, the distance from the outer surface of the stove or smoke duct (pipe) to the partition wall is not standardized. 2 In buildings of children's institutions, dormitories and public catering establishments, the fire resistance limit of the wall (partition) within the setback should be provided at least REI 60. 3 Protection of the ceiling in accordance with 6.6.20, floor, walls and partitions - in accordance with 6.6.23 should be carried out at a distance of at least 150 mm greater than the dimensions of the stove. |
As you can see, the distance should be 500 mm to wood without thermal insulation and 380 mm to flammable materials with additional fire protection. In addition to the standards set out in SNiP 41-01-2003, you should carefully read the instructions for the chimney from the manufacturer. The documentation contains information about indentations based on the materials used.
How to properly mend or seal a hole in a stretched fabric
If a small cut appears on a stretch ceiling or a small hole in a fabric-type ceiling, you can use the simplest way to eliminate defects in the tension fabric. Using a strong thread and a thick needle, the hole in the fabric is simply sewn up, pulling the edges together. Then select the paint that best matches the color of the canvas and paint over the seam. Most often, small seams and suitable paint make the repair of a stretch ceiling invisible. The best paint option in this case is acrylic compositions; it is recommended to apply them using a soft roller or spray.
To mask large holes in the fabric, you can make a patch. The best option is pieces of material that almost always remain after installation work. You need to take a patch slightly larger in size than the hole in the fabric stretch ceiling. In this case, the edges will be guaranteed to be closed. If it is not possible to find a suitable patch, you can also select a coloring composition in accordance with the color of the fabric.
It is recommended to stick the patch using transparent glue, for example, a rubber-based compound or “Moment”. Most often, such compositions are soft after drying and do not cause deformation of the canvas.
The area where the patch is glued is carefully smoothed to avoid the formation of wrinkles on the surface. To avoid deformation of the canvas, do not press the patch too hard.
To repair a hole in a stretch ceiling or small cuts, you can use regular tape to seal the damage from the inside. In this case, you can be sure that the incision will not increase in length.
Another option for masking holes in the tension fabric is the use of reflective stickers as patches, which can additionally refresh the interior. To solve the problem of how to close a hole in a suspended ceiling, you can take ready-made decorative elements or cut them yourself from a suitable material.
To create a complete decorative composition, you should make several stickers in different places. In this case, the patch sticker will not look lonely and will not attract unnecessary attention.