Features of using hidden cornices in the interior
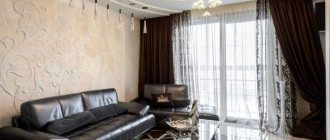
The ceiling cornice is designed to support and fix the curtains, while fitting well into the existing or newly created interior. A hidden cornice allows you to completely cover the entire wall with curtains. It seems as if the curtains are “flowing” straight from the middle of the ceiling, the junction of the wall and the ceiling.
This design does not split the space vertically, which is especially useful when the room is low. The product is also suitable for high, multi-level ceilings. The structure does not have to be mounted only along the wall with a window - it will become an excellent dividing element (in a studio apartment, a room with a bay window, a niche), if necessary, it can be removed with a slight movement of the hand.
The nuances of masking curtains
Before installing a hidden curtain rod, there are a few details to keep in mind:
- When carrying out calculations, the width of the window sill and the radiators under it are taken into account: curtains should not touch the heating equipment;
- When thinking about a hidden cornice, take care of easy fastening of curtains and runners so that they can be easily removed and installed back;
- Installing a cornice wider than the window opening will make the room visually larger.
Thus, masking curtains and cornices becomes part of modern interior design. This design move not only visually enlarges the room, but also gives a harmonious and finished look to the room.
Advantages and disadvantages
The main advantage of the hidden structure is that it is completely hidden in the ceiling, while being invisible. An ordinary cornice must be carefully selected to match various elements of the decor: ceiling decor, furniture, the curtain itself, etc. The hidden one is free from such disadvantages - as a visible interior detail, it is simply absent, which “unloads” the room and makes it more spacious. Another advantage is the possibility of installing hidden lighting at the same time as the cornice. Any type of curtains can be hung on a ceiling object of this type - from very thin to heavy, thick ones. It is only important to carefully secure the product to the ceiling and choose the appropriate material. A hidden object gives the room a very aesthetic appearance.
The element has only two disadvantages - the complexity of installation and the difficulty of replacement. When creating a stretch ceiling, you need to decide in advance where to hang the cornice, install embedded bars in this place, and only then stretch the fabric or film of the ceiling structure.
Types of hidden cornices
There are several varieties of “hidden” structures, differing from each other in fastening and material of manufacture:
- strings - cheap, but not practical, as they can only withstand light tulle curtains;
- multi-row – suitable for two or three types of curtains at the same time;
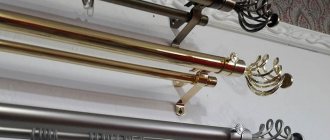
- rod round – used in wide niches;
- flexible - an excellent option for separating corners and bay windows.
The suspension is made in the form of a tire mounted on the ceiling in a specially made niche - a frame is made for this. The suspended suspended ceiling here does not reach the wall a little, although this is not noticeable from a distance. For tensile structures, single-row, double-row, and three-row cornices are used. They are installed simultaneously with the stretch ceiling, since this cannot be done later. For plasterboard options, straight and flexible products are used, which are given different shapes - crescents, waves, etc. Mounting a cornice on a suspended ceiling is also done in a niche, but it can be installed simultaneously with the latter or later.
Cornice materials
Hidden cornices are made from the following materials:
- natural wood;
- plastic;
- aluminum;
- steel.
Plastic is suitable for light, voile or cotton curtains in the kitchen, bedroom, and nursery. Aluminum and wood can withstand heavy loads, so they are installed in the hall, kitchen, combined with the living room, decorated with curtains made of heavy fabrics, with many folds, lambrequins, and tiebacks. The color of the hidden elements is usually white, less often - gray, brown, black. The color does not matter, since the cornice is not visible at all.
Options, installation features
To install a suspended structure, a niche closed on three sides is required - this is done at the stage of assembling the plasterboard ceiling. The curtain should be fastened as follows: at a distance of approximately 20-25 cm from the wall with the window, furniture corners are attached to the concrete ceiling slab, and a wooden beam is attached to them using self-tapping screws or anchors. The center of the beam is determined, a special wall molding is fixed there, which hides the beam. Next, the middle of the niche is determined, where the hidden cornice is nailed.
Another option is to mount not a beam, but a rolled steel angle to the ceiling. Next, ceiling guides are attached to the corner, and a level relative to the walls is outlined on which the fabric will be stretched. The curtain can be installed before installing the timber if a ceiling mount is selected. It is not necessary to decorate the niche itself; you can only install lighting, if provided for in the project.
Installation in a suspended ceiling
A niche is also made in the suspended ceiling, which it is advisable to provide for at the design stage. Recess dimensions:
- width - hanging curtains should not touch the window sill or “lie” on the radiator. If you plan to install lighting, this is also taken into account;
- the most acceptable length is from wall to wall or 25-30 cm longer than the window in each direction.
A wooden beam is fixed a few centimeters from the installation site of the cornice, then a curtain is hung, a baguette is nailed onto the wooden part, onto which later (after installing the curtain hanger) the ceiling fabric is stretched. The cornice is attached to the ceiling itself, made of concrete or wood.
In the ceiling niche, in addition to the suspension itself, it is easy to hide all the extra wires and some other communications.
If you have any questions, feel free to ask:
- Online consultant
- By phone
- In a request for a call back
- In an application to call a surveyor
- Just call a surveyor
- Come to our showroom
They will answer you always and everywhere.
ORDER A CALL BACK FROM A SPECIALIST
PS
Attention! Happy owners of our smaller brothers (really smaller ones: birds, lizards, rodents), order a hidden cornice only with full envelopment! These cute creatures, seeing a niche into which they can crawl, climb. There are many funny (and not so funny) videos on YouTube.
Why are there really smaller ones, even cats manage to be seduced by the ceiling space. Sometimes this ends disastrously for both the ceiling and the living creatures:
Cat on a suspended ceiling
Self-installation: tools, materials
The cost of installation by a master consists of:
- complexity of the product shape;
- type of ceiling;
- cornice shapes;
- material of manufacture;
- number of rows;
- availability of additional functions (for example, installation of an electric drive).
As a result, the cost turns out to be relatively high, so to save money, install the cornice yourself; for this you will need:
- the curtain itself;
- a narrow, sharp hacksaw (a special one designed for cutting knots is suitable);
- metal tape measure;
- long metal profile or ruler;
- square;
- plumb line;
- stationery knife with a double-sided blade;
- roughing plane, for processing the edges of drywall;
- a simple pencil for marking;
- perforator;
- rubber spatula;
- paint and brush;
- reinforcing corners;
- putty, primer;
- stepladder.
Installation of plasterboard box
Plasterboard sheets are light in weight, making them ideal for creating all kinds of ceiling structures, including niches for built-in cornices. Plasterboard sheets are cut into strips 15-20 cm wide. There are several cutting options (straight, double-sided, uneven, round holes), but the usual one is preferable - straight.
The required size is marked on both sides of the sheet, a ruler (steel profile) is applied, and the top layer is carefully cut through it. Next, the material is placed edgewise, tapped on it where there is no cut, the gypsum core breaks, the second, cardboard side is cut with a knife or sawn.
To install the box, purchase:
- a sufficient amount of drywall;
- steel ceiling profile, dimensions of which are 2.7 by 6.0 by 300 cm;
- curtain rails for the ceiling - wooden or aluminum, measuring 2.8 by 2.7 by 300 cm;
- electric drill;
- screws, dowels or staples.
The work is carried out in the following order:
- the distance from the window sill, wall with a window, protruding radiator is measured;
- an allowance of ten cm is added to the resulting number so that the curtains move freely in the niche;
- then a line is drawn, it is drawn parallel to the wall, which will be the edge of the future niche;
- guides are attached in accordance with the line, the distance between the dowels is 60-75 cm;
- to assemble the sidewalls of the box, strips of plasterboard are screwed to the guides, the step between the fixing elements is 10-15 cm;
- the perimeter is marked at the ends of the box, screws are secured, placing the profiles in the direction of the walls of the room;
- use a hacksaw to cut off the plasterboard strips - the sides of the niche, and process the ends with a plane;
- using ceiling profiles, the lathing is assembled, the interval is 40-50 cm;
- Next, the bottom of the box is sewn up, in accordance with the size of the niche; the sides can be made of glass or transparent plastic.
Designers propose making the edges of the box not straight, but wavy, broken.
Covering a plasterboard niche
Depending on its location in space, a plasterboard niche can be:
- on a separate, lowest tier near the window, if the ceiling is multi-level;
- in the form of a box along all the walls - this creates the effect of a two-level ceiling;
- like a special box near the window.
When working on the sheathing, all screws and other fasteners must be “recessed” into the drywall - the caps should not protrude. After the hole with fasteners, the joints of the plasterboard sheets are puttied, and sometimes the entire box is completely coated with primer. The inner corners are processed using a rubber spatula - to simplify finishing, corners made of aluminum or plastic can be placed in them. The corners must be pressed into the putty layer.
When the putty dries, all corners are carefully sanded with fine sandpaper, the dust is removed, and the niche is painted in a suitable color. To diversify the interior, even before installing the cornice, neon tubes, halogen lamps, and LED strips are installed in the niche. With such details, the room will become more comfortable, and curtains, especially plain ones, will “float” in the air. Advice: before starting the sheathing, the place where the cornice will be located must be marked, mortgages and dowels installed under it.
Attaching the cornice
The main disadvantage of plasterboard is its low strength if the load falls on one point, therefore it is permissible to hang only light objects directly on the plasterboard surface. Fastening here is done with Molly bolts, specially designed for hollow structures. If you plan to hang heavier products, under the plasterboard, an embedded beam is mounted directly on the ceiling, onto which the cornice is later screwed. This should be done before the plasterboard structure is assembled.
Therefore, the cornice is usually mounted in a niche, on self-tapping screws and dowels, pendants, and brackets. The standard ceiling is made of concrete; the place for the cornice is marked in advance and the middle is indicated. When the cornice is tire, there are usually holes already made in it, but if not, they need to be drilled. For three-four-row tires, holes are made in two rows, the ceiling is also drilled, the middle of the cornice is fastened with a dowel-nail, and the edges are fastened in the same way. When installing on wooden ceilings, self-tapping screws are used instead of dowel-nails.
Niche for curtains
Even if the ceiling is suspended (see PVC stretch ceilings - installation technology), the window niche is made of plasterboard. Therefore, for work you will need tools for cutting and joining the profile: metal scissors and a cutter.
You will also need tools for processing drywall: a special knife for cutting plasterboard, as well as a peeling and edge plane. The first is used for cutting edges, and the second is used for chamfering them at an angle.
As for consumables. We purchase two types of profiles: PPN 28*27 (UD) and PN60*27 (CD), 6*60 mm dowels for mounting PPN to the wall, and 3.5*25 mm self-tapping screws for fastening gypsum boards.
We think it won’t be difficult for anyone to calculate the required amount. Naturally, you will also need general construction tools: level, marking thread, hammer, hammer drill, screwdriver.
Design selection
There are two options for making a niche. In one case, only the front wall is mounted, and the base floor remains as the bottom. The second option is when the surface of the recess is lined with plasterboard.
The decision in favor of one or another method of arranging a window niche should be influenced by the following criteria:
If you live in an apartment that is not located on the top floor, or it is a private house, and there is a heated attic above, you can give preference to the option with a base bottom, which you see in the photo below. Such a niche will be less labor intensive.
Niche option with base bottom
- In a situation where there is an unheated attic above the apartment, there is a high probability that due to the temperature difference, condensation will collect on the ceiling. Moreover, the niche is also adjacent to the outer wall, and, moreover, is poorly ventilated.
- In this case, it is better to hem the base base, and our instructions will tell you exactly about this option. To prevent condensation from forming in the interior, be sure to seal all cracks and joints with cement paste and treat the ceiling with hydrophobic impregnation.
This advice applies not only to the niche, but also to the entire ceiling of the apartment, if it is located on the top floor. The main thing here is not the price you have to pay for high-quality preparation, but the absence of problems during the operation of the suspended ceiling.
Ceiling plinth, as an option to hide the cornice
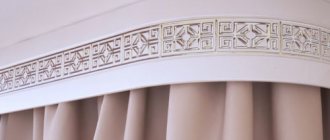
Decorating the ceiling with a plinth or baguette is an original way to completely hide the junction of the curtain with the ceiling. Backlighting is often placed there - the light bulbs themselves, LED strips will be invisible, the observer will only see their light. The lighting itself is hidden in a niche, parallel to the curtain rod, decorating the space of the room.
The baguette itself is executed:
- wooden - decorated with carvings, painted with stain, paint, found in Art Deco and classical styles;
- metallic – it is a smooth shiny strip, well suited for high-tech and industrial interiors;
- polystyrene foam - made white, painted, smooth or textured, ideal for minimalism, modern style;
- made of plaster - such a border is made extremely rarely, as it is complex in design, heavy in weight, suitable for baroque and antiquity.
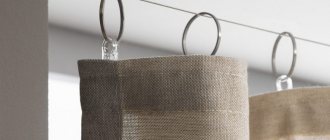
Guides of baguette design are plastic, steel, aluminum, and sometimes strings. Typically, such a curtain is attached in almost the same way as other options. It is possible to attach it to a built-in beam - then the cornice, which in normal condition is clearly visible, is hidden behind a decorative plinth, which anyone can choose.
