Not every apartment has enough space to ergonomically place all things and household items in the main living space. This problem can be partially solved by using the free space of the balcony or loggia. And in order to make storage relatively convenient and at the same time complement the interior, you will need an appropriate design.
In this article I will tell you how to assemble a cabinet from lining on a balcony according to drawings and diagrams. What tools are needed for manufacturing, how to calculate the amount of materials to save the budget.
Plans, drawings
The design of a built-in wardrobe should be carried out taking into account the type of balcony on which it is planned to be installed. For example, on a loggia with a small niche on one side, you can either install a full-size wardrobe, or divide this niche into separate sections and fill only one of them from top to bottom, and in the other place a cabinet at the level of the window sill.
Common types of structures
Standard two-door version.
If the width of the room allows, the interior space can be divided into 2-3 sections.
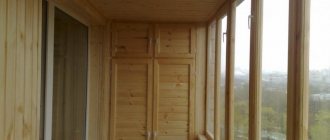
Classic wooden cabinet on the balcony
If natural wood is used for manufacturing, then such furniture can be installed even in non-insulated rooms, for example, in a country house. It will not be damaged by changes in temperature and humidity, but minimal protection from external precipitation will not be superfluous and will significantly extend its service life. For the interior decoration of doors, it is better to use moisture-resistant sheet material (OSB is optimal). It costs significantly less than wooden eurolining and also gives the opening elements additional rigidity, preventing the door frame from sagging over time. To simplify manufacturing and save some material, instead of four doors, you can make only two at full height.
One and a half closet.
One and a half option
A convenient option for balconies without a niche, glazed with hinged windows. The bedside table adjacent to the translucent elements does not interfere with the doors, leaves free access to the space at the level of the window sill and complements it.
Alternative two-piece model.
Two-section utility unit
The width of the left section can be calculated to fit the size of the window sill, which is well suited for balconies with an extension, where the window sill space is 30-40 cm less than the outer perimeter of the glazing.
Drawing of a cabinet with one vertical section.
Narrow column 420 mm wide
To make internal shelves, you can use regular laminated chipboard (LDSP).
Schematic drawing of a compact model for narrow loggias.
Narrow cabinet with four doors
A wide option for spacious balcony spaces.
Wide storage
In addition to the above projects, you can develop your own, which will best suit your needs and balcony parameters.
How to place it correctly
If there is a niche at the end of the balcony, then this is an ideal place to install a cabinet. Depending on the size and shape of your balcony, you can consider two cabinet options - corner and wall. Based on how much space you have, you can equip the structure with different types of doors.
Proper planning of the balcony space will help combine all these functions.
The following cabinet options are best suited for a balcony:
- single-leaf or double-leaf cabinet with hinged doors;
- with sliding doors.
Lining is a universal material in terms of decoration.
There are 2 design options for a balcony cabinet:
- Built-in. This option allows you to rationally use space, reducing material consumption. Please note that the built-in wardrobe is only suitable for balconies where there is an unloaded area and three solid walls on which the frame will subsequently be mounted.
- Corpus. This option consumes more material. If necessary, it can be moved to any place.
There are several cabinet designs.
Materials, fasteners, tools
For production you will need:
- Wooden beam. To assemble the frame, pine bars with a section of 50x50 or 40x40 mm are suitable. They are widely sold, durable, easy to process, resistant to moisture and the appearance of putrefactive formations. To ensure that the frame is smooth and does not deform over time, it is advisable to use planed blanks with a moisture content of no more than 12%.
- Wooden slats. Needed to assemble the door base. A suitable cross-section is 15x40 or 20x40 mm. The geometry of the slats and its moisture content are especially important here, since the doors are not rigidly fixed to anything, unlike the same block for the frame.
- Sheet material. For unheated rooms, OSB or moisture-resistant plywood is suitable, but if the balcony is insulated - laminated chipboard or MDF. Thick sheets can be used to make shelves; thin sheets can be used to sheathe the back wall and the inner surface of the opening elements.
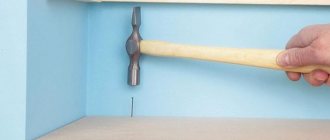
- Nails 15 mm. With their help, the lining is attached to the supporting frame. It is correct to fasten through clamps, but fixing directly into the groove is also possible.
- Stapler and staples 10 mm. An alternative to nails, less reliable and inapplicable without clamps.
- Lining. It is not advisable to buy from coniferous species (pine, spruce, larch), especially if the balcony faces the sunny side. If there are knots and areas oversaturated with resin, in the heat this resin will be released outward, which will negatively affect the stored items and the appearance of the homemade cabinet. This process can also occur with a supporting frame made of pine timber. But the likelihood of resin appearing here is somewhat less (the bars are located inside and do not heat up as much as the outer skin).
- Self-tapping screws, dowels. The frame is assembled using self-tapping screws and attached to the adjacent perimeter of the balcony. Dowels are needed for fastening to walls and concrete floors.
- Metal corners. It is much easier to assemble structures from timber and slats using such fasteners.
Cabinet doors on the balcony
It is on the cabinet door that the maximum load is ensured. They constantly open and are located on the outside. They should also protect the space inside so that folded items are not exposed to negative influences.
To increase the protective properties of doors, they are coated with special protective coatings. These can be varnishes or aerosols. As they wear off, the protective coating needs to be renewed. It is also recommended to use high-quality fittings, since otherwise the doors will quickly sag.
Calculations
When carrying out calculations, much is determined by the configuration of the balcony and the design of the cabinet. Assembly is done on site, so most elements are cut to exact size immediately before fixing. However, to start doing something, you need to purchase material. There is usually nowhere to put the excess, and if there is not enough lining or timber, it will have to be purchased, which entails additional transportation costs and loss of time.
Online services for calculating cabinets will help automate the process, but they are intended only for furniture made of chipboard and MDF. Of course, the results obtained can be adapted, but in this case it is easier to calculate everything yourself, based on the measurements taken.
Let's consider an approximate calculation for a double-leaf model with a width of 90 cm, a depth of 30 cm, a height of 2.5 m. The frame will be made of 40x40 mm timber, the perimeter of the doors will be made of 40x50 mm slats.
- Size of side face posts in mm: 2500 – 80 = 2420 (80 mm thickness of upper + lower beam);
- Middle post – 2000 mm before the mezzanine lintel + 380 mm after.
- Cross members – 900 mm (top, bottom); 820 mm mezzanine.
- Shelves – 390 mm each.
- Big doors. Be sure to subtract the gap for the porch, which depends on the canopies used. For ordinary furniture hinges – 2 mm. The width of one door is (900 – 6)/2 = 447 mm.
- Door pillars – 2000 mm; cross members – 447 – (50+50) = 347 mm.
- Small doors. Cross members – 347 mm. Racks with a gap of 2 mm between the top/bottom and 4 mm between the ceiling will be equal to 490 mm.
- The area of the required lining depends on the length of one plank. Blanks of 2.5 meters are available for sale, so the front part can be taken into account, taking into account small waste when trimming the outer parts. We calculate by usual multiplication 0.9 * 2.5 = 2.25 m2.
- The approximate area of all shelves is 0.9*0.3*4 = 1.08 m2.
Working with lining
The appearance of the entire balcony largely depends on how to make a lining door onto a cabinet.
Therefore, we will consider the entire plating process step by step:
- To create doors, we assemble a frame of appropriate dimensions from boards or thin timber. Doors should be both light and strong, for which we recommend choosing thinner lining;
- To add rigidity, a diagonal jumper is installed in the door frame;
- Having placed the finished door frame on a flat horizontal surface using nails or clamps, we secure the lining. The nails are driven “into the secret place”;
- We complete the finished door leaf with trim (optional), handles, locks and hinges.
Decorative trims in door decoration
We place the finished door (or doors) on hinges previously fixed in the frame. After the do-it-yourself balcony cabinet made from clapboard is finally assembled, clean the entire room. Vacuum all wooden surfaces and perform the final operation - coat the product with a protective varnish.
When purchasing varnish, pay attention to the manufacturer's instructions:
- for which premises the use of this product is permitted;
- the varnish can be either colorless or contain coloring pigments;
- Observe the recommended temperature conditions when working.
All technical parameters are indicated on the label
Step-by-step instruction
The structure will be installed on a clapboard-lined balcony. Its walls, floor and ceiling are level, and the corners in which the cabinet is placed are 90°. Next, I will tell you the whole process step by step.
We begin assembly from this corner, adjacent to the window sill on the left side. The window is sliding so there will be no problems opening it.
Mark the depth of the cabinet on the sides (in this case 30 cm) and draw vertical lines under the level.
Marking lines on the walls of the balcony
From the side of the wall, along the marked line, screw the rail (leave the line outside).
On the balcony side, after attaching the slats to the wall, use a plumb line or laser level to mark the overhang of the window sill and project it onto the back wall, floor and ceiling.
On the front side, attach an additional rail with an emphasis on the window sill.
Secure it at the top and bottom.
The frame of the front and back looks something like this.
Cut the lining to size and fix it on the side wall (you can fasten it from the inside).
Mark the shelf levels. It’s convenient to do this with a laser level, but if you don’t have one, you can do it with a regular construction and tape measure. Fixed top shelf:
Place a vertical partition (fix it to the block from below, and grab the shelves from above to the lintel). Then begin to assemble the partition with clapboard; the lower part will have to be filed down.
It is convenient to cut the lining with a circular saw - the cuts are smooth, and the process takes little time.
If you don’t have such a tool, you can use a regular hacksaw with a square or a jigsaw, but the ends won’t be as beautiful, and it also requires some physical effort and time. One way or another, it should look something like this:
Installation of shelves
To install shelves, we attach bars to the racks on two opposite sides. We lay several boards on them. In our case - 3 (for boards with a width of 20 cm). To ensure greater strength, guides are mounted around the entire perimeter. When calculating the height between the shelves, they are guided by the fact that a 3-liter jar can fit on the shelf with a margin. The next shelf may be narrower or wider. In our case, there are 4 shelves. We begin their installation from the top. Below there will be quite a spacious space, allowing you to hide an old washing machine, exercise machine, and a tall 40-liter saucepan. The open closet is ready!
cabinet with adjustable shelf heights Fig. 4
assembling the frame fig. 5
Adviсe
It is highly undesirable to install any built-in furniture in an unprepared room. It is possible to assemble everything smoothly and get the fittings working properly. But this will take 2-3 times longer and still, along the perimeter of the junction with the walls, floor and ceiling, there will most likely be gaps that will have to be covered with something.
Do not use low-quality lining or softwood materials for exterior cladding. When working with wood, it is better to have as many tools as possible; if you don’t have your own, ask your friends in advance so you don’t have to run around at the most crucial moment.
If you have no experience, pay special attention to calculations. Double-check everything several times and buy materials and fasteners with a small margin. There is a high probability of accidentally damaging the part by cutting it incorrectly.
Preparatory stage
If there is a niche in the open space of the balcony for building a cabinet, then the work will go much faster.
Before starting installation, you should consider several nuances:
- Availability of glazing. Protecting your outdoor space will help preserve the attractiveness and performance of wood storage structures longer.
- Repair. Arrangement of the storage area is the final stage of work, before which it is necessary to improve the entire area, including floors, wall panels, and ceilings. Replace the sheathing, insulate surfaces if necessary, eliminate cracks, and seal seams.
Preparing the space for the formation of storage areas will increase the service life of cabinets and reduce the risk of damage to stored items and products.