There are more than enough different methods for designing openings. The choice depends not least on the specifics of the room, its size and installation location. In non-standard openings, built-in wardrobes, and sometimes in partitions, instead of traditional, hinged panels, it is advisable to use folding analogues. And no matter what the skeptics claim, the accordion door can be installed quickly enough with your own hands, and the installation process itself is not particularly difficult if you understand the technology in detail.
Advantages and disadvantages of accordion doors
Accordion folding doors are more of a rigid curtain. Such products, having a number of advantages, have a large number of disadvantages.
The main design features are summarized in the table:
| Advantages | Flaws |
|
|
Types of accordion doors
Products may differ in material of manufacture and some design features.
They are:
- Deaf. For their manufacture, a solid array of any opaque material is used.
Blind accordion doors
- With glass inserts. Such accordion doors have a more aesthetic appearance, but also less strength, which reduces their service life.
Glass inserts in doors
- Made of plastic. Most often, these are not very durable products. In addition to the canvas itself, which is made of plastic, many fittings are made from the same material, which also does not have a long service life.
Accordion doors made of plastic
- Made of wood. These are more durable designs. They do not have plastic parts, and the most wearing parts are made of metal.
Wooden doors accordion
Tip: When choosing a design for installation with your own hands, preference should be given to wooden options. They have a more attractive appearance and durable structural elements. In addition, wood is less susceptible to temperature changes than plastic.
Accordion doors can have a different number of folding fragments, which depends on the dimensions of the opening.
Accordion door design
Accordion door assembly diagram
Installing an accordion door with your own hands begins with becoming familiar with its design.
The diagram shows that the product consists of:
- Top guide – pos. 1st century
- Two side guides: left – pos. 1a and right – pos. 1b.
- Two half-panels: right and left – pos. 3.
- Main panels – pos. 5.
- Connecting joint – pos. 4.
- Docking rail – pos. 2.
- Panels with lock – pos. 6.
- Runners - pos. 7, designed to move the door leaf.
- Stoppers - pos. 8, for fixing the door leaf.
- Self-tapping screws - pos. 11, for fastening the guide rail.
- Handles – pos. 9, to close the door.
- Latches - pos. 10.
Installation in a doorway
As can be seen from the recommendations, the question of how to install an accordion door yourself will not be difficult even for an inexperienced craftsman. Choose the right material for sliding doors, fittings for them, take into account all the features of these structures, and they will serve you well.
Installing an interior accordion door with your own hands
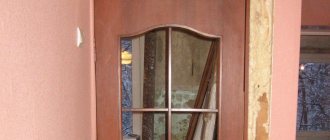
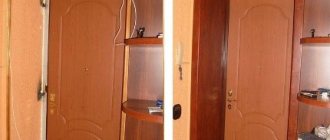
The main idea of almost any design solution in terms of decorating an apartment or house is the separation of rooms from each other and the formation of separate compositions within each. The most important element of dividing space is naturally interior doors.
Until recently, most people associated this type of door with a cheap option for those situations where, in a small home, it is necessary to save and preserve every square meter of space. In their modern form, accordion sliding doors are already a separate design element, and not a forced compromise. There are many different variations of accordion doors on the market with a wide variety of design styles.
The basis for such doors can be either PVC or MDF strips. The differences are not even so obvious at first glance. In both cases, the appearance of the doors appears pleasant and harmonious.
Plastic is naturally much lighter and less susceptible to both damage and contamination. It is easy to clean and can last quite a long time.
The downside is again its somewhat excessive lightness. After all, when using such a door, there is a certain feeling of its flimsiness. However, the latest versions of PVC slats are made with a more sophisticated system of stiffening ribs, so they only seem flimsy.
In terms of installation, plastic accordion doors are somewhat easier. Firstly, the door elements are very easily clicked together manually and are easily adjusted in size to the required dimensions of the doorway. Secondly, setting up such doors is much easier, as well as correcting possible flaws during the installation process.
Doors made of MDF are already much more massive, and this affects their ease of use.
Design selection
Types of structures
To avoid problems when installing the accordion door, and for it to fit harmoniously into the opening and into the interior of the room, it is necessary to choose the right model.
To do this, you should follow some recommendations:
- You need to purchase an accordion door in accordance with the interior of the room, taking into account the technical features of adjacent rooms.
- You should not install an accordion door in an opening 0.5 meters wide. In the open position it will be difficult to move from one room to another.
- You need to correctly calculate the number of canvases needed for a specific interior opening.
- You should not save when buying a product, who does not know that the stingy pays twice. In cheap models, low-quality plastic and fragile fittings are used in production, which cannot withstand heavy and frequent loads.
Tip: When purchasing a kit for an accordion door, you need to take the panels with a reserve in case of unexpected damage to the elements of the panel. This will allow you to quickly replace the damaged panel if necessary. Production is constantly updated, old models are discontinued, and the presence of an additional element will avoid a situation when a part needs to be replaced, but it is not on sale.
Step-by-step installation instructions
As an example, we will look at a door with plastic slats in the middle price segment for this product category.
Preparatory work
Step 1 . Unpack the product and carefully inspect the door components. Regardless of the manufacturer, the standard list of elements is almost no different. The kit includes door handles, magnetic locks, hanging casters, plugs, dowels and screws. There are horizontal and side bars. If you have heavy wooden structures, then the slats move simultaneously along the lower and upper guides; accordingly, the number of components increases; they are made of durable materials. Our assembled door has dimensions of 83x204 cm; all preparatory and installation activities are carried out in accordance with the specified parameters.
First you need to check the door configuration
Accessories for accordion doors
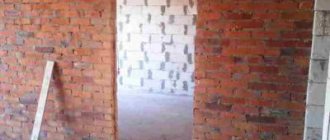
Step 2 . Prepare the doorway. If its dimensions have to be changed, then the surfaces around the perimeter must be sewn up with additional strips. They perform the function of a door frame, only in a significantly simplified and lightweight version. The additional strips are made of laminated chipboard with a thickness of one centimeter. They are installed in several stages.
- Calculation of doorway dimensions. The clean width of the doors is 83 cm, the thickness of the two side strips is 1 cm, the required minimum gap for foaming is also one centimeter on each side of the frame. As a result, the width of the opening should be 83+2+2=87 cm. This is the minimum value, the maximum can increase by several centimeters.
Take measurements of the opening - Remove any remaining plaster from the side of the opening. You can go the other way - do not touch one side at all, and increase the width only at the expense of the second side. Due to this approach, the amount of finishing work is significantly reduced - since you don’t break anything, you won’t have to plaster the perimeter of the doors later. The decision must be made by the foreman on site depending on the existing specific conditions.
Clean the plaster on one side of the opening - On the other side of the opening, make a mark of the required width, in our case 87 cm, and draw a vertical line.
Mark the cut line for the wall - Using a hammer drill or grinder with a diamond blade, remove the excess wall. The grinder gives an even cut, but there is a lot of dust in the room. It is not recommended to use such a tool in a residential apartment. In order for the hammer drill to remove the wall exactly along the line, it is recommended to first drill holes in increments of 3–5 cm.
Using a hammer drill to expand the opening
Remove construction dirt and dust, prepare the site for further work. Start installing the doors.
Installation of the structure
Step 1 . First you need to assemble the additional strips of the box into one structure. Straighten the ends of the planks if they do not have a right angle. Cut the top strip 85 cm long (door width + two thicknesses of the strip), connect it with nails or self-tapping screws to the vertical ones. Before doing this, you need to measure their height.
Prepare the frame of the structure
Practical advice. This design is very unstable, work with it as carefully as possible. The connection is made only to facilitate further installation of the box in the doorway. You only need to drive nails or screw self-tapping screws into chipboards into prepared holes, otherwise there is a high risk of cracking. The diameter of the hole should be 1–2 mm smaller than the size of the hardware.
Step 2 . Insert the structure into the doorway, install the sidewalls and top plate strictly level, check the width in several places. Temporarily install spacer wedges and check the position of the box again.
The resulting box is inserted into the opening
Step 3 . Secure the vertical slats of the box to the wall. They are fixed with dowels at a distance of approximately 40 cm, the pitch should be the same. Constantly check the position, the posts should be vertical and at a distance of 83 cm. Fix the horizontal bar.
Secure the box with anchors
There is no need to cover the holes; they are then hidden by plastic door elements. But be sure to drill out a countersunk hole under the caps; protruding structures interfere with the correct installation of the doors.
Step 4 . Start foaming the cracks. It is very important to pre-wet the surfaces with a spray bottle. Most masters ignore this operation. There is no answer to what this is connected with, because wetting the surface takes only a few seconds. But the adhesion strength of the foam to surfaces increases significantly, it hardens much faster, and performs its tasks better. Do foaming from the bottom up; the operations must be repeated on both sides of the box.
The cracks around the perimeter of the opening are filled with foam
Let the foam harden while you can assemble the plastic parts of the door.
Door assembly
Step 1 . Saw off the horizontal and side profiles. Vertical ones are made according to the length of the sidewalls of the box 204 cm, the length of horizontal is 83 cm.
Side profiles are adjusted to size
Step 2 . Connect the narrow panel; special locks are provided for this. Then put on the hinge profile, it allows the elements to rotate when opening/closing the doors.
Connect the finishing and narrow panels
Step 3 . Place a wide profile on it and continue assembly in this sequence over the entire width of the doors. The last element is the finishing panel, which is closed with a connecting guide profile.
Put on the hinged profile
Step 4 . Place plastic plugs on the hinge profiles and secure them with self-tapping screws. This is done so that in a vertical position the doors do not crumble under their own weight. The plugs must be installed both below and above the assembled canvas.
Plugs are placed on each hinge profile
Step 5 . Screw rollers to the finishing panel and each wide panel. For this purpose, special technological places are provided at their ends. Fixation is done with self-tapping screws.
The next step is installing the rollers
Step 6 . Make holes in the horizontal rail, a minimum of four at the same distance. If there is a desire or doubt about the reliability of the fixation, then the number of fixation points can be increased; this rail supports the entire weight of the doors. Attach it to a horizontal bar and drill the same holes in it.
Drill holes in the rail and horizontal frame of the box
Step 7 . Assemble the door leaf with an accordion and insert the rollers into the holes of the rail. In this form, attach the top rail with an accordion to the top crossbar of the box. Check the functionality of the blade; it should open/close easily and without jamming.
Place the rollers into the rail and fix the blade at the top
Step 8 . Using the same technology, make holes and install the side guide profiles in place. Constantly monitor the vertical position, this is the main condition for the functionality of the doors.
Install side profiles
Step 9 . Using the connecting element, connect the canvas to the side profile; a click should be heard, it signals that all the parts have taken their places.
Connect the canvas to the side profile
Step 10 . Install handles and magnetic lock. The handles are screwed into the holes provided by the manufacturer. The magnets are fixed to the door leaf strip, and the metal plate to the guide profile. Make the correct markings; the magnets should be located exactly in the middle of the plate. Check the functionality of the structure; if everything is normal, then you can seal the cracks around the perimeter of the doorway.
The handles and lock on the door are installed last.
Attaching the handle and lock
The final stage of installing the structure is attaching the handle to the accordion door and the lock. Usually the lock chosen is magnetic, but if desired, you can use other types of locking products.
Attaching the handle for the accordion door
Sequence of operations:
- Markings are made to place door hardware. In this case, the handle needs to be slightly shifted from the edge of the accordion door. Otherwise, it may prevent the canvas from tightly adhering to the wall when closing the opening.
- On the outer panel of the door, on the side where the lock is installed, holes are drilled to fix the lock and handle.
- All fittings are installed.
- The smooth running of the blade is checked, the absence of cracks and distortions.
- After installation, the doors can be decorated with decorative trims on both sides around the interior portal.
The general technology for installing accordion doors is almost the same, but different models differ in their design features. For example, according to the material and method of connecting the lamellas. Therefore, in each specific case, you should only follow the manufacturer’s instructions for this design.
Finishing work
Before installing the trims, you need to use a sharp mounting knife to cut off the excess hardened polyurethane foam.
Carefully cut off the foam
Step 1 . Place the trim against the vertical post of the box and make a sawing mark. Apply the same mark on the second element.
Mark the cutting line of the platband
Step 2 . Using a miter saw or an ordinary hacksaw with a miter box, saw off the workpieces at an angle of 45°. Use finishing nails to nail the vertical trims to the door frame.
Trim and nail trims
Step 3 . Measure and cut the top trim and secure it in place.
Attach the upper casing
Repeat the same operations on the other side of the doorway. If necessary, repair the plaster and restore the finishing surfaces of the walls. Accordion doors are ready for use. Strictly follow all operating recommendations, and they will serve for a long period of time.
Video – Interior accordion doors
Interior doors-accordion are considered both a budget option and a modern solution for furnishing premises. Now you are familiar with the technology of their installation, the strengths and weaknesses of the design. To increase the service life of doors, you must be able to correctly adjust the elements, periodically check their position and perform technical maintenance. Plastic balcony doors require the same attentive attitude. There is a detailed article on how this is done on our website.
Testamentary stage
When everything is securely fastened and checks have shown that everything works, we begin installing the trim around the perimeter of the door frame. They need to be installed on both sides. The excess is cut with a hacksaw, thereby limiting the length. These products are attached to liquid or furniture nails.
This completes the installation. Now you can feel all the benefits that come from installing accordion doors. The price of the structure is low (from 2200 rubles), and the effect of the installation is noticeable. You can immediately see how such a door saves precious free space.
So, we found out how to independently install an accordion-type door.
Options for using sliding systems
Sliding systems, regardless of design features, can be used as:
- For sliding doors, it is enough to fix the guides on the wall along which the door leaf moves.
Sliding doors. The guide is mounted on the wall above the correct opening - Cassette doors, when a special niche is made in the wall into which the door leaf is hidden when opened.
Cassette sliding interior door: the door is hidden in a wall niche - Cascade doors, which can consist of one fixed door and several movable ones, which, when opened, hide behind the fixed part.
Cascading sliding doors: one leaf pulls the other
Sliding doors are the simplest solution to the problem of occupied living space. These doors are easy to install yourself. It is very important that the preparatory work is of high quality: the wall must be vertically flat, as well as reliable, capable of withstanding additional load. The disadvantages have already been mentioned, so this system is not suitable for installation, for example, in an adult bedroom. The advantage of cassette doors is that when open they do not interfere with anyone or anything, since they are located in a niche. In addition, such doors have better sound insulation characteristics, since it is possible to stick a seal around the perimeter. The disadvantages, although not obvious, do exist: firstly, such doors can only be installed at the renovation stage, and secondly, they also take up useful space, since you have to install a false wall. Although, as mentioned above, not everyone can understand this, since the shortcomings are hidden.
Cascade doors are difficult to install due to the presence of several guide elements and leaves. Their installation requires precise calculations, so such a system will be expensive, and it is not possible to install it yourself without experience. As a rule, such doors are installed in luxury residential premises, when issues of saving money fade into the background.
Installation of a sliding system of 4 panels - standard option
Let's sum it up
So, to summarize the information provided in this article, we can say that accordion interior doors do not perform all the functions necessary for a high-quality interior door - there are too many shortcomings built into their design. On the other hand, for simply closing various types of storage rooms and non-residential premises from the prying eyes of guests, accordion doors are quite suitable. Moreover, due to the peculiarities, namely the presence of many slots in their design, such rooms provide a sufficient level of ventilation.
Mastermind: vse-pro-dveri.com
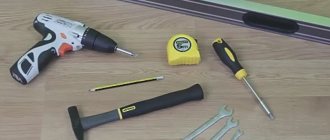
Required Tool
If you decide to install accordion folding doors yourself, then you will need the following tools:
- Drill and hammer drill. A drill is needed, most likely an impact drill, and a hammer drill will come in handy if you decide to expand the doorway.
- A plumb line and a building level, preferably a bubble type, for greater accuracy.
- Meter and construction angle for accurate measurements and correct markings.
- Hacksaw and miter box (carpentry device for cutting boards, has the appearance of a tray).
- Wooden bars.
- Polyurethane foam.