12109 0 2
Mullvatt September 7, 2016Specialization: Capital construction work (laying a foundation, erecting walls, constructing a roof, etc.). Internal construction work (laying internal communications, rough and fine finishing). Hobbies: mobile communications, high technology, computer equipment, programming.
Laminate - we finish the floor, walls and... ceiling.
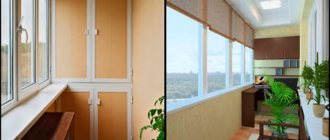
Lately, at least according to my observations, finishing balconies with laminate has become increasingly popular. Moreover, with its help, not only the arrangement of the floor is carried out, but also the finishing of the walls (and sometimes the ceiling).
Just recently I was asked to cover a loggia and balcony in a client’s apartment with this material. And I decided to simultaneously tell all my readers about this technology. After all, covering a balcony with laminate is one of the simplest ways to decorate it, which is easy to implement with your own hands.
Why he?
You can solve the design issue by installing laminate flooring on the balcony. The advantage of the material is its technical characteristics. The base is made of layers of wood and plastic.
It is popular in the construction industry due to:
- cheapness;
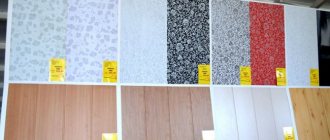
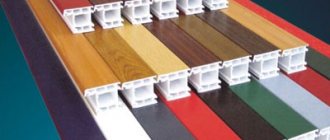
- variety of appearance (textures, colors);
- ease of installation and use;
- resistance to mechanical stress;
- heat resistance;
- hygiene (microorganisms and bacteria do not develop on the surface);
- ease of maintaining the original appearance (easy to clean with a sponge).
You can use laminate to cover the entire balcony. Suitable for walls, floors, ceilings. There are no restrictions on use. You can completely decorate the room, adding aesthetics.
Finishing the balcony area with laminate can cause trouble if there is a sudden change in environmental conditions. It is susceptible to sudden temperature changes and high air humidity - it can easily swell and swell.
The material does not provide a high level of sound and heat insulation. Difficulties may arise due to the weight of the laminate board (more than two kilograms). It is not easy to lift and attach to a wall or ceiling; you are unlikely to be able to do it yourself.
Requirements for balcony cladding
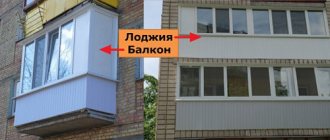
The decoration of the walls of the loggia has its own specifics. The requirements for it are somewhat different from those when working in other types of premises. Let's look at them in more detail.
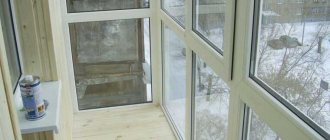
- The quality of the coating is determined by its resistance to deformation during operation. To prevent the laminate from becoming cloudy and peeling in winter, it is necessary to ensure a temperature of at least 5°C on the balcony. To do this, the balcony must be glazed with double glazing, and the walls under the laminate finish must have an additional layer of insulation.
- Like any coating containing wood, laminate flooring can swell under the influence of high humidity in the loggia. The exception is a special waterproof type of coating on a plastic basis - the only option acceptable for use on the balcony;
- The absence of a rigid fastening of the laminate panel will provide the tolerances necessary to ensure that cracks do not appear on it with some fluctuation in linear dimensions.
- Panel fasteners must be located outside of the laminate locks.
Laying features
Laying laminate flooring on a balcony requires compliance with a number of conditions. If you miss key points, you won't be able to install the panels accurately.
Things to remember:
- Install only on an ideal base. You will need to make smooth, dry surfaces, free of excess dust and debris.
- Only carefully insulated loggias are suitable. The minimum permissible temperature is +5 degrees Celsius. A double-glazed window (two- or three-chamber) must be installed, walls, floors, and ceilings must be insulated.
Laminate classes: which one to choose
The classification determines the technical indicators of laminate panels: moisture resistance, impact resistance, sound insulation, wearability. Production is represented by boards of two groups: household (21-23) and commercial (31-34).
For a balcony, choose laminate cladding from the second group. The service life will be about 10-15 years, with careful care it can last. If the balcony space is not insulated enough, take waterproof panels 33 or 34. Their cost is much higher, but such panels will withstand changes in temperature and humidity.
Class 31 or 32 can be chosen if the windows and walls are carefully insulated and the temperature is kept to zero degrees. Their price is lower, but in terms of strength and wear resistance they are not inferior to other classes.
Installation method
There are three options for attaching laminate flooring: on plasterboard, metal or wood sheathing. Let's look at each installation method.
The easiest way to attach it to drywall is with glue, but it is not recommended to use it. The material can withstand heavy loads, but reacts negatively to excess air moisture. If you choose this method, initially choose drywall impregnated with a waterproof mixture.
Frame made of metal profiles
Initially you will need to prepare a flat surface. Drywall can be installed with glue, additionally reinforced with self-tapping screws and dowels. Next, glue the boards, connect the locks, placing them in the grooves. It is advisable to coat the grooves with sealant (glue) - this will increase resistance to moisture.
A better installation option is on the lathing. The material of the lathing affects the purchase price and period of use. Wooden bars will be more economical, but metal profiles will last longer.
The wooden sheathing is created by vertical fastening over the entire surface every 40 cm, then horizontal slats are installed on top. First, it is advisable to treat the tree with an agent that prevents the development of fungi.
Installation on a metal sheathing is carried out in the same way. The basis of the frame is zinc profiles. Wooden blocks are also used for horizontal slats.
Selecting a substrate
The main function of the backing is to provide a tight fit and additional protection from moisture and excess noise.
The choice of material is small, but requires attention:
- Cork backing. It has good shock absorption and is resistant to stress. This option is not suitable for a balcony - the material is susceptible to moisture. But you can use impregnations.
- Polyethylene foam (isolon). The cheapest option with increased moisture resistance. The material is fragile and begins to deform under load. The service life is short because it soon loses quality.
- Expanded polystyrene (Penplex, TechnoNIKOL, Styrex). It is better to choose it for installation on a balcony area. Provides noise and thermal insulation, durable, moisture-resistant material. Over time, it wears out like any resource.
The thickness of the substrate is different for each type: about 2-20 mm when using polyethylene foam, 3-5 mm when using polystyrene foam.
Sequence of work
To understand the question of how to cover a balcony with laminate with your own hands, we will consider in detail the main stages of the work.
Initially, it is necessary to check the boards for quality compliance, subject to detection of defects. Next, prepare the surface for cladding: dismantle the old coating, eliminating unevenness and excess dirt. The depth of permissible differences is no more than 2 mm per 1 cm.
Required Tools
Prepare the tools you will need when covering the balcony:
- ruler, marker (pencil) to mark the required distance;
- a hacksaw or circular saw with fine teeth;
- hammer;
- perforator;
- screwdriver, screwdrivers;
- screws, nails.
Install the backing and prepare the frame for installation. Laying the boards should be done in a checkerboard pattern parallel to the sun's rays. During the process, leave gaps 1-1.5 cm wide between the walls and the material using expansion wedges. The length of the plate must be at least 30 cm.
Next, you should analyze the process separately for installing the floor and walls, since there are different nuances of the work.
Step by step instructions
If you have a concrete floor, be sure to add a dry core panel as a base as well as a moisture barrier. Adding a wood subfloor underneath the concrete will help air circulate underneath and warm the floor.
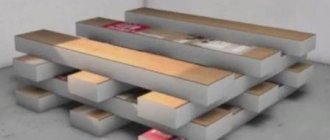
Before you begin, be sure to check your manufacturer's instructions. Some may recommend leaving the laminate package in the room for a certain period of time. Your boards will adjust to humidity and room temperature, so you can avoid ripping or cracking your floors later. Carefully inspect all your boards before and during installation in daylight for any defects.
Add inserts to the wall to create a slight gap that allows for expansion and contraction. Start building the first few rows and place them opposite the inserts. You can also hold them in place by placing a pack of flooring or a weight on the first board of each row.
Each laminate flooring board has a tongue and groove that fits together and “floats” above the floor. Try to hit them at least 12 inches at a time, you will need a saw to cut multiple pieces to specific lengths. Don't forget to wear safety glasses! Use the right tools if you encounter obstructions such as door frames, vents or cabinets. They will cut the floor to make sure you don't make a mistake, you can also refer to the manufacturer's instructions on how to assemble into the trim. When you install laminate flooring on your balcony, apply a silicone-based sealant for a waterproof seal.
Leaving one row, measure the length from the wall and the last row minus the expansion gap. Now you know the width of the last row. When marking the cut strip on your board, do not measure from the tongue. Saw the board along the strip and connect the last row using a rod. Follow the manufacturer's instructions for installing transition strips and grading the floor. If you installed a separate underlayment, trim the excess from the perimeter around the floor.
Stages of laying on the floor
To achieve a perfectly flat floor surface, you can use a concrete screed in the form of a self-leveling mortar or mixture. It is worth pre-insulating it with expanded polystyrene or expanded clay in order to maintain favorable conditions for the laminate all year round.
If there is wood at the base of the floor, you need to level it using floor joists, laying plywood false floors in a checkerboard pattern.
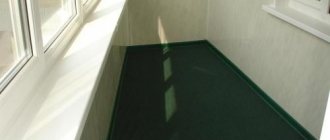
The next stage of finishing the balcony floor with laminate is laying the slabs. First, after leveling the floor, lay an overlapping waterproofing film, leaving an overlap of 20-25 cm. A backing made of the selected material is installed on top.
Measure the room, adjust the material. Installation of slabs should begin from the extreme corner of the balcony. Each panel must fit tightly, and the joints must be filled with sealant.
Technological sequence for covering balcony walls with laminate with your own hands
Let's look at how to decorate a balcony with laminate panels. We will look at a method using a metal grid and mounting brackets - it is not as simple as some others, but is suitable for wet rooms.
Required Tools
To carry out installation work you will need the following items:
- Hacksaw for metal;
- Electric drill;
- Self-tapping and regular nails;
- 2 types of clamping staples - with a smooth protrusion and with notches;
- Square;
- Simple pencil;
- A block used to adjust the laid out panels;
- Ruler;
- Hammer.
Wall decoration: order, pros and cons
Installing plates on walls requires more attention than for flooring. It is important to take accurate measurements and select the appropriate size of panels.
You can choose any installation method:
- Lock type panels can be fastened with glue or silicone; if you choose to fasten to a metal or wooden sheathing, use the lining method;
- Click type is more reliable because it provides increased resistance to mechanical stress.
In the first case, we align the metal profiles (step size 0.4 m) using a building level. We fasten it to the wall with dowels. We fill the resulting cells with sheet insulation. We cover the sheathing with plasterboard, forming a surface for the front finishing. We secure the plates with self-tapping screws. We glue the joints with tape and treat them with putty.
When using Click laminate, we create a similar frame; there is no need to additionally cover it with plasterboard. We fasten the boards with liquid nails or a stapler or a clamp with flat protrusions.
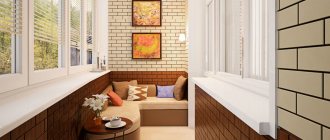
Finishing the walls of a balcony or loggia with laminate helps to improve the appearance. A functional room where trash is collected turns into a relaxing place with views of the city or nature. You don’t need any special skills to cover walls with laminate, just time and desire. Everyone can figure it out. No additional work required after assembly.
In order for the material to serve you fruitfully, you should be careful about creating optimal conditions. By insulating the balcony, no additional problems will arise.
Composition, characteristics, advantages
The term “laminate” is usually understood as a special type of floor covering, with a base made of high-density fiberboard. Translated from Latin, “laminated” means “layered”. That is, in its structure this material resembles a “puff pastry”, the upper part of which is a protective wear-resistant film that acts as a finishing decorative coating.
The undoubted advantages and advantages of laminate include:
Laminate has a huge number of design options
- Original and spectacular appearance, a wide variety of color options.
- High strength, resistance to various types of chemical, mechanical and bacterial influences.
- Fire resistance.
- Versatility. Laminate can be used to finish any balcony surfaces, including floors, ceilings and walls.
- Ease and convenience of installation and maintenance.
- Affordable price.
Winter styling technology
If the balcony cladding is carried out in the cold months, a number of conditions for the main stages of work should be taken into account:
- perform leveling with cold-resistant additives - resistant to -10 to -25 degrees (UPDM, FTS, Gidrozim, Pobedit, etc.);
- The drying period of the screed increases - it will take at least a month to gain strength;
- use wooden sheathing to avoid the occurrence of “cold bridges”;
- create a gap of 5-10 mm, additionally using a damper tape;
- insulate with two layers.
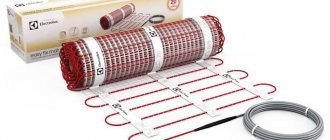
To equip your balcony for the winter, install heated floors. The classic installation method involves placing a heating element on the base, then a screed is made. You will need to first arrange the grooves and line the surface of the joists with Penofol. It is better to choose infrared films for “warm floors”; they are much easier to install.
Exploitation
Laminate has good technical performance, but is susceptible to sudden changes in temperature. It is necessary to take care and use the material carefully so that it can last for many years.
To pay attention:
- Consistency of temperature. The minimum permissible temperature is 5 degrees above zero.
- Choosing waterproof options. The cellulose included in the composition causes the plates to swell at high humidity.
- Fastening. It should not be mounted rigidly to avoid deformation of the material. You should not use laminate locks.
Photo of a beautiful design of balconies with laminate finishing
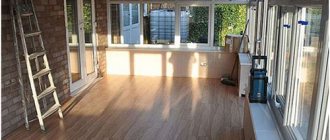
Balconies finished with laminate can look very beautiful. Using material of different colors, textures and different installation methods, you can create a stylish space on the loggia that will look solid and neat.
Finishing a balcony with laminate is a relatively simple procedure that you can do yourself. By following all the required technologies, it is not difficult to decorate the loggia beautifully, while obtaining a coating that will subsequently last for many years.