Low tides on open balconies used to be exotic, and remain so now, with modern construction and decoration.
I mean not the tides on the window blocks of covered balconies, but the metal tides on the balcony floor slab.
NO PROFILE ON THE BALCONY.
The absence of this detail is the reason for the destruction of many balconies. The process occurs especially intensively on unglazed balconies at the beginning and end of winter, when the snow melts during the day, and at night the melt water freezes in cracks and destroys the concrete as it expands.
Destruction does not happen immediately. The problem appears gradually and is therefore invisible. It’s not just us who don’t pay attention to it:
On a glazed balcony, damage can also occur if you decide to insulate it. Under certain conditions (not always) condensation will occur. And then - according to the script that was shown earlier.
No concrete can withstand such conditions. After cracks appear, an intensified process of corrosion of the load-bearing reinforcement of the balcony slab begins in the concrete. Over time, the diameter of the reinforcement decreases and the reinforced concrete structure gradually becomes concrete. And a concrete structure, as you know, does not work as a cantilever.
Destruction of reinforcement on the balcony slab.
This is what the collapse of balconies indicates.
Balconies without tides
In the absence of ebb tides, even waterproofing and ceramic tiles do not stop the destruction process.
Water from the balcony surface should not flow down the wall. The source of destruction simply shifts to the end of the balcony or wall. The example from the photographs shows that destruction begins along the perimeter of the slab (in these places the damage is greatest).
Balconies usually have a slope from the wall to the edge. Water flows down it, then along the end of the balcony and further along the lower edge of the slab. The drop does not immediately come off the concrete. For this to happen there must be an olive tree.
Balconies without tides.
Balcony areas destroyed by frost in Syktyvkar.
In our case, the wall surface is saved from significant damage by foam cladding. Therefore, only the putty and facade paint were destroyed.
Facade destruction.
Abroad, companies engaged in the production of tiles provide a special profile for this case.
Profile of the company “LITOKOL”.
Bordtec profiles are shown in more detail (in PDF file) below:
If such products are not available for sale, they can be replaced, for a while , by any ebb or drip. But a solid metal sheet under the tile will create microcracks.
Metal drip.
Not always (and not every) installed low tide saves the balcony from destruction. It still needs to be installed correctly and the whole range of work on the balcony must be correctly completed:
- screed slope
- the strength of the fastening of the screed on the balcony slab and the strength of the screed itself
- balcony waterproofing
- laying tiles with the correct adhesive and filling the joints correctly.
- filling the junction of the tile to the ebb with sealant.
Destruction of balconies with installed ebb sills.
What suffers the most on the balcony is the outer row of tiles, which are laid at low tide. There are several reasons:
- Tidal expansions create microcracks.
- Metal fence posts create conditions for moisture to penetrate under the tiles.
- At the end of some balconies and terraces there is a massive metal corner. It also has an effect similar to
.
The video below shows such an example. Moreover, the tile fell off only at the edge along which water flowed. On the other side of the “L”-shaped balcony, the cladding remained unharmed: In the absence of waterproofing, a weak slope and the wrong grout , the consequences are even worse. A short excerpt from the video shows this balcony:
Drainage from the balcony: options for protection from precipitation
Lately the weather hasn't let us relax - it's raining too much more and more often.
And under these conditions, water that penetrates into the house for some reason turns into a serious problem. Whether it is an open balcony or glazed from the floor, ensuring maximum flow of natural light into the living rooms, there is a real danger of rainwater entering the premises if the drainage from the balcony is incorrectly installed or selected with insufficient characteristics. There are many ways to organize the drainage of rainwater from the balcony. Back at the beginning of the twentieth century, architects noticed an interesting pattern: if you look from below at the absolutely horizontal surface of its slab, the observer will see it as if falling, tilted down. The impression, frankly speaking, is unpleasant. Therefore, it was decided to lift them up slightly, by about 5–6 degrees. However, the reverse slope of the slab leads to other complications - moisture accumulates that gets there during precipitation, rain or snow. Having penetrated into microscopic, invisible to the eye, cracks in concrete, over time they lead to the complete destruction of the balcony, since freezing water expands the cracks. This can, of course, be avoided if you properly arrange an organized drain by pouring a cement screed with an outward slope.
Basic principles of water drainage from balconies
Open balconies are undoubtedly beautiful, especially in sunny weather. But when there is wet snow or slanting rain, then it is necessary to take protective measures: lay reliable waterproofing under the finishing coating along its overhang, be it wooden or tiled floors, with the obligatory installation of a metal drip line for the roof. Despite the ease of installation, it is able to prevent the lower and vertical parts of the structure from getting wet and thereby free the owners from constant repairs for many decades.
External drain
External gutters can be used exclusively for drainage from small surfaces of balconies. Their length should not exceed 5 meters. For comparison, we note that the width of a balcony gutter should be about 70 mm, while gutters working on large roof areas have a width of up to 250 mm. As for the diameter of the pipes, it ranges from 60–150 mm. The umbrella tin is carefully glued between the layers of insulation.
In other cases, it is necessary to organize the design of internal drainage, ensuring that the surface declines by 1.5-2% towards the drainage opening.
Internal drain
Drainage from a balcony is not always convenient or advisable to use roof drains, since they are large in size and have a throughput capacity. Internal drainage in these areas is often organized using small drains and funnels - they are also called “balcony”. The installation principle of such drainage elements is similar to conventional roof drains.
They resemble parapet ones, but, unlike them, are made of plastic. Balcony funnels are equipped with several outlet pipes: one main and two emergency, but smaller in diameter, which are located at different levels
When calculating emergency discharge systems and funnels for draining water, in any case, even in the process of designing the roof structure, it is also important to take into account the risk of extreme loads
If one water intake funnel is used when installing drainage, then a small drain is used as a place for emergency drainage of water from the surface. It is best to use multi-element funnels.
Low tide on the open balcony
In most cases, installing a low tide is associated exclusively with glazed balconies, while installing such an element on open objects is the exception rather than the rule. We will clearly demonstrate below why the absence of this detail is the main mistake when using open balconies.
What does the lack of drainage on open balconies lead to?
As you know, “water wears away stone,” in this case concrete. In the absence of drainage, moisture penetrates into the internal cavities of the concrete base and slowly but surely destroys the slab. Especially during the transition period winter-spring, when during the day melt water penetrates into microcracks and crevices, and at night it freezes and expands, destroying the structure from the inside.
Note! Sealing and waterproofing concrete does not always work when there is no low tide on an open balcony. In this case, the water, instead of being drained down, flows onto adjacent surfaces and the source of destruction moves to the ends, lower plane and walls.
To understand why the metal flashing should be located around the perimeter of the concrete slab, let's delve into the theory of drainage. The fact is that water has good adhesion to concrete, that is, it is able to stay on its surface for a long time. During the process of rain or snow melting, water droplets do not immediately come off the concrete surface, sometimes seeping inside or moving onto neighboring structures. A completely different situation is observed in the presence of low tide. In this case, moisture does not linger on the metal surface, so drainage works more efficiently.
These photos show what the absence of a balcony sill leads to:
Structural solutions for protecting concrete foundations
Not every drainage system is capable of protecting a concrete slab from destruction.
First of all, such an element must be installed correctly. A regular end cap will not work properly if mounted on top of the base. For drainage to be effective, the flashing must be below the surface of the slab. Therefore, it is either immersed in a layer of screed or placed under the tile. Naturally, in both cases, the base of the balcony must have a layer of reliable waterproofing. Some tile manufacturers offer their customers interesting design solutions for water drainage, which can also be applied to other coatings.
- Profile with curved visible part
This design is installed under the tiles in a layer of adhesive and serves as reliable protection for protruding concrete edges. The invisible part has a special wavy structure for better connection with the tiles and reduces the likelihood of cracks in the screed. The visible bell-shaped part acts as a cornice, protecting the end of the balcony from water drops.
- Profile with straight visible part
If the previous option is installed on both straight and curved ends, then the L-shaped profile is intended solely to protect the smooth side edges. Provide a gap between the visible part and the end of the slab. If you install such a flashing close to the balcony slab, it will lose all meaning, since water will flow from the metal onto the concrete.
- Semicircular profile
In addition to the fact that this design looks very aesthetically pleasing after installation on the balcony, it has a special drainage element. For the profile to work effectively, its junction with the slab must be sealed.
Note! If ebbs of a standard design are placed under the tiles, this will eventually lead to a violation of the integrity of the tile layer, since an even sheet of metal in the screed will contribute to the appearance of microcracks.
Types of drainage systems for soft roofs
Now let's look at the gutter materials that are used for soft roofing. Most often these gutters are made of plastic, but options such as galvanized steel, aluminum, copper and titanium-zinc are also suitable.
PVC gutters are factory-coated with a layer of acrylic and titanium dioxide, which increases their resistance to ultraviolet radiation and chemical elements of rain. Gutters made from this material are excellent for roofs made of modern flexible tiles, because... Thanks to their special technique of painting inside the mass, scratches will not be noticeable.
What do the scratches have to do with it? The fact is that roofing from modern flexible tiles is produced in this way: hot bitumen sheets are sprinkled with colored protective coating. It is this that is quite easily erased over time by falling snow masses and ice needles.
Yes, it is the rough roofing that is famous for ensuring the absence of avalanche snow, but at the same time the snow often takes with it small particles of the topping that retain it. These crumbs often scratch the drain
Therefore, if it is important for you to preserve its appearance and durability, choose a drainage system made of material with high-quality, scratch-resistant paint
Copper gutters are also popular for roofs made of soft materials. These are made from ordinary copper sheet, without any coating - there is no need. They are connected using soldering or folding. The only disadvantage of such gutters is that over time, copper oxidizes and becomes covered with a patina, acquiring a greenish tint. But in combination with modern roofs made of flexible tiles, such a drain looks extraordinary!
This is what a rectangular copper drain looks like:
And this is the installation of a semicircular copper drain:
Modern metal elements of the drainage system are coated with a polymer material, which allows them to retain their color and resist damage and corrosion. The advantage of such drainage systems is that they are very easy to match to the existing color of the house facade and roof, because They are produced in the widest range of colors. Such gutters are connected using locks, special brackets and latches on a rubber gasket.
Aluminum gutters are made with anti-corrosion protection, paint and varnish of different shades. Such complaints are connected using a special paste or silicone. For a roof made of soft material, the advantage is that such drainage elements are easily formed to the desired shape and cut to the required length, which is indispensable when arranging a roof of complex shape. Why are we talking about this? The fact is that the most unusual architectural solutions and complex roofs are covered with flexible materials.
Soft roofs with a titanium-zinc drainage system also look unusual. It is a zinc alloy with a mineral additive that gives it a silver-gray color, with or without shine.
The only difficulty is connecting such grooves, for which you have to use special soldering pastes. But titanium-zinc drainage systems also look great, not to mention their famous quality and durability. We’ll tell you how to make a drain on a soft roof not made of plastic a little later.
It is important to note that plastic pipes are usually connected easily and without problems, but metal pipes sometimes have to be welded:
Waterproofing the balcony from the inside
Of course, it is always recommended to carry out waterproofing on the outside of the structure, but sometimes this is impossible or very expensive, since the exterior of the terrace has been finished, tiles, screed, insulation, etc. have been installed... and dismantling all of this is not easy and expensive. If it is not possible to carry out work from the outside, the leak can be eliminated from the inside of the balcony or room by injection of polyurethane compounds such as HydroInject. In fact, if we are talking about eliminating a leak from the inside, then it is necessary to inject a polyurethane composition either into cold seams (after opening them from the inside and sealing them with special expanding sealants) or into the concrete body (finishing elements are cleaned or dismantled) from the inside. When performing work using injection waterproofing and injection into concrete or a seam, all voids and cavities existing in the concrete are filled with polyurethane, which in turn expands and squeezes out all the water and moisture from the concrete, thus strengthening it and making it waterproof. When using this method from inside the room, do not forget that you got rid of the water inside, but you did not solve the problem of waterproofing outside - which means that water continues to pass through the damaged waterproofing layer, penetrate the upper layers of concrete and destroy it. Accordingly, sooner or later leaks will appear again.
Types of roof flashings
Not so long ago, it was necessary to install hand-made water drainage devices on the roof.
Usually, old pipes, cut into two equal parts, acquired a “second life”, becoming roof flashings.
Now they are being replaced by specially invented devices - various types of ebbs, mounted on the roof in just a few hours.
These devices differ from each other in color, shape, selected fittings, and most importantly, material.
The most popular are drip tides made of galvanized steel. In addition to them, aluminum, polymer, plastic and copper (oxidized) devices that remove rainwater are often installed on the roof.
All of the above devices are unique in their own way. Therefore, when choosing between them, you should be guided by the properties of the material used to make the casting and the operating characteristics of the product.
Galvanized ebbs are popular for their efficiency and unsurpassed strength. But devices made from a special metal can also create a negative impression.
The fact is that galvanized drainage systems have a disadvantage - they tend to make the sounds of falling drops louder.
True, you can turn a blind eye to this drawback if you cover the device with a special polyester film.
The ebbs, made of aluminum, are durable and at the same time lightweight. Easy to install, aluminum devices for removing rainwater from the roof surface are recommended to be treated with an anti-corrosion compound.
The outer coating of the device, created from ductile white metal, is incredibly smooth, which allows the tide to maintain its original appearance for a long time.
Copper-based roof drains are considered very reliable because the metal is oxidized during their production process.
Thanks to the protective coating, devices that remove rain from the roof are distinguished by enviable strength and durability.
Moreover, copper shimmers perform their task without losing their aesthetic appearance for many years. True, devices made of metal with a pronounced color are sold at a high price.
Devices whose main material is polymers or plastic have a lot of positive properties. Such drainage systems are not only durable, lightweight and economical, but also silent and economical.
In addition, these devices are incredibly easy to install on the roof, meaning that even a non-specialist can cope with the task of installing a plastic or polymer flashing.
Drain system design
When installing a roof drain for a small building, it would be appropriate to use a gutter up to 110 mm in size and a pipe up to 75 mm in diameter. If the roof area is large, then the gutter and pipe are required larger -130 mm and 100 mm, respectively. For buildings with a large roof area, you will need a gutter 200 mm in diameter and a pipe 150 mm in size. The length of the gutter directly affects the downspout - if its length exceeds 8 m, then two downspouts will need to be installed.
To install drains with your own hands, you will need certain materials and tools:
- pipes and gutters;
- connection elements;
- gutter plug;
- rubber seals;
- funnels for receiving water;
- glue and sealants;
- hacksaw or grinder.
It is important to pay attention to some nuances before making roof drains with your own hands. The gutter should be attached to the roof and wall at an angle relative to the drain pipe, which will ensure efficient drainage of water. You need to carefully study the instructions included with the purchased kit, which should contain a detailed installation diagram.
Technical details of installation
Now let’s take a brief look at the technology of fixing the drainage system to the finished roof.
Here's how to properly install a drainage system on a frontal board:
- Step 1. On the board itself, which was previously installed, mark a horizontal line with a laser at the highest point of the gutter.
- Step 2. Then place a real line, taking into account the slope, which should be from 3 to 5 millimeters for each linear meter of the gutter.
- Step 3. Now you need to number all the hooks, and the marking itself should be done taking into account the slope of the gutter. Next, using a bender, we bend the edges of the hooks.
- Step 4. Install the two outer hooks, and between them, along the very bottom of the gutter, you need to stretch the rope. Install the remaining fasteners.
- Step 5: Determine the location of the funnel at the end of the gutter.
- Step 6. Place the funnel on the gutter and trace the outline with a pencil. From the edge of the outline to the center, leave a 45 mm edge and cut a hole with a regular hacksaw or special scissors for metal. Now bend the resulting frames outward and attach the funnel to the gutter.
The entire assembly is quite simple, akin to a children's construction set.
Now let's move on to installing the gutter:
- Step 1. Check the angle of inclination and location of the brackets.
- Step 2. We install the gutter profile on them and join them together using gutter connectors. We close the free ends with a plug.
- Step 3. Mount the funnel.
- Step 4. From the funnel we make a branch to the pipe on the wall.
- Step 5. Mount the brackets for the pipe.
- Step 6. Mark the path for installing the pipe and attach the vertical drainage elements.
Modern metal gutters are connected to each other using seals and clamps. Plastic gutters are connected in three main ways: with latches with a clamp, with rubber seals and by cold welding. The main thing in all this is to take into account linear expansion compensation.
Also think about an element such as a special grille for the drainage system. It is needed in order to clean the flowing water from plant debris, which is often washed off the roof - these are leaves and branches.
Step-by-step installation of the lower ebb
Scheme for fastening the lower ebb.
Installation of the lower ebb is simplified due to the presence in modern windows of a special groove for attaching the ebb panel. Installation of the drainage system in the lower part of the frame is performed in the following sequence.
- The canvases are placed under the installed window block, marked and trimmed.
- Holes for fastening are drilled in the canvases at 50 cm intervals.
- Using a special gun, silicone is applied to the joints of the profile and ebbs.
- The canvases are inserted one by one into the profile on the window frame. After this, each is pressed tightly at an angle so that the sealant fills the joints. To increase reliability, additional fastening is used with special self-tapping screws up to 20 mm long.
- The joints of the canvases are reinforced with self-tapping screws and treated with silicone.
- The free space under the ebb is filled with foam. The work is done carefully so that the foam does not raise the ebb.
Video instruction:
How to choose the right mount?
In total, to secure the drain you will need the following fasteners:
- The brackets on which you will attach the gutters. It will not be difficult for you to choose a suitable mount, based on the shape and dimensions of the purchased gutters.
- Clamps are special devices that allow you to attach drain pipes to the wall. This type of fastening is also selected depending on the type and size of the drain pipes. Also decide on the material for making the clamps: if it is plastic, then it has two attachment points, while metal ones have one, long hardware.
On sale you will find two types of hooks:
- The long ones are attached to the sheathing, to the rafter legs.
- Short ones - to the front board, according to the original plan or due to the fact that the roof is already installed.
The distance between the hooks should ideally be about 50 cm, maximum 60 cm. If you use long hook holders, it is better to screw them through the sheathing directly to the rafters, then the fastening of the drainage system itself will be more durable.
Upon completion of installation, both long and short hooks from above must be covered with a curtain rod.
Of course, according to all instructions, long hooks must be attached under the roofing directly to the sheathing. But there are often situations where it is not so easy to remove the old roofing covering, just as it is not possible to lift it up.
For example, it is old, so such hooks are often screwed even onto the hem of the cornice. Despite the illogicality of this method, in practice it often turns out to be rational and sometimes the only possible one.
Basically, according to the rules, metal hooks are used for metal drains, and plastic hooks for plastic ones. Today, copper hooks are rarely, but still used:
Additional elements
We invite you to familiarize yourself with other types of additional roofing elements:
- Skates are used as a decorative component to mask the joints of roof cladding with corrugated sheeting. They protect the ventilation gap of the under-roof space and joints from seepage and water retention;
- The end strip protects sheets of metal tiles or corrugated sheets, covering them at the ends from strong winds, the penetration of water under the roof in the area where the roof adjoins the gables, and also prevents insects or birds from entering under the roof;
- The wall strip is used in areas adjacent to walls or other vertical planes.
- The straight wall protects the joint without grooves with additional sealing;
- The wall bottom is attached under the facing material, metal tiles or corrugated sheets in the area of attachment to the wall or to another surface located vertically. At one edge of the additional element there is a fold that prevents the drainage water from overflowing over the edge.
- The upper valley directs water flowing from the roof, mainly performing a decorative role of masking the internal areas of the joint of sheets of roofing material.
- Bottom valley is an element used in areas where negative angles meet. It protects the junction of sheets of metal tiles or corrugated sheets from water seeping under the roof;
- Flashings are an element designed to protect the joints of windows and walls of a building from water penetration;
- Junction strips are used on various roof breaks. They protect the joint from the penetration of water under the roof space;
- Snow support strips protect against unexpected avalanche-like descent of snow masses, as well as unintentional falls of roof components;
- Internal and external corners are decorative elements used to mask the joints of the internal and external corners of the roof cladding material;
- A ridge aerator is a product used to get rid of excess moisture in the area under the roof;
- The ridge cap is an important component that prevents dirt and moisture from getting under the roof.
Additional elements
The work of all additional roofing elements together is aimed at maintaining the integrity of the roof and increasing its service life. The absence of any element can, although imperceptibly, have an extremely negative impact on the design of the house as a whole.
Types of tides
Balcony sills consist of separate panels laid overlapping. Most often they have a standard shape: drip outward or drip inward.
Depending on the installation location, drainage systems are divided into types.
- The top ebb is a canopy over the window frame, which is mounted on the floor slab. It protects the upper part of the window block from destruction under the influence of precipitation. In addition, drainage is a reliable protection against moisture getting inside the glazed balcony.
- The lower ebb is a canopy that protects the lower part of the window block and the parapet from moisture. It is attached to a special profile under the frames. Without such a design, the service life of window units and parapets is significantly reduced.
Different materials are used to make both types.
- Cink Steel.
On balconies, ebbs made of galvanized steel are most often installed. They are manufactured on a special machine, where a galvanized steel strip 0.5 mm long and 2000 mm long is bent to the required shape.
Drains made from this material are resistant to temperature changes, well protected from corrosion, and are not afraid of gusts of wind due to their rigidity. True, if you do not use special insulation, they make a lot of noise when it rains.
Low tide with sound absorber
When an additional polymer layer is applied to galvanized steel, the characteristics of the product are improved. Thus, the durability of the canvas increases, corrosion is completely eliminated, and it is possible to choose an option that matches the color of the window. The main advantage is the reduction of noise from raindrops.
- Aluminum.
Aluminum cast sheets are made in the factory from strips 1 mm thick and up to 6000 mm long. Additional protection against corrosion is provided by the application of powder paint, most often cinnamon and white. The advantages of aluminum sheets include:
easy installation;
greater durability;
resistance to natural factors;
wide choice of color shades;
Easy care, any dirt is washed off with water.
The big disadvantage of products made from this material is that they make a lot of noise when it rains, which means it is necessary to lay a layer of noise protection.
- Plastic.
The ebb panels are made of polyvinyl chloride, so they are completely compatible with plastic windows. In addition, such products make almost no noise during precipitation.
In addition, the advantages of plastic sheets include:
high resistance to rotting and corrosion;
wide range of color shades;
affordable price;
- easy care;
- shape and color do not change under the influence of sunlight.
The disadvantages of plastic panels include their fragility
In addition, it is important to pay attention to the quality of the plastic, since products made from recycled plastic quickly turn yellow and have an unpleasant odor
Upper ebb on the balcony
The canopy at the top of the balcony takes on the heaviest load for water drainage. This element protects the balcony block from precipitation that falls from the sky and from water flowing down the facade of the building or coming from the upper unglazed balcony. The difficulty in installing the top drainage system is that it needs to be mounted from the outside of the window, so the installer must follow all safety precautions when doing such work.
Mounting options
The method of installing the upper ebb on the balcony depends on the type of balcony structure, of which there are only two - with the location of the fence inside the opening and with the location of the fence outside the opening.
In the first option, when the parapet rests on the floor slab, installation is simpler. The ebb is attached between the window frame and the concrete slab using anchors, and then secured to the window profile using self-tapping screws. The gap is carefully sealed with polyurethane foam, and the outer part of the foam seam is protected with PSUL tape.
PSUL (pre-compressed sealing tape) keeps water out from the outside, but still releases moisture that is in the foam. This protects the foam joint from waterlogging and destruction.
Method No. 1 of fastening the upper ebb
A more difficult task is installing a canopy when the fence is located outside the opening. In this case, there is a joint between the parapet and the horizontal ceiling, through which water can penetrate from the upper floor if the neighbors have not glazed the balcony. It is necessary to use such a design for the ebb so that its inner part completely covers the seam, and the water coming from above flows down the canopy onto the street.
Method No. 2 for attaching the upper drainage system
Stages of installing a visor
The drainage system is installed after fixing the window frame in the opening, while the upper profile is attached to the ceiling not with anchors, but with mounting plates. The algorithm is as follows:
- Measure the balcony opening. If it is not a multiple of the ebb size, then the necessary parts are cut off, taking into account a slight overlap at the point of their connection.
- The prepared piece of ebb is applied to the top slab and secured to the concrete using an impact drill and dowels in increments of 50 cm. Pre-treat the installation site with sealant.
- The fixed drainage system is secured with “bug” type screws to the window frame.
- The following parts of the ebb tide are installed using the same principle. Adjacent elements are connected to each other with self-tapping screws or rivets.
- The free gap between the frame and the ceiling on the balcony side is filled with polyurethane foam.
View of the top drainage from inside the balcony
If it is impossible to place the canopy between the frame and the concrete slab, then it is attached to the outside of the balcony. In this case, it is important to seal the junction with a material that is resistant to precipitation and temperature changes.
External installation of drainage is carried out by industrial climbers
Preparing containers
To ensure the work goes quickly and efficiently, bottles are prepared in advance. There are not many requirements for the basic material:
- The volume of the container is liters.
- The bottles have the same diameter. This makes the gutter easier to assemble and helps make the drain leak-proof.
The color affects the aesthetic appearance of the drain. In dark containers, debris and dirt deposits are less noticeable, but color grading will take time and reduce the amount of material.
The presence of labels will affect the aesthetics when the leftovers begin to hang in unattractive rags. If the appearance of the drain is important, time is spent processing and cleaning the bottles.
To calculate the amount of material, a series of calculations are performed:
Drip line for standing seam roofing
Under a seam roof, the same type of dripline is usually made and installed as for a regular metal roof.
But modern manufacturers delight with their creativity, thanks to which there are already special sheets on sale, at the end of which a drip is already installed:
Agree, this approach greatly simplifies the entire installation and helps make the roof overhang much more reliable and airtight.
Installation of a pediment drip: the process in detail
Let's now take a step-by-step look at the process: how to install a drip line on the gable side of the roof.
Step 1. Try on the gable strip and cut the required length:
Step 2. Secure the strip on both sides of the roof:
Step 3. Now lay the eaves drip, starting from the adjacent wall, if there is one:
Step 4. At the corner junction, cut off the excess from the planks and securely fix the overlap:
Step 5. Now is the time to roll out the waterproofing membrane:
- Alexander Khromtsov Reply
My father and I reinstalled on our metal-tiled roof just such a drip tray as described here above. The builders who built our house and laid the metal tiles probably didn’t know the basics of construction well. The membrane was not sufficiently brought to the surface of the installed drip, which is why the water flow was partially directed towards it. I had to redo it for them. Therefore, be careful in everything when you accept a job! - Olga Reply
We are going to remodel the cold attic, we want to arrange something like an attic there. I would like the interior space to be completely unaffected by atmospheric water, so that it would be quickly and fully drained from the slopes. Now we don’t have drips, only gutters. And then, in the spring, when the snow began to slide off the roof, half of these drains were torn off. If I understand correctly, IVs are a must. But here’s the question: they are quite thin. Will the falling snow bend them? It just comes off in huge layers! And what is the way out?
Drainage from balconies and terraces
Drainage from balconies and terraces is an effective way to drain water from flat roofs using roof funnels and sloping pipeline systems.
Why do you need to drain water from flat roofs?
Drainage from flat roofs protects the surface from the effects of precipitation, which causes the destruction of the coverings of balconies, terraces and garages, as well as the penetration of moisture into the interior of the room.
Types of drainage funnels from balconies and terraces:
- SitaCompact
SitaCompact funnel - used for draining rainwater from flat surfaces (terraces, balconies, garages, loggias).Main properties of SitaCompact:
- high throughput
drainage from operated and unused roofs
several-level drainage drainage of water from small flat roofs thermal insulation floors from 50 mm combining SitaCompact with a flange
- SitaCompact with flange
The SitaCompact funnel with flange is suitable for small areas where installation for optimal drainage is difficult. This funnel differs from the usual SitaCompact funnel in that it contains a clamping flange structure. - SitaMini
The SitaMini balcony funnel is a small funnel designed to save space on a balcony or loggia. Provides optimal functionality when installed.
Main properties of SitaMini
- drainage from operated and unused roofs
- several level drainage
- drainage of water from small flat roofs
| Products | Welded connection apron | Removable flange design | With extension according to DIN EN 1253 | For maximum thermal insulation thickness | Installation in particularly narrow floor structures |
| SitaCompact | |||||
| SitaCompact with flange | |||||
| SitaMini |
Advantages of drainage systems for balconies and terraces:
- The versatility of funnels allows them to be used in almost any situation
- Despite their compact size, the funnels have high throughput
- Due to their strength and compactness, drainage systems are safe to use
- Material design: thermally insulated
General installation recommendations:
Roof funnels are installed at the lowest points of the surface. All holes located in the supporting structure of the surface must be reinforced with a reinforcing plate. It is important to secure the bodies of roof outlets with the supporting structures of the roofs. Flanges and extension elements of roof drains are installed at the level of vapor barrier and waterproofing roofs. It is necessary to ensure free access for possible repair or maintenance work. In some cases, it is necessary to insulate roof drains and the pipelines connected to them with mineral wool or aluminum foil. This procedure helps prevent condensation. When installing roof drains, all screw flange connections must be tightened several times (min.
3), while using a torque control wrench. Preventative maintenance for roof drains is carried out twice a year. More often if necessary.
Sealing drain holes
Sealing drain holes on the balcony
Photos of the stages of sealing drain holes on the balcony
Do-it-yourself repair of drainage holes on the balcony
When repairing the balcony, we decided to use foam blocks to fill drain holes, due to the fact that they are easy to saw and strictly adjust to the size of the drain and other obstacles in the form of fittings. When sealing drain holes on the balcony, you should pay attention to whether you will need holes for draining water when drying clothes. If you do not plan to dry your laundry on the balcony or plan to dry thoroughly wrung out laundry, then the drain holes can be completely sealed, which will give better heat savings. It is also worth considering that if you subsequently plan to raise the floor on the balcony or lay laminate or tiles on the floor on the balcony, then making holes may no longer be possible without completely dismantling the floor, which in turn may result in a major repair of the entire balcony.
Having completed all the careful adjustment of foam blocks, gas blocks, bricks or other means, you can begin to fasten them. Probably the simplest, fastest and most reliable method is cement glue or mixtures for bricklaying. It is necessary not only to plaster the materials inserted into the drain holes, but to remove them from there and apply the product to the floor and stick the materials for sealing the drain holes on top. This will ensure reliable fastening of materials. And then plaster the inside of the balcony. As for what the design of the balcony would look like from the outside of this type of sealing of drainage holes, in our case it did not matter, and I didn’t really want to putty at the height of the 15th floor.
Another type of sealing of drainage holes on the balcony , when the drainage holes are filled with polyurethane foam, did not seem to us a very reliable way of sealing drainage holes on the balcony as a whole. Therefore, we would recommend using our method or another, more reasonable one of your choice.
After the cement glue has dried, the sealing of the drainage holes can be considered complete.
How to fix the gutter yourself?
When installing any drainage system, it is extremely important to take into account the thermal movement of the gutter and its structural elements, which, depending on the material of manufacture, work differently in tension and contraction. According to the rules, the only movable element of this type should be a hinged complaint, which is mounted without additional gluing - only on a latch
Moreover, modern manufacturers take care of this by making a special, so-called expansion mark inside the gutter, which helps to assemble in accordance with the air temperature that exists at the time of installation
According to the rules, the only movable such element should be a hinged complaint, which is mounted without additional gluing - only on a latch. Moreover, modern manufacturers take care of this by making a special, so-called expansion mark inside the gutter, which helps to assemble in accordance with the air temperature at the time of installation.
Here's how to properly attach a gutter directly to an eaves overhang:
What problems can arise if the drainage of a balcony or terrace is done incorrectly?
Improper drainage of a terrace or balcony using unsuitable materials is one of the most common causes of damage to this type of structure. The remaining water penetrates deep into the floor layers, causing:
— cracking of the floor layer and, as a consequence, its crumbling as a result of thermal stresses caused by the freezing of water at subzero temperatures outside; - the formation of mold and fungal blooms, for which a humid environment is an ideal place for development; - cracking or even peeling of tiles whose adhesive layer has been weakened by moisture or freezing water;
Each of these problems, which can arise due to poorly executed drainage of a balcony or terrace, is associated with the need for expensive repairs. That is why it is so important to take care of this issue already at the stage of construction of this type of structure.
First case.
Balcony cleared of asphalt
Judging by the photograph, it is difficult to understand the quality of the base on the balcony - loose concrete (after many years of freezing with moisture impregnation) or durable. The film on the surface is unclear. This is the impregnation that was under the asphalt or you applied a primer. But in any case, I would nail a masonry mesh (diameter of rods 4-5 mm, cells 100 x 100 mm), then place two beacons with a slope of 2-3%.
Make a screed along the beacons with a solution of M 200 (1:2). Then secure the ebb. Then apply waterproofing mixtures. It’s hard for me to say which one is sold in your city. Most likely there are good Finnish mixtures. But you need to read the instructions on the bag to see what surface you can apply it to. Most likely only for dry screed. Therefore, you need to wait until it dries completely. Apply waterproofing directly to the wall. It seems to me that you have a cement plinth there - cut it down and replace it after installation with a plinth made from pieces of tiles.
To make it clearer, I’m doing something similar with a grid here. Only there the steps were smooth and one tile at a time - so there was no need for a screed.
And regarding waterproofing https://101ohibka.ru/plitka-na-krilce/gidroizolyaciya-krylca-i-stupenej.html
If the tiles on the balcony are porcelain stoneware, then apply glue to both surfaces, the tile and the screed. A 6 mm comb is better. As a result, it will give a layer of glue of 10 mm. Glue (as one of the options) CM17 “Ceresit”.
The grout used to fill the joints should be suitable for porches and balconies.
Video on your topic https://www.youtube.com/watch?v=fgOx8sNPJr4&list=UUAH22FLgrKL1Wl7M5DIHZ1g
Air conditioner condensate drain
This multifaceted problem has several solutions, but in certain circumstances there are no good ones:
1. A pipe sticking out of the wall from which condensation drips onto the street. If there are hanging balconies on the house nearby, when there is wind, all this drips onto the neighbors’ eaves, pollutes the glass and interferes with sleep. 2. Collect condensate in a container on the balcony. A whole bucket can leak in a day. We must remember to take it out. 3. Drain into a drainpipe. A good option, but often there is no pipe. 4. Drain into the sewer. It’s a bit expensive, in my case I need to drill a channel in a half-apartment-long wall. 5. Make sure that condensation flows down the wall of the building. I saw that they do this. Is this a normal way, or an asshole one? They write that this could cause the wall to collapse.
Linux here is that the air conditioner is an important part of the cooling system, since it cools the air that is used by the cooler.
- Link
I have the fifth floor, the unit itself is on the balcony, the tube is led out from the bottom of the balcony wall to the roof (attic), so that the condensate flows down the roof where it is needed. Displayed carefully, not visible from the outside.
- Link
condo is for the weak.
- Link
Is this a normal way, or an asshole one? They write that this could cause the wall to collapse.
Normally, this is either a water pipe or some kind of long plumbing pipe along the wall to the level of the first floor.
- Link
pour it onto the grille of the external unit of the air conditioner - it usually evaporates and blows away normally
- Link
pour it onto the grille of the external air conditioner unit
I saw this solution on the Internet, but they write that dust can stick to wet radiator plates and they will clog.
- Link
Certainly. But it solves the problem of “it drips onto neighbors’ balconies and window sills, pollutes the glass and interferes with sleep.” However, if the neighbors are non-conflicting, option 1 is better.
- Link
A pipe sticking out of the wall, from which condensation drips onto the street. If there is wind, it drips onto neighbors’ balconies and window sills, polluting glass
Why would she pollute anything? This is considered distilled water. The most popular and IMHO adequate method.
- Link
In general, according to the standards, the only acceptable option is to drain it into the sewer system. Air conditioning is expensive and must always be planned initially, at the design stage of the building. Otherwise, it either becomes even more expensive or turns into a complete collective farm like your options :)
- Link
If the balcony glass is dirty and covered in street dust, the drops will create ugly stains.
- Link
Why would she pollute anything? This is considered distilled water. The most popular and IMHO adequate method.
Yes, the most popular, that’s what they gave me. I don’t know about pollution, but the Internet is full of complaints, and about noise too.
- Link
Solve problems as they arise. Are the neighbors grumbling? Then what are the problems?
- Link
Manufacturing process and installation
After preparing the tools and consumables, you can proceed directly to the manufacture of the drain. In order for everything to work out as expected, the following steps should be followed:
- Draw an approximate design drawing to fully understand the future picture.
- Using a knife or scissors, it is necessary to cut off the cylindrical part of the container, then cut lengthwise on one side. This is the future blank for the horizontal gutter.
- All workpieces must be connected using a stapler, and the workpieces must overlap each other with an overlap of 1 to 2 cm. For secure fastening, the seams can also be tied with wire. All holes for fastenings must be covered with something; ordinary paint or even plasticine will do for the first time.
- Now we attach the gutter to the roof. At regular intervals, you need to make holes in the tiles, slates or metal (depending on the roof covering used), and use an awl or drill to make holes in the gutter. It is necessary to calculate so that each hole is opposite each other. We secure the gutter with wire.
- It's time to start draining to protect the walls from water flows. Cut off the neck of one bottle, leaving the bottom intact. This is a kind of twist; we cut a hole in the side of the container so that the drain pipe fits into it.
- Then we construct the vertical part of the gutter, choosing one of the options proposed above in the article.
Thus, even an ordinary plastic bottle finds its use in everyday life. This method is perfect for an economical option for making a drain, for example, for a summer cottage.
- 5
- 4
- 3
- 2
- 1
Preparing to install drip tides
In order to quickly and efficiently install ebb tides, it is necessary, first of all, to prepare tools and purchase materials.
- Tool preparation.
The following minimum set of tools should be at hand:
- electric drill or hammer drill with a set of drills;
- screwdriver or screwdriver with replaceable bits;
- metal scissors. For aluminum and plastic sheets, you will need a hacksaw;
- marking kit: tape measure and felt-tip pens;
- mounting gun;
- hammer.
- Procurement of materials.
To install the upper ebb, the following materials are required:
- a set of canvases depending on the length of the ebb. They are ordered from manufacturers or purchased in retail chains. It is convenient to use ready-made products. The canvases are prepared with a reserve, since there must be an overlap of at least 60 mm at the joints, in addition, there will definitely be trimmings;
Top canopy made of galvanized steel
- PSUL sealing tape, which reliably insulates the joints, while moisture evaporates freely;
Self-expanding tape PSUL
- polyurethane foam for filling voids using a special gun;
- soft cover strips (flashings) to protect joints; Self-adhesive cover strip
- dowels for fastening canvases;
- Silicone sealant for sealing all connections.
Calculation and planning
- with a roof area of up to 50 sq. meters, you should purchase gutters 10 cm wide and drain pipes with a diameter of 7.5 cm;
- if the roof area is from 50 to 100 square meters. meters, then the width of the gutter should be 12.5 cm, and the pipe - 8.7 cm;
- for large roof areas, gutters with a width of 15 cm and pipes with a diameter of 10 cm are used.
Important! Drainage systems are installed in separate lines on protruding parts of the roof (canopies, canopies, etc.). When calculating the drainage system, it is necessary to determine the number of pipes intended for the production of gutters and pipes that will be used as vertical drains, as well as the required number of brackets and clamps for their fixation
The easiest way to depict the calculation results is as a sketch.
When calculating the drainage system, it is necessary to determine the number of pipes intended for the production of gutters and pipes that will be used as vertical drains, as well as the required number of brackets and clamps for their fixation. The easiest way to depict the calculation results is as a sketch.
The total length of the gutters is equal to the perimeter of the roof. The required number of pipes will thus be half as large, since each of them will turn into two gutters when cut.
The number of pipes required to make vertical drains is calculated as follows:
Standard elements of a drainage system
Drip line for metal tiles
The installation of a drip line on the roof itself begins with the installation of the eaves board. It is mounted with a cut into the rafter leg. The width of this board ensures reliable support of the dropper, therefore the following sections are considered possible: 150x30 mm or 100x25/30 mm.
If you are building a metal roof, then in this case the membrane should be placed on the surface of the dripline and direct the flow directly to it, and from there to the drainage system.
This way the entire roof structure is as airtight as possible:
The drip itself, which is installed under the membrane, must be secured with corrosion-resistant nails with a 9 mm head, in increments of 20 cm, and an overlap of at least 5 cm.
There is also such a subtype of apron as a plastic overhang with ventilation ducts, but these are rarely found on the Russian market.
Drainage technology
You can make a drain yourself from cheaper materials. The most common option is the manufacture of gutters and storm drains from sewer pipes made of polymer. They have a beautiful appearance and do not require large financial expenses. Such pipes are sold in regular hardware stores. The material is very easy to work with.
We invite you to familiarize yourself with a DIY solar battery - how to make your own solar panels
The main advantage of polymer tubes is their long-term performance properties. After all, they are predetermined for sewerage during construction. As is known, these pipes contain wastewater that has a negative chemical composition. Rain and snow are simpler in composition, so these tubes will last for many years.
When building a drainage structure with your own hands, you will need to prepare the following elements:
Features of organizing roof drainage
Installing a roof drain is not that difficult. Most manufacturers offer ready-made circuits with detailed installation instructions.
The main task is to first think through where the water will drain from and where, make the wiring correctly and take measurements. When drawing up a drawing, you need to take into account construction standards and recommendations that have already been tested in practice.
Types of drain structures
First you need to choose the type of system - indoor or outdoor, organized or unorganized. The type of drainage depends on the number of storeys of the building and roofing material.
It is advisable to equip houses with an internal spillway over 6 levels. These are heated buildings with roll or mastic roofing. Internal drainage is also suitable for flat roofs.
If there are up to 2 levels, you can get by with an unorganized system. The most acceptable and recommended option according to SNiP for buildings up to 5 levels is an external organized drainage system. It is easier to install than others and is not difficult to maintain.
Key design considerations
Before purchasing drainage elements, a drawing of the roof perimeter is drawn up with all protrusions, turns, and angles are measured. This helps to determine the system parameters and make calculations. But the drainage design must be based on justification.
There are 3 factors that are taken into account in the calculations:
- Area and design features of the roof.
- Amount of precipitation.
- Minimum possible temperature.
The diameter and footage of pipes, the number of funnels and brackets - all this depends on the roof area. If it does not exceed 100 m2, gutters with a diameter of 7-11.5 cm are suitable, the diameter of drainpipes is 7.5-13 cm. If the roof area is more than 100 m2, gutters with a cross-section of up to 20 cm and gutters up to 16 cm are needed .
Typically, designing and choosing the type of drainage does not cause difficulties. The simplest systems are created for single-pitched and gable roofs. Traditionally, two separate gutters are equipped for gable roofs, and a continuous contour for hip roofs. In frame buildings, vertical pipes are placed along load-bearing posts.
Requirements for a drainage project:
- the slope angle for installing hanging gutters must be more than 15 degrees;
- gutters are selected with a side height of 12 cm;
- structural elements are checked for compliance with GOST 7623-75, where their technical parameters and marking features are indicated;
- drain points are installed at a distance of up to 24 m;
- the diameter of the pipes is calculated by the formula - 1.5 cm per 1 m 3;
- The slope angle of the gutters is 0.2-0.3 degrees or from 2 to 5 mm per linear meter.
These parameters may vary depending on climatic conditions. The standards provide parameters for the eastern system, installed in regions with average temperatures (minimal risks of freezing) and precipitation (75 mm/h).
At the design stage, it is necessary to consider a system option for collecting and draining rainwater transported through the drainage system. Ideally, it is better to dispose of it in a storm drain, but there may be other options: discharge into a collector with subsequent release into a drainage ditch, a filter well, a filtration field, a container for collecting rainwater, etc.
Principle of calculation of parts
The number of gutters is calculated based on the perimeter of the roof and the length of one slope. Next, the number of joints of the parts is determined and it is found out how many connecting elements are needed.
The number of fasteners depends on the chosen material for the drainage device: for metal, the distance between fasteners is 40 cm, for plastic - 70 cm. Plugs are placed on each pipe break, funnels - on each drain.
It is impossible to calculate the exact amount of materials based only on the roof area. Two roofs that are identical around the perimeter may have different gutter parameters and costs.
The nuances of arranging a roof of complex shape
Here you need to collect water from each slope, bay window, and it is advisable to install several drains. If you arrange the system according to the principle of the minimum, a strong flow will enter the pipes, which will slow down as it passes through the gutters. This will create a load on the entire structure.
Sometimes additional channels for collecting water are needed above balconies, along the perimeter of towers, and in architectural superstructures. It is difficult to prevent such places from freezing and moisture penetration.
For lucarnes and roof windows, drains are not required. They are done only if the slopes are large and multi-directional.
Another possible problem when designing drainage for a complex roof is a large number of elements. Color helps: details are selected to match the roof or contrast with it. The design also uses the shape of the profile when it is installed as an architectural element.
Materials for making castings
Externally, all balcony sills look almost identical. But the materials from which they are made vary. Let's look at popular solutions available on the Russian market.
Cink Steel
The most affordable type of drainage in terms of price. This option looks unpretentious, but if installed correctly, it fulfills its function. The zinc coating protects the metal from corrosion, so the service life of galvanized casting reaches 20 years. However, keep in mind that zinc does not withstand the effects of acids and alkalis, so if there is an industrial plant nearby, the metal will begin to corrode earlier.
Galvanized casting
Polymer coated steel
The optimal solution in terms of price and quality. This material costs more than galvanizing, but it looks much more attractive; the color is selected to match the facade and window frame. The polymer coating serves as additional protection for the metal from corrosion, so it can withstand adverse conditions, including acid rain. However, in order not to damage the coating, you should be extremely careful during installation.
Balcony ebb with polymer coating
Aluminum
It is not subject to corrosion like steel, so it is not afraid of scratches and external atmospheric influences. The aluminum cast is also painted to give the product greater aesthetics. The service life reaches several decades, but due to the fact that aluminum is more expensive than steel, such drainage has a higher cost.
Aluminum casting
Plastic
Plastic drainage systems have been used on balconies relatively recently. Their main advantage is their resistance to precipitation. Plastic does not always tolerate temperature effects well, especially when it comes to cheap material. When exposed to direct sunlight, the surface turns yellow, and extremely low temperatures make the material brittle, which often leads to cracks and chips.
Plastic drainage
Choice
In order for the ebb to perform its function of protecting window units for a long time, it must not only be aesthetically attractive, but also have a surface that is not susceptible to corrosion.
The following types of window block design details meet these requirements:
- Made from galvanized steel.
Mandatory characteristics of ebb tides: a coating that prevents corrosion, resistance to deformation and loads, and an attractive appearance.
These products are formed from a sheet of steel 0.55 mm thick, the surface of which is coated with zinc. This thickness was not chosen by chance: it gives the product maximum rigidity. For window blocks made of plastic and aluminum, it is enough that the side is 2 cm high and the relief chamfer is 10 cm long. But if, when installing frames, the situation with the load-bearing wall or facade of the building is such that it will have to be mounted with a large recess into the wall, then you need buy a larger width ebb.
What are the benefits of galvanized steel flashings? Because they are resistant to acid precipitation, which is not uncommon in urban environments. During operation, care must be taken not to damage the zinc coating, otherwise corrosion will begin to develop. This will inevitably lead to damage to the product, and its appearance will become unsightly. The thickness of the zinc coating is important. You can ask the seller what layer is applied to the product. The optimal density is 275 g/m2. This one will flawlessly last 5-7 years longer than the one with a layer of 180 g/m2.
- Made of galvanized steel with polyester coating.
How to move a sink in the kitchen, that is, move it to the loggia?
Our kitchen is connected to a loggia where an electric stove is installed.
My wife asks me to move the sink there too. Is it possible to move a sink from the kitchen to the loggia and, if so, what is the best way to do this? The sink can be moved to the loggia.
Our task is to supply hot and cold water and sewerage to the sink on the loggia.
And the sinks are different and the pipes are different, I write in general:
Measure the thickness of the wall between the kitchen and the loggia, purchase a drill of this length, 60 cm, should be enough, a drill bit for a hammer drill (with a Pobedit).
We mark the place for the sink, drill holes for the pipes, everything is clear with the water supply system, with the sewerage system we don’t forget about the slopes; your pipe is 50 mm, which means 3 cm per m.
If you have a PVC sewer system, remove the 90-degree corner (the corrugation of your siphon is inserted into it), replace the corner with a pipe of the required length, and use the same corner on the loggia at the finish line.
If it is polypropylene, then cut it on a flat area under the sink, solder in a coupling like this,
In general, everything is different, with other materials (cast iron, steel, copper, plastic, etc.) and the work is different.
Pipes without sagging, sewer clamps, polypropylene clips.
Pipes can be hidden in boxes, grooves, look at the place, you can also put them in from the outside.
Technically there shouldn't be any problems. Everything is pretty standard. You will need to install two water pipes (cold and hot water, respectively), as well as a drain pipe (that is, sewerage). If everything is quite simple with water pipes, then you will have to tinker with the sewer pipes if you don’t want any problems in the future. So, it is necessary to observe the slope of the sewer pipe; it should be 2-3 cm for each linear meter of length. So, if you move the sink by 2-3 meters, you will have to make a slope to a height of 6-10 cm. That is pretty bad. This is where the whole problem lies, because few people will have such an opportunity. Alternatively, you need to come up with some kind of pedestals and so on, or raise the level of the screed. Another solution lies in using a forced sewer pump - it will allow you to pump water out of the sink and send it into the riser, but this is too fantastic a solution for our person, who would rather take a risk)))
It is also worth noting that when laying a sewer pipe, you should not use 90-degree angles; it is better to make two 45-degree angles, this will significantly reduce the likelihood of blockages.
It would also be a good idea to make good waterproofing in case of leakage, so as not to anger the neighbors below and authorities like the housing inspectorate.
But let's not forget about the legal aspect. Theoretically, no one will know what you are doing in your home, at least until you decide to sell the property. But according to the law, such redevelopment is not legal. If this fact comes to light, you will have to pay a fine and return everything to its original form.
Source: www.remotvet.ru
Remember
On the issue of responsibility for the condition and repair of balconies in apartment buildings, management organizations should remember the following:
- The common property of the apartment building does not include the entire balcony, but only the balcony slab (floor) and the load-bearing wall of the house.
- The management authority is obliged to conduct inspections and monitor the condition of the common property of the house, including balcony slabs, and take timely measures to restore their proper condition.
- The management authority must carry out routine repairs of balcony slabs at the expense of funds collected from residents of the house for the maintenance and repair of common property, regardless of whether the corresponding decision was made at the OSS.
- If the balcony slab requires major repairs, about which an inspection report has been drawn up, then the decision on repairs can only be made by the owners at a general meeting. In this case, the management authority should carry out work as part of routine repairs, if major repairs are not planned in the near future.
- If the owners have not decided to overhaul the emergency balcony slab, then the management organization has the right to close and seal the entrance to the emergency balcony.
The management organization should not ignore complaints from residents of the building about the condition of the balconies: if the structure collapses due to wear and tear on the balcony slab, the management organization and its officials will bear responsibility for this.
Features of the room
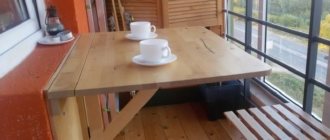
The key differences between a balcony and a loggia are their location relative to the main wall. The balcony is separated from the living space by a wall, the dismantling of which is prohibited. The remote structure is not designed for loads typical of the floor in the room itself.
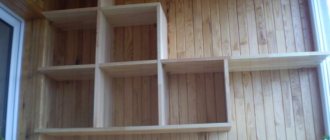
Creating a full-fledged kitchen here with the necessary communications is an impossible task. The problem is solved by placing individual elements of the kitchen interior on the balcony. In this case, permission is not required to move a refrigerator, microwave, or electric hob.
An example of a compact layout is in the photo.
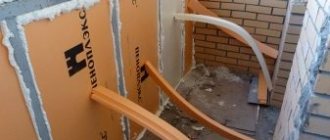
Balcony insulation
The temperature regime in the converted loggia should be the same as in the rest of the apartment. Insulation and decorative panels will move the balcony wall into the room by at least 15 cm. This disadvantage can be mitigated by moving the windows beyond the edge of the balcony. It is necessary to make a metal frame structure. Its upper part can be used to install a countertop and other kitchen interior items.
Sewerage
Laying sewerage on a loggia is the most labor-intensive. A kitchen-loggia cannot do without a drain, and it may be located far from the sewer riser, so you will have to drain it through the entire apartment.
The main problem and feature of laying sewer pipes is the mandatory requirement to maintain their uniform slope. If you hide this pipe in a box, it should be quite high, so that, moving away from the sink in the highest position, the pipe gradually drops to the level of the entrance to the sewer riser, being in the box throughout its entire length.
When laying a sewer system during a major overhaul, you can make grooves in the walls for laying the pipe or mask it with plasterboard.
For a kitchen drain, a 50 mm pipe is considered optimal. As it should be when laying a sewer system, sharp turns should be avoided here, trying to make them smoother, and where this is not possible, it is necessary to install an inspection through which blockages are removed. In this case, the slope of the sewer pipe per meter of length should be within 1-2 cm.