Owners of apartments with balconies have long begun to convert this additional space into useful premises. It is not uncommon to have a balcony with a winter garden, an office, a dressing room, or even an option combined with a living room or kitchen. But the bravest craftsmen embody many ideas that seem crazy at first glance. For example, a sauna in your own apartment. Not a bad balcony upgrade, isn't it? Let's figure out what is needed to bring this idea to life.
How to build?
Please note that when constructing a mini-sauna, brick and concrete coverings should be completely excluded.
Below we will describe how to properly construct a sauna. The first step is to assemble the frame. The section of the board is 60x60 cm, the distance between the beams is about 45 cm. A vapor barrier is installed between them. Next, install the insulation
Please note that in this case you cannot use polystyrene foam and polyethylene, since under the influence of high temperatures they will begin to release harmful substances that can be poisoned later. The best solution would be mineral wool. After this, the aluminum foil is mounted using a stapler
The shiny side should be on the inside. The denser the insulation, the faster the steam room will heat up. The ceiling should be thermally insulated in 2 layers, since hot air flows will be directed upward. The bayonets are closed with adhesive aluminum tape. At the very end, the structure is covered with a cladding board. You can’t rush here so as not to accidentally tear the foil.
In almost every house, the balcony walls are very crooked; to level them, the frame should be sheathed with 4 mm plywood. When installing the door, try to ensure that it does not open inward, otherwise it will be much more difficult to leave the room.
Please note that metal transfers heat well, so all metal products, including bolts and screws, can be hidden with decorative plugs
Let's look at the stages of laying floors.
First of all, you need to lay down a moisture-proof covering. Next, 25- or 40-centimeter beams are installed with a distance of 45 cm. The height from the concrete is 7 cm. Insulation is installed between the boards, which must be covered with another protective layer. The last step is installing the floorboards
Please note that a metal mount will heat up, so it is installed at the edges of the room.
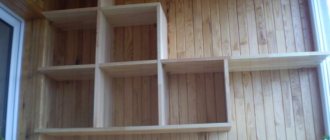
After the above points have been completed, you can start constructing the shelf. Separate fasteners should be made for it so that the structure is reliable and can withstand several people.
- Boards with a cross section of 80 mm are attached to the floor.
- On top of them are fixed bars with rounded corners, about 50 cm thick and 1 cm in increments, so that air can circulate freely.
- At the end, the structure is treated with special oil.
Choosing a stove for a Finnish sauna
• The stove must be electric. It is preferable to choose a ready-made sauna stove, as they are designed taking into account safety and power requirements. • The electric heater is selected taking into account the volume of the room. For 1 cubic meter, 1 kW of furnace power is required. • The design can be anything, there are floor and wall options. It is advisable to have a thermostat and remote control.
Advantages of a ready-made electric sauna stove: • can be installed anywhere, easy to assemble; • the room heats up in 1 hour; • no chimney required;
• ease of maintenance (sometimes you need to change stones); • no garbage in the sauna; • electrical safety; • fire resistance; • the case is safe in case of accidental touches; • it is impossible to get poisoned by carbon monoxide; it does not burn oxygen; • reliability; • lasts a long time; • small sizes; • Beautiful design.
Important! A DIY Finnish sauna requires preparation for use. It is heated to 60 degrees with the door open
Allow to cool and leave open until the next day. Then heat to 90 degrees and leave for a couple of hours. On the third day, heat up to 100 degrees, also leaving for two hours. You can use it on the fourth day. Those who made an infrared sauna on a loggia themselves say that it is not difficult, as long as the construction procedure is followed.
A few words about stones for a miniature sauna
Very often, inexperienced steam lovers purchase quartz to fill their heaters. Despite relatively satisfactory thermal properties, this stone is distinguished by one extremely unpleasant quality. Under the influence of different temperatures, it begins to defragment into tiny scales with razor-sharp edges. Quartz stone fines can easily cut skin. In conditions of extremely limited space, this quality can create not only a certain discomfort during procedures, but also carry the risk of cutting injury.
Decorating ideas
Depending on how you want to decorate the balcony yourself, step-by-step instructions may differ. Before you start carrying out any work, you need to decide on the following things:
- Purpose of the premises.
- Willingness to spend a certain amount on purchasing materials.
- Room style.
- Functionality.
The following materials are most often used for interior decoration of balconies:
- MDF is a relatively inexpensive panel that is easy to install. They will help to quickly close the walls and make them visually smooth, even if the balcony structure is curvature. The material is environmentally friendly and durable. Technical indicators are similar to solid wood, but MDF is much cheaper than the latter. The panels are made from pressed wood shavings. Carbide resins are used to firmly connect the chips; they do not emit formaldehyde, which is harmful to humans and can be found in chipboards.
- Siding. The use of this material is permissible for both indoor and outdoor use. Installing it is quite simple, since the siding sheets are the same and have special fastenings. The material is not afraid of low and high temperatures, does not burn, does not crack, does not become moldy, does not rust or rot. Any inexperienced craftsman can install siding, that is, you can do it yourself. The service life of the material exceeds 25 years, no weather conditions can harm it.
- Plastic panels are a cheaper option than siding. They are light in weight, easy to install, and protect the structure well from drafts and moisture. If you require good sound insulation, plastic panels are a fairly good option as they can contain sound well. Plastic panels can be of any color, and a pattern can be applied to them. They well imitate wood, stone, marble, and other materials that are expensive and do not have the required qualities, while still meeting the aesthetic needs of the owner of the premises. Caring for plastic is quite simple: when it gets dirty, wash it with any detergent or just use a damp cloth. The material is not afraid of water and repels dirt.
- Plaster is an old and traditional option, but working with it is not very convenient for a beginner. You will need to create a sheathing from a special mesh; the walls must be smooth. Plaster cannot be applied to soft insulation. It is worth considering that it is applied in layers, and each layer takes about a day to dry: this is the longest option. Plaster is afraid of moisture; a positive quality is low cost. The plaster mixture can be painted after hardening; it is well suited for classic interiors. Another positive quality is the ability to retain heat well indoors.
The procedure and complexity of balcony insulation work
The goal of insulating any construction project is to create a heat-insulating shell that prevents the entry of cold air from outside and retains the heat generated by heating devices inside the room. To achieve such indicators on the balcony and loggia, insulation work is carried out in the following sequence:
- Warm glazing.
- Insulation of internal surfaces.
- Installation of a "warm floor" system.
The heated floor system on the balcony functions as a source of thermal energy, without which it is impossible to achieve comfortable conditions in a cold room. No matter how high-quality the double-glazed windows and insulating materials are, they do not generate heat, and therefore by themselves are not able to provide the required temperature on the balcony.
The heating source, in addition to the heated floor, can be a wall-mounted or free-standing radiator. However, if the neighbors below have not insulated the balcony or there is a basement below, this is ineffective.
It is difficult to make a warm balcony with your own hands from start to finish without experience in such work. Each stage has its own difficulties. For example, for glazing you will need the help of at least one person; without the skills to install window blocks, it is better not to undertake such work yourself. The situation is simpler with internal insulation of the balcony. With the correct selection of material and compliance with installation technology, the likelihood of a high-quality result is high.
How to make a sauna on the balcony with your own hands
The main thing in this matter is not to separate the sauna and the balcony, the expert notes.
– After all, they work together, so they both will have to pay equal attention
We start making a sauna... by insulating the balcony with mineral wool
Let's start with insulating the balcony. The best material for this is mineral wool. It does not burn or melt like polystyrene foam with penoplex. After all, the sauna runs on electricity, one spark and you can’t put it out. In addition, insulation, for example penofol, is laid on both sides of the insulation. Moreover, on the inside it should lie with foil in the room, with the outside - with foil on the street.
Insulation serves several functions. Firstly, it protects the insulation from moisture. Secondly, it prevents steam from wetting the ceiling of neighbors below, and the floor of neighbors above. Thirdly, it makes it so that your neighbors can hear you less.
It is better to lay double insulation on the ceiling. After all, where does the steam rise? Of course, to the ceiling. The neighbors will start to get damp, and they will complain.
The sheathing for the steam room is sheathed with plywood
After insulation, build a frame for the cabin from 50x50 mm timber. Then line the sides and ceiling of the box with plywood. And don't forget about the hole for the door!
The sauna must be at least 80 cm long and wide, and 2.1 meters high. Moreover, these norms were invented for a reason, but for human convenience and safety. If you make the sauna narrow, a person will not be able to turn around; if it is low, it will be too hot.
The sauna cabin, like the balcony, is insulated with mineral wool
The sauna cabin is also insulated with mineral wool. Foil or other thermal insulation is laid on top of it to retain heat. After this, the walls and ceiling are covered with clapboard.
Next, you can make a shelf on which you will relax. You need boards with rounded edges; when laying, leave a gap of 0.5-1 cm between them for free air circulation. The backrest on the top shelf will make your stay in the sauna more enjoyable.
Afterwards the heater is installed. A ventilation grille is made on the ceiling or wall above the heater, and a ventilation valve is installed opposite. If you open the valve, the air flow will increase, and when it gets cool, you will close it.
The final part is wiring for lighting; a thermometer and a clock are hung in the corner. Welcome to the sauna!
If you are planning a sauna, it is also practical to cover the balcony with PVC panels. On the website we have provided detailed instructions with a list of tools and prices for materials. For other finishing options, see the article: Options for interior finishing and loggias.
If you don’t even have glazing on your balcony yet, where is the best place to order it in Moscow, read this material.
We arrange ventilation
Often, for such an impromptu sauna, a small square opening of approximately 0.3 meters is enough. Don't forget about the plug : it is made of a wooden plank with a piece of polystyrene foam glued to it.
Finishing sequence
Repair work on the balcony must be carried out in strict sequence, this is the only way the next step will not spoil the work already done. During the DIY repair process, you will have to go through the following steps:
- Arrangement of the frame, which will become the basis of both the external and internal cladding, as well as the window system.
- Glazing. It is preferable to use two-chamber aluminum or wooden systems: although plastic ones have a more affordable price, they will last less.
- Exterior finishing with moisture-resistant material: clapboard, siding, etc.
- Installation of galvanized metal sheets or plywood on the frame for protection from weather conditions.
- Attaching the waterproofing film, installing insulation, blowing the gap with special foam.
- Installation of additional sheathing from slats.
- Finishing of surfaces: ceiling, floor, walls.
Work related to the balcony should be carried out in the warm season - this will significantly facilitate and speed up the process
When taking on this process yourself, it is especially important to pay attention to choosing a period when cold or excessive dampness will not interfere with finishing
Before starting bathing activities
If the apartment owners are overwhelmed by the desire to arrange a sauna on the balcony, then they have two options:
Before you turn your balcony into an area for wellness treatments, you need to draw up a plan for refurbishment of a small room. It must take into account:
If a radical reconstruction is planned, then you need to coordinate your actions: prepare all the papers, then take them to the architectural bureau and BTI, get the go-ahead from sanitary inspectors, firefighters, etc. When there is no desire to deal with this red tape on their own, they turn to a law firm; it will do the work relatively quickly and save the owners from long and painful trips to the authorities.
How to prepare a balcony?
Before starting construction work, owners must make considerable calculations; this process should be taken seriously. The balcony must be carefully prepared before facing. Take care of its glazing, waterproofing and insulation in advance. Thanks to these actions, your neighbors won't have to worry about you flooding them.
However, it is important that the sauna rests on a load-bearing wall; such a technique significantly reduces heat transfer
For fire safety purposes, you will have to comply with some standards: the dimensions of the room should not exceed 80 cm in width and 210 cm in height. This is another disadvantage, since it will be difficult to turn in such a narrow room.
If the owners decide to save on height in favor of width, then the sauna will be too hot. During finishing, wood is most often used. During construction work, you cannot use wet wood; it must be soaked with an antiseptic. If the humidity of the finishing surface is more than 10%, it will begin to crack and swell over time.
Wood is an environmentally friendly material that is not afraid of high temperatures. Experts say that linden, aspen and poplar are best suited for these purposes. It is better not to use conifers, since if they are heated to 110 degrees, the boards will begin to emit a rosin smell, which will not have the best effect on the human respiratory system.
Basic requirements, do you need permission to install?
Any redevelopment of a residential premises requires a certain permit; in the case of a sauna, you will need to contact the following structures: housing inspection, sanitary and epidemiological inspection service, fire inspection.
In addition, you need to meet some requirements:
- the design of the steam room should not be heavy, since the balcony can withstand a certain weight, it is worth abandoning heavy elements in the form of bricks and blocks;
- the small size of the stove requires high-quality insulation; it is worth taking care of glazing the balcony in advance;
- for finishing it is better to use the most suitable material; preference should be given to high-quality wood species (the costs will not be significant due to the small area).
It is imperative that you coordinate the arrangement of the bathhouse with your neighbors, otherwise they may submit complaints and complaints to various authorities.
Before organizing a bathhouse, you need to be safe; you need to take care of the reliability of the balcony, which will significantly increase the weight; for this, supports are installed. It is advisable to carry it out, this will increase the area of the bathhouse.
The weight of the stones that are laid out on the grid should not exceed 15 kg
Installation of electrical equipment
A Finnish sauna in your own apartment must be equipped with an electric or infrared stove. An infrared oven directs heat rays directly to a person rather than to heat the air. Infrared heaters are installed according to the manufacturer's instructions for uniform heating of the entire body. Infrared waves do not create additional stress on the cardiovascular system. Sweating removes excess fluid, fats and toxic substances from the body. An ordinary electric stove with heating elements should be tightly surrounded with stones and fenced. All fastenings must be of high quality (supplied with the equipment).
The power supply to the mini sauna must be supplied by a power cable from the panel with a minimum cross-section of 4mm2. All electrical wiring must be under the casing (purchase a heat-resistant cable or place the cable in a thermostatic hose). A prerequisite is the grounding of electrical equipment and the use of an RCD. To install lighting, you should choose only waterproof lamps that are connected in parallel.
electrical equipment for sauna
To avoid getting burned on glass, it is better to cover it with protective wooden screens. All switches must be located on the outside of the sauna - the presence of plastic in the steam room is unacceptable.
Important: all heating elements must be located at a height of at least 20 cm from the floor.
You can complete your mini sauna by making a steam generator yourself using an old electric kettle, a bucket, metal corrugation and electrical tape.
Making heating
We will heat our sauna room using heating elements or infrared heaters. It is best to purchase it in a special store. Such devices are made specifically for bath conditions, from waterproof, durable metal. All connections are located on the back and are protected from moisture getting on the terminals and other electrical contacts. At the bottom, they are equipped with a special tray for collecting water, which is very convenient. If installation on a wall is necessary, the stove is often equipped with special mounts.
You can also use infrared heaters for heating. They heat the air using infrared radiation and are quite compact in size. The use of infrared technologies is not recommended by doctors, since infrared rays have a bad effect on the human body. Preference should be given to electric heating elements, which are of higher quality than infrared heaters.
Finishing work for the sauna on the balcony
After completing the insulation work, it is necessary to begin the interior arrangement of the sauna. The layout of the sauna depends on its location
A corner sauna will be smaller in area than its longitudinal location, but in any of the options it is important to rationally place shelves and a fireplace
Since a sauna in an apartment on the balcony can accommodate no more than two people, the construction of two shelves will be sufficient for the steam room. It is not advisable to attach shelves to the wall; it is better to construct them from the floor. To do this, you will need wooden beams that will be secured to the floor and to each other, creating a shelf for sitting or lying on. The distance between the first and second shelf should be at least 50 cm to make it comfortable to sit and place on the shelves.
It is not recommended to use resinous trees, because when exposed to high temperatures, resin is released. In addition to the rich smell in the steam room, the resin will heat up and affect the skin.
Once the shelves are secured, they need to be sanded well to achieve a smooth surface. And after the surfaces of the shelves are sanded, they are coated with a special solution that prevents the wood from drying out or swelling when exposed to moisture.
Doors from the sauna to the steam room can be either glass or wooden.
For safety reasons and to avoid burns, all screws holding the beams on walls and shelves are deepened into the beams, and their caps are closed with wooden plugs, which can be cut to the size of the hole or set with glue.
Selection of cladding material
The most suitable material for finishing the walls and ceiling of a sauna on a balcony is considered to be lining made of hardwood (alder, linden, aspen). When heated, they emit a pleasant smell, the structure of the material is smooth.
Materials made from coniferous wood - cedar, larch, pine or spruce - are not recommended: when heated, they release resin, which not only gives off a strong odor, but also has an effect on the skin.
To avoid burns or injuries, all self-tapping screws, screws and other metal structural elements should either be buried in wood or the caps should be hidden with wooden plugs.
Equipment
The walls or ceiling are ready. Now you need to additionally equip your bathhouse with everything you need. The first thing to do is install the shelves. It is made from wood. To ensure normal air circulation, make the shelves non-solid.
Photo 5. Do-it-yourself shelves in the bathhouse
You also need to build ventilation. To do this, place a ventilation hole with a valve next to the shelf so that it is convenient for you to adjust it. And build a hole near the place where the stove will be installed. As soon as you open the damper, fresh air will enter from below and exit through the hole near the shelf. This will make it easy to control the flow.
Photo 6. Ventilation hole in the bathhouse
Install the stove in the bathhouse. It is better to do the wiring for it with your own machine, from which an insulated wire will run all the way to the balcony. If you are not familiar with electricity and cannot do everything yourself, then it is better to turn to professionals. Electricity is no joke!
The walls near the stove must be equipped with sheets of non-combustible material. The same thing needs to be done with the floor. This way you will protect yourself from the possibility of a fire as a result of a short circuit or overheating of the stove. A lamp must also be installed inside the structure. It should be chosen carefully, since there will be high temperatures in the bathhouse, the lighting device must withstand all this. Don't forget about sealing.
Photo 7. Electric stove in the bathhouse
The door to the bathhouse should close tightly. You don't want heat to escape through the cracks, do you? But at the same time, it should not have latches, latch or other locking devices. You cannot close from the inside, and the door itself must open outward - these are safety requirements that are best observed, in case someone becomes ill in the steam room, but you cannot open the door.
Building a sauna on your balcony is not that difficult, you can easily do everything with your own hands, the main thing is to want to. Of course, it will only be a dry steam room, but still better than nothing
It is important to remember safety measures; you should only use a factory-made stove. If you handle everything, then you will have a place where you can relax after a hard day, and do it without leaving home
Safety regulations
Opponents of installing saunas on balconies usually say that this design is unsafe. But if you follow all safety standards, you can protect yourself and your loved ones from unforeseen situations:
- Entrust the electrical installation and installation of lighting on the loggia to professional craftsmen. It is also important to monitor the entire process personally.
- The outer walls of the steam room should fit tightly to the insulating material. The booth should not border the street.
- It is recommended to make a separate outlet for the stove. It is not safe to run wires inside the mini-sauna.
- Measure a distance of about 3 centimeters between the floor and the door.
- It is better to use an electric oven with automatic settings. After working for 8 hours, the stove will turn off automatically.
- To avoid accidentally getting burned, it is advisable to cover the stove with a special screen.
- A stove-heater consumes a lot of energy, so it is better to connect them to the panel via its own cable.
- It is important to isolate the stove-stove from the wooden covering of the floor and walls. For insulation, choose high-quality heat-resistant materials.
- It is advisable to make the door inside from wood. If the handle is metal, you can get burned on it.
- The booth must have a lighting fixture with a heat-resistant coating and water protection level IP54.
- After visiting the sauna, it is necessary to thoroughly dry and ventilate.
- The total weight of the stones in the oven should be up to 15 kilograms.
- For doors you need to use special glass, which is sealed with rubber inserts when closed.
After the sauna on the balcony has been erected, it needs to be heated well. Open the door and turn on the heater for 60 minutes. The next day, dry for longer, up to 2 hours. Make the temperature no lower than 90 degrees. After this treatment, you can start steaming.
Insulation of the sauna
Along with reliable plastic windows, which will help maintain the temperature in the “dressing room” as best as possible, additional insulation and insulation of the steam room will be needed. To insulate the ceiling of a room, a thermal insulation material such as mineral wool is suitable. It is durable and absolutely safe to use. The beams are fixed on the ceiling approximately 35 cm apart and mineral wool is placed in the space between them, and then foil insulation is fixed.
Before treating the walls, you need to install the wiring from the electric meter to the sauna. It is worth using a special heat-resistant cable. To save space on the balcony, the outside should be insulated with foam plastic. Inside, 50x50 mm bars are placed vertically at a distance of about half a meter. The space between them is filled with mineral wool for insulation. Then the walls are covered with foil insulation, onto which slats are subsequently nailed. This structure is finally sheathed with clapboard or other wood material. Perfect for finishing boards with shrinkage less than 10%.
Before insulating the floor, keep in mind that the floor structure itself must be installed with an inclination towards the street so that condensation and moisture do not accumulate inside the room and create problems for you and your neighbors. Logs are placed on the floor 30 cm apart and filled with mineral wool. The floor is first covered with waterproofing and then with boards. And in the steam room, the floor is made at least 10 cm higher than in the rest of the room to ensure additional outflow of liquid.
Legitimacy of the idea
After enterprising citizens began installing mini-saunas in their apartments, representatives of the housing office and the fire inspectorate unanimously banned this installation. But according to regulatory documents, such installation can be carried out.
In fact, when installing a sauna, the balcony is not structurally rebuilt. Even if a partition is made, it will not be considered a major repair. Theoretically, there are no violations. Before installing a steam room at home, it is recommended that you familiarize yourself with the types of documentation:
- “Architectural and planning solutions for multi-apartment residential buildings” (SP 31 - 107 - 2004);
- “Residential multi-apartment buildings” (SNiP 31 – 01 – 2003).
It is recommended to contact the Management Company for registration to obtain a list of services from which you can obtain permission to install a mini-steam room. But if the neighbors don’t mind and security measures are followed, you don’t have to collect documentation.
Fire safety
In a steam room installed in an apartment building, only an electric stove is allowed. Its power should be up to 4.5 kW. In this case, there must be a ventilation system. It is prohibited to discharge steam into the ventilation shaft inside the house, since this load was not provided for during construction. The fire inspector will also require the installation of a special dry pipe that automatically supplies water in the event of a fire. The dry pipe must be connected to the fire alarm system.
Types of steam rooms
There are several steam rooms that differ in their healing effect, operating principle, and internal design. Before choosing the type of steam room, you need to study the features of each type.
Infrared
Infrared steam rooms are cabins of different sizes with glass doors trimmed with wood. An IR radiation generator is located inside. The waves warm up the body of the steam.
Infrared steam rooms are safe for the body, since if you choose the right mode, it is impossible to overheat in them. Radiation is not harmful to health.
It is prohibited to use cosmetics in the booth, as they may cause burns on the skin.
Japanese
Baths are very different from Russian steam rooms and Finnish saunas:
- Visiting a Japanese steam room is a complex process consisting of several sequential procedures.
- Inside there are large barrels with warm water in which visitors warm themselves.
- Warming up should be combined with massage, covering the body with warm sawdust.
Before visiting a Japanese bath, you must undergo a medical examination.
Finnish
The sauna has dry air, minimal humidity, and high temperature.
To make a Finnish steam room in an apartment, you need to prepare a large room. Arranging a sauna with a shower in an apartment is accompanied by difficulties in connecting communications.
Turkish
Most people like hammams due to their mild microclimate. They are characterized by low temperature and high humidity. Steam constantly enters through special channels in the walls. Requirements for arranging a hammam:
- ceilings from three meters high;
- forced ventilation system;
- high-quality vapor barrier.
Hamams are suitable for cosmetic procedures.
Russian
Classic Russian steam rooms are preferred by most bath attendants. They are characterized by low temperature, high humidity, and abundant steam. It is impossible to make a real Russian steam room in an apartment, since it requires a stove that runs on solid fuel.
Electric
A popular option for steam rooms for apartments.
They are fireproof because they do not require the use of solid fuel. The room is heated using an electric stove, which increases energy costs.
Mini
For bathing procedures, a phyto-barrel is used - a container with benches installed inside. In terms of effect and design, the design is similar to ofuro. Before use, the barrel is connected to a regular outlet and filled with water.
Choosing a steam room
Factors to pay attention to when choosing a steam room for an apartment:
- available amount of free space;
- type of fuel used;
- possibility of establishing communications.
If desired, you can place a steam room on several square meters, for example, it is popular to arrange a sauna in an apartment on the balcony.
What is the difference between a sauna and a bathhouse?
Before you begin construction, you need to clearly know the differences between both bath options. At first glance, a steam room and a sauna are one and the same. In reality, this is not the case, although it is also not worth considering both structures as something completely different.
What is the difference between a sauna and a bathhouse?
At one time, wood was used to heat the sauna, as in the case of the Russian bath. Also, many are mistaken about the fact that they do not use a broom in Finnish steam rooms - this is not true, since massage with birch branches is possible in both options.
Massage with birch branches
Regarding the differences, which certainly exist, they appeared only in the last century - at that time electric heating elements began to be used to heat the sauna. Then significant differences appeared. So, if the owner of a private house, in principle, does not care how to heat the stove, then in a multi-storey building this moment is decisive, especially when constructing a steam room on the balcony.
Electric sauna stove
Due to the use of a stove, a Russian bathhouse needs a chimney, which entails a number of fire safety measures and a bunch of papers that must be signed and approved. Add to this the bureaucracy inherent in officials and as a result, when everything is ready, the bathhouse may no longer be a joy.
Electric sauna stove
Dry saunas heated by heating elements do not have such disadvantages. They can be installed almost anywhere where electricity is installed. Balconies in multi-storey buildings are no exception.
Preparation for construction
An abstract idea should always be embodied first of all on paper, that is, in terms of reconstructing a balcony. This document must meet all the requirements and standards for the re-equipment of balcony structures.
Sauna drawing from above
What needs to be taken into account in terms of balcony reconstruction:
- Maximum possible load on the floors;
- Methods for strengthening a balcony slab;
- Hydro- and thermal insulation of the room;
- If necessary, arrange the roof;
- Materials that meet fire safety regulations.
Another important point is the consent of neighbors to the reconstruction. Even if the balcony looks exactly the same from the outside as it did before construction, attentive neighbors may see it as a potential danger.
All prepared papers should be taken to the BTI and city architecture, then permission from other authorities (fire departments, sanitary inspectors, etc.) must be collected. After receiving permission, construction can begin.
Advice: if it is difficult for you to collect the necessary documentation, contact the city’s construction companies.
Specialists will advise you not only on reconstruction issues, but will also draw up a plan and collect the necessary permits.
Beginning of work
The first thing to do before arranging a sauna is to prepare a balcony. For this purpose, continuous glazing is performed. In this case, the wooden elements will be protected from the effects of precipitation, and the level of thermal insulation of the room will increase significantly. Some of the insulation elements are made to open.
This is followed by waterproofing the balcony. First of all, you need to cover the floor. Before laying the waterproofing sheets, the base of the balcony is leveled and treated with penetrating waterproofing. Then the power supply is introduced. On the residential side, the input is equipped with a packet switch.
Floor
The best option for insulating a balcony is the use of polystyrene foam boards. This insulation practically does not conduct heat and has good waterproofing properties. Floor insulation is carried out in the following order:
- The logs are secured to the base using dowels. They are made from 30-40 mm timber. The height of the logs must be no less than the thickness of the insulation.
- In places of fastening, waterproofing is restored using liquid sealant.
- Thermal insulation boards are laid between the joists. They can be glued to a layer of waterproofing. However, they are often left loose.
- The seams between the insulation and the joists are sealed with sealant.
- A second layer of waterproofing is laid on top of the polystyrene foam.
- The final finishing – lining – is installed.
During work, you should adhere to safety rules. After such procedures, you can begin finishing the walls.
Waterproofing a balcony with your own hands is quite simple - it is important to select the necessary materials
Walls
To insulate the walls, the same material is used as for the floor - polystyrene foam. Penofol or foam glass are also often used. To secure the insulation to the walls, a special frame is made of beams. There should be a distance of 40-50 cm between the slats. Insulation is placed in each cell. Often pieces of material are not secured at all. When insulating a large area with mats, they are secured with special nails. The insulation layer consists of the following elements:
- insulation material
- diffusion film;
- clapboard finishing.
The top of the insulation is covered with a vapor barrier. This allows you to protect the material from moisture and condensation, as well as significantly increase the service life of thermal insulation and increase the safety of the balcony walls.
Often walls are insulated with polyethylene. The rolled material is thinner than mineral wool. In addition, it has a foil surface on one side. Aluminum protection reflects heat.
Penofol is laid with foil inside. The material is secured using wooden slats, which are nailed on the outside. After the insulation is laid, the walls are covered with clapboard. A photo of such a sauna on the balcony can be seen below.
Ceiling
Ceiling insulation is carried out in the same way as walls are insulated. However, in the case of insulated, the thickness of the insulation is less. Other aspects of the technology remain the same:
- first you need to fill the frame;
- then lay the insulation;
- fix the vapor barrier, perform finishing.
Such procedures will help to reliably protect the room from heat leakage. The work is done quickly and easily. The main thing is to follow the plan.
Ventilation
An important stage is the implementation of ventilation made in the outer wall. It will ensure the outflow of steam and eliminate foreign odors from the steam room. Ventilation is installed simultaneously with the construction of the ceiling. The outlet is equipped with a plug. It is made quite dense, which ensures heat retention in the room. For the plug, a piece of foam plastic cut to fit the dimensions of the hole is usually used.
Wiring
The electrical wiring stage is one of the most critical. Electricity is a source of increased danger, and moisture can cause a short circuit.
The lighting of the steam room must be closed. It is also necessary to reliably protect it from moisture. Thermal spotlights are often used to illuminate the sauna. They have a fairly high level of protection against moisture.
To protect the wiring from short circuits, the system is equipped with a special disconnect device (RCD). If you do the wiring yourself, you should follow the following sequence of actions:
- install a panel equipped with a 25 A circuit breaker;
- Use it to route wires to electrical points.
It is worth considering that only installation of lamps can be done inside the bathhouse. Switches and sockets must be installed outside. To protect the cable, corrugated pipe should be used. Its ends are carefully sealed.
Organization of electrical wiring
The cable must have good heat-resistant properties. Sauna stoves are very powerful and consume a lot of electricity, so they must be connected via a separate cable.
Work order:
1. A separate machine is installed on the distribution panel, taking into account the power of the heating device. 2. The power supply network is equipped with a residual current device. 3. A separate outlet is installed on the balcony. 4. The cable is laid, protecting it with a corrugated pipe. 5. The wire to the lamp is laid in a metal hose.
It is recommended to use special sealed thermal spotlights as a lighting device for a sauna. They work properly at temperatures up to 120 °C.
Switches, sockets and distribution boxes cannot be installed in the steam room. They must be taken outside of this compartment.
Finishing work inside the sauna
The best material for finishing the steam room is larch, linden, poplar or aspen. It is best to avoid using excessively resinous wood, as resin can be released from the wood at particularly high temperatures and create an overly strong odor.
Depending on what type of sauna you choose (corner or wall-mounted), it is important to rationally plan the location of the seats and stove. A compact steam room on a balcony is usually designed for 2 people, and the shelves will be small - the width of the balcony
To construct 2 tiers, the beams are attached to the floor and to each other, and then seating areas are created with a minimum distance between them of 50 cm.
After fixing, all surfaces are sanded and coated with a solution to prevent swelling from moisture and drying from excessively high temperatures. Steam room doors can be made of wood or heat-resistant glass. To save space, doors must open outward. And you should not use a lock on the door, because if a person becomes ill in the sauna, access to it should be open. And one more important nuance: be sure to cover all screws in the steam room with wooden plugs. This will help you avoid possible burns from hot metal.