No. 1. mosquito net
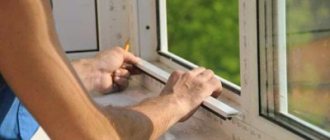
As a rule, a mosquito net (to be absolutely precise, an anti-mosquito net) is installed immediately with plastic windows, but still some people refuse it at first. The realization of the mistake comes soon. A mosquito net not only protects your home from various types of insects, but also prevents pets from accidentally falling out of the window.
There are several types of mosquito nets:
- frame – standard and most popular option. A mesh is stretched over a frame made of PVC or aluminum; it is inexpensive, lasts for years, and only needs periodic washing. Installation of the mesh is done using the side handles and may require some skill at first. In winter, it is better to remove the net with a plastic frame and store it at home;
- Velcro mesh It is as easy to install and remove as possible, and when folded it takes up minimal space. This is the most budget option, but its durability is low. In addition, one of the sticky parts will have to be glued to the profile;
- rolled mesh in one movement it can be moved to the top of the window, like roller blinds. It is convenient and practical, but a little expensive;
- sliding mesh suitable for very large windows; when opened, it moves to the side, like doors in wardrobes;
- the pleated mesh is also retractable to the side, but at the same time it also folds into an accordion;
- The hinged mesh opens like a regular window sash. Convenient if the window opening often needs to be completely open.
Choose a mesh with a cell size of 1-1.2 mm. If there are too many insects in the region, then pay attention to products with smaller cells. There are nets with increased strength that can withstand the weight of an animal - “anti-cat” nets.
No. 2. Air valve
A good plastic window is a reliable barrier between the street and the house, and so reliable that air does not even leak through it. Previously, leaks, cracks in windows and slopes were part of apartment ventilation. If, after installing plastic windows, you notice that the air has become stale, stuffy and damp, then it’s time to upgrade the window and install an air valve that lets in fresh air, but keeps out dust and noise.
The valve can be attached to an opening window sash , and it will not be noticeable. The air flow is adjusted either manually by moving a handle on the body, or automatically thanks to the presence of complex control systems inside. Some valves are easy to install yourself, while others require the assistance of a specialist.
If space allows, the valve can be installed under the window or on the wall near the window, but then you will have to make a through hole in the wall.
Mounting sealing strips
Mounting tapes become necessary after installing and securing the window to make it airtight. The sealing material reliably closes cracks and gaps, protecting against moisture and destruction. The special composition with which the tape is impregnated makes the insulating material resistant to temperature changes, solar radiation, and humidity. There are three types of tapes:
- Vapor permeable - used to seal the seam between the window frame and the wall from the outside in order to isolate it from water.
- Vapor-tight - used to seal the gap between the window frame and the wall from the inside.
- Self-expanding - used as a sealant, often in addition to polyurethane foam, on the outside of the window. The tape fills the entire space between the window frame and the opening, thereby protecting the remaining insulating materials.
No. 3. Films for window profiles
It happens that after just a couple of years the white window profile turns yellow. Or the interior of the apartment has changed, and white is no longer suitable. In this case, it is ideal to replace the windows, but you can go the other way and purchase a film for laminating the window profile. Something similar is done in production, when they make a profile with imitation wood, but there is a pre-treatment with a primer, and the film is glued by machines under high temperature, after which it is rolled with rollers. This is the most reliable method, but it is not suitable for an already installed window. To update your profile yourself, you can purchase a special self-adhesive film, which is available in different shades and textures. Some craftsmen adapt car film for this purpose. The service life of such a coating is not very long, but re-gluing the film is inexpensive and does not last long.
As an alternative to laminating film, special paints for PVC , however, you will first have to sand the surface and treat it with a primer. Paint will last much longer than film.
In order not to have problems with a yellowed profile, it is better not to engage in manic saving even at the stage of purchasing windows, hoping that all windows are the same, and high prices are just someone’s thirst for profit. Not the same! It’s even stupid to compare a reliable German profile with a little-known Turkish or Chinese one, and responsible manufacturers of plastic windows use only high-quality materials. “Factory of Breathable Windows,” for example, uses exclusively the Rehau profile; the range of the company’s offerings can be found on the page https://oknafdo.ru/plastic_windows/. It was this professional approach that allowed the company to become a leader in the south of Russia with a wide network of branches, and an indicator of quality is the 7-year warranty period for windows.
Materials for installation of plastic windows
If you plan to install or replace old windows with new plastic windows yourself, you should buy a set of products necessary for this. Today, “warm” window installation is increasingly practiced, requiring a certain sequence, tools and materials. The WINDOWS MEDIA portal will tell you what materials are needed when installing plastic windows.
Window designs are undergoing changes, and along with them, the approach to the window installation process is changing, and accordingly, new installation materials appear on the market, which we had no idea about just a few years ago. Useful installation accessories needed in the process of installing plastic windows yourself include, among others: anchors, polyurethane foam, mounting wedges, spacer blocks, sealing strips and additional profiles.
First of all, plastic windows must be installed correctly horizontally and vertically. Windows are installed in the correct position using mounting wedges and spacer blocks. The lower part of the frame rests on spacer blocks, and mounting wedges are placed on the sides and top. Using these elements, you can install the window in the desired position during installation and temporarily fix it. Mounting wedges and spacers are usually made of plastic.
Polyurethane foam is used to fill the space between the window frame and the wall. The foam forms an insulating contour and also compensates for movement caused by deformation of the frame material. In most cases, low-expanding polyurethane foam is recommended for the installation of plastic windows.
The foam should be applied in a thin layer on both sides of the window. It should also be used to fill the places where the mounting wedges were inserted. Spray foam hardens after 24 hours, and moistening the substrate before application improves expansion and adhesion. Hardened polyurethane foam is vapor-permeable, that is, moisture that accumulates in the house can escape to the outside. Today, polyurethane foams are offered for sale, which can be used in the cold months, at temperatures down to - 12 ° C, the so-called winter installation of windows.
Plastic windows must be secured with dowels or anchors. The decision to choose a method for securing a window is made by installers based, among other conditions, on the characteristics of building structures. According to experts, both fastening options are good, but they have their advantages and disadvantages.
Many window installers believe that dowels provide greater structural stability than anchors. However, dowels should not be used to secure the bottom of frames and sills. Open chambers of frame profiles are difficult to protect from the penetration of rainwater or moisture.
Thanks to anchors, plastic windows can be installed without damaging the integrity of the frame. Therefore, they are more aesthetically pleasing, since when using dowels you need to drill holes in the window frame. On the other hand, installing a window using anchors is more labor-intensive. The anchors must be screwed to the profile with self-tapping screws, and they must be fixed into the walls with two spacers so that they cannot change their position.
Adjustable anchors are used for “warm” installation of windows, when the frame must protrude beyond the wall surface line. The anchors are fixed to the window sill covered with a leveling layer. When the wall is made of porous or perforated material, additional mounting brackets must be used to ensure the stability of the window structure.
Supporting consoles are used with “warm” installation technology and allow the window to be located behind the outer surface of the wall so that it is in the insulation line. Consoles are attached to the wall around the window or just below the window. The system consists of sections of various lengths (5, 10 or 15 cm) with additional fastening elements - anchor dowels, anchor plates, corners, corner posts.
A single cantilever consists of a flat rod bolted to the wall and the height of the screws adjusted by angles or plates on which the window rests. Attachment points should be installed at a distance of 10-15 cm from the corners of the window, as well as fixed imposts with a maximum pitch of 70 cm (for a window made of a white PVC profile).
The vapor-permeable tape is designed to seal the joint between the frame and the wall on the facade side. The tape is capable of releasing moisture that is in the insulating layer. It is also designed to protect the insulating layer from the ingress of water from the outside. The tape is cut with a small margin and fixed with a slight allowance, taking into account the operation of the window in the wall. Two separate pieces of vapor-permeable sealing tape should be connected at the corners.
Vapor-tight tape is an adhesive tape that seals the joint between the window frame and the wall on the room side. This is done to ensure that as little moisture as possible penetrates into the insulating layer.
Self-expanding tape is used as a sealing layer between the window and the wall. When this gap is small, the tape can be replaced with polyurethane foam. However, it is often used as a supplement to polyurethane foam. The self-expanding tape serves to seal the junction of the window and the wall from the outside, protecting the foam from the harmful effects of ultraviolet radiation.
After installation, the self-expanding tape can significantly increase in volume and fill the empty space. It has a special impregnation, so it does not absorb or allow water to pass through. Self-expanding sealing tape can be glued before installing a plastic window or placed in the gap after installing the window frame. When using such tape, the use of vapor-permeable tape is not necessary.
The support profile protects and insulates the junction of the bottom of the window with the wall, eliminates thermal bridges and reduces the likelihood of condensation. The installation space under the window is the largest, sometimes reaching up to 3 cm in height. The use of XPS extruded polystyrene foam systems allows you to speed up and simplify the installation of a plastic window. This one element can handle instead of three. The support profile made of polystyrene foam is hard and resistant to loads, and also has a low thermal conductivity coefficient (λ = 0.035 W / (m • K)).
Thanks to this technique, the place under the window acquires very good thermal insulation parameters. The stand profile is shaped in such a way that it forms the basis for both the window frame and the internal and external window sills. The higher central part is the frame's support point, so this area must be sealed with expansion tape.
Silicone caulk or silicone is used to attach window sills and fill joints. Silicone sealant can cost from 40-50 rubles to 200-300 rubles. Cheap, low-quality silicone will quickly turn black and turn to dust in less than a year of use.
When deciding to install plastic windows yourself, you should take into account that the materials used for fastening windows, finishing, vapor and waterproofing are exposed to extreme weather conditions every day. Moreover, the temperature difference on the outer surface of the wall of a house on a frosty winter day and on a hot summer day can exceed 100 degrees. In addition, changes in air humidity can fluctuate over a wide range - from zero to the maximum possible humidity level. Accordingly, when buying materials for installing plastic windows, you should take into account that they are ready to work for a long time, taking into account these unfavorable factors, as well as weathering and exposure to ultraviolet radiation. Experts recommend using only the highest quality materials for installing plastic windows. .
Installation of plastic windows is the most important step between the purchase and operation of window systems. The largest percentage of complaints in Russia are related to the quality of window installation. Properly selected materials for window installation greatly influence the final result - the functionality of the windows. Remember that saving on the quality and quantity of installation accessories will certainly affect the performance of your plastic windows.
WINDOWS MEDIA recommends: We choose materials for installing plastic windows ourselves
No. 4. Accessories for child safety
Statistics say that about 4,000 children fall out of windows every year. Keeping your child away from the window is not an option - children are inquisitive. When the baby grows up and learns to climb onto the windowsill on his own, the window design needs to be modernized, and now we are not talking about bars. There is something better:
- handle with key - the simplest option, it is installed instead of a regular handle, and with the help of a key you can lock the window when closed. If the key is well hidden, then the child is not in danger at all. The downside is that you won’t be able to open the door.
- lock on the bottom door blocks swinging, but allows the sash to recline;
- child restraint opening, as it were, stops the opening of the sash more than the required level, it opens and closes with a key;
- child lock with cable. One part of the cable is attached to the fixed sash, the second is thrown onto the movable sash and secured with a key. Fresh air enters the apartment, but the child cannot accidentally fall out of the window.
Basic elements of window fittings
Constipation
– elements necessary to open and close a window. They are driven by window handles. Constipation is classified as moderate, additional and basic. Middle locks ensure that the frame adheres to the profile. Additional locks are most often multi-point locks. There are three main types of constipation:
- tilt and turn
- rotary
- shulpovye
Fastening loops
are connecting tools that help open and close a window. There are several types:
- overhead or standard
- screw-in
- hidden
- anti-burglary
- hinges for balcony doors.
Handles
are lever tools that open and close windows. The following types of handles can be distinguished:
- standard window handles
- handles with lock
- reversible handles
- petal handle
Trunnions
are elements of the locking mechanism necessary for a tight fit of window sashes to the frame and coupling of other elements.
Latches
are window elements that hold the window in an ajar position, preventing the sash from accidentally swinging open in the event of a strong wind or draft.
Installed on rotary, tilt-and-turn and sliding windows, as well as on balcony doors. Strips
are window parts that help firmly press the window sash to the frame.
The slats come in reciprocal and tilt-and-turn types. Corner switches
are elements of a locking mechanism that allow you to close a window through a corner.
Tilt-and-turn scissors
are window hardware parts necessary to secure tilt-and-turn windows in the open position.
If scissors are installed on the windows, then you can change the position of the handle only when the sash is closed. Decorative overlays
are elements on the visible part of window fittings that emphasize the individual design of the window.
Slit micro-ventilation
is a micro-ventilation mechanism that facilitates the release of stagnant air from the room.
In this case, the valve is designed in such a way that complete sound insulation is ensured, drafts and condensation are not formed. Rollers
are window fittings used for sliding windows. They are wheels with fastenings, thanks to which the doors can move. Wheels come in metal, plastic, nylon and rubber.
No. 5. Decorative layout
To bring a standard modern plastic window closer, for example, to the French style, you can decorate the double-glazed window with beads or decorative layouts. Such elements are usually made of aluminum; they can have different widths and be of any color (the most popular options are white, brown and gold). The profile shape is usually rounded. Using a sprocket, you can divide a double-glazed window into several parts and give it a more interesting look. However, imitation binding is not always necessary - this is an option only for rooms decorated in a suitable style.
If desired, the layout can be ordered at the window manufacturing stage, and then it will be located between the panes in the double-glazed window. This option gives a more realistic effect, but if the window is already installed, then all that remains is to mount the brackets only on top of the glass, and always from the inside. You should choose the number and length of such decorative elements with extreme caution, based on the principle of “doing no harm.” To achieve maximum realism, special connectors are used, thanks to which you can position layout elements at an angle of 90, 180 or 135 degrees. The sun layout on arched windows looks especially interesting.
Preparing the window opening
Work begins with preparing the window opening.
This process consists of several stages:
1. Dismantling old windows
2. Removal of all types of seals and insulation;
3. Cleaning up construction waste.
4. Alignment of the walls of the opening.
Correct installation of plastic windows according to GOST is possible only if they are manufactured using industrial equipment and fully comply with previously taken measurements. Even at the stage of preparatory work, it is necessary to take into account the fact that the opening must be 2–5 cm wider and higher than the window structure, so that a full-fledged installation seam consisting of 3 layers can be formed there.
The easiest way is that if windows are installed in new buildings, one of the most difficult stages - dismantling - is eliminated. But in case of window replacement, it is mandatory. Removal of the old window begins with the removal of the sashes. As a rule, there are no difficulties at this stage if the frame is not completely rotten. In this case, you must first remove the glass so that it does not fall out when removing the sash.
The frame itself can be removed in several ways, including some that are very gentle, but time-consuming, allowing you to keep the frame intact and suitable for further use, for example, in a country house or as a load-bearing element of a greenhouse. Most often, the old frame is simply cut with a circular saw and removed piece by piece.
The opening is thoroughly cleaned of debris and remnants of old sealant. If there are recesses, potholes and cracks with a diameter of more than 2 mm on the walls of the opening, then GOST requires them to be sealed with plaster or putty mortar. Few people adhere to this point due to the fact that the plaster completely dries within 5 - 8 days, which is not entirely convenient. All this time the opening will be open. But you can use quick-drying gypsum or polymer mixtures, which will reduce the waiting period to several hours.
No. 6. Comb limiter
There are windows whose sashes can only swing open, and they do not have a tilting or micro-ventilation mechanism. Such designs are cheaper, and many, trying to save money, choose them. Then it turns out that there are more problems with the windows than initially thought, so you have to come up with something in order to be able to ventilate by opening the sash slightly and fixing it in this position.
The easiest way is to install a comb limiter. A latch is mounted on the movable sash, and a comb with several gaps for fixation is mounted on the stationary sash. When you need to open the window slightly, you need to hook the comb on the latch. It is most convenient to install at the level of the window handle.
Combs are usually made of white plastic, so they won’t be too noticeable. The longer the length, the greater the permissible maximum fixed level of opening of the sash. As a rule, combs are made 10-12 cm long, but longer ones can be found. The more gaps there are, the more fine adjustment of the opening of the sash can be made. The standard option is 4 gaps, but combs with 10 gaps are available on sale.
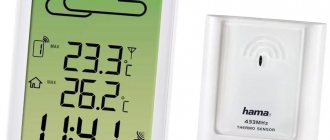
No. 7. Window thermometer
Yes, each of us has a smartphone at hand, which even broadcasts data about the weather outside the window to the main desktop. It would seem that it’s enough to look at the screen in the morning and understand how to dress, but that’s not the case. Many of us, out of habit, go to the window to evaluate all the parameters personally: temperature, presence of precipitation, cloudiness, etc. There is no escaping tradition, and often this method turns out to be more accurate than the data in a smartphone. An elderly person without a regular thermometer will be completely uncomfortable.
All existing types of outdoor thermometers can be used with plastic windows:
- familiar to all of us alcoholic, moderately accurate, cheap, but it is worth keeping in mind that over time it begins to lie, as the alcohol gradually evaporates and begins to condense in the upper part of the capillary;
- bimetallic, whose action is based on spring compression, is the least accurate of all;
- electronic most accurate, looks good.
You can attach the thermometer directly to the glass with Velcro, but it is advisable to mount it on a fixed sash (if there is one) and on the north side - this way the readings will be more accurate. There is also an option for mounting on holders. The most practical and safe option would be a thermometer with a remote sensor, i.e. you will see the indicators on the display indoors, and the sensor itself will be located outside the apartment, but this is no longer quite a window thermometer.
No. 8. Stained glass film
Classic stained glass is expensive and complex; it must be created at the window production stage. But what to do if there are already windows, they cope with their functions, only the interior has been updated a little, and now it could not be better decorated with stained glass. The solution is simple - take a stained glass window film. You can find a lot of ready-made drawings on sale. The installation process is extremely simple. The glass is cleaned, degreased, and then stained glass film is carefully glued onto it. There is no need to use glue - the film is sold on a self-adhesive basis. For greater resemblance to real stained glass, you can use tin broaches, which are also available on a self-adhesive basis.
No. 9. Protective films
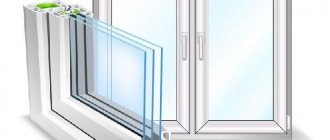
Protective films for plastic windows are glued in exactly the same way as stained glass films, only their task is not to decorate, but to protect. If, when choosing a window, you made a mistake with a double-glazed window and took the simplest one, and then realized that it does not retain heat well enough or does not reflect the sun's rays well, then you can improve the design with a suitable film:
- heat-saving films are produced on the basis of polyethylene phthalate, a thin coating of silver or a chromium-nickel alloy is applied to the polymer layer. This coating allows you to reflect IR rays into the apartment and keep it warm. According to the manufacturers of such films, it is possible to achieve up to 30% savings on heat payments. This is the main, but not the only advantage of such a film. If the glass is damaged, all the pieces will remain on the coating. It is better to mount the film for the winter period, and remove it with the onset of warm weather. Self-adhesive and shrink films are available for sale. Installation of the latter is carried out using warm air;
- reflective films – a necessity for south-facing apartments. They allow you to reflect the sun's rays, making the room cooler and more comfortable in the summer heat. Such films are made based on polyethylene terephthalate and coated with a thin layer of rare earth metal oxides, which have the property of reflecting UV and IR rays. The coating can be colorless, or it can have a colored coating or even a mirror surface. Films that reflect up to 15% of sunlight are suitable for apartments. If you take an option that is too dense, you can get the opposite effect - the room will become too dark. It is good to use such films in the warm season and then remove them;
- shockproof film makes the double-glazed window more resistant to impacts and other violent burglary attempts. No, such a film will not completely protect against a hammer blow, but it will increase the durability of the structure, and then you’ll see which of the neighbors will see the intruder. Anti-vandal films are divided into classes. Films of class A2 can protect a double-glazed window from thrown bricks, and class A3 films can even withstand gunfire. If the glass unit is nevertheless damaged, then all the fragments will remain on the film;
- You can also hide the room from prying eyes thanks to a matte film with a pattern. A certain amount of light will leak in, but no one will see you from the street. A good option for the bathroom.
Installing a plastic window and securing it
Before installation, substrates are attached to the lower end of the opening. They can be made of wood or plastic. The entire frame is installed on them. The supports remain as they support the window structure. The frame is secured with pegs on the sides, driving them between the wall and the profile. If they are neglected, the frame may bend. To check the horizontalness of the window, use a regular water level, which is also useful for measuring height and width.
Rice. 12. Installation of PVC.
Fastening PVC windows through the frame
This process requires the use of a hammer drill. With its help, holes are made in the sides of the opening, which determine how clearly the window structure will be installed. There is no way you can make a mistake here. First, the lower part of the frame is attached, on the left and right, after which the anchors are installed, but they are not fully secured. Afterwards, you should again check the vertical position of the window, and only then drill holes at the top of the profile.
When the anchors are ready and the level is correct, tighten the fastening. Remember that it is not recommended to tighten the anchors too much to avoid putting too much stress on the frame, which may become deformed.
Rice. 13. The figure shows the differences in fastening the frame in different ways.
Fastening PVC windows using plates
The plates are special fasteners made of thick metal that are shaped like ears. They have holes for anchors. The mounting arm is bent so that it resembles a step. The ears should be adjacent to the wall. Only in this case can you drill holes for the anchors. Similar to the previous method, the frame is attached starting from the bottom edge, and then the verticality is checked and the upper part is installed. The levels must be observed.
Rice. 14. Parts for installing the window.
Drainage installation
A drainage system is a special hole and groove through which water flows without collecting on the glass unit and without destroying it. There is a special groove for it on the outside of the window, where the drainage system is inserted. After this, foam is applied according to PVC installation technology. There are cases when the drain is additionally secured with screws to the edge of the window frame.
Rice. 15. Structure of a plastic window with drainage.
Sealing gaps
Polyurethane foam plays the role of a sealant when eliminating the gap between the wall and the frame. The sealant is necessary to provide good thermal insulation; without it, heat will escape from the room. Only when using this material, you must close it to prevent exposure to sunlight and dampness, since the foam can quickly become unusable and lose its properties. A water barrier acts as protection. Installers often ignore this, and then the window owners do not know why the cold is coming from the window, and the windows constantly sweat.
Rice. 16. Using foam will protect windows from drafts and fogging.
Window sill installation
The window sill is an essential part of the window. It should be installed after the frame has been installed. It should fit into the hole between the frame and the bottom edge of the opening and be attached firmly, without loosening. The window sill should rest against the lining and fit against the sides of the opening on both sides. The space underneath is filled with foam or mortar. The window sill is attached to the frame with self-tapping screws, which are built into the inside of the frame along the edges and in the middle.
Rice. 17. The window sill must be secured firmly.
No. 10. Anti-burglary fittings
If the area is more or less busy, then a thief will not break the double-glazed window - it is noisy and takes a long time. He will prefer to break the locking mechanism. An experienced burglar will need a few seconds and a simple screwdriver. It is better to install anti-burglary fittings on a new window, then you will get the most secure system. You can also refurbish an old window, but then there is a high probability that a major overhaul of the sash will be required, but in this case the safety of the system will increase significantly.
Anti-burglary fittings are a whole system that consists of several components:
- the locking mechanism installed in the handle area does not allow drilling or knocking out the lock from the outside;
- mushroom-shaped axles can withstand loads of up to 1.5 tons, which is several times more than conventional axles;
- counter strips and hinges are made of durable steel, and due to the fact that the trunnions enter the strip in different directions, an attacker will not be able to overcome the window by simply moving the fittings to the side;
- increased number of locking points. If a regular window has only one locking point, then a secure window has at least 5;
- Instead of aluminum hooks that go into the frame, they use steel ones, which are more resistant to burglary.
Protective fittings are divided into several classes. WK1 class fittings will withstand kicks, shoulder impacts, and push-ups from four corners. WK2 class fittings protect the window from burglary with a screwdriver, pliers and other similar tools, and WK3 class is protection against burglary using a pry bar. It will be difficult to install everything correctly with your own hands, so it makes sense to take the help of a professional.
Tools, seals and installation materials
TBM-Market does not sell toxic, unlicensed compounds. All chemical products for installation and maintenance are certified. With us, the ecology of your home is protected. Tools for work are of high quality, ergonomic and durable. With them, any window work is done easily and quickly. The seals contain no harmful substances, they are resistant to ultraviolet radiation and will last more than 10-15 years. Window fittings are made of durable materials with a durable coating.
The TBM-Market website presents products of Polish, German, Chinese and Russian production. Our consultants have extensive experience working with window systems. They know everything about windows and will be happy to advise you and select the necessary components for each window.
Why Muscovites are increasingly choosing TBM-Market:
- With us, you don’t need to look for components in different stores, travel around Moscow and order from different suppliers. TBM-Market is the place where you can order everything at once and without overpayment.
- We have components, tools for window installation, retail fittings, ventilation and automation systems. You can order from us any volumes of mosquito net fabric, accessories for their manufacture, or ready-made nets according to the ordered sizes.
- We have the most convenient payment methods.
- We will deliver the goods the very next day after ordering or the goods can be picked up.
- We regularly hold promotions, we give unexpected surprises and gifts to our Clients.
We are interested in you, which means you will enjoy your order and purchase. Windows equipped with our components will last for many years, maintaining warmth and comfort in your home.
No. 11. Slopes, window sill and ebbs
As a rule, window sills and slopes are finished during the installation of plastic windows, but if suddenly something happens to the original panels, you can always order new ones. The same plastic windows and window sill are best suited to plastic windows. They are easy to maintain, relatively simple to install, and look aesthetically pleasing. If you have chosen a plastic profile with imitation wood, then the slopes and window sill can be selected in the appropriate shade.
The window sill can be chosen from PVC, acrylic or stone, or it can be finished with wood or tiles, but this goes beyond the scope of accessories for plastic windows.
Window sills are also installed simultaneously with the installation of windows. Essentially, this is the same window sill, but external, and it is necessary for the proper drainage of snow and rain, as well as for the protection of polyurethane foam. Aluminum, plastic and polyester casts are used. Plastic ones are the cheapest, but at the same time quite durable, aluminum and steel with a polyester coating will last longer and are more expensive, but with rain cables constantly falling, a sound is inevitable, which can infuriate some.
Sometimes blinds and pleated curtains are considered accessories for plastic windows. Of course, these are important elements for organizing a comfortable space, and so important and complete that it is difficult to classify them as accessories.
The article was written for the site.
Tags:Windows
Installing and aligning the window in the opening
After proper preparation of the opening, further installation continues with the installation of the frame. It is necessary to take into account that the structure is installed plumb and not along the edges of the opening. In most old Soviet-built apartment buildings, and often in private houses, the side walls of the opening are far from vertical, and the bottom and top are far from horizontal.
If you take one of them as a guide without first checking the level, then you can install the frame, but with the sashes it will be more difficult - all the fittings are designed to strictly comply with the level.
When installing plastic windows according to GOST, the instructions require compliance with certain tolerances - vertical deviation no more than 3 mm/m. (less than 4.5 mm over the entire length of the structure). The correct installation of the frame is checked using a water or laser building level.
Before foaming the seam, you can check the plumbness of the frame in another way - simply open the sash more than halfway. If it spontaneously opens further or begins to close, then the window is not installed vertically and the position of the frame must be adjusted. If this is not done, there will be no proper sealing, which threatens not only a lower temperature in the room, but also damage to the window structure due to the appearance of ice.
The frame is fastened to the wall using anchors or special mounting plates, if provided. Naturally, before fixing the frame, it is necessary to dismantle the double-glazed window and remove the sashes. This will make aligning the frame and installing it much easier. Usually, a PVC window correctly manufactured on industrial equipment is very easy to disassemble into its component parts (except for the frame) and then put back together, having the necessary skills, of course.
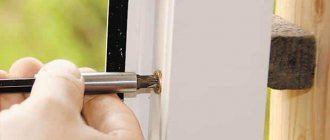
For fastenings in the frame, holes for anchors are made from the inside using a drill - three on the vertical walls and two on the horizontal. Their diameter is 8–10 mm, depending on the hardware used. When drilling, use a regular hammerless drill; a hammer drill is needed when preparing holes in wall material. If the wall is wooden or made of cellular concrete, then you can only use a drill.
The sequence of fastening is the lower anchors on both sides (not screwed in completely), then the upper and middle ones. At each stage, the plumbness of the structure is rechecked. When tightening the anchors, moderation should be observed - the frame, especially in the middle part, is very easy to deform.
After fixing the frame in the opening, the supporting pads from the bottom are not removed; they act as a holding structure, partially relieving the load on the anchors. During installation, support pads must be installed along the edges of the frame and at the point of contact of the vertical middle post (impost) with the horizontal lower part of the frame.


