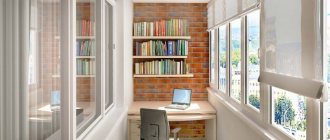
The microclimate of balconies and loggias often suffers. The direct reason for this is that it is constantly damp here, and often the surfaces of balconies are exposed to mold. The temperature difference between outside and inside the room is also not conducive to the microclimate; because of this difference, condensation constantly forms on the balconies. It is not surprising that owners are constantly in search of materials that are more or less capable of normally withstanding such humidity and temperature changes.
The cork will protect the balcony well from temperature changes
It is desirable that the materials also retain heat. In this case, finishing the balcony with cork may be the best solution to the problem. This material is universal, it is quite easy and simple to use.
Natural material
Cork can easily be called one of the newest finishing materials. It is indispensable for cladding loggias.
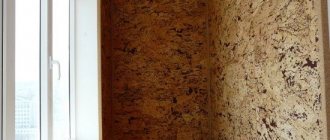
Cork is natural and is not affected by dampness. Also, corks are not prone to fading, deformation or rotting. It also differs in that it perfectly suppresses noise from outside and perfectly retains heat in the room. And, most importantly, the tiled balcony looks simply amazing!
Cork is a sound insulating material
The material for the wall is sheets of natural cork, which are crushed and pressed during the production process. Also, during the production process they are covered with finishing veneer with natural shades. The specific, one might even say unusual, structure of this coating makes it possible not to apply any special care to the material. In addition, cork walls will not absorb odors and have antistatic properties.
The panels can be glued to a flat surface of any material. To provide the cork with additional protection, it is treated with varnish or specific wax.
Experts assure that lining a balcony with cork material will be a universal solution; this will allow you to recreate an optimal microclimate.
Installation of cork wallpaper on walls ↑
Gluing cork wallpaper is carried out in the same way as other heavy paper-based wallpaper. First the surface is prepared. The walls are cleaned of old cladding, their surfaces are leveled and the baseboards are dismantled.
Please note: cork wallpaper is easy to cut with scissors; no special tools are required for its installation.
They begin to glue wallpaper from the window. Cork wallpaper is glued end-to-end, and if the joints come off, the un-glued areas are once again covered with glue and pressed to the surface.
When gluing cork sheets or plates, apply special glue to the walls using a notched trowel and wait five minutes, after which the sheets or plates are pressed tightly against the wall.
Benefits of coverage
The big advantage is that it is a natural material. It never causes allergic reactions, retains heat perfectly, and protects from excessive noise. In addition, there are many other advantages of finishing balconies with corks:
This coating is also suitable for people suffering from allergies.
- microcosmic indicators of loggias are significantly improved
- there is no release of harmful substances
- finishing is done very quickly
- during installation you do not need special knowledge or equipment
- the material is lightweight
- the panels do not need additional processing, they are not deformed
Having chosen cork as a finishing material, be one hundred percent sure that a good microclimate and freshness will always reign on the balcony, and you will never experience discomfort
Types of coatings and features of choice
There are three main types of finishes, which differ in shape, structure and installation method:
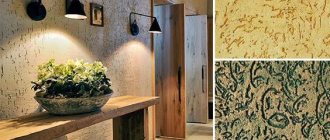
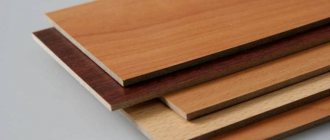
- Tile. Available in different designs: double-sided (the base of the products is crumbs, on the front side there are pieces of balsa wood); modular (three-layer structure); heterogeneous or heterogeneous.
- Roll material. It is presented in two options: rolled cork, wallpaper. In the first case, we are talking about a coating that requires additional finishing with wax/varnish, since this type of cork does not have a protective layer. Wallpaper is somewhat different from roll material because it has a paper base. A new type has also appeared - self-adhesive wallpaper. In this case, installation is carried out without the use of adhesive.
- Canvas. No synthetic binders are used in its production. Such cork wall panels are most often used for finishing balconies.
The choice is made taking into account a number of factors: the characteristics of the room (presence of insulation, quality of the wall surface), on the basis of which the appropriate type of coating is selected; shade of material, size. The tiles are available in two versions: 60x30 cm and 30x30 cm.
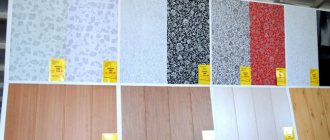
Various types of wall coverings
The thickness of such products is 0.3 cm. Roll material and panels are characterized by different dimensions, but their thickness varies between 0.2-0.4 cm. Wallpaper is much thinner: 0.4-1 mm.
Varieties
There are several main types of cork flooring. Let's look at them.
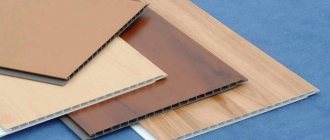
Cork tiles. Consists of three layers:
- backing (2 mm thick),
- crushed pressed cork,
- outer sheet (made with decorative veneer).
Types of cork covering
The panels are attached with a special glue made from natural ingredients. Typical dimensions of modular slabs can be 60x30x0.3 or 30x30x0.3 cm. Today, manufacturers are ready to offer panels that are perfect for rooms where high humidity prevails. On the outer sides, such plates are protected by additional varnish or wax layers. Panels of a special design (double-sided, which consist of tiles placed on a sealant - crumbs from cork) can also insulate rooms.
Rolled fabrics. They are also made from pressed chips covered with decorative veneer. A distinctive feature of the rolled material is that no horizontal seams are formed during installation - the pattern is uniform.
After gluing the cork, you need to varnish it
Important: cork sheets are not covered with protective layers during production. When laying them, it is advisable to treat them with varnish or wax. You will also be pleasantly surprised by the price of such products - despite all the characteristics, the canvases are relatively inexpensive.
Cork wallpaper with a paper base. The basis of such wallpaper is paper, very thick. Its surface is covered with decorative veneer during production. In this case, the thickness of the wallpaper does not exceed 4 mm.
Content
- Advantages of cork wall coverings
- Types of cork wallpaper
- Installation of cork wallpaper on walls
- Cork coverings in the interior
- Cork wallpaper photo
- Cork wallpaper on a balcony or loggia video
Cork coverings for wall decoration are in the form of rectangular plates or rolls. In their production, cork chips are used, which are pressed with the addition of special components that give strength to the material. The surface of the cork plates is veneered. The top layer of wallpaper is covered with wax. This not only improves the aesthetic qualities of the material, but also prevents the absorption of foreign odors and makes the wallpaper easier to clean.
Preparation for installation
Cork consists of natural materials.
First of all, before you start decorating the balcony with cork, you should perform heat and vapor insulation of the room. Only after this is the sheathing mounted on the wall, to which the drywall is attached. Plasterboard sheets will perfectly provide the necessary hardness of a flat surface.
The following is important at this stage. Don't forget that drywall has absorbent properties. Therefore, it simply needs to be treated with a primer. This will prevent violations of the glue drying time, which means the adhesion will be of the required strength.
Important: the main indicator of a primer for drywall in this case should be a large penetration depth.
If, after purchasing the slabs, you do not immediately begin repairs, it is recommended to store them in a paving area, where it is dry and constantly ventilated. By the way, in such a room the slabs must lie down for at least two days. When installing on a balcony, the temperature regime must be maintained from 18 to 28 degrees, and the humidity should not exceed 65%.
For finishing tools, you will need a rubber hammer, a roller or hand press, a tape measure, and a roller with long terry bristles.
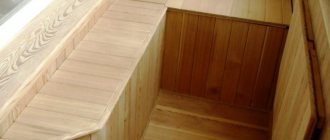
Balcony finishing with cork covering
Cork panels are completely ready for use. The modules are mounted using glue, using water-soluble acrylic (odorless), or solvent-based (with a pungent odor, but more reliable). Before gluing the tiles, prepare the surface:
- smooth areas are sanded with coarse sandpaper to improve glue adhesion;
- remove grease stains and dust;
- primed with deep penetration solutions;
- dried.
It is better to plaster, putty, or prime uneven surfaces.
Important! The cork on the balcony retains its properties only in close contact with the surface.
Installation is carried out at a temperature of at least +180C. The pattern of the butt sticker coincides with the laying of the tiles.
Procedure:
- The surface is marked with a building level, horizontal and vertical lines are drawn;
- glue is applied to the wall section and tiles;
- wait 15–20 minutes for the surface to dry;
- press both surfaces tightly.
Roll with a roller to completely remove any remaining air and distribute the glue evenly. Tap the seams with a rubber mallet. The next module is applied to the glued tile, etc., completing the row. If cracks or other defects have formed, correct them with a liquid stopper.
Laying cork material
The first step when finishing with chalk cord is to find the very center of the wall and draw a couple of symmetrical lines perpendicular to each other. They will be the beginning of your countdown.
At the location of the line, carefully install the panel, gently press it, apply special force at the edges. Install the initial row to the very edge of the wall. Next, proceed to the second row, which will pass above the first.
Is the laying done like bricklaying? The first row starts with a whole slab, the second with a half, and so on.
When covering balconies with corks, keep in mind that they will fade somewhat when exposed to sunlight. To prevent this from happening, close the windows with blinds. Further, when it becomes necessary, the coatings can be treated with oil and hard wax.
Cork coverings are cleaned with a vacuum cleaner. Occasionally it is recommended to wipe the cork with damp cloths.
Cork wallpaper photo ↑
Below are photographs on the topic of the article “Cork wallpaper for walls when decorating a balcony or loggia.” To open the photo gallery, just click on the image thumbnail.
Minuses
There are plenty of positive aspects to this design, but there will be very few disadvantages. The most significant of them:
- Since the coating will be porous, it will be soft and pressed when pressed. If you lay such a floor, heavy objects will leave marks on it.
- The cost of finishing, if done not with a substrate, but with other types of material, will be quite high.
Another point that some may attribute to shortcomings is actually just a feature of this finish. Many people overestimate the ability of slabs or wallpaper as soundproofing or heat insulators. However, in a balcony, both of these points will not be particularly important - there will always be noise here and you cannot completely get rid of it, and thermal insulation only with such materials will be completely ineffective.
How to lay the floor on open or closed balconies
If the balcony is supposed to be left open, then the choice of flooring is very limited. In this case, materials that are resistant to external influences are required. Most suitable: tiles, porcelain stoneware, “liquid linoleum”. A wooden floor is also a possible option, but in this case the floor on the balcony requires careful care and constant treatment with special compounds.
In the case of a glazed balcony, the choice of material for the flooring is very wide - it will not face the destructive consequences of precipitation and sudden temperature changes. There is one more component: a balcony, even a glazed one, quite often remains a cold place in the apartment, so the flooring should also be warm, say, cork or carpet.
Preparing the base
Regardless of the choice of flooring material, it is necessary to prepare the base, that is, a concrete slab. It should be clean (no dust or debris), level and dry.
penofol on the floor
In most cases, the floor on the balcony is laid on wooden joists. If the choice is made in favor of cork slabs, the floor is insulated, which will protect the future covering from dampness and help retain heat. For these purposes, penofol, for example, may well be suitable. It is cut to the size of the balcony and carefully laid on a concrete slab, with the foil layer facing up.
They also cut the timber with a hacksaw and lay the resulting logs parallel to each other at a distance of half a meter. To insulate the floor, pieces of insulation – extruded rigid polystyrene foam – are placed between the joists. Having leveled it, a subfloor made of pieces of plywood is laid on the joists and secured with self-tapping screws. The base on which you can lay a covering of cork slabs, nail the baseboards - ready.
Helpful information
The subfloor tends to creak. This can be completely avoided if you lay plywood with a gap between its sheets and the walls - 3-4 mm is enough. When insulating the floor, the gaps are also sealed.
Installation work
The cork covering is mounted on a pre-prepared base - a thermal insulation layer with lathing, hydro- and vapor barrier. Before installing the finishing panels, plasterboard slabs are installed. They are attached to the sheathing.
This option is considered the most suitable, as it provides the most even walls. It is recommended to cover the surface with a deep penetration primer, which will provide improved adhesion to the finishing material.
To work you will need tools:
- rubber hammer;
- hand press;
- rule;
- roulette;
- putty knife;
- wide brush;
- plumb line;
- roller with soft bristles.
The material is laid using an adhesive, which is applied around the perimeter of the slabs. First of all, you need to determine the center of the wall. To do this, use a tape measure and a chalk cord. At the central point, lines perpendicular to each other are drawn. From here the laying of the slabs in a row begins.
The principle of fastening is the same as in the case of brickwork. The roller allows you to press the cork as tightly as possible. The press is designed for modular three-layer material. Depending on what type of finishing is used (rolls, wallpaper, slabs), finishing with varnish/wax may be required.