Otherwise, the following consequences may occur:
- The appearance of mold on walls and other surfaces;
- Constant condensation on the glass;
- Increased humidity and, as a result, an unpleasant putrid smell in the apartment.
Condensation forms due to the difference in temperature between the outside and inside the room.
Advice! In order for the loggia to be dry and well ventilated, it is recommended to provide external and internal insulation along with ventilation. It is advisable to insulate both the walls and the floor.
Types of exhaust valves
Slot valve operation diagram
Valves are divided into types, depending on the method of installation and control. Depending on their device, they can be electrical or mechanical.
Valve classification:
- Seam dampers are installed on a previously installed balcony frame; they allow a small amount of air to pass through, preventing cold and noise from entering the room. They are installed in window cutouts and have a fairly low cost.
- Slot valves are manufactured with mechanical and automatic control. The passage of air is ensured by a channel measuring 170 mm x 400 mm; it can be universal or accommodate outdoor and indoor units. The outdoor unit lets air into the room, and the indoor unit releases humid air outside. Provides high-quality air circulation, suitable for installation on a finished window.
Supply valves serve to suck air into the room and are regulated mechanically and automatically. To learn how to install a valve on a window, watch this video:
Soundproof ventilation valve
They are mounted in plastic windows or walls. Provide air exchange recommended by SNiP. For example, let's take the KIV supply ventilation valve.
This is an independent device that is not intended for installation in a window structure. The valve does not affect the frame and glass unit. Accordingly, it does not complicate the installation of the latter and does not increase its cost.
The KIV valve can be mounted on any part of the external wall. This is a small plastic pipe with a diameter of 13.3 cm and a length of up to a meter. It can be cut to any wall thickness.
Operating principle and installation of the valve:
1. A pipe is inserted into the outer wall of the balcony. From the street side it must be covered with a round cast aluminum grille with inclined blades. They prevent precipitation from getting inside the valve.
2. There is thermal and noise insulation inside the device. Most of the noise from the street that gets inside the plastic is absorbed. The KIV valve reduces street noise to 37 dBA.
3. A special impact-resistant plastic cap is placed inside on the balcony wall. The material is resistant to temperature changes and ultraviolet radiation.
4. A synthetic porous EU3 class filter is built into the head. It traps dust that comes with the air. The filter is easy to clean. A damper is installed here to regulate the air flow. It can be opened and closed using a handle or cord.
The KIV valve is a modern version of a window: the outer mesh retains dust, insects, and leaves; Thermal and noise insulation protects against noise and cold.
If the owners are absent for a long time, special plugs can be removed from the blades. The balcony will be ventilated at a minimum.
What is important to know about ventilation with recovery
- Installation restrictions: nearby heating devices.
- Provides simultaneous influx of fresh and exhaust of humid, exhaust air.
- Purification of incoming air from dust and street pollution.
- The air masses entering the room are heated to 23°C due to the air masses escaping and the presence of a heater in the structure. This allows you to maintain a comfortable temperature in rooms such as a balcony or loggia in winter.
- The system dries the air, bringing it to standard levels.
The simplicity of design and installation allows even a non-professional to install ventilation on a loggia with recovery.
Installation diagram
- Using a hammer drill, make a hole for mounting the device.
- Remove the outer protective grille and the device itself, which is mounted indoors.
- Insert a telescopic or corrugated pipe (depending on the model) into the drilled hole, having previously wrapped it with insulating material at least 10 mm thick.
- Secure with polyurethane foam.
- Strengthen the protective grille on the street side.
- Install the device on the wall from the inside.
- Connect to power source. The recuperator is ready for operation.
To put it simply, when installing ventilation on a balcony/loggia, the same engineering solutions and technological techniques are used as in any other room of the apartment.
Breezer
Ventilation on the loggia can be done using compact breathers that provide a local supply of pre-purified air. These are supply systems that look like a small plastic box. They take fresh air from the street and, having previously cleaned it of dust and impurities, supply it to the room.
When installing them, a small receiving hole is made in the wall with access to the street. The equipment has the following features:
- compact dimensions;
- low noise level during operation;
- several stages of cleaning - thorough purification of the air from dust, smoke, exhaust gases, poplar fluff, pollen, various impurities and odors;
- flow preheating mode, which reduces heat loss in winter;
- can perform ionization and aromatization;
- several feed speeds - from three to six;
- you can change mode settings - control is performed using a remote control or a smartphone that connects to the system via Wi-Fi or Bluetooth;
- microclimate control;
- you can combine several devices into one system, adding an air conditioner and a humidifier to the equipment;
- if necessary, additional equipment can be connected to the breathers to modernize the system - often more powerful filters or new control units are installed.
It is easy to keep the breather in excellent condition. To do this, you need to install a new set of filters once a year. Every month they are cleaned from poplar fluff, dust, and dirt, which gradually accumulate inside the channel.
Uninterrupted circulation of air flows between the balcony and the external environment is one of the conditions for comfortable use of the room as a place to relax or work. In order for the system to work without failures and not create problems, you need to carefully think through all the details, calculate the power and other parameters. If the technical requirements are not followed, the ventilation may be weaker than the required level, which will lead to the accumulation of condensation and deterioration of the finishing condition of the loggia.
External insulation
This is the most effective way to create a comfortable state in a room. External insulation is a structure of several layers, starting with sheathing with mineral wool or foam boards, sealing seams and cracks, followed by laying construction mesh and plaster. This insulation allows you to move the dew point outside, beyond the inner wall. The balcony becomes warm and dry, as condensation does not form on it. The only disadvantage of such insulation is the complexity of execution. The design of the outer wall of a balcony is not always within the control of the average resident of a city apartment.
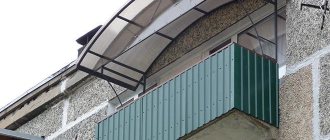
How to cover the grille on the loggia from dirt, insects, rain and snow?
Our loggia is designed to be cold and ventilated for the correct operation of the external air conditioning unit that should be installed there. For ventilation, instead of one window sash, a ventilation grille is installed. Our climate is not hot, the air conditioners are not turned on often, but all year round dust, dirt and fluff blow into the loggia through this grille, insects fly in, and in heavy rains and snowstorms, decent puddles and snowdrifts can appear on the loggia.
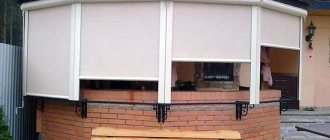
Roller shutters
The best solution to close this grille is roller shutters. They can always be opened in hot weather for normal operation of the air conditioner and kept closed most of the year to protect the loggia from dust and dirt. In addition, their installation will not require replacement of glazing, and the appearance of the house will not be spoiled.
The cost of installing roller shutters (roller shutters) will be about 10 thousand rubles. With collective purchasing it will be much cheaper, it’s not for nothing that you need to be friends with your neighbors. All roller shutters are made to individual sizes, so calling a measurer is required, and the exact cost will only be given after the measurement. Moreover, there may be situations when the external unit of the air conditioner is installed very close to the grille; in order to install the roller shutters, it will need to be outweighed, slightly moved to the side. When ordering, an advance payment of about 70% is usually made, then production takes a few days, then installation and final payment.
Contacts of the company that has already manufactured many roller shutters in Orange Park: https://abc-safety.ru. But you can contact any other one.
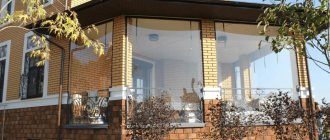
Replacing the grille with glass
It is possible to replace the grille with regular glass, but before turning on the air conditioner on the loggia, you will need to first open the windows, otherwise the external unit will overheat. If the windows on the loggia are at full height, be sure to install tempered glass so that no one below is accidentally killed by fragments if the glass suddenly breaks. To replace it with glass, you need to contact window specialists, saying that you need glass for an aluminum sliding profile. For those neighbors who had already done this, the cost was around 7 thousand rubles. Below are examples of work.
Separate box or zone for air conditioning
A more serious solution is to fence off part of the loggia with air conditioning into a separate space. This will allow you to turn on the air conditioner without the need to open the roller shutters or windows. This option will also make it possible to change the glazing to a warmer one. When designing this solution, especially carefully consider the temperature regime of the air conditioners so that they do not overheat during operation.
Preparing for exterior cladding
Possible solutions
The outer cladding is designed to perform two functions:
- it protects the balcony railing and everything that is behind it (i.e. waterproofing, thermal insulation, decorative materials) from external influences;
- it provides the balcony with an attractive appearance.
To make the implementation of these functions possible, we need to spend time and effort on preparing the balcony itself, or rather, the balcony railing. The instructions that I follow during a major overhaul involve working according to the following scheme:
- Weakly holding elements of the balcony railing are being dismantled. We should have either a metal frame or a concrete parapet fixed on metal mortgages.
Fencing ready for cladding
- The fence is being repaired: the metal structure is reinforced with additional load-bearing elements, and cracks in the concrete are being expanded and filled with cement mortar. It is also possible to impregnate a concrete slab with penetrating reinforcing solutions - they quite effectively protect the material from destruction under the influence of moisture.
- If the old fence is in extremely poor condition, then it is better to dismantle it completely. In the vacant space, we either install a new frame from a profile pipe and angle, or erect a parapet from foam concrete blocks (with mandatory masonry reinforcement).
Sometimes the ceiling has to be changed completely. Flooring made of thick timber, as in this photo, is not the worst option
If the fence is replaced, it is necessary to check whether the concrete base can cope with the increased load. In any case, it is worth strengthening the concrete slab around the perimeter with a reinforcing belt and repairing the crumbling edge.
By the way, despite the fact that I prefer to do most of the work with my own hands, here I would advise turning to specialists. And it’s not just a matter of labor-intensive repairs: a correct assessment of the bearing capacity of the foundation is very important, and it’s not worth doing it “by eye.”
Features and design standards
Smoking rooms are installed not only in public buildings and entertainment venues. In enterprises with more than 200 employees, it is mandatory to have a smoking area. Regulatory data on the features of the device is in SNiP 05/31/2003 “Public buildings for administrative purposes” and in SNiP II-92-76 “Auxiliary buildings and premises of industrial enterprises”. The regulatory documents contain a lot of useful information for calculating the ventilation of a smoking room and hookah bar, but there is no main indicator - the maximum permissible concentration of tobacco smoke in the air (MPC). At the moment, there is no standard in Russian legislation, so designers take approximate indicators in the countries of the European Union.
There is also no single approach. MPC requirements range from 0.1 to 1 mg/m3. Therefore, when implementing a project, we must strive to completely remove tobacco smoke. What is possible only with intensive air exchange.
In addition to the maximum permissible concentration, when calculating the ventilation of a smoking and hookah room, designers use the air exchange rate. It should not exceed 8-14 times/hour. More intense ventilation will disrupt the thermal balance, and the heating system will not be able to cope with heating the room.
The estimated area per visitor is assumed to be 0.7 m2/person. You can use the standards for air cubic capacity per smoker. It depends on the intensity of smoking and ranges from 30-100 m 3 /person.
Fire alarms are installed in smoking and hookah rooms, the sensors of which react to rising temperatures and do not detect smoke.
Mistake 8: Improper floor design
Do not try to make the floor perfectly flat using a thick sand-concrete screed, which will subsequently be covered with a solid layer of tile adhesive and then ceramic cladding. It is dangerous to overload the ceiling. It’s better to insulate the floor using ultra-light materials (let’s immediately agree that in this example we are not talking about a heated floor system).
InMyRoom tip:
There are many recipes for insulating a loggia floor, but they all essentially boil down to using soft insulation directly on top of concrete slabs (you can use penoplex or mineral wool). Then it is recommended to put a second layer of insulation - and be sure to apply waterproofing (lay hydroglass insulation with an overlap of more than 15 centimeters). You can make a thin screed on top - and many craftsmen simply lay plywood if there is no significant slope on the balcony: the plywood is thin, light, smooth, and on top of it, in a warm and moisture-protected loggia, you can lay both carpet and laminate.
What materials are balcony grilles made of?
When choosing grilles for a balcony, you need to understand what and how they are made. The strength of the finished product and its price directly depend on the material. For example, the lattice could be:
- Steel.
Steel is one of the strongest and hardest metals, which does not have high ductility and toughness. Therefore, steel gratings are not particularly artistic.
- Iron.
Iron is a very ductile and easy-to-work metal. But, due to its properties, it is used for the manufacture of products from alloys (cast iron, steel). Iron gratings do not have high strength, but are affordable.
- Cast iron.
This alloy is highly durable, but cannot be forged. That is why cast iron gratings are made exclusively by the casting method.
- Copper.
Copper is a very ductile metal, which means it is easy to process and forge. At the same time, products made from it are practically resistant to corrosion and are environmentally friendly and completely safe for human health.
- Brass.
An example of interior decoration of a balcony.
In this article we want to talk a little about the processes associated with finishing balconies and loggias, and use a real example to show the stages of the work being performed. Perhaps for those who will finish their balcony with their own hands, this material will be of some use.
We will carry out the work on an L-shaped balcony with a brick fence having a length of 3480 mm and a width of 1080 mm.
Photo of the balcony before installation of glazing and finishing.
Step 1. Glazing the balcony.
The balcony is supposed to be “warm” even in the cold season, so the customer chose glazing with a PVC profile. The glazing structure is made of a 5-chamber Novotex Termo PVC profile with a width of 70 mm and a two-chamber double-glazed window with a width of 40 mm.
To insulate and finish the surfaces of walls and ceilings, it is necessary to use an additional (expansion) profile; in this case, an additional profile with a height of 60 mm was used.
Appearance of the additional profile.
The upper corner of the glazing structure with an additional profile.
Step 2. Installation of the floor on the balcony.
The base of the floor on the balcony is a reinforced concrete slab, a vapor barrier film is laid on it and a layer of sand-cement screed is poured with a slope towards the drainage holes in the balcony enclosure. Below in the photo you can see the electrical wiring outlet to the balcony; it was provided by the owners when carrying out renovations in the room.
The future floor on the balcony will be on logs, which are timber with a cross-section of 50 x 50 mm. The joists are leveled and attached to the base of the floor using frame anchors 10 x 132 mm.
The space between the logs is filled with sheets of expanded polystyrene 50 mm thick, and the joints between the sheets are foamed. Since in our case the vapor barrier of the floor was already carried out by the house builders, the logs and insulation are laid directly on the sand-cement screed. If you do not have a vapor barrier layer on your balcony, then it must be done before laying the insulation
This is especially important if you use mineral wool insulation, which has increased moisture absorption
After the insulation has been laid, it must also be covered with a vapor barrier film on top. In our case, we used penofol for these purposes. The next step is laying a tongue-and-groove floorboard 27 mm thick, which is attached to the joists using self-tapping screws. Linoleum will be used as the flooring; it will be laid after finishing work is completed.
Step 3. Insulation of wall and ceiling surfaces on the balcony.
Before insulation, a layer of polyethylene film is placed on the balcony fencing; it prevents the penetration of wet water vapor onto the balcony from the street side. At the same time, metal hangers are installed on the surface of the walls and ceiling, which are necessary for the subsequent installation of the sheathing frame.
To insulate this balcony, we used expanded polystyrene (foam plastic) 50 mm thick. The joints between sheets of foam plastic are filled with polyurethane foam.
Penofol 10 mm thick is laid on top of the foam, which serves as additional insulation and, at the same time, a reflective vapor barrier.
Step 4. Finishing the surfaces of the walls and ceiling on the balcony.
The YarMontazh company uses plastic panels and lining as finishing materials for balconies and loggias, but on this balcony, as an exception, the finishing was done with moisture-resistant plasterboard. The photographs above show the structure of the frame, made of metal profiles, to which sheets of drywall will be attached. The wall that borders the room does not need insulation; we level it with gypsum plaster along the beacons.
First we lay electrical wiring along the wall. Power is supplied to the balcony through a separate circuit breaker with a copper cable 3 x 2.5 sq. mm. On the balcony there are planned two wall lamps with a switch and a socket for connecting an electric radiator. We dismantle the metal window sill and install a window sill made of laminated chipboard instead.
After the plaster has dried, we putty all the walls and ceiling. When all surfaces are finally prepared, we treat them with a primer and paint them with moisture-resistant acrylic-based paint.
After painting the walls and ceiling, we move on to the final stage of finishing. We install electrical appliances, lay linoleum and install skirting boards.
We install horizontal blinds on the side sash of the balcony; they will serve as protection from prying neighbors' views. At a table made to fit the width of the balcony, you can spend time with a laptop.
Proper insulation of a balcony - what should it be?
Condensation forms on surfaces that are least insulated or not insulated at all due to the sharp contrast of cold and warm air. To prevent this from happening, insulation and glazing of a balcony or loggia must be done correctly, taking into account the technical features of the room.
The main structures on the balcony are:
- window;
- walls and parapet;
- floor;
- ceiling.
And each of them should be insulated - only in this case ventilation on the balcony will bring the desired effect and relieve it of condensation and dampness.
Note: The most effective is external insulation, which shifts the dew point outside the balcony. But this type of insulation is not always possible due to the high complexity and cost of such work.
The first is double-glazed windows. Since the area to be glazed is quite large, and financial possibilities are often limited, many choose single-glazed windows as the most budget option. But in a double-glazed window, the cold air from the street has two barriers and it is much more difficult for the glass in the room to cool down. That is, the likelihood of condensation forming on this glass is significantly reduced. That is why it is better to choose inexpensive, but double-chamber double-glazed windows than good, but single-chamber ones.
Dew point depending on the type of insulation
In addition to windows, condensation forms on the walls. And also on the floor and ceiling, especially when neighbors have open balconies: if there is cold street air on the back side of the ceiling. In this case, no matter how much you heat the room, there will still be condensation. Therefore, attention should also be paid to the insulation of walls, ceilings and floors.
The balcony is initially built as an open structure, so the partitions are not subject to particularly high requirements in terms of thermoregulation. If it is decided to make the balcony closed, the situation should be corrected independently: the walls, ceiling and floor are insulated with heat-insulating materials. For example, foam plastic or penoplex - they have low thermal conductivity, so they almost never cool completely. Insulating material is laid on the floor before laying linoleum, laminate or other finishing material; the same goes for walls. If desired, the insulated ceiling can also be decorated with plasterboard or a tension structure.
Penofol or another vapor barrier film can be used as additional insulation and a barrier to condensation. It is applied on top of foam plastic (penoplex) and its use is a prerequisite for the absence of condensation on the main thermal insulation material.
We cover the insulation with penofol
It is also recommended to move the heating radiator to the wall bordering the loggia, increasing the number of sections in it. Or you can put an electric convector on the balcony, or any other heating device that will heat the balcony - the heat coming from the adjacent room will not be enough.
Such insulation will allow you to maintain a comfortable temperature inside the room, rather than transfer heat to the street. This is especially important if the balcony is not only glazed, but also attached to the room - through thin walls, heat will quickly be removed from the room, and therefore, especially in winter, you will have to forget about a comfortable temperature.
You will find instructions on how to insulate a balcony with polystyrene foam outside and inside in a separate article on our website.
Read about the use of wall-mounted infrared heaters for balconies and loggias here. Operating principle, types and installation tips.
You can learn about the technical characteristics and features of penofol on this page.
Ventilation with heat recovery
How necessary is a ventilation system with recovery on a balcony? Everything will depend on whether there is a distinction between the balcony and the room adjacent to it. That is, is there a door between them or is there a free opening? In the first case, there is no need for air recovery. An insulated and glazed balcony is a small room, and the heating system installed in it can cope with low temperatures.
A completely combined balcony, for example, with a living room or kitchen, is another matter. In this case, recuperation does not work. After all, it is one thing to heat rooms into which cold air enters, spending additional heat on this, or, on the other hand, to save money when warm air enters the rooms.
To do this, you will have to install a recovery system in the form of a monoblock on the balcony. It is suspended from the ceiling near one of the side walls, running air ducts along the upper corner. By the way, this system can be hidden in a plasterboard box.
Construction and material
Purely structurally, the device consists of a body and a ribbed front part. Both elements can be connected to each other by bolts, screws, welding, casting and other methods. It all depends on the model.
There is another classification where elements of this type are divided into four categories:
- Adjustable. Their design includes blinds, with which you can change the direction of incoming air flows. They belong to the group of supply models.
- Unregulated, they are also non-directional. Their ribbed front part is stationary, that is, it is impossible to change its location inside the body. Such ventilation grilles are installed in the bathroom, kitchen or toilet.
- With shut-off valve. The design contains a valve that keeps the ventilation duct closed at all times. When ventilation operates, pressure is created inside the air ducts, which changes the location of the valve relative to its central axis. That is, it turns it. Thus he opens the channel. The purpose of the valve is to protect air ducts from the penetration of debris, birds and small animals.
- Inertial. This model repeats the functionality of the previous version. Only instead of a valve it has blinds.
The shape of the gratings is made in the form of a square, rectangle or circle. It is due to this that you can easily select them to fit into the interior of the room.
Today, manufacturers offer several materials from which air distributors are made:
- plastic;
- aluminum alloys;
- galvanized steel, often painted;
- brass;
- tree;
- ceramics.
Hood on the balcony for smoking: when is ventilation needed?
Ventilation on the loggia is required if the room is completely sealed. If there is no air movement in such a room, the air feels stale. Condensation, high humidity, and mold are indications for installing a hood.
Ventilation is necessary in situations:
- there is a smoking area (read more in the article “Is it possible to smoke on the balcony?”);
- there is condensation on the walls and furniture;
- a barbecue has been installed (for more details, see the article “Is it possible to grill kebab on the balcony”).
Forced ventilation is necessary when drying clothes, as well as when using the room for storing things and materials that deteriorate from dampness.
Option 3. Installation with main device and valve
Algorithm : A hole is drilled in the wall facing the balcony, and an additional hole is drilled in the wall of the balcony itself. A protective grille is hung outside the balcony, and a ventilator is hung inside the balcony. A protective grille is also hung on the outside of the hole in the wall of the house, and a supply valve of the KIV or KPV type is installed inside the apartment.
Effect : Fresh air from the street enters through the ventilator onto the balcony, passing through the filtration system (including small particles of dust, pollution, bacteria, etc.). Next, the air enters the room through a hole in the wall.
Pros: Saving space in the apartment due to the absence of the device inside the room. The installation cost is lower than when laying an air duct. Ventilation appears on the balcony. Possibility of installation in both warm and cold loggias. The balcony is clean.
Cons: Works only with double-chamber, dense glazing. Not all devices are suitable for installation on a cold loggia/balcony. The ventilator will take place on the balcony.
Thermal insulation errors
Residents expand the space of their living rooms and kitchens by adding a balcony to the adjacent room. The technical characteristics and microclimate in both rooms must be the same.
The following signs indicate errors in balcony insulation:
- mold in the far corners;
- water on the walls and condensation on the cladding;
- deformation of wooden parts.
The cause of such defects may be insulation flaws. If there are gaps between the ceiling and walls, in the floors, or on the balcony, drafts appear. This leads to dampening of materials and furniture due to cold air.
The appearance of water and condensation is caused by:
- malfunction of heating or its absence;
- improperly designed ventilation on the balcony;
- poor-quality insulation, flaws in the installation of thermal insulation.
Moisture appears on surfaces that become colder. Ventilation allows you to equalize temperature and humidity. If the indicators on the balcony and living room differ significantly, high-quality air exchange will help to avoid such troubles.
Options for creating a ventilation system for a balcony
Usually, when installing ventilation on balconies with double-glazed windows, an inflow is installed. Much less often, installation of a hood may be required.
According to the method of organizing air exchange, the system can be:
- Natural. Usually this method is sufficient for the balconies of ordinary residential apartments. You can do it yourself.
- Forced. Can also be used for residential apartments. Suitable if natural ventilation is not enough, and/or if you need to ensure stable air exchange in any weather (for example, if something is stored on the balcony that may be damaged by humidity).
Natural
This is the simplest method: it does not use fans, air will flow inside through holes in the balcony frame or windows.
Ventilation system
You can organize natural influx from the street in the following ways:
- Just keep the windows open. The advantage is that you don’t need to buy or install anything. The downside is that an open window lets in not only air, but also various insects, dust, poplar fluff, as well as all street noise. In addition, during heavy rain or snow, precipitation will also enter inside. Therefore, it is unlikely that you will be able to keep the windows open in the fall and winter.
- Install windows with micro-ventilation. A more successful option: in this case, the window does not open completely: the sash moves away from the frame by a few millimeters. Air enters through such a gap, but insects and poplar fluff will not penetrate. Street noise will be heard, but much weaker than with the window open.
- Installation of a window comb (suitable for owners whose windows do not have a ventilation mode). In this case, a limiter is mounted between the sash and the frame, which will fix the open sash in a certain position, preventing it from opening further, but also preventing it from closing. The degree of opening can be adjusted (opening more or less).
- Window valve installation. A small valve is cut into the window sash, through which air flows even when the window is completely closed. This way, neither various debris nor street noise will penetrate inside, and air will be able to flow. The downside is that window valves have a relatively low capacity (on average up to 30 m³/h), so it is advisable to install several of them.
- Installation of a wall valve (in the balcony frame). Essentially the same as the previous option, only the valve does not cut into the window, but into the fence. Wall dampers have a larger cross-section than window dampers, so more air can flow through them.
Other methods of ventilation
You can arrange high-quality forced forced ventilation by using a breather. Quite an expensive, but high-quality solution, since the device is highly functional. The breather is compact in size and effectively cleans the air from dust, smoke and odors. Can operate in air heating mode.
Installing a breather is similar to installing a supply or exhaust fan. Wall perforation is also required. The only difference is that there is a need for careful sealing.
Installing a breather will not only provide high-quality supply and exhaust ventilation of the loggia, but also regulate the temperature in the room
Another way to organize ventilation of a glazed balcony or loggia is to install an air conditioner. The high functionality of the device is determined by the model. But almost any modern air conditioner is capable of, in addition to cooling and heating the room, performing the functions of supply and exhaust ventilation.
Excessive humidity can not only cause discomfort, but also cause serious illness if it leads to the development of fungus and mold. Therefore, ventilation of balconies and loggias is a mandatory measure, as for any residential premises.
Forum of the representative office of AERECO JSC in the Russian Federation
How to properly design ventilation in a one-room apartment
How to properly design ventilation in a one-room apartment
Post by elf » Apr 16, 2011, 9:46 pm
Re: How to properly design ventilation in a one-room apartment
Post by Dr. Mechnikov » April 16, 2011, 10:31 pm
Re: How to properly design ventilation in a one-room apartment
Post by elf » April 17, 2011, 7:11 pm
“In the balcony frame of the kitchen or room?”
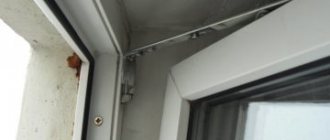
The grille is built into the window frame of the glazed balcony instead of glass. (photo attached).
“Where is it whistling? in which place?"
When you open the window, it whistles in the hoods, in the kitchen and in the bathroom. A very strong air flow, it whistles against the grilles on the hoods.
“a normal solution, but it has an indirect relation to ventilation.”
the relationship is direct, if you insulate the balcony and the windows on the balcony are closed, then how to ventilate the kitchen and room, because both windows overlook the insulated balcony and there are no other windows in the apartment.
"unclear. show me exactly where on your diagram?”
I have attached a diagram. I wanted to run a plastic pipe directly from the street into the kitchen or room with a fan and shutter to prevent it from constantly blowing. But I found these valves. Tell me how they work and will they suit me for my apartment?
“How many people live in the apartment? Is the stove gas or electric?”
My wife and I live together for now, and we are planning a child within the next year. Gas stove.
Re: How to properly design ventilation in a one-room apartment
Post by Dr.Mechnikov » Apr 18, 2011, 4:46 pm
Automatic regulation. The mode involves automatic regulation of the supply of outside air depending on the level of relative humidity inside the room. It is turned on using the operating mode switch - to the right to the “I” icon. Minimal ventilation. The mode is designed to reduce air flow in cases of severe frost and wind, or “underflow” due to a temporary decrease in the heating load in the central heating network. It is turned on using the operating mode switch - left to the “0” icon. b) Hood. In your option, to regulate the air flow in the kitchen and bathroom exhaust grilles, it is possible to install GHN exhaust devices instead of the existing exhaust grilles.
Now, about the scheme you proposed. Such a scheme also takes place. A little theory. Don’t forget that, according to the building regulations by which your house is most likely built, it is necessary to constantly remove 90 m3/h from the kitchen (including to ensure the operation of the gas stove) and 50 m3/h from the combined bathroom. A total of 140 m3/h. You understand that in order to meet these standards, you need to compensate for the same amount of air by organizing an inflow (there are many options.). Where the influx is organized has already been said. Based on calculations, when using Aereco EHT wall supply valves, you will need to install three valves (two in the room, one in the kitchen). Technical implementation is solely your decision.
What contributes to ventilation efficiency
Ventilation on a loggia or balcony is necessary not only when glazing and using the room throughout the year, but also in other cases - if you want to insulate structures, if fungus is detected, high humidity, if you smoke or store any things here. Since the choice of means is quite large, various factors should be taken into account in order for the ventilation efficiency to be high.
To improve the quality of ventilation, additional measures must be taken:
- The optimal solution is to insulate the balcony. This must be done from the outside to shift the dew point.
- When installing a heating radiator on the balcony, a healthy microclimate will also be maintained, but such an option must be agreed upon with the relevant authorities.
- The use of double-glazed windows with energy-saving characteristics will also help improve the indoor climate. Then you can install not the most powerful ventilation, but choose a simple and affordable solution.
- It is optimal to install fans in two places - at the top to remove warm air and at the bottom to bring in fresh air.
Which glass unit is better?
An equally important issue of saving from the negative effects of condensation is the choice of double-glazed windows for the future window on the balcony. Even with the simplest air exchange scheme, good glazing will avoid condensation. In addition, the safety of the rooms adjacent to the balcony or loggia - kitchens, living rooms, bedrooms, etc. - depends on the quality of the material itself. Therefore, you should know about the features of choosing double-glazed windows.
The most budget option is one glass. Condensation forms on it very quickly, so it is better not to use it.
To prevent the glass from sweating, you should buy double or triple glazing. They are ideal not only for balconies, but also for any other rooms with high humidity and air temperature (bathroom, kitchen, etc.).
Subject: Help needed! Cut off bars on plastic windows
Theme Options
- print version
- Subscribe to this topic...
Help is needed! Cut off bars on plastic windows
You need an aerial platform and a person who can cut off the bars without harming plastic windows. Ideally, I wanted to deal with the question this week. I can post a photo if needed.
Please PM me with specific suggestions.
In the kitchen there is a blank grille that does not open. And the distance from the window to the grill is very short - the hand cannot pass.
Well, if you can find such a ladder, then even better!
It is very difficult to work with a grinder in a canopy (it doesn’t cut from the top, but it turns out to be sideways). You need to sow confidently, preferably on a platform. If you bite the circle, you will fly away from the stairs along with the tool)) It’s easier to bite with scissors.
There, the reinforcement goes as thick as a wall. If only hydraulic
The 12th fitting is easily taken without hydraulics. Just be careful not to piss, otherwise he won’t pick up the scissors))
It’s better not to cut with a grinder. I cut this thing with a grinder. The circle pinches once or twice. I don’t think it’s worth talking about the consequences. It will be easier to cut with a metal saw.
depending on how the pins are driven in, if the distance from the grille to the window is less than 5 cm, and between the grille and the opening is less than 1 cm, then the canvas is not at all like
With an ordinary electric saw. Place the blade according to the mentality and forward. On the contrary, it’s more convenient to climb, there the blade is about thirty centimeters long.
For now yes, just speculation for now.
The man is still being sought!
Oh, that's right, I forgot to write the address. Engels, center.
Ugh, nope.
On topic - take out the glass and you will have greater access to the grille. In fact, you can cut it with a hacksaw.
PS If this path actually seems simpler to you, I advise you to look here for plastic window installers with a spatula and a rubber hammer. Without this tool it will be more difficult to remove/insert the glass.
No, I’m afraid to remove the glass, especially myself. The best option, in my opinion, is to eat with scissors, as described above. But will they take such a thickness?
Install on another part of the building
This is the most radical method, which consists of mounting an external unit on the walls of the building, not visible from the street. Of course, it’s inconvenient that communications will have to be extended throughout the entire apartment. But the problem will be solved.
Another option is to raise the blocks onto a flat roof. Then they definitely won’t bother anyone. But this option is only good for low-rise buildings or for apartments located on upper floors.
Plastic windows have long become an integral attribute in almost every apartment. They are the ones who give comfort, coziness and give a unique style to your home, but there was always a chance that small children could use the open doors and slip out into the street. Unfortunately, we know many such tragic cases. According to statistics, 5,000 children a year fall out of windows, but now this will be stopped. When you notice your child at the window or see how he opens it, you will be calm and confident in his safety.
Until recently, the best solution for ensuring the safety of plastic windows for children was frame mosquito nets, but they only provide the illusion of protection. It is not uncommon for them to fail, which can lead to dangerous consequences, which is especially dangerous if you live in a high-rise apartment building. Contact us and you will get the best alternative. Our grilles provide a high level of protection, are absolutely reliable, patented, and their design is brought to perfection.
Window bars to prevent children from falling out not only reliably protect them, but are easy to install and operate. They do not require special care and can be installed either temporarily or permanently. If you decide to dismantle them, they are easily twisted, and plastic plugs are installed on the frame of the plastic window. And most importantly, our bars will always ensure the safety of children when the windows are open.
Distinctive features :
Load resistance
Our gratings can withstand up to 40 kg of load, which is enough to support even the weight of a teenager!
Protection of children under 5 years of age
Optimal use in families with children under 5 years old.
Compatible with mosquito nets
Window bars to prevent children from falling out are fully compatible with mosquito nets and do not require discarding them.
Color richness
We offer products in many colors.
Worth knowing
Window bars for child safety are installed both on conventional metal-plastic structures and on their aluminum analogues. But you need to know that in the latter case, there will be certain restrictions when installing the grille. So, if you have a sliding aluminum window system, then by installing the grille on the central opening, the outer sashes will be blocked, since the grille will be attached to them.
If you have a non-standard window system (for example, an old-style SOK profile system), then in order to preserve the old frame grids when installing the grilles, they will need to be slightly modified. It is better to immediately warn us about this when drawing up a contract or calling a surveyor.
Rarely, there are vents on modern windows. This may interfere with the installation of the safety grille. For proper installation, you need to make sure that the horizontal rail of the grille does not fall in height on the window impost.
Types of bars on windows to prevent children from falling out
In our activities, we use two main types of protective grilles: solid and standard. The main difference between them is that solid grilles are made individually to the exact dimensions of your window (both height and width). This is convenient and reliable, but will require accurate measurements (calling a measurer is free!) and may take some time. But whatever system you prefer, it will ensure maximum safety of plastic windows for children.
- Standard grilles are 84cm high
- for a standard double-glazed window after installation, the distance from the window sill to the top edge of the grill will be approximately 90cm. Such grilles are adjusted to the exact dimensions of the window opening only in width. - Solid grilles
cover the window opening completely, providing maximum protection for your household.
The standard distance between vertical slats = from 8 to 10 cm, if you need other distances, please indicate this when placing an order.
Prices for installing safety grilles in Volgograd:
Important to know: our grilles are similar to the seat belt in a car. No seat belt guarantees that you will not be injured in an accident, but if you believe the statistics, it has saved many lives. The same principle applies here - the grill will directly reduce to zero the danger of your children falling out of the window.
| Service | Price per piece |
| Standard grill (4 sections) | 1790 rubles |
| Standard grill (5 sections) | 1990 rubles |
| Standard grill (6 sections) | 2190 rubles |
| Standard grill (7 sections) | 2390 rubles |
| Solid grille (4 sections) | 1990 rubles |
| Solid grille (5 sections) | 2240 rubles |
| Solid grille (6 sections) | 2490 rubles |
| Solid grille (7 sections) | 2740 rubles |
* Prices for grilles installed on windows of non-standard size will require additional consultations with our specialist.
How to make a hood on a balcony and loggia with your own hands
It is quite possible to construct a supply and exhaust system with your own hands. In fact, you just have to install two fans, one of which will work for air supply, and the second for air output. And in order to place them correctly, let’s remember the simplest law of physics: warm air moves up, cold air goes down. Therefore, the supply unit is mounted near the floor, and the outlet unit is mounted closer to the ceiling.
It is advisable to design the ventilation openings diagonally to each other - this way the system is guaranteed to cover the entire room and prevent the formation of condensation.
Compact multi-zone ventilator
To work you will need:
- 2 fans of equal power for air intake and exhaust. The best option is to choose models that are immediately equipped with plugs that block access to air when the device is not working. Otherwise, in winter you will have to close the ventilation hole with homemade partitions.
- Electricity supply.
- Fastening systems.
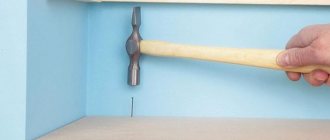
- Hammer.
- Sealant, plaster mixture, spatula.
To install the fan, draw a marking for the diameter of its shaft, turn on the hammer drill to jackhammer mode and make a through hole outward. Then you need to connect the device to pre-installed wiring, install it in the prepared passage and treat it with plaster around the perimeter, masking the joints. When the mixture dries, you can apply a sealant around the perimeter to prevent air from entering from microcracks.
On a small square loggia, you can get by with installing one supply and exhaust fan. If the room is long, it is better not to take risks and mount two devices.
How to insulate a balcony (loggia) with cold glazing
Insulation does not always mean a complete replacement of the structure with warm glazing - for this you can, for example, lay thermal insulation on the floor, ceiling and walls. These options do not require large investments, and if you have minimal skills, you can work on your own, without the involvement of a specialist.
You can insulate a balcony with cold glazing yourself
Insulation of seams between window frames
Since the main heat losses are associated with the window, first of all it is the seams between the frames that should be insulated. The sequence of actions is as follows:
- Remove old paint from the seams using a 10 cm wide spatula.
- Make sure there are no gaps or cracks (in the light or using a powerful lamp).
- Insulate voids using polyurethane foam or cement mortar.
- Wait a few days for the material to dry and remove any excess (cut off the protruding parts of the polyurethane foam).
- Insulate the seams by covering them with putty, and for reliability, install plastic flashings, which can be bought at any repair store.
A separate task is to insulate a stained glass balcony with cold glazing. This is the name for panoramic loggias with large glass reaching to the floor. Obviously, the larger the window area, the greater the heat loss. Therefore, it is necessary to insulate the building:
- First of all, seal all the cracks at the joints of the glass and the frame of the balcony room itself. To do this, you need to apply a high-quality sealant, for example, polyurethane foam.
- After this, a layer of hydro- and thermal insulation is laid on the inside. You can use a modern version of sprayed thermal insulation - then you will not need to lay a layer of waterproofing.
- Penofol is fixed over the insulation, and aluminum tape is fixed over the seams - then the material will not collect moisture from the inside.
- For forced heating, heating devices are installed, for example, floor or vertical. You can also use convectors that are mounted under the floor, or infrared films (they are mounted on any flat surface - horizontal and vertical).
Before starting insulation, you need to screed the floor
Insulation of walls and ceilings
You can insulate the walls and ceiling using the same technology as the floor, except for the screeding stage (described below):
- A wooden sheathing is installed from the inside.
- Insulation is placed between the cells - it can be mineral wool, penoplex, polystyrene foam or foil polystyrene foam.
- On top of it there is a layer of sheathing, for example, sheets of plasterboard.
- The final stage is finishing.
Important! If the frame of a cold balcony is metal, it must also be insulated from the outside. The main finishing option is siding, insulation is lightweight foam block. If this is not done, the room will suffer large heat losses.
If this is not done, the room will suffer large heat losses.
Floor insulation
It is necessary to insulate the floor, especially if the apartment is on the ground floor or the neighbors below have an open balcony without an insulated ceiling. To lay the material, proceed as follows:
- Make a floor screed to level the surface. This stage is especially important - if the stove is old, you first need to check its reliability.
- Installation of the sheathing: lay a wooden beam with a cross-section of 50×25 mm in increments of 50–60 cm. The frame can be assembled yourself using self-tapping screws.
- The next stage is to insulate it with material, laying it between the beams. For this purpose, polystyrene foam and mineral wool are used.
- Lay waterproofing (film) over the insulation - this step is desirable, but optional.
- Sew the floor using a sheet of plywood or chipboard.
- Finishing: linoleum or laminate.
How to decorate pipes?
If you don’t want to bother with complex construction procedures, then don’t hide the pipes, but decorate them. But you still have to tinker a little: before covering, the pipe is washed and insulated with plastic film.
Pipe decor options
Painting
It is enough to paint the pipe to match the walls, and it will become less noticeable. Apply a pattern or ornament that is repeatedly repeated in the interior (on tiles, textiles) to the pipe. This will make her friends with the space. If you are ready for bold experiments, make the pipe a bright interior detail by painting it in rich contrasting shades.
Pink pipe in the kitchen
Important: before applying paint, you must exclude the presence of condensation on the pipe and cover the surfaces adjacent to it with a protective film.
To ensure that the paint adheres well and the metal is protected from corrosion, before painting, do not forget to clean the surface of the pipe from dust, sand it a little and coat it with a primer. For pipes through which hot water passes, choose special heat-resistant paints (alkyd enamels) that do not change their color when exposed to heat. Plastic pipes are the most vulnerable to chemicals. Compositions without acetone (acrylic, water-soluble, pentaphthalic based on white spirit) are suitable for them.
Advice: to get the hang of it, paint cold pipes first, since paint dries quickly on hot pipes, and poor-quality application will be immediately noticeable.
With the participation of polyurethane tubes and stucco decor, vertical pipes can be designed in the form of columns. They will fit perfectly into the classic style of the interior. And fans of eco style can paint the pipes to match the tree trunk and entwine it with artificial vines or leaves.
Imitation of railing
A horizontal section of a gas pipe in the kitchen, running along the apron, can make a good “false rail.” Only lightweight items can be hung on it. Install the real railing parallel to the pipe, but slightly lower. The main secret: the diameters and shades of the pipe and railing should match as much as possible. This life hack is perfect for modern interior styles.
Railing and pipe
Decorative overlays
These include sockets, pipe rings and plugs. They serve to cover sloppy protrusions where pipes enter the ceiling, wall and floor. Such a small decorative touch makes the design more aesthetically pleasing and complete. The main thing is to choose the appropriate texture, diameter, section shape and color of the lining.
Pipe covers
Rope trim
How to beat pipes in eco-style? Wrap them with hemp rope or jute rope. This is a great idea for decorating interiors with marine and eco themes, especially in children's rooms. Another plus is that the rope around the pipe can become a convenient scratching post for cats.
Pipe wrapped with rope
Shelf part
If special boxes and false walls take up a lot of space, try installing a practical shelf or rack on top of or around the pipe. The final touch is to paint the pipe and shelf in the same color for better camouflage.
Pipe under the shelf
Hanging shelves without screws and drills are easy to install using a horizontal heating pipe. Wrap it with a rope and hang small planks from it using hemp ropes. You can store any small items and lightweight trinkets on them.
Decoupage
This is a well-known decorating technique characteristic of shabby chic, rustic, Provence and country styles. With its help, you can effectively decorate the pipe, turning it into a charming decorative element.
Knitting
Handicraft lovers will certainly be interested in the idea of knitted covers for pipes. The process of creating them is not fast, but as a result you can get an absolutely unique decor. Children will definitely appreciate colorful products in the shape of funny animals.
Why did condensation appear on the loggia or balcony?
This can only be noticeable in the cold season. In summer it does not form due to the fact that the temperature is elevated. In autumn, the windows fog up only at night, and during the day they dry out again. The cause of condensation is usually the difference between external and internal temperatures. At night, the air cools, and if water vapor has accumulated on the balcony, it will settle in the form of dew on the surface of the glass.
Naturally, any additional source of moisture will increase the percentage of humidity and lead to condensation on the balcony. And if you have repaired an unglazed balcony by making it glazed, and condensation now appears on the ceiling, it means that the preparatory work was carried out incorrectly. That is, the cracks were repaired incorrectly and the frames were processed incorrectly.
Using diffusers
Diffusers are special ventilation devices that provide the ability to regulate air exchange, up to its complete blocking. Manufacturers today offer a fairly large selection of exhaust, supply or adjustable diffusers. If the first two types are capable of passing air flow in only one direction, then adjustable devices are capable of changing the direction of action.
You can find plastic and metal diffusers on sale. Each of them has its own strengths. For example, the advantage of plastic diffusers is that they do not rust. At the same time, metal diffusers almost always have anti-vandal properties.
How to close the ventilation grill on the balcony?
- Repair of plastic windows
- Aluminum window repair
- Wooden window repair
- Repair of dormer windows
- Repair of fittings and installation of additional elements
- Additional elements Blinds
- Slopes
- Low tides
- Soundproofing window sill
- Window sills
- Children's locks
- Handles with key for windows
- Micro ventilation valves
- Combs for windows
- Opening limiters
- Door closers
- Replacing a double-glazed window with a sandwich panel
- Replacing one glass in a double glazing unit
- Milling drainage holes
- Balcony latch and shell handle
- Double-sided handle for balcony door
- Metal fasteners for mosquito nets
- Installing a continuous ebb tide on the balcony
- Installing glass instead of metal blinds
- Changing the window configuration
- Installation of additional clamps
- Setting the micro-ventilation mode
- Replacing single-chamber double-glazed windows with double-chamber ones
- Sealing window seams
- Window insulation
- Window profile painting
- Installing screens on plunger fasteners
- Manufacturing of external slopes from metal
- Waterproofing of facade glazing
- Replacement of double-glazed windows on roof windows
- Replacement of double glazing on aluminum windows
- Replacing double glazing in a wooden window
- Replacement of facade glazing
- Replacing tinted glass
- Replacing knee glass
- Replacement of energy-saving double-glazed windows
- Replacement of armored glass
- Glass armoring
- Replacement of triplex double-glazed windows
- Repair of swing doors
- Repair and adjustment of portal system windows
- Removing mold from windows
- Cleaning and lubrication of accessories
Mosquito net