Mirrors, shelves, doors, stained glass windows and other glass objects are an integral part of the interior of a residential building. Most often, mirrors are found in the hallway and in the bathroom. And shelves, stained glass windows and doors made of such material are less popular, but are not excluded as decor. Despite their different functionality, all these products are united by increased fragility. Therefore, the standard wall fastening system is not suitable. In this case, it is necessary to use special fasteners for glass.
Types of fittings and fasteners for installing glass products
The choice of fittings for fastening glass and other fragile products is made taking into account the location of the object in space (vertical or horizontal), as well as the level of expected load on it. Based on this, the following types of fastening can be distinguished:
- point;
- clamping;
- on an adhesive basis.
Point fastening is performed by attaching the clamp to the glass sheet through a special hole. This clamp is called a connector. It is made of stainless steel. Its design contains a sealing gasket, which ensures excellent tightness of the connection and protects the glass sheet from damage during operation.
Clamp fastening is performed by fixing the clamp without making a hole in the blade. It can be carried out using point clamps (corners, clips). Sometimes it is attached using a glass profile to a wall or to another object.
Glue-based fastening is rarely performed, as it is considered less reliable. This mount is used to install glass or mirror on the wall. The product can be fixed using double-sided construction tape or a special adhesive composition.
Fastening glass products to the wall is best done using a silicone-based adhesive.
Regardless of the type of fastening, the fittings should be selected taking into account its scope of application:
- fixing glass to glass;
- installation of glass to the wall;
- using glass as part of another structure, for example, when attaching glass doors to furniture.
Apron design options
Glass can be used to produce real designer masterpieces. This is determined by its characteristics and existing processing technologies.
Transparent panels
Aprons made of colorless glass are used mainly not for decorating rooms, but as protective panels for interesting cladding of the kitchen. For example, if there is no desire to cover brickwork, printed wallpaper or wood trim, transparent screens are used. In this case, the overall design solution remains the same, since the panel is practically invisible.
Clear glass apron
If you want to diversify the design, you can use products with a textured surface.
Important! You can also make an interesting design panel from transparent glass. Using a self-adhesive film with printing glued to the back side of the material, it becomes possible to get an attractive apron without significant investment. In addition, the film can be removed and replaced with a new one if desired.
Not only for transparent skinnels, but also for designer aprons, it is recommended to use not simple glass, which usually has an inconspicuous tint, but a special material - Optiwhite. This glass is brightened, resulting in the elimination of distortion and extraneous tones.
Optiwhite glass splashback
Matte apron
The matte surface can become a decorative element. Glass shades may vary. White matte aprons look stylish in many interiors.
Matte apron
In this case, decor can be applied to the surface, for example, satin.
Glass satin finishing
Tinted glass
In the interiors of a number of style concepts, it is appropriate to use tinted glass to decorate and protect areas above work surfaces. Their colors can be different, even black.
Tinted glass
As a rule, coloring of the material is done in bulk, at the production stage. However, film gluing is also used.
You can also color glass using another technology.
Stemalit
Interesting designs are made from glass onto which a tint is baked in using ceramic paint. This uniform decor becomes part of the glass. It cannot be removed. A wide range of colors are used. The glass itself can be transparent or tinted. With the help of this technology, it became possible to create interesting design effects.
Red glass apron
Apron with a pattern
Photo printing is most often used to produce panels with images. This uses special UV-curable inks. Using a printer, the image is applied to the back of the glass panel. The choice of topics is unlimited. It is possible to transfer your favorite family photos to the glass.
Apron with photo printing
Photo printing on glass
A fairly expensive apron can be made from triplex, in which the images are between the layers. In this case, the drawing is completely protected from damage.
Standardly, a triplex apron is made with a thickness of 8.38 mm using sintering of two 4 mm glasses
Sandblasted glass
By exposing the glass surface to an air flow mixed with an abrasive, it is possible to create various, even the most intricate, patterns.
Using a rather complex but effective processing method, you can perform exclusive engraving
Artistic sandblasting
Mirror aprons
Mirror coating has an important effect - it can visually significantly expand the space of the kitchen. However, as practice shows, more often they install not solid panels with a mirror coating, but aprons with a printed pattern, or they install cladding from individual mirror tiles.
Mirrored apron with diamond patterns for a bright kitchen
When making aprons, a combination of several types of finishes is often used.
Mirror apron for the kitchen
An interesting design technique, regardless of the type of glass processing, is the installation of decorative lighting. It is performed using strips with LEDs.
Mirrored apron with lighting
How to choose glass fittings
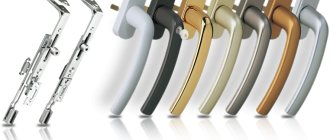
When choosing accessories for fastening glass, you should rely on the type of item itself, its location and functionality. If you are selecting a fastening element for installing a mirror or other glass structure in the bathroom, you should give preference to parts made of stainless metal (steel, zinc, brass). It is also worth paying attention to the decorative appearance. This detail must fit neatly into the design of the product. Fasteners on glass must have a protective gasket so that during contact with the canvas it does not deform.
What prevents you from mounting a mirror on the wall?
A mirror is one of the few items that can be attached to walls anywhere and in unlimited quantities. There is even a certain interior design style that uses a large number of mirror panels of different designs. If you correctly position and secure mirrors on the walls, you can significantly change the perception of the room and even visually expand the boundaries.
Most owners, after renovation, do not want to drill into the walls and spoil the newly hung wallpaper. Most often, they try to attach the mirror using adhesives; you just need to choose a good glue and solve the problem of how to clean the wallpaper from dust after repair.
But attaching mirror glass with glue is not as easy as it might seem at first glance. Most often, problems arise in the following situations:
- When trying to fix a mirror on recently pasted wallpaper. A small and relatively light mirror can stay on the wallpaper surface, but at the same time “pull” part of the wallpaper into an “accordion”. You cannot attach mirror glass directly to a fresh canvas, otherwise you will have to look for a way to remove wrinkles from the wallpaper after drying;
- In case the glass plate of the mirror needs to be attached to a water-based emulsion, latex, liquid wallpaper, drywall or a lime-whitened wall. None of the listed materials are friendly to glue and shear loads, so there is no point in trying to attach even a small mirror - the coating will peel off.
Most high-strength adhesives based on alcohol, dichloroethane, and acetone have high shrinkage. The exception is epoxy adhesives, but due to their low viscosity, they are almost impossible to attach heavy objects to the walls of a room.
The opposite situation is also possible, when the wallpaper is glued to the wall with relatively weak CMC glue. In this case, attempting to attach heavy mirror glass with glue will result in the wallpaper breaking along with the mirror.
Is it possible to attach a mirror with glue?
In order to understand how to properly attach a mirror to wallpaper, let’s perform a small estimation calculation. The average weight of the glass base of a wall mirror is 2.5 kg. The fastening technology involves applying an adhesive layer 1-2 cm wide over the entire horizontal width of the wallpaper base, which is approximately 60-61 cm.
Installation of glass fittings
There are two ways to install fittings to glass:
- by gluing;
- using a drill.
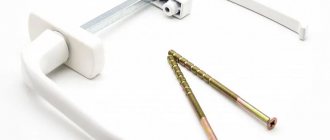
Installation of fittings with glue
The easiest way to fix a part that is glued with glue. The process of its installation is carried out by applying an adhesive composition to that part of the fittings that will be adjacent to the glass. Next, fixation is carried out using a screw clamp. You can install such fittings yourself, and the chance of damaging the fabric is minimal.
The use of adhesive fittings is permissible only if the weight of the items does not exceed 20 kg.
Installation of fittings with drilling
To install and fasten glass using drilling, use accessories for which you need to prepare a hole in the panel. Such fasteners allow the installation of heavier elements or products designed for greater loads. In this case, it is also necessary to make a recessed hole in the wall for reliable fixation.
The fastening part that requires a hole is made of metal. But to avoid direct contact with the glass sheet, the contact point is protected with a rubber or silicone gasket.
Profile mounting
In this case, as in the previous one, there are no holes for fastening on the panels themselves.
Apron installation diagram
To install the apron, you need to use self-tapping screws to secure the mounting profiles designed for fixing the glass to the wall (top and bottom).
After this, the panel can be installed.
- To do this, its lower edge is moved slightly away from the wall, and the upper edge is inserted into the profile.
- The bottom of the glass is brought to the profile and is also inserted into it (you have to press a little on the product).
- If several panels are installed, it is necessary to ensure that the gap between them is as small as possible. A rubber mallet is used for this, but the tool should be used with caution.
Features of self-installation of glass products
When installing glass structures yourself, you must follow a number of rules to ensure that the product is functional and lasts a long time.
- They determine the location of the glass structure or object, where it will be located - in the bathroom or in the hallway.
- Choose a suitable fastening method (adhesive mounting or installation of special fittings).
- Having chosen the fastening method using fittings, select the appropriate fasteners.
- Depending on the fasteners, they are installed in the correct order.
- Check the reliability of the work performed.
Tips for installing mirrors yourself
When installing a mirror yourself, you should consider many factors. Each material requires a certain type of fastener.
The mirror is fixed to the concrete wall using glue. It is worth considering that glue is not always able to withstand a massive product, so you can use a combination of glue with double-sided tape.
The mirror sheet is fixed to the plasterboard wall using holders. It must be remembered that drywall can be deformed if there is a strong impact on it, so the weight of the mirror sheet should be taken into account.
Rules for installing glass shelves yourself
Attaching a glass shelf yourself is not difficult, if you consider the following:
- To secure a shelf no more than 50 cm long and 20-25 cm wide, only two holders are required, but if you intend to install a longer shelf, the number of holders increases.
- Before installing fittings for a glass shelf, you should mark its location (the holders must be attached so that the shelf is horizontal and level without distortion).
- When installing several shelves, it is better to start installation from the top row.
By following these tips, you can independently carry out a number of activities to install any glass element and structure.
Did you manage to solve your problem using the recommendations from the article?
Yes!
46.45%
No. More answers required. I'll ask in the comments now.
38.48%
Partially. There are still questions. I'll write in the comments now.
15.07%
Voted: 803
What you should pay special attention to when attaching
If you decide to carry out this work yourself, then you need to pay special attention to three points.
- Building bubble level, your most faithful friend. In order for your shelf or mirror to look beautiful and level, you need to clearly check the level, i.e. arrange your shelves and mirror in advance, making all the necessary markings clearly horizontally and vertically.
- Roulette is your second assistant. To maintain equal distances from walls, or from other objects, you will often have to look for the center, which is why a tape measure is useful.
- Marking is something that needs to be re-measured more than once before making a hole in the wall. Everything is simple here; in order not to spoil the wall or wall decor, you don’t need to make random, unnecessary holes.