Windows that are not covered with curtains create the effect of some kind of incompleteness, or even “coldness” of the room. Perhaps this is acceptable in a strict office, but in your home or apartment you want a more comfortable environment. Therefore, curtains in the vast majority of cases are considered as one of the key elements of interior decoration of rooms. And if you do not take into account exotic types of window drapery, such as roller or Roman blinds or all kinds of blinds, then what remains is a standard, decades-tested “set” of light translucent curtains for daylight hours, and thick curtains drawn at night.
How to hang a ceiling curtain - several options for different occasions
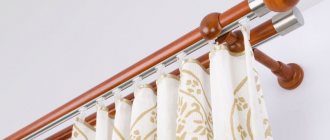
But to hang any curtains, you need to have special curtain rods. These curtain rods can be attached to both the wall and the ceiling. In our time, ceiling curtains are more in demand, since with them the curtains look much more beautiful, almost completely breaking up the space near the window from top to bottom, without significant clearance from above, and often without it at all. And now – a small “linguistic nuance”. According to orographic dictionaries of the Russian language, light curtains are called curtains. But it just so happened that this name somehow “migrated” to their suspension system, that is, to the cornices. And when asking the search query “how to hang a ceiling curtain,” the user in the vast majority of cases expects recommendations specifically for installing a ceiling cornice. Let’s not be picky, we understood the task at hand, and we will try to reveal it in detail in this publication.
Varieties
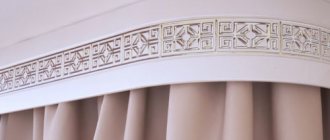
The ceiling cornice (a photo of one of the options is presented below) can be made of different materials. Most often they are made from plastic, wood or metal. The choice depends on what material the curtains will be made from. There are curtain rods for light, medium or heavy fabric.
If chintz or tulle are used as curtains, a string cornice will be quite sufficient. This is a lightweight, practical type of construction. Steel or wooden types of curtain rods are used for heavy fabrics. For medium-weight curtains, a plastic curtain rod is suitable.
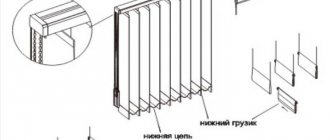
The design of the cornice may vary. There are products that have one, two or three rows. If you only need to hang thin tulle, a curtain rod with one rail is sufficient. If the window is breaded and covered with curtains, you need to purchase a design with two panels. Three-strip cornices are designed for use in a lambrequin ensemble.
Structures can be rigid or flexible. The second option is typical for plastic, polyurethane curtain rods. They allow you to give the strip the desired configuration. This is especially important if you are installing a ceiling cornice for a bay window, attic or figured windows. It is worth noting that flexible bay windows include more fasteners in their design. This allows you to fix bends.
Cornice material
Before we move on to a review of various mounting options, let's study what materials curtain rods are made from. This is the easiest thing to deal with.
- Wooden cornices are distinguished by their impressive weight, they look solid, but they are also the most expensive. Such a cornice will fit perfectly into a classic interior, and in some cases, into a modern setting. The main thing to remember is that wood does not like sudden changes in temperature (more than 7 degrees) and does not welcome high humidity, but it is durable and able to withstand the weight of heavy panels. Wooden cornices come in a wide variety, but carved models look especially luxurious.
- Aluminum cornices are the golden mean; there is a margin of safety combined with low weight and an adequate price. They are not afraid of cold, heat or humidity, do not put a load on the floors, can withstand three-layer lambrequins, but the hollow structure is easy to deform and should be used with caution. There are both laminated and painted models on sale, so choosing the right product will not be difficult.
- Steel curtain rods are a good companion to heavy curtains, but such a product is heavy in itself. It is used when the length of curtains is more than 3 m. It is steel curtain rods that are used to decorate stages, and there the weight of the curtain is more than substantial. They can be decorated with wood or plastic to look more harmonious in the room. The cost is higher than that of the aluminum counterpart.
- Plastic ones are a bestseller in any city. Plastic can be painted or laminated in almost any way, so it allows you to bring any design idea to life. Although the material is not so noble, the strength without defects is impressive. However, there are minimal restrictions on the range of movement of curtains. However, it is better not to hang heavy curtains on a plastic curtain rod.
Additionally, sometimes there are forged cornices , which have all the same advantages as steel ones. They are strong, durable, reliable, can withstand the weight of heavy curtains, and look interesting, but it is difficult to call such products universal. They will fit well only into certain interior styles, incl. Provence, country, classic.
In addition, there are also combined cornices. The base, for example, can be made of aluminum, on top of which plastic is used. This combines the strength of aluminum and the wide decorative possibilities of plastic.
We also note that, regardless of the material of manufacture and method of fastening, curtain rods can be designed for 1-4 sets of curtains, i.e. you can hang tulle, thick curtains and a lambrequin for decoration on the same cornice.
Advantages of ceiling structures
The installation of a ceiling curtain rod has a number of features. This type of design has a number of advantages over other product options.
All fasteners will be hidden in the ceiling space. This significantly improves the appearance of the cornice. The appearance of the room also becomes more aesthetically pleasing. Such designs are suitable even for installation in rooms with low ceiling heights. After installing the tension fabrics, it may decrease. The use of a ceiling cornice allows you to visually increase the height of the ceiling.
The cost of cornices of the presented type remains acceptable. Most often they are made of plastic. It can imitate any other materials (for example, wood or metal). Plastic is not afraid of moisture or temperature changes.
The scope of application of the presented products is large. They can be mounted in any living space, on a loggia or balcony, as well as in almost any hard-to-reach places. If you choose the right cornice, as well as fulfill the requirements for its installation, the structure will last a long time.
Installation of ceiling cornices made of polyurethane or plastic will be a good solution for almost any type of curtains. The weight of the material can be up to 50 kg. The structure can be mounted on almost any base. The ability to take the desired configuration (wavy or zigzag) is also an advantage of the presented types of cornices.
What cornices are fashionable in 2022
Beautiful cornices will give any room a finished look. Along with properly selected curtains, they will highlight the design of the room. In 2022, Scandinavian style and minimalism remain trendy. Therefore, when choosing the most suitable product, it is better to give preference to more functional models without unnecessary decoration. Metal cornices painted black or white, or wooden ones with a natural pattern will look most appropriate.
Art Deco will also strengthen its position. For this direction, you can use gold-plated products that will look perfect with Armstrong hanging systems. The classic style, which is characterized by strict symmetry, an abundance of decor, and the use of natural materials, is also relevant. When decorating the interior, you should think about the cornice hidden in the niche of the stretch ceiling, leaving only the flowing curtains in sight.
What will be needed for installation?
To install a ceiling cornice with your own hands, you need to prepare all the materials and tools necessary for the work. To install the structure, you will need a ruler, pencil, building level, electric drill (hammer) or adhesive.
The design of the cornice can consist of several elements. It includes a profile. This is the section of the cornice on which the rows for fabric are located. The profile is most often made in white. Variants are also possible. For example, you can find on sale a profile for a ceiling cornice in beige or cream color.
The design may contain curves. They are installed on the sides of the cornice, giving the image completeness. Straight plugs are used if the cornice occupies the entire width of the wall.
Connectors are used in complex structures. They allow you to combine 2 profiles. At the places of such connections, the curtains will open and close without hindrance.
An important element of the cornice are the stoppers. They are installed on the ceiling profile on both sides at a certain distance from the edge. They prevent the hooks from falling off the bar. There are also hooks on the slats (curtains are put on them).
Installation of a plastic ceiling cornice or any other product is carried out using different types of fastening. Hardware can be supplied as a set, but more often they have to be purchased separately. You can also additionally buy a decorative strip that will enhance the appearance of the cornice.
Curtain design
Criteria for choosing curtains
The usual name for curtains (cornice) also has another meaning, according to which curtains are curtains made of light and flowing material. Modern designers often include them in decoration, since with their help they can achieve comfort, harmony and a sense of celebration in the room.
In order for the purchased curtain to go well with the style and direction, you need to buy a suitable product. To do this, general factors should be taken into account:
- interior of the room;
- textile color and decorative elements. For low rooms, choose smooth curtains and light curtains instead of heavy drapes;
- functional purpose of the room;
- size and shape of the window opening.
Video on how to choose curtain rods for suspended ceilings
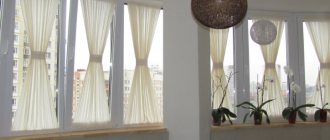
A variety of photos and videos in the interior will help you find a suitable curtain design.
If you decide to tackle this issue yourself, then when choosing a product, follow these tips:
- in narrow rooms with windows of irregular geometric shapes, choose wide curtain rods;
- a light curtain will visually expand the spatial boundaries of the room and make the room more comfortable;
- A simple plastic or aluminum baguette without decorative overlays or patterns will suit the minimalist direction in the interior;
- a classic interior requires luxury and wealth, so wooden cornices or steel baguettes with luxurious curtains made of expensive types of fabrics would look appropriate here;
- Art Nouveau style is emphasized by curtains in the form of panels. Despite the external severity, such products look very beautiful;
- If you are a supporter of Japanese interiors, purchase special curtain panels. Their other name is Japanese curtains.
Thus, curtains should fit laconically into the interior, combined with the rest of the decoration, furniture, accessories and decorative elements. If the room is small in size, it is better to abandon heavy drapes and curtains with ruffles, flounces and other elements that weigh down the appearance of the structure.
Methods for attaching curtain fabric
When choosing curtains, pay special attention to the methods of attaching the curtains to the curtain rod:
- with ties. Such fasteners can be made from any type of fabric, using regular tape or cord. The ties can be matched to the fabric or you can choose a shade that contrasts with the curtains. It is best to use this option for light curtains made from natural fabrics;
- on loops, which are also made of fabric. They come in different lengths and widths, solid or removable;
- on the eyelets. Such a fastening requires the presence of slits in the fabric, protected by rings through which the curtain is threaded. Thanks to the uniform arrangement of the eyelets, the folds on the curtains are neat and even;
- on the drawstring. Here the fabric itself is used without special connectors. Such curtains move silently along the cornice, since additional elements do not interfere with sliding;
- on the braid. If you choose this option for fixing the fabric, you will need to purchase more fabric, since the sewn braid, when pulled together, forms many small folds;
- on the rings. On sale you can find curtains with ready-made rings. In this case, you only need to sew on the fasteners;
- on magnets. This type of fastening can be used for any curtains, creating various interesting draperies.
When carrying out repairs and decoration of premises, do not forget that every detail can radically transform the interior. Think through your options carefully so you can make the right decision.
Fastener selection
Installation of a flexible or rigid ceiling cornice occurs using different clamps. They are designed for different base materials. The most common options for fastening structures are:
- dowel-nails;
- self-tapping screws;
- liquid Nails;
- brackets;
- dowels for drywall.
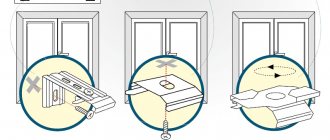
Most often, dowel-nails are used to install cornices in city apartments. They are suitable for a dense, uniform base. The clamps are installed in increments of no more than 60 cm. The curves are fixed separately. Next, holes are drilled through the profile. After this, the cornice is removed. The plastic elements of the dowel-nails are driven into the prepared holes. Next, the cornice is installed in the desired location. The screws are screwed into plastic dowels.
Self-tapping screws are suitable if the base is made of wood or chipboard, MDF. Their length must be at least 25 mm. Self-tapping screws are also stitched through the cornice profile.
Liquid nails allow you to install ceiling curtain rods without the use of power tools. In this case, you need to properly prepare the surface and degrease it. A special composition is applied to the reverse side of the cornice. If it needs to be dismantled, this procedure will be quite difficult.
If the ceiling is made of plasterboard, you can attach a ceiling cornice to it using special dowels. They differ from conventional hardware in the design of the key. Such dowels are also called “butterflies”.
If it is not possible to attach the structure to the ceiling, special brackets are used. With their help, they are fixed to the wall.
Installing cornices on a bay window
Bay windows are characterized by various shapes. They repeat the protruding shaped part of the building, which can be round, oval, trapezoidal, multifaceted. For rooms with non-standard geometry, special bay windows are used, which are practically no different from standard options and can be flexible and rigid. In the first case, bay window adapters are used to connect the elements; in the second, the profile itself is bent, after which it is installed in the designated place. Consider the method of installing flexible curtain rods:
- Depending on the chosen location for mounting the structure, we make markings on the wall or ceiling.
- Every 30-40 cm we drill holes for the brackets.
- We install fastenings.
- We try on the cornice and cut off the excess.
- We fix the structure to the fastenings.
- We hang hooks.
Attaching a cornice to a regular ceiling
There are simple step-by-step instructions that allow you to install plastic ceiling curtain rods yourself. Recommendations from specialists will help you with the installation. You will need to prepare all the necessary tools and materials. In addition to a complete set of elements, to assemble the cornice you will need a hammer drill or at least a powerful electric drill. You also need sharp drills designed for the base material (most often concrete cutters).
First you need to measure the width of the window. In this case, you need to consider whether rounded or straight plugs will be used. In accordance with the measurements taken, the cornice is cut. Next, it is connected to plugs or roundings. Next, the cornice is applied to the base. You need to use a level to level its position. It is better to do this work with an assistant. Next you need to mark the points where the holes will be drilled.
They retreat 5 cm from the edges. Next, you need to evenly distribute the fasteners so that the distance between them does not exceed 60 cm. Recesses are created through the markings with a puncher. The cornice is removed. The holes are deepened so that the key can fully fit into the recess without protruding above the surface of the base. After this, the cornice is installed in place. It is fixed using self-tapping screws, which are cut into prepared dowels. It is better to start attaching the cornice from the center. This is where the first screw cuts in. Next, the clamps are installed along the edges. Check the position of the cornice. After this, you can fasten the remaining screws.
How to choose a cornice
From a functional point of view, the cornice is intended exclusively for attaching curtains. From an aesthetic point of view, this is an important element that can emphasize the style of the room and focus attention on the window opening. The item has a simple design, which consists of the following parts: a base supporting the curtain (pipe, string, tire); brackets, holders for fixing the base; fasteners for textile fabric; side plugs.
The choice of product should be approached very responsibly. When purchasing a design, you must consider the following points:
- Window size. The length of the cornice should exceed the width of the window opening by 40 cm.
- Load bearing capacity. The item must be strong enough to withstand the load exerted by the curtains.
- Location of batteries, pipes, protruding part of the window sill. These elements should not interfere with the free hanging and movement of the canvas.
- Color spectrum. The shade is selected in accordance with the existing design.
- Size and space. If round models are suitable for framing windows in a room of any size, then string models will look more impressive only in small rooms, and bulky wooden ones are recommended to be installed in large living rooms.
- Number of rows. Depending on the purpose, you can choose one-, two-, three-row designs. The latest models will allow you to decorate a room with complex textile compositions.
- Material. Metal, wood, and plastic are used in the production of products. The choice of the most suitable option depends on the style, price category, and personal preferences of the buyer.
Installation to a suspended ceiling
Installation of a ceiling cornice on a suspended ceiling can be done in an open or closed way. In both cases, you will need to use a special wooden beam. It will need to be installed before the canvas is stretched.
First, markings must be made on the prepared ceiling base. Using a level, draw a straight line. Using the markings, drill holes for attaching the ceiling beam. This procedure must be done before the baguettes for mounting the canvas are mounted.
After drilling the holes, you need to install the strips. The suspended ceiling will subsequently be attached to them. Next you need to insert the dowels into the drilled holes. A beam is attached to the ceiling surface. It is fixed with dowels. The surface of the beam should come close to the suspended ceiling (located at a distance of 1-2 mm from the canvas). You can adjust the position of the beam using mounting wedges.
Next, you can mount the tension fabric. To strengthen the material in the places where the cornice is fixed, you need to install special polymer rings. Their internal space is simply burned out. After this, you can use self-tapping screws to attach the cornice to the wooden beam. At this point, the installation of the ceiling cornice on the suspended ceiling using the open method is completed.
How to hang a ceiling curtain yourself
In this section of the publication, the main attention will be focused on the installation of tire profile cornices. And this is quite easy to explain
String or rod ceiling cornices are attached with precision. That is, in certain places, usually slightly to the left and right of the window, brackets (racks, hangers) are mounted to the ceiling. Sometimes, if the cornice is very long, a third bracket is added - in the place where the curtains or drapes to be drawn will meet. Then all the “equipment”, that is, a crossbar or a cable (fishing line), is suspended from these brackets. Very often, such brackets have a decorative shape, and visual concealment of fastening elements is provided - plugs, caps, etc. But the principle itself is the same.
With the tire cornice, things are somewhat different. The fundamental difference is that the structure is first assembled on the floor, then raised to the ceiling and attached to it in finished form. All that remains is to put on the hooks and install the plugs (unless, of course, the master did not do this right away, which is more reasonable) - and after that you can hang the drapery.
Such cornices are suitable for the vast majority of types of ceilings, including those that combine very well with suspended ones. Moreover, with tension ones, several options for “coexistence” are possible at once. We'll talk about all this below.
In the meantime, first of all, let’s take a closer look at the design of the plastic profile tire curtain rod.
A few words about the design of a profile ceiling cornice
To make it easier to explain the installation procedure, it makes sense to recall the structure of a profile ceiling cornice - its most common type, in the form of a flat plastic tire. Models from different manufacturers may have differences in nuances, but the general principle still remains unchanged.
| Illustration | Part name and necessary explanations. |
| The double-row tire is perhaps the most popular among other varieties. Allows you to hang two levels of curtains, for example, heavy curtains for covering windows at night, and light tulle curtains for the day. The length of a standard tire is usually 2500 mm, but in some models it can vary in one direction or the other. It can be easily cut to the required size, and if it is necessary to use a longer cornice, the tires can be easily spliced using special adapter inserts. As a rule, mounting holes are located in the center of the bus with a pitch of usually 500 mm for mounting to the ceiling. If desired or necessary, it is easy to drill such holes in the right place yourself. The dimensions of this part (like all others in the proposed table) are indicated using the example of one model. But you can find others on sale, again, both thicker and wider, and vice versa. | |
| The tire is three-row - the only difference is the presence of an additional guide for hooks, which increases the size in width. Otherwise, everything said in the cell above applies to it. Naturally, three rows of guides provide owners with more imagination in decorating window openings with curtains. | |
| The rotating element (corner) allows you to make the previously mentioned end of the cornice rounded towards the wall. The corners are left and right - and there is no interchangeability here, since the parts have clamps for connecting to the bus. When joining a straight strip and a corner, the guide grooves for moving the suspension hooks completely coincide. In the center of the bend, as a rule, there is also a mounting hole for fastening. | |
| The same, but in a three-row design. | |
| Decorative facade strip, called a baguette or hood. Well hides the area where curtains and light curtains are hung on hooks. It is attached to the front side of the tire, for which a “locking pair” is provided in the form of protrusions and grooves (different models may have their own characteristics). Most often it comes to stores in coils and is sold by the meter. Flexible, able to freely follow the bends of the assembled tire. The buyer can be offered various design options for the blend (baguette). | |
| End caps - to “lock” all the grooves and cavities along the edges of the assembled cornice. An optional part in some kits, but with plugs the appearance is better, and the design will be easier to clean from dust. | |
| Stoppers – are installed in guide grooves to set the boundaries of movement of curtains. They are inserted from the outside onto an already mounted cornice, in the right place, according to the owners. A completely different form (and even principle of operation) of such stoppers is also possible, but figuring it out is not difficult. | |
| Hooks for hanging curtains. On the left is a hook equipped with miniature rollers, on the right - with a head that simply moves along a guide groove. Based on experience of use and reviews, roller blinds are easier to “manage,” but stationary curtains sometimes begin to jam. This is not the only form of hooks - there are others, which are also easy to figure out. Very often (but not always) the required number of hooks is immediately included in the kit of the cornice. If not, you will have to buy more individually. |
Installation of ceiling curtains on a hard ceiling
Several ceiling options are possible here - a reinforced concrete ceiling, a wooden ceiling lining and a suspended structure, in which plasterboard sheets are most often used to create a ceiling plane. Installation of the cornice in all cases will be approximately the same - the main difference will lie in the fasteners used.
How to hang a profile cornice on a reinforced concrete ceiling
Perhaps one of the most common cases. If only because the majority of city residents live in multi-storey buildings, where such floors completely predominate.
Let's look at the installation of such a cornice using an example - step by step.
| Illustration | Brief description of the operation performed |
| We have to install this cornice on the ceiling. It is still in the package, sealed in film. But it is already clear that the model is two-row. The mounting hole through which the structure will be attached to the ceiling is very clearly visible. | |
| The apartment owners decided to install a cornice with rotating sections towards the wall. Therefore, in addition to the tire itself, a set of corners was purchased - with a left and right part. | |
| Flexible decorative tape - the hood was purchased by the meter, taking into account the length of the tire and the rounded side sections. It is recommended to always take with a small reserve - it is not expensive, but it can come in handy. | |
| The purchased set of parts is complemented by plugs that will cover the mounting holes, hooks for hanging curtains and a stopper, which were described above. | |
| This illustration clearly shows the principle of connecting the main busbar to the rotating part (angle). There are guide protrusions on the corner that should fit into the grooves of the tire. | |
| Then all that remains is to carefully push the corner towards the bus until there is a characteristic click - and the parts will receive a fairly reliable connection, taking into account the fact that they will all be fixed to the same plane. | |
| And this illustration clearly demonstrates how in this model of cornice a decorative hood is attached to the rail. It (the hood) has a groove with two sides turned towards each other. It is between these sides that the guide protrusion of the tire should fit - it exactly matches the dimensions and geometry of the groove. It seems simple - but there are nuances... | |
| There are models in which simply squeezing the force of the hand is enough to connect the hood to the tire - the decorative strip is fixed with its groove on the protrusion of the eaves with a click. | |
| But in the example demonstrated, this will not work. You have to run the edges of the tape onto the tire groove from the end and then pull it along the entire length. To do this, the corner parts of the tire must be removed for now - threading the tape through the turning section and stretching it along the entire length of the cornice, and even with a second turn, is an almost impossible task. | |
| Even on a long straight section, sometimes you have to resort to “forceful methods” - carefully push the tire along the belt using a rubber hammer with gentle, directed blows. | |
| After this application, there should be enough tape left on both sides of the tire to cover the turning areas. This is why it is recommended to take a lens hood with a small margin, so as not to make a mistake. It is on these free areas of the hood that the corner elements are placed one by one with a groove... | |
| ...and, putting on the tape, gradually move towards the main tire... | |
| ...where then the parts are joined together, as shown above, but with a decorative strip. | |
| Here is the assembly for joining the strip and the corner in assembled form. It is probably clear that all these actions should be carried out on the “ground”, before attaching the cornice to the ceiling. Installing such a decorative tape on an already assembled and installed cornice is hardly a feasible task. | |
| Since there was extra decorative tape, there will be a small excess at both ends. They can be cut off either immediately or after installing the end caps - this will make it more accurate. | |
| For example, the master is installing a plug, but for now he left a reserve of decorative strip, simply cutting it at an angle so that it does not interfere with installation. | |
| But here the plug is already installed - and you can cut the bar perfectly exactly along the resulting smooth end. Similar actions, of course, are carried out at the opposite end of the cornice. The cornice can be considered practically assembled, and you can proceed to the process of attaching it to the ceiling. | |
| At this stage, of course, it would be nice to enlist the help of a friend. The cornice itself is not heavy, but it is long and bulky, and therefore, when marking, it costs nothing to allow for displacement and error. And the task now is to attach the cornice to the ceiling surface exactly along the intended line of its facade... | |
| ... and then use a pencil or marker to mark points through the mounting holes that will become the centers of the holes for the fasteners. | |
| Then the hammer drill is prepared for work - the drilling mode with chiselling is set, a drill with a diameter of 6 or 8 mm is inserted into the chuck (depending on the diameter of the selected mounting dowels. Then holes are drilled at the marking points. The master simultaneously uses a vacuum cleaner, bringing the suction pipe to the drilling site - to the resulting debris did not fall onto the floor. | |
| In the example demonstrated, the mater uses 6x40 mm dowel-nails. You can take a little longer - 6x60, so that you can be sure that even the heaviest curtains will not tear them out of their sockets. | |
| Plas dowels are inserted into the holes made... | |
| ... and hammer into them to their entire length. | |
| Then the assembled cornice is again installed in the place prepared for it - this time finally. Dowel-nails are inserted through the holes into the plastic plugs, and using a hammer and punch, carefully (so as not to damage the plastic tire) they are driven as deep as possible, ideally until they stop completely. If it is impossible to drive the dowel-nail all the way in, use a screwdriver to screw it in until it stops. | |
| With high-quality installation, the cornice will eventually press tightly against the ceiling along its entire length. In fact, the installation of the cornice itself has already been completed. | |
| There are some small "touches" left. Thus, the existing plugs can be used to close the mounting holes. These “plugs” are simply inserted into the holes and lock themselves there. | |
| Agree, with the mounting holes closed with plugs, the cornice looks much neater. | |
| The last step in our example is the master installing stoppers - there are rectangular windows for them on the edges of both guides. | |
| And the installer hung a package of hooks on one of the stoppers. And the owners will then decide for themselves how many and on which guide they need hanging points for drapes or curtains. The work on installing the ceiling cornice is successfully completed! |
Installation of a cornice on a suspended plasterboard ceiling
In many ways, the installation of the cornice is similar. The whole difference is in the attachment to the ceiling surface.
For a thin plasterboard sheet (and gypsum board with a thickness of only 9 mm is usually used on the ceiling), dowel-nails are in no way suitable. This means we need to look for another solution.
Three options can be offered:
- The first is to place a galvanized metal ceiling profile in advance, even at the stage of creating a frame (lating) for plasterboard sheets, exactly along the line of fastening the cornice. Then the plastic profile can be fixed to the ceiling surface using metal screws, those used for installing drywall. This profile can be a component of the lathing system. If not, then it won’t be difficult to simply install one additional one specifically for the cornice.
- The second is similar to the first, but you can use a wooden block or strip as an embedded part, securing it to the sheathing elements. Then ordinary wood screws of the required length will be suitable for fastening (for example, 35 mm will be enough).
- The third is when there is no embedded part, that is, they decided to hang the cornice after the plasterboard suspended ceiling was installed. But even in this case, the issue is resolved quickly and with little bloodshed. Simply, special plasterboard dowels will be used to secure the tire. There are several types of them
— Dowel (anchor) “butterfly”
Easy to use and fairly secure mount. To install it, a hole is drilled in the drywall with a diameter corresponding to the diameter of the anchor (usually indicated on it, or it’s easy to check with a caliper).
Butterfly anchor and the principle of its installation.
Then into this hole, for which it is enough to squeeze them towards the center with your fingers. Then the screw is tightened so that the anchor is completely seated. Next, the self-tapping screw is unscrewed, and the cornice rail is attached to it. The more the self-tapping screw is screwed in, the stronger the folding “wings” are pressed from the inside to the plasterboard sheet, and the tighter the fastening is.
— Anchor MO LA
In many ways, the design and principle of fastening is similar to the “butterfly”. However, it is made of metal; instead of a self-tapping screw, a screw is used, which is screwed into a rigidly fixed nut located at the end.
MOLA anchor and brief graphic instructions for its use.
On the outside there is a fixed press washer with two sharp protrusions turned towards the surface of the drywall - this is to prevent the anchor from turning when the screw rotates. The installation is the same as that of the “butterfly”. That is, first the anchor is inserted into the drilled hole, then the screw is screwed in all the way (this will give the desired deformation of the petals behind the wall), then the screw is unscrewed - and the necessary part of the cornice is finally attached to it to the thin gypsum board ceiling.
— Dowel DRIVA
Such fasteners can be metal or polymer - the principle of their design and fastening does not change. The anchor itself has the shape of a screw with wide and sharp turns. Often there is a drill at the end - then you don’t even have to make a hole in the drywall.
One of the variants of the DRIVA type dowel and the principle of its fastening in a plasterboard partition.
The plastic or metal anchor itself (without a self-tapping screw) is first screwed into the plasterboard surface at the intended point until it stops at the wide side. And in front of us is a ready-made dowel-hole for screwing in the self-tapping screw that secures the tire.
Expert opinion: Afanasyev E.V.
Chief editor of the Stroyday.ru project. Engineer.
You need to be careful with such dowels - if you screw them in at the first stage of the process with excessive force, they can crumble the drilled hole, and the fastening therefore becomes unreliable.
* * * * * * *
Otherwise, attaching the cornice to the ceiling is no different from the example shown above.
The cornice is attached to the wooden ceiling
Here you don’t have to “bother” at all and don’t write much. This is the simplest case, when no drilling or any special fasteners are required, ordinary wood screws and a screwdriver are sufficient.
Placing a ceiling cornice on a suspended ceiling
Stretch ceilings have made a “revolution” in the field of interior decoration, and their popularity is constantly growing. Therefore, it would be strange if questions do not arise as to whether and how to hang a ceiling cornice on a suspended ceiling.
Let’s say right away that it is possible, especially if you prepared for it ahead of time. There are several options here too.
Installation of ceiling cornice on embedded parts
There is no point in installing a suspended ceiling yourself. If there is no experience, then the likelihood of getting a decent result is frighteningly small, and expensive material may be damaged.
But when you call a team of craftsmen to install such a ceiling, and your plans include installing a ceiling cornice, do not forget to point this out to the specialists. Then they will simply install the embedded part along the line of the future cornice. The most obvious solution is a wooden beam. But it may well be a galvanized profile, which is used for plasterboard structures. The whole difference subsequently is only in the choice of fasteners, screws for wood or metal.
Embedded timber (board) from wall to wall - this is where, after tensioning the canvas, you can hang any ceiling cornice.
Experienced craftsmen will place the embedded part so that its lower edge is level with the future canvas, literally 1 mm above the planned level of the ceiling plane. And then, when attaching the tire to a profile or beam, the geometry and appearance of the coating will not suffer at all.
Expert opinion: Afanasyev E.V.
Chief editor of the Stroyday.ru project. Engineer.
By the way, some teams, in order to save material, practice installing not a continuous embedded part along the entire length, but several support platforms, say, from fragments of plywood. It’s just that when attaching the cornice, you will need to make sure not to make a mistake with the location of these support points.
Such embedded platforms are installed for the installation of ceiling lighting fixtures. But several similar (even significantly smaller in size) plates, arranged at intervals of 500 mm along the same line, will be enough to fasten a long cornice.
Installation, even independent, of a ceiling cornice on embedded parts is almost as simple as on a wooden ceiling. But there is an important nuance - in those areas where the canvas will be pierced with self-tapping screws, it is necessary to stick small pieces of reinforced tape, approximately 50x50 mm. This ensures that the hole does not become a spreading tear.
Pieces of reinforced tape, glued in places where the stretch ceiling fabric is punctured with self-tapping screws, protects against tearing or spreading.
Expert opinion: Afanasyev E.V.
Chief editor of the Stroyday.ru project. Engineer.
By the way, reinforcement of puncture points is largely intended for PVC sheets. Fabric ceilings do not suffer from spreading. But I wouldn’t risk it - I would still stick the tape in this case too. This will not take much time or any serious material resources, but will be incomparably calmer.
One more thing - many installers promise that PVC film will never creep. They say that there were no such cases in their practice. I’m not sure whether to believe such statements: fifty times it didn’t crawl, on the fifty-first one it would break... And in any case, I would have reinforced the attachment points anyway - it wouldn’t hurt.
As a result, after installing the cornice, it will fit tightly to the stretched canvas without deforming it. Approximately as shown in the illustration.
An approximate diagram of fastening a ceiling cornice on a suspended ceiling to an embedded part.
Let us repeat - for this method you need to warn the specialists who arrived to install the stretch ceiling in advance. Yes, this will make the overall estimate somewhat heavier, but it’s worth it.
The ceiling cornice is hidden in a niche of the stretch ceiling
Many people love this option. Indeed, it looks impressive when the cornice is completely invisible, since it is located above the plane of the ceiling, and the curtains fall from a niche running along the window.
An example of an interior with a ceiling cornice hidden in a niche of a stretch ceiling
Again, you will have to entrust this to the team that will stretch your ceiling. Only the canvas will not go all the way to the wall with the window, but to the partition made, for example, from the same timber. The partition is positioned so that the cornice fits freely between it and the wall and there remains a distance for the curtains at the required distance so that they do not touch the window sill or the protruding heating radiator.
One of the schemes for installing a ceiling cornice in a niche of a stretch ceiling.
An approximate diagram is shown in the illustration above. By the way, for such purposes, many craftsmen use not timber, but a special rectangular aluminum profile.
And sometimes the scheme is complicated - they completely cover with canvas the entire space up to the cornice, including the inner vertical wall of the embedded beam, and even the gap from the cornice to the wall. Of course, all this increases the cost of work - so the choice is up to the homeowners as to how they like it and what is available to them.
You shouldn’t take on such a task on your own; it requires considerable experience.
What to do if the ceiling is already stretched?
This also happens - the suspended ceiling has been in use for a long time, and then the owners suddenly realize that they cannot continue to live without a busbar ceiling cornice. How should they be?
The easiest way is to call a team of craftsmen again. For them, although this is not an easy task, it is quite an ordinary task. They are able to remove the canvas from one side of the room in order to secure the embedded beam, which can then easily be used to mount the cornice. Presumably, if the owners wish, specialists can also handle creating a niche in the ceiling. Of course, all this must be paid for - but the owners themselves are to blame for not thinking about the future for the future.
But if you absolutely don’t want to call a professional, but you absolutely need a ceiling cornice on a suspended ceiling, can you do it yourself?
Yes, it is also possible if you act carefully.
To do this, you will need several thermal rings with an internal diameter of about 50 mm and glue for them. It is best to take a special one, Kosmo, which is probably sold in the same place where thermal rings are sold - in the department of a hardware store that sells accessories for suspended ceilings.
Thermal rings and special glue for them.
In addition, you will need a piece of polypropylene pipe with an outer diameter of 40 mm. and for fastening - dowels with plastic plugs of 8 or 10 mm, but with an increased length of the self-tapping screw. Such that this length is enough to enter the clogged dowel plug at least 30-35 mm, the distance between the ceiling and the tension fabric, and the thickness of the profile cornice. For example, 100 or 120 mm long.
How this task is performed:
- Attachment points are marked along the holes in the assembled cornice - directly on the stretched canvas.
- Next, the rings are coated one by one with a thin layer of glue and glued to the canvas at the designated points, so that this point is exactly in the center of the circle.
- The glue hardens quickly, so after gluing the last ring, you can already return to the first. Now our goal is to cut out the core of the circle, exactly along the inner border of the ring. A thin stationery knife with replaceable blades is best suited for this. Thus, we get a hole, but it will not creep and will not tear further, since it is fenced with a thermal ring, which serves precisely this purpose.
Cutting out the fabric inside the glued thermal ring.
- The next step is to individually measure the distance from the ceiling surface to the stretched fabric at each point using a ruler. And exactly according to this measured value, a section of polypropylene pipe is cut. The pipe should be cut with special scissors, ensuring that the end is perpendicular to the walls of the pipe - this is important.
- Then, carefully using a hammer drill, with the obligatory collection of debris with a vacuum cleaner, holes are drilled in the ceiling for plastic dowel plugs. Such a plug is inserted into each hole and pushed into it along its entire length - you will have to use a hammer with some kind of improvised punch, so that it passes through the hole made.
- You can begin installing the cornice. A self-tapping screw is passed through the mounting hole, and on the other side it must pass through a section of pipe. And so on at each attachment point. For convenience, you can coat the ends of the pipe sections with instant glue and temporarily glue them to the ceiling - it will become easier.
- Next, the cornice is installed in place, the ends of the screws will go through the tubular channels to their dowel plugs. And all that remains is to screw the structure to a rigid base. The pipe sections will rest with one end against the ceiling, the other against the upper surface of the cornice, which will thus itself be located exactly at the level of the ceiling.
- After tightening all the screws, the cornice will be ready to accept curtains. If everything is done carefully and accurately, no deformations will occur on the stretched canvas, and the cornice will look like it fits tightly with its entire upper wall to the ceiling surface.
* * * * * * *
There is another simple option if you are terrified of even touching the stretch ceiling. You can pretend that the cornice is on the ceiling, but in reality it will be mounted on the wall using L-shaped brackets. If you try to position the tire as close to the ceiling surface as possible, then perhaps no one will notice such a change. It will be quite beautiful!
The cornice is almost adjacent to the ceiling surface, but in fact it is secured to the wall with brackets.
And at the end of the publication, watch a video that reveals some of the nuances of attaching a ceiling cornice to a tension thread.
Invisible fastenings for stretch ceilings
Installation of a ceiling cornice on a suspended ceiling can be done in a different way. It is also called niche installation. The cornice must be purchased in advance. A corresponding tension fabric is made for it.
First, you need to attach the cornice to the base of the ceiling. To do this, use dowel nails or another suitable fastening option. The work is carried out carefully so that the profile is mounted evenly.
Next you need to prepare the wooden beam. A baguette will be attached to it for installing a stretch ceiling. The beam needs to be made at some distance from the cornice, but not much. It is necessary to leave such a niche so that the curtains can be hooked onto the hooks and, if necessary, removed.
The beam is installed according to the previously created markings. Before installing it, appropriate holes for dowels are drilled in the base surface. After this, the beam is applied to the ceiling and hardware is cut into it. The step between them should be small. The beam must support the weight of the tension fabric.
After this, a profile is installed around the perimeter of the room (including on the beam). Next, the suspended ceiling is installed using the technology established by the manufacturer. As a result, the cornice will be invisible to the eye. The curtain will come down from the niche. This allows you to create a certain decorative effect.
Types of ceiling curtains (i.e. cornices)
To begin with, let’s get acquainted with what types of cornice designs we have to deal with.
First of all, cornices (curtains) can be ceiling or wall. However, this “border” between them in most cases is very arbitrary. That is, wall-mounted models can, if desired, be mounted on the ceiling, and, conversely, ceiling-mounted ones can be placed on the wall above the window opening, using additional devices such as brackets, homemade or standard ones.
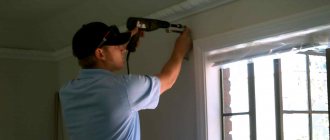
Wall cornices used to clearly prevail. There is a very simple explanation for this - in the vast majority of cases it was simply much easier to mount on walls. No one had even heard of rotary hammers then (literally 25-30 years ago); electric drills were primitive, without impact function and without speed control, that is, they could not cope with reinforced concrete floors in new buildings. All that was left was a hammer with a bolt, and punching even one hole for a dowel was a very difficult task, accompanied by extremely inconvenient application of force with bruised fingers and dusty eyes.
Once upon a time, a home craftsman had to suffer to punch holes in concrete - he only had a hand bolt at his disposal. Or you had to find a craftsman with a construction pistol.
Expert opinion: Afanasyev E.V.
Chief editor of the Stroyday.ru project. Engineer.
It is interesting that good money was then raised in new buildings by craftsmen who had mounting guns. Such a tool was loaded with a powder cartridge and a steel dowel. After the shot, the powder gases literally drove the dowel into the concrete through the piston. It was fast and reliable (if the shot was successful), but the connection was permanent (it was almost impossible to pull the dowel out of the concrete afterwards), and the specialists charged quite a lot for each shot.
Walls, of course, are also not a gift, but it is still much more convenient to work, since the efforts are applied more effectively, and it was much easier to punch holes for dowels.
But ceiling cornices still look better. And now, when drilling holes in any building material is no longer difficult, most apartment owners prefer them.
What are they?
- Tubular cornices. Everything is very simple - brackets are attached to the ceiling, on which a round crossbar in the form of a plastic, metal pipe, or wooden one, turned to a round cross-section, is already suspended. Rings move along this crossbar, from which the curtains are hung.
There can be two crossbars, and sometimes (rarely) even three. In this case, they are located at the same level parallel to each other.
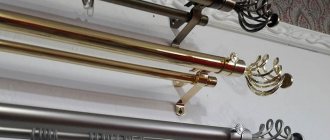
Both the crossbars themselves, and their ends at the ends, and brackets can be additionally decorated with certain decorative details. Or be succinctly strict, which is also suitable for some interior design styles.
Double row tubular ceiling cornice with decorative details.
By the way, if the cornice is single-row, then it can also be used as a wall one - just then the brackets will be attached to a vertical plane. With cornices with two or more crossbars, this number will not work - here we get a clear division into wall and ceiling.
A single-row tubular cornice can be easily mounted both on the wall and on the ceiling.
Such cornices appeared much earlier than others, but to this day they are very popular. They are unpretentious in operation, and are quite capable of becoming in themselves a decorative detail of the overall interior of the room.
- String cornices. Everything is simple - between two brackets (of one or another degree of decorativeness), fixed rigidly to the ceiling, a string is stretched - wire, reinforced fishing line or cable. Rings or hooks with hangers for curtains move along this string.
Single-row string ceiling cornice.
It is clear that, by analogy with a single-row tubular one, it can, if desired, be attached to a wall. When installing such curtain rods, it is very important to achieve maximum string tension. Therefore, all devices of this type are equipped with a simple but effective screw mechanism that ensures the specified condition. It’s not difficult to figure this out, especially since everything is usually clearly explained in the attached instructions. It is only important to fasten the brackets very securely so that the tension of the string does not lead to loosening of the fastening.
For example, here is one of the disassembled models of a single-row ceiling string cornice.
String cornices can also be double. By the way, in the 80s of the last century there was a crazy fashion for them - it was difficult to find them on sale, they were sold out with a bang.
It was once upon a time that there was almost a “hunt” for such string ceiling cornices, simple by today’s standards – they were not always and not everywhere available to buy.
String cornices are good because they are unnoticeable and can be easily hidden behind, for example, a ceiling molding. But they also have a very serious drawback - over time, under the weight of the curtains, the strings begin to sag, and they have to be periodically tightened.
- Profile cornices . At the moment, they are perhaps in the leading position in terms of popularity.
Structurally, it is a metal (steel or aluminum) or plastic (PVC) profile, in which there is one or more longitudinal grooves-tracks along which hooks for hanging curtains move. These hooks are often equipped with small rollers to make closing and opening curtains easier, or are simply specially configured to move along the tracks. And to prevent the hangers from jumping off the profile, these grooves or guides are equipped with special plugs or stoppers on the sides.
Single-row profile ceiling cornice on brackets
Particularly in demand these days are ceiling cornices in the form of a flat rail that fits tightly to the ceiling. Such devices become almost invisible even when open. And in addition, many models are also equipped with decorative sides, giving the design a special completeness.
Double ceiling profile cornice in the form of a flat rail. Even without a decorative side it looks very decent.
In addition, such cornices are often optionally equipped with curved, arched sections on one or both sides. When using such a model, drawn curtains, if desired, will seem to “envelop” the window, with virtually no gaps on the left and right, without leaving a large gap between the wall and the drapery.
A ceiling rail cornice with rotating sections allows you to achieve a very interesting spatial effect from hanging curtains
Such cornices are convenient in that they are unlimited in length, since the rails can be spliced together, the turning sections can be joined together, and if necessary, if the intended interior design project requires it, it is even possible to make an extended curved structure, for example, for draping a wall .
Using various parts of this kit, you can mount a long winding cornice almost for the entire room...
A unique type of profile ceiling curtains also includes a flexible cornice. It is so named without any exaggeration - the polymer from which the tire (single-row) is made allows it to be bent under fairly small radii, and thereby create very interesting designs of cornices on the ceiling. An excellent solution, for example, for semicircular bay windows or loggias!
Flexible profile cornice - before installation, and after installation, with a hanging curtain.
Ceiling profile cornices are currently the most popular. And our further conversation about carrying out independent installation will largely concern precisely such structures.
- baguette models are also classified as a separate type of cornices . This is unlikely to be completely correct - behind the decorative molding there is usually a ceiling rail cornice, simply hidden by a decorative strip.
Baguette cornice is rather not a separate variety, but simply a decorated profile one.
These planks (baguettes) can have different profiles and colors, be plain or colored, decorated with patterns or artistic relief. By the way, the buyer is often offered several baguette options to choose from. But this does not significantly affect the installation of the cornice itself, and the principle of operation of the system also does not change in any way. And besides, string and even tubular cornices are sometimes covered with baguette.
So it is more correct to treat this as a decorative addition, and not as a separate type of cornices.
Using Brackets
It happens that it is not possible to mount the cornice on the ceiling. For example, the house already has a suspended ceiling, the integrity of which, of course, cannot be violated. In this case, the ceiling cornice is installed on the wall. For this purpose, special brackets are used.
Such fasteners are purchased separately in a specialized store. If the length of the cornice is up to 240 cm, you can purchase only two brackets. If this figure is higher, you need to add another bracket. Each similar element for installing a cornice has a bracket, a bracket and screws.
Next, perform simple steps. The bracket must be screwed to the top surface of the cornice. To install the ceiling cornice correctly, the plates are placed symmetrically on the surface of the profile. They are screwed on with self-tapping screws. After this, the brackets can be installed into the installed brackets.
After this, the structure is brought to the ceiling. The desired position of the cornice is determined. Markings are made in appropriate places. You can attach the cornice higher or lower. This will allow you to determine the correct position of the structure. It is worth remembering that it should be located at least 10 cm higher than the window sashes.
Features and rules for installing cornices
Assembling and installing any model will not take much time from an experienced craftsman. An amateur who wants to do the work with his own hands will need help. Initially, he needs to take measurements of the window opening, on the basis of which calculations are made. Next, you should familiarize yourself with the rules and features of installation:
- Regardless of the mounting method (ceiling, wall), the length of the structure must be at least 30 cm greater than the width of the window, with the exception of the option when the product is located along the entire wall.
- The distance from the wall to the rod is selected within 10-15 cm. This is quite enough for the curtain to move freely without touching the protruding part of the window sill or the radiator.
- The distance between the cornice and the ceiling is determined individually, but professionals recommend mounting the structure at a distance of 5-10 cm from the ceiling surface.
- Particular attention should be paid to the height at which the device will be mounted above the upper border of the window frame. This parameter must exceed 5-7 cm, otherwise the curtains will interfere with the opening of the window.
Completing the installation of brackets
To install the ceiling cornice on the wall, you need to drill holes in the designated places for installing self-tapping screws. If the walls are wooden, you can immediately screw the hardware into the brackets.
The structure must be level. Its position must be controlled using a building level. The brackets in this case will be located at the same level. The cornice is simply put on the mounted structure. It can be moved further from the base of the wall or moved closer to it.
It is worth considering that many experts note this feature. The higher the ceiling cornice installed on the wall, the better.
Installation of wall cornices
Models mounted on walls have a wider application. They are compatible with interior design made in any style. Unlike ceiling options, these structures are much easier to install yourself. For clarity, let’s look at how to install the main types, which include:
- round;
- strings;
- profile;
- baguette
Each type has its own installation features. However, all of the above types are mounted using brackets. The main stages of the work are almost identical, as can be seen from the examples given in the instructions.
Baguette
The main difference between baguette cornices is the presence of a decorative strip that hides all structural elements. Based on the type of base used for attaching curtains, rod, string, and rail models are distinguished. The procedure for installing a baguette with a plastic tire:
- We mark the wall according to the level.
- We drill holes with a hammer drill and insert dowels into them.
- We install the brackets and securely fix them with self-tapping screws.
- According to the existing diagram, we assemble the workpiece and connect the tire to the decorative strip.
- We fix the resulting workpiece to the brackets.
- Upon completion of installation, you can hang curtains and tulle on the finished product.
String
The main feature of string models is their special structure. They consist of steel threads, brackets, and hooks. The length of the string should not exceed five meters; it can be hung in several rows. However, it is worth considering that only light textiles can be hung on a thin thread. The structure will not support the weight of heavy curtains. Installing these curtain rods should not cause difficulties even for an inexperienced person; the process itself is as follows:
- We determine the location for fastening and carry out markings according to the level.
- After attaching the fasteners, we make a mark for the dowel.
- We drill holes and install fasteners.
- Through the hole in the installed mount, we insert a steel string into the first bracket.
- We distribute hooks or rings along the thread.
- We pass the string through the second string bracket and adjust the required tension using a special bolt.
- We cut off the excess steel thread, you can also roll it, this will allow you to lengthen the product in the future.
Rod
Round cornices, in which the rod is the main element, are classic models. Special caps or decorative tips are attached to the edges of the product. They act as decoration and do not allow the rings to come off the pipe. When choosing such options, you should pay attention to their parameters. Short structures can be fixed on two brackets, but if their length exceeds 1.5 m, then additional fasteners should be provided, which are installed in the center. Installation work is carried out according to the following scheme:
- We measure the width of the window.
- We make markings according to the level.
- We unscrew the heel from the holder, try it on the wall, and mark with a pencil the places for the dowels.
- When installing long products, we make an additional mark in the middle of the window opening.
- Using an electric drill, we drill holes in the intended location and hammer dowels into them.
- Using self-tapping screws, screw the heels to the wall.
- We screw the base of the holder onto the heels.
- We assemble the structure, put on the required number of rings, and install plugs on the sides.
- When installing, first fix the central bracket, then the side fasteners.
- At the final stage we hang the curtains.
Profile
Profile models look appropriate in any interior. They are made from plastic or aluminum. The maximum length does not exceed 6 m, however, if necessary, this parameter can be increased using connecting parts. Some products are capable of bending in two planes at any angle, which allows them to be used to design window openings of any fancy shape. For clarity, let’s look at the step-by-step instructions for installing the structure:
- We determine the installation location.
- We make markings along the entire length with a pencil.
- If a long structure is being installed, it is necessary to provide more than two brackets, especially at bend points.
- Often profile curtain rods are sold without holders, so they will have to be purchased separately.
- We drill holes and install brackets.
- We fix the profile on the fasteners.
Installation on drywall
Some inexperienced craftsmen claim that it is impossible to mount a ceiling cornice on drywall. This is far from true. First you need to purchase everything you need for installation. Dowels of the appropriate shape (“butterfly”) must be at hand.
The cornice must be assembled and attached to the base of the ceiling. The holes are simply outlined with a pencil. Next, the cornice is put aside. Using a conventional screwdriver, holes are drilled in the material. They should be 10 mm in diameter. Dowels are installed in the holes. To do this, their protrusions are compressed. Each such element must be pushed into the hole until it stops.
Then the cornice must be attached to the ceiling. You need to insert a screw into the hole in the cornice. It hits the tip directly into the plastic hole. It goes into the limit switch, tightening this element of the retainer with a thread. The protrusions on the back side of the material should rest against the surface. This is how the cornice is fixed. It will adhere firmly to the surface of the drywall for a long time. However, in this case it is better to use medium or light weight fabrics.
Having examined step by step how the installation of a ceiling cornice is carried out, everyone will be able to complete the installation themselves. In this case, a number of nuances are taken into account. By correctly performing the installation work, you can create a durable structure that will be used for a long time.
How to beautifully drape a panel?
In order for the curtain panels to form beautiful folds, you need to know how to properly hang the curtains on the cornice. The stick and string devices have rings and clips for this purpose, and the profile one is equipped with hooks. The curtains are attached to the curtain rods using these elements: the hooks can be inserted into the loops, and the clips and rings are equipped with clamps.
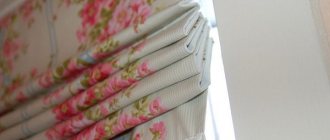
But in order for the curtain to lie in even waves, it is not enough to simply attach it to the cornice. Folds need to be laid either when sewing or when hanging curtains from the ceiling. In order to make a wave or gather when sewing, take 1.5-2 times more material than required by width measurements. You can make drapery when sewing like this:
- Sew curtain braid to the wrong side of the panel. It consists of a fabric tape through which strong threads are pulled. The sewn braid needs to be collected by pulling out these threads. As a result, the canvas will acquire a neat gather along the upper edge and form lush small folds.
- On the fabric, mark places for folds (counter, bow, one-sided), fold the material as required for this, and stitch it.
To hang draped curtains, you can use any type of fastener.
Folds on tulle
When hanging curtains with a straight panel, proceed differently. There is an old way to hang tulle to make the curtain look fuller. This requires an odd number of rings on the cornice. First, the tulle must be attached along the edges with 2 rings on the left and right. In this case, the sides are turned towards the window by 5-7 cm and 2 layers of fabric are clamped with a clip at once. Next you need to disassemble the rings into 2 sides. There will be 1 ring left in the center.
Find the middle of the curtain, make a small fold and secure it with a clip. On each half of the panel, do the same steps: disassemble the rings, find the center, secure with a fold. Do this until the entire top of the curtain is folded. Then stretch the tulle along the cornice.
Folds on the curtain
Even folds on a curtain suspended on a rod or string cornice can be made using the same pattern. But what if a profile cornice with hooks is installed? In this case, curtain braid will help to secure the curtains beautifully.
It needs to be sewn to the back side of the panel, but not pulled together, but use the loops that are on it. It is more convenient to first insert the hooks into the eyelets, and then hang the curtains on the ceiling cornice. Measure 10 cm from the side of the curtain and insert the hook. Bend the edge of the curtain so that this fastening element becomes the last one, and put the loop on the edge of the tape onto 1 hook with the one next to it. Do the same on the other side.
The remaining loops along the entire length of the tape should be put on hooks in pairs. As a result, the entire panel will be collected into uniform, regular folds. Their depth and number depend on how to combine the loops: in a row or with 1-2 gaps.
If the curtains on the ceiling cornice are hung correctly (with neat draping or gathering), then the appearance of the curtain will be ideal. Curtains that hang vertically can be given volume by tying them with tiebacks. Thin curtains can be sewn in the Austrian or French style, with scallops. All these techniques help to elegantly decorate windows.
How to make lighting in a niche with the effect of floating curtains
To illuminate the curtains, an LED strip is glued into the niche on the side of the room. If you choose the option with a profile for two-level ceilings, purchase a baguette with special recesses.
This creates the impression of a higher room. The LED strip can be mounted independently or combined with hidden lighting around the perimeter of the entire ceiling.
Some tips:
- Tapes are available in different colors and even with the ability to change lighting, the latter option allows you to give the interior of your home a different mood;
- for curtain lighting, it is better to mount a separate switch;
- Tapes with a remote control are available for sale, which allows you not only to conveniently turn the light on and off, but also to change the color of the lighting.