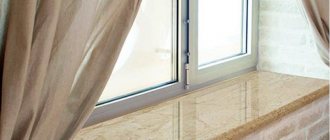
Comfort during operation of plastic windows is largely achieved through the use of high-quality fittings.
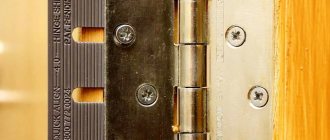
The most important mechanisms of the movable sash of any window structure are the hinges, which are installed in the upper and lower parts of the window opening filling element, absorb the load from its mass and ensure safe opening.
Hinges for plastic windows are subject to increased requirements to ensure strength, reliability and durability.
What it is?
Hinges for PVC windows are the main part of the fittings, which are responsible for the following functions during the operation of the window:
- Attaching a swing or tilt-and-turn sash to the supporting frame of a window structure.
- Perception of the forces generated by the load of the sash when opening it. In the open position, a multidirectional pair of forces acts on each of the hinges, which keeps it in a static position without sagging.
- Transfer of load to load-bearing horizontal or vertical imposts of a fixed frame.
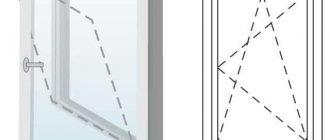
- Ensuring the movement of the window structure by rotating relative to the hinge formed by the movable coupling of two parts of the hinge mechanism.
When choosing hinges, the consumer takes into account such parameters as strength and the calculated load-carrying capacity of the element declared by the manufacturer. A standard hinge, supplied by most factories, can withstand a load of about 100 kg; reinforced parts support the weight of the sash up to 150 kg.
Product classification
- Location:
- Upper
- Corner
- Lower
- Options:
- Regular ones that fit most models.
- Large sizes that are mounted on entrance areas where the fittings need to withstand heavy loads.
- Small parts are chosen for non-standard or small windows.
- According to the form of window operation:
- Overlay parts are an inexpensive, short-lived product that provides outward opening.
- Folding mechanisms are needed for products when the doors open upward.
- According to the adjustment option:
- Adjustable – the most practical and durable products. Convenient to use when changing the geometry of the sash.
Unregulated mechanisms require infrequent use of windows and doors. Suitable for office and commercial premises.
- By manufacturing method:
- Forged hinges
Pressed
- From the shift axis of the fitting groove:
- 13 mm (usually for Rehau profile or its analogues)
- 9 mm (KBE profile and analogues)
Pivot hinges are used where door and window panels can open outward or inward.
- Manufacturer:
- Great Britain
- Slovenia
- Germany
Alloys of brass, aluminum and steel are used for fittings, regardless of the manufacturing method. The steel is coated with an anti-corrosion compound, and on the outside all steel elements are protected by plastic plugs for the hinges.
Kinds
Manufacturers produce several types of hinges for PVC windows. These fittings vary depending on their location on the sash, design and functional purpose.
By location
Depending on their location on the moving part of the window structure, hinges are divided into the following types:
The upper ones are made of high-strength steel, absorb tensile force, provide a static position of the sash and the ability to rotate it relative to the attachment point.- The lower ones perceive compressive force. They perform an auxiliary function, balancing the sash by generating a response from the support.
- Central - mounted as additional elements necessary when operating a sash with a weight exceeding 130 - 150 kg.
Type
Depending on the type of design and functional purpose, window hinges are divided into 4 basic types:
- Invoices . They are used for the installation of heavy sashes and are characterized by a massive design, increased strength and reliability. They not only support the weight of the sash, but also prevent it from sagging when dynamic loads are applied. As a rule, they are used in public buildings with intensive use of window units.
- Rotary . Standard hinges used for fastening standard PVC sashes in residential or public buildings. The hinges belong to economy class products and can withstand loads of up to 110 – 130 kg. Designed for opening doors with maximum dimensions up to 1200 x 1900 mm.
- Folding . Installed on lower horizontal imposts, designed to open the sash in the vertical direction. They have one or two attachment points. They are often supplemented with scissors when installing tilt-and-turn structures.
- Anti-burglary . They are installed in a hidden design; when closing, the windows remain between the imposts and sashes. They are distinguished by increased strength of metal and fasteners.
Depending on the type of loops, as well as the material from which they are made, their technical characteristics change. Before purchasing products, it is necessary to study the basic parameters and functional limitations of the product.
2 Normative references
This standard uses references to the following standards: GOST 2.601-95 Unified system of design documentation. Operational documents* ________________ * GOST 2.601-2006 is in force on the territory of the Russian Federation, hereinafter in the text. — Note "CODE". GOST 9.308-85 Unified system of protection against corrosion and aging. Metallic and non-metallic inorganic coatings. Methods of accelerated corrosion tests GOST 9.401-91 Unified system of protection against corrosion and aging. Paint and varnish coatings. General requirements and methods of accelerated testing for resistance to climatic factors GOST 397-79 Cotter pins. Technical specifications GOST 538-2001 Lock and hardware products. General technical conditions GOST 1145-80 Screws with a countersunk head. Design and dimensions GOST 11648-75 Quick-release thrust washers. Technical specifications GOST 15140-78 Paint and varnish materials. Methods for determining adhesion GOST 15150-69 Machines, instruments and other technical products. Versions for different climatic regions. Categories, operating conditions, storage and transportation - regarding the impact of climatic factors of the external environment GOST 15878-79 Resistance welding. Welded connections. Structural elements and dimensions GOST 24705-2004 (ISO 724:1993) Basic standards of interchangeability. Metric thread. Main dimensions GOST 30777-2001 Rotary, tilting and tilt-and-turn devices for window and balcony door units. Technical conditions Note - When using this standard, it is advisable to check the validity of the reference standards using the “National Standards” index compiled as of January 1 of the current year, and according to the corresponding information indexes published in the current year. If the reference standard is replaced (changed), then when using this standard you should be guided by the replaced (changed) standard. If the reference standard is canceled without replacement, then the provision in which a reference is made to it is applied in the part that does not affect this reference.
What tools are required for installation?
To install hinges on PVC windows, you need a certain set of tools, which, as a rule, every home craftsman has:
tape measure, high-precision ruler, construction corner for measuring imposts and sash before installing hinges;- building level to check the geometric accuracy of the sash installation;
- a pencil for marking the installation locations of fittings;
- a drill with a thin drill, the size of which should be 1 - 2 mm smaller than the diameter of the hardware;
- a screwdriver for fixing hinges using self-tapping screws;
- a screwdriver and a hex L-shaped key for adjusting the sash of the window structure before starting operation.
The tool must be of high quality, in good working order, cleaned of dirt and dust, and ready for use.
A little about screw-in hinges
Loop device
Screw-in hinges for doors and windows consist of three main parts:
- frame part, which is attached to the door frame;
- the leaf part installed directly on the door leaf;
- connecting pin.
Components of the screw-in hinge design
Some types of loops are equipped with a nylon insert and a ball. Additional design elements are intended for:
- silent operation of fittings;
- reducing the friction force that affects the service life of the fittings.
Additional elements in the screw-in hinge design
Any hinge can be supplemented with a decorative cap that hides the internal structure of the fittings and gives the hinge an aesthetic appearance so that it does not stand out from the overall design of the room.
Overlays for screw-in hinges, giving the fittings an aesthetic appearance
The more additional elements added to the hinge design, the higher the cost of the fittings and often the longer the life of the product.
Types of loops
Screw-in door hinges differ in several ways:
- dimensions. Loops are currently available in various sizes. The small screw-in hinge is a window hinge, the large hinges are door hinges;
Various sizes of screw-in hinges
- number of pins. Screw-in hinges are equipped with 1-4 pins in each part. Hinges with 1-2 pins are optimally suited for lightweight plastic doors and window sashes. Hinges with 3 pins are installed on doors made of wood panels. Screw-in hinges with 4 pins are recommended for mounting doors made of solid wood;
Screw-in hinges designed for various types of doors
- Screw-in hinges can be adjustable, that is, after installing the hinge, you can align the position of the door in three main planes and are non-adjustable.
It is recommended to select screw-in hinges based on all the parameters presented. An overview of various types of screw-in hinges is presented in the video.
Application area
Screw-in hinges are used for installing interior and other wooden doors, as well as wooden windows. This type of loop has a number of advantages, which include:
- ease of installation. To install the hinge you will need a drill, marking tools and a minimum of installer skills;
- installed hinges are almost invisible, and the visible part can be covered with various decorative elements that give the hinge an individual look;
- most hinges are equipped with an adjustment that allows you to hide minor defects that arose during the installation of the door;
- minimal care. The hinge requires periodic lubrication, which is applied without removing the door leaf from the hinges;
Caring for screw-in hinges
- low cost. Due to the simplicity of the design, the cost of fittings is lower than that of other types of hinges.
Step-by-step DIY installation instructions
The installation of hinges for installing PVC windows can be done with your own hands, without the involvement of professionals. To achieve the desired result.
It is necessary to take into account some features of the procedure and follow the technological map:
- The required distance for installing the part is measured on the sash. The hinges should be located in close proximity to the top and bottom edges of the opening part of the window.
- The sash is applied to the frame and held in a static position for marking. Considering that the sash has a large mass, two people are required to apply precise markings, or the double-glazed window is temporarily removed from the profile by removing beads.
- Included with each loop is a special template, which is applied to the marking site and traced for precise positioning of fasteners.
- At the installation points of the self-tapping screws, holes are drilled using a drill. The type of drill is selected depending on the internal structure of the profile - if the part is reinforced with a steel channel, a metal drill will be required. The drill should be held strictly orthogonal to the mounting plane.
- When the holes on the sash and frame are made, each of the individual parts of the hinge is applied to the mounting plane and fixed with self-tapping screws using a screwdriver.
- When fixing the hinge, it is necessary to control the position of the part with a level in two planes - each element must be mounted strictly in a vertical position.
- The sashes are hung on the hinge pins, after which the free movement of the structural element is checked when closing.
- After fixing the hinge on the sash, you need to install the scissors. There are special eyes on the surface of the mechanism for precise positioning of the bar.
- After installing the scissors, they are wedged into the body of the sash using a special crimp washer.
Upon completion of installation, it is necessary to fully open and close the sash several times. If the PVC part touches the metal strips, it is necessary to eliminate the problem by adjusting special screws that provide slight play in the structure.
Features for top and bottom
When installing the upper hinges on the sash, a number of important nuances should be taken into account for the subsequent safety of window operation:
The top hinge is subject to the greatest operational load, which causes a significant tensile force when opening the sash.
As a rule, these fittings are equipped with 3–4 holes for self-tapping screws, each of which must be fixed.- When purchasing an economy class hinge, you should not use the self-tapping screws included with the product. The best solution would be to purchase hardware of the same size from hardened steel.
- When installing a tilt-and-turn sash, scissors are attached to the top hinge to limit opening. The slots on the parts must completely match the shape of the hinges.
When using heavy sashes weighing 100 kg or more, you should purchase only reinforced hinges that provide a load reserve.
The lower hinges are subject to less stringent requirements , since they experience a compressive force from a pair of forces acting on the mating points. When installing elements, it is necessary to take into account the alignment of the rotation line so that the window opens without bending forces.
For successful operation of the window, both hinges should be purchased from the same batch, from identical manufacturers. If the mechanism is replaced, it is recommended to reinstall the hinges in pairs.
Nuances for invoices and anti-burglary
When installing overhead or hidden hinges, you should also consider a number of recommendations that will reduce the risk of incorrect operation of the window structure:
- The fittings must be compatible with the profile; hinge mechanisms must not limit the rotation, closing or full opening of the window.
- When purchasing anti-burglary hinges, you should choose titanium products, and purchase self-tapping screws for their installation separately.
- Hinges for heavy sashes, as well as anti-burglary elements, should be fixed through the steel reinforcing element of the profile. In this case, maximum structural strength and protection against unauthorized entry are achieved.
It should be noted that overhead hinges on PVC windows are in the field of view, which is why they must be selected taking into account the design of the profile, as well as the shade of its lamination. There is also a wide range of overlays on sale in different shades, which are installed on top of the hinge after its installation.
6 Acceptance rules
6.1 Acceptance of loops is carried out in accordance with the requirements of this standard and GOST 538. Loops are accepted in batches. When accepting hinges at a manufacturing plant, a batch is considered to be the number of hinges of the same name, manufactured within one shift and issued with one quality document. A batch is also considered to be the number of hinges of the same design, manufactured according to one order.
6.2 The quality of hinges for compliance with the requirements of this standard is confirmed by: - incoming inspection of materials and components; — operational production control; — acceptance control of finished loops; — periodic and certification tests; — standard tests; — qualification tests.
6.3 The procedure for conducting incoming and operational production control at workplaces is established in the technological documentation for the hinges.
6.4 Acceptance quality control of finished products and periodic tests are carried out in accordance with Table 3. The control plan and the procedure for carrying out acceptance control are in accordance with GOST 538. Table 3
| Indicator name | Standard requirement clause number | Type of test | Frequency (at least) | |
| 1 Acceptance control | 2 Periodic tests | |||
| Appearance | 5.1.1 | + | + | For test type: 1 - each batch, 2 - once every two years |
| Performance | 5.3.4 | + | + | |
| Labeling, packaging | 5.7 | + | + | For test type: 1 - each batch, 2 - once every two years |
| Dimensions, deviation of controlled dimensions | 5.2.1 | + | + | For test type: 1 - each batch, 2 - once every two years |
| Quality control of welded joints | 5.5.5 | + | + | For test type: 1 - each batch, 2 - once every two years |
| Reliability (non-failure operation), load resistance | 5.4 | — | + | For test type 2 - once every two years |
| Coating quality | 5.5.3 | + | + | For test type: 1 - once per shift; 2 - once every two years |
| Corrosion resistance | 5.5.3 | — | + | For test type 2 - once every two years |
6.5 Periodic testing of products is carried out once every two years. Tests are carried out on samples that have passed acceptance control.
6.6 Certification tests of products are recommended to be carried out within the scope of periodic tests.
6.7 Type tests of products are carried out after changes are made to the design, materials or manufacturing technology to assess the effectiveness and feasibility of making changes. The scope of type tests is determined by the nature of the changes made. Products that have passed acceptance control are subjected to standard tests.
6.8 Qualification tests of products are carried out for all indicators when putting products into production.
6.9 Certification and periodic tests are carried out in testing centers (laboratories) accredited for the right to conduct tests of these products.
6.10 Each batch of products must be accompanied by a quality document.
6.11 Acceptance of products by the consumer does not relieve the manufacturer from liability if hidden defects are discovered that lead to a violation of the performance characteristics of the products during the warranty period.
Regulation rules
Perfect installation of hinges is almost impossible, since, even with precise markings, there is always a slight deviation. Such errors affect the operation of the sash - it can be skewed, make sounds when closing, and also form a gap due to a loose connection.
To correct this defect, you need to adjust the hinges:
To adjust, you will need an internal hex key or a simple screwdriver, depending on the shape of the screw head.- Each loop is equipped with an adjusting screw in the visible part of the element. To access the part, remove the decorative cap, then rotate the screw counterclockwise or clockwise to lower or raise the sash.
- When opening the window, there is a second screw on the inside of the hinge, the rotation of which causes the sash to move slightly to the right and left. This adjustment allows you to ensure a uniform gap between the sash and the frame profile to eliminate drafts.
- Hinges of a higher price category are also equipped with a third adjusting screw, which allows you to change the pressing density of the sash. This method of adjustment allows you to change the density of the junction in the vestibule in winter or summer to ensure micro-ventilation.
When adjusting the hinges, please note that both hinges (upper and lower) must have a strictly identical position. Only in this case can the sash be tilted, which causes disruption during its operation.
3 Terms and definitions
This standard uses terms in accordance with GOST 538, as well as the following terms with corresponding definitions: hinge: A product used to connect a sash, window, transom (leaf) with a window (door) frame, as well as for connecting paired window sashes (leaves) ( balcony door) blocks and providing opening and closing of the sash, window vent, transom (leaf) of the window (door) block. right hinge: A hinge installed on a window (door) block, the sash (leaf) of which closes counterclockwise. left hinge: A hinge installed on a window (door) block, the sash (leaf) of which closes clockwise. universal hinge: A hinge installed on a window (door) block, the sash (leaf) of which closes both clockwise and counterclockwise.
How can you close and decorate a window element?
Not all hinges have a pleasing appearance to the eye, and most steel elements must be masked.
There is a wide range of linings made of plastic or steel on sale with different colors and shapes suitable for installation on metal of a certain configuration.
If it is impossible to select the desired decorative trim, you can use a metal paint and varnish composition of the desired shade . Also, when using a living space, thick curtains or plants on the windowsill can help disguise the hinges.
7 Control methods
7.1 Compliance of materials and components with the requirements of regulatory documents is established by comparing the indicators of the accompanying documents with the requirements of the RD for materials and components.
7.2 The dimensions of the loops and maximum deviations are determined with a universal tool, and software methods for monitoring the technological process of manufacturing enterprises are also used.
7.3 The appearance of products, welds, completeness, presence of markings, packaging are checked visually for compliance with the requirements of this standard, design documentation and reference sample.
7.4 The quality of coatings is checked according to GOST 538; adhesion - GOST 15140; corrosion resistance of coatings - GOST 9.308, GOST 9.401.
7.5 The operation of the moving parts of the loop is checked manually, repeating the loop operation cycle at least five times.
7.6 Testing of products for reliability, resistance to static and dynamic loads is carried out on special equipment (stands) according to agreed and approved programs and methods. After testing, the loops should remain operational.
Replacement
Hinges for window structures, depending on the manufacturer, manufacturing quality and pricing policy, are divided into several reliability categories, which provides them with from 20 to 60 thousand complete opening and closing cycles without breaking. Thus, the resource of each element is limited, and premises owners are forced to periodically replace parts.
When might it be required?
Replacing hinges on PVC windows may be required if any of the following situations occur:
physical wear of a structural element after long-term intensive use;- replacing the standard hinge with a new, improved design;
- breakage, deformation of a part due to mechanical damage, after a fire, or due to incorrect operation of the window;
- replacement of a complete set of fittings;
- rearrangement of windows in the room;
- the impossibility of adjusting the hinge to the desired position due to limited free movement of the sash when the screws rotate.
Before replacing hinges on window structures, you need to select parts of the desired configuration that are compatible with other fittings.
How to do this correctly?
To replace hinges on moving parts of translucent structures, you need to perform a simple algorithm and take into account the following nuances:
- when dismantling the hinges, you should carefully disconnect all the accompanying elements of the fittings - scissors, blocking parts, without damaging their structure;
- if the holes for the screws of the new hinges do not coincide with the installation locations of the old elements, new holes should be drilled;
- if the holes intersect or are located at a slight distance from each other, it is recommended to use liquid plastic for cold welding.
Any new hinge must be adjusted after installation to ensure free movement of the sash. Before installation, all adjusting screws should be set to the neutral position.
Mortise hinges
This is the most advanced design of conventional window hinges, which corresponds to a similar type of door hinge system - the only difference is in size. Such hinges are used when installing windows with separate sashes that cannot be lifted. If you hang mortise hinges on the flaps, then only a movable rod is used.
Combined hinges
In this design, one card is embedded, and the other is only seated on screws with the appearance of semi-countersunk heads. Here you can pay special attention to such advantages as:
- Less material is consumed for making loops
- No overturning moment due to contact of the embedded card cylinder with the middle rod
- Greater friction when gripping the mortise card due to the larger contact surface area of the sides
- You can use metal fittings for wooden windows both on the left and on the right, and as folding hinges - since the rod is removable and can be inserted from both sides
- Quick installation - due to the fastening of mortise hinge cards on the sashes
- High strength
Average prices in the Russian Federation for parts
Hinges for PVC windows are available on the market in a wide range from many competing manufacturers. The price of the product is determined by the type of material, level of reliability, load capacity, as well as the pricing policy of the brand.
Average prices for hinge mechanisms in the Russian Federation:
standard rotary loop - from 70 - 80 rubles;- reinforced rotary hinge, with a load capacity of up to 130 kg - from 90 - 110 rubles;
- premium class hinge from manufacturers such as Roto or Maco - from 150 - 200 rubles;
- plastic cover for the hinge – from 30 – 50 rubles;
- hidden loop - from 130 rubles;
- overhead loop - from 150 - 200 rubles;
- bottom hinge, for a swing-and-turn sash - from 200 - 250 rubles.
All prices listed above are current as of August 2022. Depending on the quantity of goods in the batch, the final cost of the order may vary several times.
Appendix B (recommended). Examples of hinges and their components
Appendix B (recommended)
Figure B.1 - Example of overhead loop PN 1
In millimeters
| Type-size | Screw according to GOST 1145 | |||||||||||
| Dimensions | Number | |||||||||||
| PN1-70 | 70 | 22 | 8 | 10 | 25 | 10 | 6 | 7 | 33,5 | 2,0 | 4x25 | 6 |
| PN1-85 | 85 | 27 | 10 | 10 | 32,5 | 13 | 7 | 8 | 41 | 2,0-2,5 | 4x30 | 6 |
| PN1-110 | 110 | 27 | 10 | 10 | 30 | 13 | 7 | 8 | 53,5 | 2,5-2,8 | 4x30 | 8 |
| PN1-130 | 130 | 30 | 12 | 12,5 | 35 | 16 | 8 | 8 | 63,5 | 2,5-3,0 | 5x30 | 8 |
| PN1-150 | 150 | 35 | 15 | 15 | 40 | 19 | 9 | 9 | 73,5 | 3,0 | 5x30 | 8 |
Figure B.1 - Example of overhead loop PN 1
Figure B.2 - Example of an overhead loop of standard size PN1-110
Figure B.2 - Example of an overhead loop of standard size PN1-110
Figure B.3 - Example of an anti-removal overhead hinge of standard size PN1-110
Figure B.3 - Example of an anti-removal overhead hinge of standard size PN1-110
Figure B.4 - Example of overhead loop type PN2
Dimensions in millimeters
| Type-size | Screw according to GOST 1145 | |||||||||||
| Dimensions | Number | |||||||||||
| PN2-70 | 70 | 22 | 8 | 10 | 25 | 10 | 6 | 7 | 34 | 2,0 | 4x25 | 6 |
| PN2-85 | 85 | 27 | 10 | 10 | 32,5 | 13 | 7 | 8 | 34 | 2,0-2,5 | 4x30 | 6 |
| PN2-110 | 110 | 27 | 10 | 10 | 30 | 13 | 7 | 8 | 38 | 2,5-2,8 | 4x30 | 8 |
| PN2-130 | 130 | 30 | 12 | 12,5 | 35 | 16 | 8 | 8 | 42 | 2,5-3,0 | 5x30 | 8 |
| PN2-150 | 150 | 35 | 15 | 15 | 40 | 19 | 9 | 9 | 46 | 3,0 | 5x30 | 8 |
Figure B.4 - Example of overhead loop type PN2
Figure B.5 - Examples of overhead loop type PN3
Dimensions in millimeters
| Type-size | Screw according to GOST 1145 | |||||||||||
| Dimensions | Number | |||||||||||
| PN3-85 | 85 | 27 | 10 | 10 | 32,5 | 13 | 7 | 8 | 41 | 2,0-2,5 | 4x30 | 6 |
| PN3-110 | 110 | 27 | 10 | 10 | 30 | 13 | 7 | 8 | 53,5 | 2,5-2,8 | 4x30 | 8 |
| PN3-130 | 130 | 30 | 12 | 12,5 | 35 | 16 | 8 | 8 | 63,5 | 2,5-3,0 | 5x30 | 8 |
| PN3-150 | 150 | 35 | 15 | 15 | 40 | 19 | 9 | 9 | 73,5 | 3,0 | 5x30 | 8 |
Figure B.5 - Examples of overhead loop type PN3
Figure B.6 - Example of an overhead loop of standard size PN3-130
Figure B.6 - Example of an overhead loop of standard size PN3-130
Figure B.7 - Examples of overhead loop type PN4
Figure B.7 - Examples of overhead loop type PN4
Figure B.8 - Example of overhead loop type PN5
Dimensions in millimeters
| Standard size | Screw according to GOST 1145 | |||||||||
| Dimensions | Number | |||||||||
| PN5-40 | 40 | 16 | 6 | — | 6 | — | 4 | 1,5-1,6 | 3x25 | 4 |
| PN5-60 | 60 | 20 | 8 | 22 | 12 | 7 | 5 | 1,6-2,0 | 3x25 | 6 |
Figure B.8 - Example of overhead loop type PN5
Figure B.9 - Example of overhead loop type PN6
Dimensions in millimeters
| Standard size | Screw according to GOST 1145 | ||||||
| Dimensions | Number | ||||||
| PN6-80 | 80 | 31 | 20 | 39 | 2,5 | 4x25 | 6 |
| PN6-110 | 110 | 38 | 25 | 44 | 2,5-2,8 | 4x25 | 8 |
Figure B.9 - Example of overhead loop type PN6
Figure B.10 - Example of an overhead hinge type PN7
Figure B.10 - Example of an overhead hinge type PN7
Figure B.11 - Example of an overhead hinge type PN7 for door blocks made of aluminum alloys
Figure B.11 - Example of an overhead hinge type PN7 for door blocks made of aluminum alloys
Figure B.12 - Example of an overhead hinge type PN8
Dimensions in millimeters
| Standard size | Screw according to GOST 1145 | |||||||||
| Dimensions | Number | |||||||||
| PN8-110 | 110 | 27 | 10 | 10 | 30 | 13 | 7 | 2,8 | 5x30 | 8 |
| PN8-130 | 130 | 30 | 10 | 12,5 | 35 | 16 | 8 | 2,8-3,0 | 5x30 | 8 |
Figure B.12 - Example of an overhead hinge type PN8
Figure B.13 - Example of an overhead loop size PN-115
Figure B.13 - Example of an overhead loop size PN-115
Figure B.14 - Example of an overhead hinge type PN9
________________ * For door blocks with a leaf thickness of 52 mm.
Figure B.14 - Example of an overhead hinge type PN9
Figure B.15 - Example of a PV1 type mortise hinge
Dimensions in millimeters
| Standard size | Number of pins | ||||||||
| PV1-80 | 80 | 35 | 28 | 25 | 28 | 21 | 39 | 2,0-2,5 | 4 |
| PV1-100 | 100 | 42 | 35 | 35 | 34 | 27 | 49 | 2,5-2,8 | 4 |
Figure B.15 - Example of a PV1 type mortise hinge
Figure B.16 - Example of a PV2 type mortise hinge
________________ * When installing hinges on automated lines, in agreement with the consumer, it is allowed to use pins 35 mm long for sashes of window units for residential buildings and 45 mm long for public buildings. ** The length of the pins is indicated when ordering.
Dimensions in millimeters
| Type-size | Number of pins** | |||||||||||
| PV2-75 | 75 | 30 | 25 | 6 | 12,5 | 23 | 15 | — | 37 | 7 | 2,0-2,5 | 4 |
| PV2-100 | 100 | 35 | 30 | 7,5 | 17 | 25 | 18 | — | 49 | 7 | 2,5 | 4 |
| PV2-125 | 125 | 45 | 35 | 10 | 20,75 | 32 | 22 | 6 | 61,5 | 8-9 | 2,5 | 6 |
Figure B.16 - Example of a PV2 type mortise hinge
Figure B.17 - Example of a PV3 type mortise hinge
________________ * For window units with triple glazing; pins - 4 pcs.; The length of the pins is indicated when ordering.
Figure B.17 - Example of a PV3 type mortise hinge
Figure B.18 - Example of a PV4 mortise hinge
Dimensions in millimeters
| Standard size | Number of pins | ||||||||||
| PV4-60 | 60 | 30 | 22 | — | 7,5 | 22,5 | 23 | 15 | 6 | 2,0 | 4 |
| PV4-75 | 75 | 35 | 27 | 5 | 10 | 27,5 | 28 | 20 | 7 | 2,0-2,5 | 6 |
| PV4-90 | 90 | 35 | 27 | 5 | 10 | 35 | 28 | 20 | 7 | 2,5 | 6 |
Figure B.18 - Example of a PV4 mortise hinge
Figure B.19 - Example of a mortise hinge size PV4-100
Figure B.19 - Example of a mortise hinge size PV4-100
Figure B.20 - Example of a screw-in loop type PVv1
Figure B.20 - Example of a screw-in loop type PVv1
Figure B.21 - Example of a screw-in loop type PVv2
Figure B.21 - Example of a screw-in loop type PVv2
Figure B.22 - Example of a screw-in loop type PVv3
Figure B.22 - Example of a screw-in loop type PVv3
Figure B.23 - Example of an overhead hinge made of an aluminum profile for window and door blocks made of aluminum alloys and polyvinyl chloride profiles with a maximum weight of 80 kg
Figure B.23 - Example of an overhead hinge made of an aluminum profile for window and door blocks made of aluminum alloys and polyvinyl chloride profiles with a maximum weight of 80 kg
Figure B.24 - Example of an overhead hinge made of an aluminum profile for window and door blocks made of aluminum alloys and polyvinyl chloride profiles
Figure B.24 - Example of an overhead hinge made of an aluminum profile for window and door blocks made of aluminum alloys and polyvinyl chloride profiles
Figure B.25 - Example of an overhead hinge made of an aluminum profile for door blocks made of aluminum alloys and polyvinyl chloride profiles
Figure B.25 - Example of an overhead hinge made of an aluminum profile for door blocks made of aluminum alloys and polyvinyl chloride profiles
Figure B.26 - Example of a set of axleless ball hinges for metal doors
Figure B.26 - Example of a set of axleless ball hinges for metal doors
Figure B.27 - Example of a combined hinge for a door block with a tempered glass leaf
Figure B.27 - Example of a combined hinge for a door block with a tempered glass leaf
Overhead hinges
Such loops are a design of two small-width patch cards with a cylinder. A rod is inserted into the cylinder, and such hinges are used to connect the window sashes of paired structures.
It can be used for both right-handed and left-handed attachments - simply by changing the rod. In this case, a hinge card of greater width is screwed to a quarter of the inner sashes, and a less wide one is screwed to the overlaps of the outer sashes.
All forces that arise at the moment of overturning of the outer sashes will act in the longitudinal direction of the horizontal axis of the screws. In this case, the holding force of the hinges will depend practically on the resistance of the screws to pulling out. It should be remembered that the overlay of the outer sash, which has a thickness of 12 mm, may not provide the required strength.
The tilting fittings of wooden windows themselves must ensure horizontal rotation of the sash. Unlike a hinged structure, which is mounted on the vertical bars of a window sash, no torque can arise in a tilting system, and therefore there are no special requirements for the strength of the structure during installation.
Video: WINDOW HINGE GIESSE FLASH BASE