A balcony is a rather limited space, which means you need to use every centimeter wisely. In recent years, there has been a tendency to renovate balconies and loggias into a recreation area, while cluttered shelves, old furniture and seasonal items are no longer stored “outside” the apartment.
But what to do if you want to have a modern renovation on your balcony and set up a lounge area, but there is absolutely nowhere to put some things or seams away? Multifunctional furniture will come to the rescue, namely benches with built-in drawers. This is an ideal solution for both a small balcony and a spacious loggia, and it is quite possible to make such a piece of furniture with your own hands.
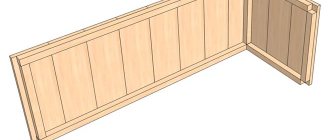
Corner version of a bench with niches
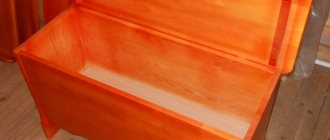
DIY balcony bench
Almost all owners of city apartments have loggias or balconies. But many people use this room as storage rooms, where they store supplies or old things. For a balcony to become a comfortable place to relax, it needs to be equipped. This concept includes not only repairs and insulation of the premises. The balcony must also be furnished. But you can install full-fledged furniture only on a balcony with a large area. Not many can boast of such parameters. But a bench for the balcony will be an ideal solution for a small space. And if there is also a hidden drawer inside, the bench on the balcony will become practical and multifunctional.
Are there life hacks for balconies? Of course! Here is the list:
Furniture
- Choose stylish garden furniture that is the right size for your balcony. For example, a small table and a couple of chairs in the style of a French cafe will fill the space with the special atmosphere of Paris, the smell of freshly brewed coffee and croissants.
- Folding furniture would be a great idea. The table and chairs are easy to put away when not in use, freeing up space for other activities.
- Small hanging tables are attached to the railings, look attractive and save space.
- The wall panel and box-bench are suitable for most balconies; they will not only allow you to store things and place flowers, but will also become a great place to relax.
- The box can serve as both a table and a storage place, and if you put a couple of pillows or a blanket on it, it will become a place where you can sit down and read a book.
- Shelving built into the wall does not eat up space, is spacious, looks compact and organic. Plants or some things will feel great on the shelves.
- You can easily design a bench with storage space yourself and paint it in your favorite color. By adding textiles, you will get an unusual sofa.
- You can breathe new life into an old box and it will still serve you well.
- If you turn on your imagination and show a little imagination, then an old stepladder turns into a storage system.
- Use shelves.
Details
- Add textiles. Pillows and rugs add softness and texture to the space.
- Create a special atmosphere with light. There are even flashlights on sale that run on solar batteries; no wires are required. Nature itself takes care of everything, and the balcony turns into a quiet haven in the evening.
- Candles and candlesticks will fill the space with the spirit of romance, create an intimate atmosphere, and add warmth to summer evenings.
- A mirror will expand the space and add light.
Choosing a bench design
A bench for a balcony can come in different variations, but it should be light and elegant enough so as not to visually burden the small space of the balcony.
The bench can be made comfortable by upholstering it with soft fabric, or you can simply place pillows on the seat. There are two types of benches according to their functionality:
The bench should not take up much space on the balcony, so its width and length are selected individually for each room. The bench can be of a very simple design, or you can equip it with armrests and a backrest.
A bench with a drawer on the balcony is not only useful, but also a beautiful piece of furniture
The advantages of folding and folding benches are obvious; they unfold only when necessary, and when assembled they take up very little space. The disadvantage of these structures is less strength.
Tip: When building a bench for a loggia, take care of its versatility. It should be a simple, but reliable and strong element of the interior.
Preparatory work
To begin with, the location of the bench is selected and its drawing is drawn up. These steps will help determine:
- Dimensions of the future bench. They can be individual, but some generally accepted parameters will have to be taken into account: the height of the backrest (if necessary) is 350-500 mm, the distance from the balcony floor to the seat should not exceed 600 mm. Regarding the length of the seat, it can be equal to the width of the balcony, so the bench will fit well between its two long sides. This option provides for the absence of armrests. The width of the bench is optional.
- The method of placing the bench on the balcony, as well as its appearance.
- Calculation of required materials.
Homemade balcony bench with a soft seat
To make a balcony bench with a drawer, you can purchase chipboard sheets at any hardware store. But this issue can be solved in a more practical way. You can get the necessary material from old unnecessary furniture. To make the frame you will need 40x40 mm bars.
Necessary tool
- metal ruler and square;
- roulette;
- pencil;
- sandpaper;
- plane;
- jigsaw;
- self-tapping screws, nails, screws;
- drill;
- drill;
- Grinder;
- hammer;
- building level;
- paint brush.
Let's start making a bench with our own hands
Answering the question of how to make a bench with your own hands, it should be noted that a bench for a balcony with a drawer consists of the following main parts:
To make the bench last a long time and be more durable, metal corners can be used at the joints of structural elements. To attach the lid, it is better to choose piano hinges .
Ready-made bench with drawer
At each stage of work, the correct position of each element must be checked with a square and level. The bench for the balcony was assembled with your own hands. Now you can safely start decorating it.
An interesting solution is a closet with roller shutters for the balcony. It does not take up much space, looks aesthetically pleasing and you can also make it yourself.
Along with the bench, it will be useful to have a small folding table on the balcony. Instructions for making this piece of furniture are here.
And if you need to decorate your windows beautifully, roller blinds day and night are one of the modern solutions.
The working process
All work can be divided into two parts - preparatory and assembly. We will analyze each of them separately to make it easier for you to understand all the operations performed.
Preparation
Work begins with the following activities:
- First of all, you need to take measurements on the balcony to figure out how much space you have and what the maximum dimensions can be for our benches . You can make one or several benches, you must decide for yourself how many are needed;
- For comfortable sitting, the height should not exceed 60 cm, as for the width, it should be at least 40 cm and no more than 70, otherwise it will again be uncomfortable to sit on it . As for the length, you must determine it yourself; you shouldn’t make the structure 3 meters long; it’s easier and more reasonable to make two benches;
- Once you have decided on the basic parameters, you can make a sketch of the future product. Here you don’t need to be a professional draftsman; you need a diagram that will show all the main dimensions and design features. This will help you clearly understand the final result and make it easier to understand further work, because you will have a ready-made diagram in front of you;
An example of a simple bench with a backrest
- Also, make sure in advance that the balcony is cleared of various rubbish and that all necessary materials and equipment are at hand . Also, as I noted above, you can sand the board at least on the front side, so as not to have to do this work later.
Assembly
The instructions for carrying out the work are not complicated, to make it even clearer, first I will show a diagram with the sequence of work, and below I will describe each of the points in detail:
The workflow consists of such operations
- First of all, you need to cut the elements for the frame, in our case these are four bars that will be located in the corners from the inside . You can also cut the board for all the walls. The most important thing here is to carefully take measurements so as not to cut off excess and spoil the material; when cutting, do not press too hard so as not to damage the ends;
Accurate cutting is a prerequisite for a quality bench
- You can assemble the side walls; to do this, take two bars, place them on a horizontal surface at the required distance, after which boards are placed on top and screwed with self-tapping screws . As a result, you should end up with two assembled sidewalls, it is important that they are smooth and not skewed, so control the even position of each board;
- Next, you can attach the sides; for this it is better to attract an assistant to hold the resulting shields while assembling them. The board can be attached either tightly or with slots, if you do not need a blind box, then the distance between the elements should be the same so that the bench on the balcony looks neat;
The front board should cover both the block and the end of the side board, remember this
- To secure the bottom, two bars are attached to the bottom from the inside, and transverse boards are attached to them; this is the simplest option;
- Then you need to nail it to the bottom of the support, this is necessary so that the structure does not come into contact with the floor . This will allow the board not to become damp from the floor, and in the event of a water spill, the product will not get wet. The configuration of the legs can be any, as long as they are durable;
- The top cover is assembled separately; the simplest option is to fasten two boards from the inside . To prevent the resulting shield from warping, I advise adding a diagonal spacer between the two crossbars, this will make the cover much stronger and more reliable;
This is what the simplest version of the lid looks like, which will also serve as a bench seat
- Lastly, a piano hinge is attached to the end side of the lid, cut to the required size if necessary . Next, the structure is leaned against the box and fixed on it; if the seat will lie between the bars, then, in order for the lid to move normally, it is better to lay washers 1.5 mm thick on the sides in order to accurately fix the hinge.
Fastening must be done carefully and accurately
The finished box can be used, but it is much wiser to pre-coat it with a protective compound. This could be paint, or maybe varnish, which will give the surface the desired shade, without hiding the structure of the wood. If you wish, you can paint the surface with patterns or ornaments; it all depends on your wishes and preferences.
It is better to coat the finished box with a protective compound
If you decide to make upholstery on the seat, then the easiest way to do the job is to use a furniture stapler; with it you can quickly secure the material from the inside of the cover . In order for the surface to be soft, the layer of foam rubber must be at least 5 cm; thinner material is pressed very hard.
You can not attach the upholstery, but sew several pillows; this option is both simpler and looks very stylish. In addition, if necessary, the pillows can be washed or used in another place.
This folding bench for the balcony looks very stylish
And one more tip - if you store potatoes or other vegetables in a box, you can line the inner surface with insulation with a reflective layer. This will ensure better preservation of vegetables.
This bench is great for storing vegetables
Decorating a bench
There are various options for improving the appearance of a bench. The structure can be coated with varnish or paint. The product can be given special originality by applying an ornament.
Using, for example, foam rubber and upholstery fabric, the seat can be made soft. To do this, the foam rubber is cut exactly to the size of the bench cover. The upholstery fabric is cut with a margin so that its edges can be secured with a stapler on the inside of the seat.
You can decorate the bench differently - cover the manufactured structure on all sides with the most ordinary clapboard. It is necessary to cover all ends with a self-adhesive film that matches the color of the lining. The corners of the structure can be decorated with plastic corners.
In this case, the seats can also be covered with leatherette, faux fur or soft fabric. It is possible to make seats soft not only with the help of foam rubber. For these purposes, polystyrene foam is perfect, which is glued to the surface of the seat using double-sided tape.
Preparation of parts and installation
A DIY balcony sofa begins with preparing the frame. To do this, it is necessary to cut the timber to the dimensions indicated in the drawing. The slightest deviation will lead to damaged material or unevenness of the structure after the completion of the assembly process.
After completing the cutting, each part must be processed using fine-grained sandpaper until a smooth surface appears. After all the elements have been sanded, they should be covered with stain or varnish, and then left to dry. Preferably in a dust-free room at room temperature.
After drying, you can assemble the frame. The timber is connected to each other with self-tapping screws. To make the structure more durable, all seams are additionally glued with good furniture glue. Next comes the fastening of the rigid surface to the frame: sheets of plywood, fiberboard, chipboard or OSB boards. The base is also fixed with self-tapping screws.
The final stage is upholstery of the sofa. To do this, layers of foam rubber are laid on the base and covered with upholstery fabric on top, which is secured in inconspicuous places with construction staples. Instead of a soft back, you can make simple pillows. This option would be relevant for an ottoman.
It is very convenient to make a sofa for the balcony, which has additional niches or drawers for storing things. Before starting work, you should decide on the type of these products:
- The space under the sofa can be one large drawer; it is enough to equip it correctly. Having made a strong structure and a rising base, you can additionally cover it with foil material, for example, for storing soft drinks.
- The base of the sofa on the front side can be made open and divided into several compartments. Each will be a separate box.
- There is another option for arranging one large box, but only a double-leaf one, similar to a shelf. It looks quite aesthetically pleasing.
When starting to make a sofa with drawers, you need to pay special attention to the frame, since the space under the product will be hollow. Accordingly, the structure should be strengthened, for example, with metal corners or using a larger beam
As a surface for the frame, it is best to purchase OSB boards with a thickness of 12 mm.
Measurements
Upholstery scheme
Collecting parts
Upholstery
Installation of the sliding mechanism
How to make a bench for a balcony with your own hands?
The balcony was combined with the kitchen and now there is a place to relax. How to make a light but comfortable bench for a balcony with your own hands?
For a folding bench, it is enough to fix a frame made of timber with folding brackets to the wall. A board of the required width must be attached to the top beam using hinges.
As practice shows, the most functional form of bench for a balcony is a bench-chest, that is, under the seat it has a hidden container for storing all sorts of things.
If you don’t want to resort to such a design, then here, for example, is a very successful lightweight bench for a balcony, all the fittings for it are obvious:
Structurally, benches for a balcony can be different: bench-box, corner bench, soft bench, stationary and sliding, etc.
The sizes of balconies are different and this must be taken into account.
That is, at the beginning you need an idea, sketches, drawings and full calculations of the load on the bench.
As an option, you can purchase these corner brackets:
You can make your own wooden corner brackets.
Next, calculate the pitch between the corners and their number.
The corners are attached to the wall with anchor bolts (optional).
Then we buy a board for the seat of suitable length and width (dimensions in the drawings).
We make holes in the board with countersunk holes and fasten it to the brackets with bolts (the head of the bolt is countersunk).
If the seat is soft, then the board can be covered, for example, with leatherette foam under the leatherette (it is better to take furniture foam).
The backrest of the bench can be (most often this is done, because there is not a lot of space on the balcony), for example, the wall of the balcony is upholstered with clapboard), or a support independent of the seat can be made, for example from wood.
If you are making a box-bench, then it is assembled using frame technology, that is, at the beginning the frame,
Top lid-seat (opening), optionally on piano hinges.
Fastening the bars to the floor, walls, among themselves, with wood screws.
Frame sizes are individual.
The forest must be dry, and it is advisable to treat all wood with an antiseptic.
Source
Making a corner sofa
This option is convenient for very limited loggia space. It is easy to adjust to the size of the room. The downside is the impossibility of proper rest, since you cannot lie at full height on the sofa. But the corner is very good for tea drinking and gatherings. The production of the model begins with measuring the room and drawing up a drawing with the dimensions of the furniture. You can create a printed design or make a hand sketch. The sketch must reflect the correct dimensions and shape of the product.
Stages of assembling a corner sofa for a loggia:
- Make the frame of the product by rounding one of the sides. Between the extreme points of the sofa frame, strengthen several vertical ribs, attaching them to the base in the upper and lower parts.
- Having given the structure a curved appearance using vertical strips, cover the frame with chipboard, plywood or OSB. Secure the sheathing material using corners and self-tapping screws; the seams can be treated with glue.
- Make a cover frame and cover it with plywood.
- Wrap the seats on the balcony with a layer of thick foam rubber and cover them with wear-resistant material. Secure with a construction stapler or glue. After this, put the seat on the hinges. You can also use homemade sofa cushions.
Advice! Upholstery material should be cut taking into account allowances for folding the fabric.
Making a corner model differs little from assembling a regular straight sofa. The greatest difficulty is creating a smooth bend in the corner of the frame. In some cases, craftsmen try to give the material a certain shape by bending it by hand, but at the same time it gradually loses its rigidity and is pressed through.
Making a bench for the balcony with your own hands - step-by-step instructions
Loggias in apartments with standard layouts often do not please their owners with the capacity and beauty of the space. Very often they are used as a warehouse for storing excess things. Unfortunately, this creates the impression of clutter and unpresentability of the apartment.
Agree, you always want to have a place of additional comfort. I must say, the task of changing and improving the loggia is quite doable. Using our simple tips, even a small loggia will delight you with its appearance.
Today we are talking about building a designer interior bench with your own hands.
Lifehacks for the balcony. Getting rid of the landfill
Many people use the balcony as a place to store things for which there is not enough space in the apartment. This often ruins the entire look. The balcony can become beautiful and cozy, where at the same time there is storage space. To do this, you need to approach the issue intellectually and creatively. The ideas or life hacks presented in the article will help you look at a cluttered space in a new way. Properly furnished and decorated, even a small balcony can become an additional area for relaxation, privacy, eating, playing with children and meeting friends.
What benches can be placed on the loggia?
First, we carefully evaluate the possibilities of a loggia or balcony. Determine the appearance of the future bench. What do we want to get in the end? What will it be? An additional lounge area, a space for rest and relaxation, or a place to store household utensils and supplies for the winter? Or maybe we can combine business and pleasure in one?
The shape of the bench can be static or can include elements of transformation: folding, unfolding, turning into a sofa or table. If you have decided on your choice, then we will start selecting the design and methods of decoration. The appearance of the interior bench should be in harmony with the overall style of the loggia and apartment.
A built-in drawer will increase the functionality quotient of the project without ruining the overall purpose. In this case, the miracle bench will serve as a small table and a chest of drawers at the same time.
Of course, you can't buy such a thing in a store. A balcony bench is purely individual furniture. Many conditions and restrictions. It's hard to find, but you can really make it yourself.
If you want to make a budget option, then try to find parts from old bedside tables or drawers for the project. As you can see, we should strive to make furniture multifunctional for the balcony, using modern ideas from practical designers.
Bench made of wooden chairs
Necessary materials:
- four chairs;
- boards for sitting.
Manufacturing stages:
- remove the seats from all four chairs, saw off the front legs of two of them and remove the backs;
- if you want to remove old varnish or paint, apply a product to the surface that will dissolve the paint coating; the softened layer can be removed a little later with a spatula;
- drill holes for dowels in the racks; they will be required on the front and end sides;
- lubricate the dowels with glue and insert them into the drilled holes, connect the base of the bench with self-tapping screws for reliability and sand the surfaces of all parts;
- select boards or wooden slats of suitable size for the seat, which can be joined with wood glue;
- glue the resulting seat to the base, place heavy objects on top and leave to dry;
- Treat the finished product with stain; you can also paint it.
View the embedded image gallery online at:
Photo source: www.postroiv.ru/2016/06/skamejka-svoimi-rukami/
Here are two more examples of how to make a bench out of chairs. The manufacturing process is not fundamentally different from the previous version, just a slightly different configuration.
But if you are interested in instructions on how to make a two-seater bench from chairs, visit the website of the author of this project using the link under the gallery.
Dining room chairs are usually attached with screws, wood dowels and glue, so a rubber mallet and a flexible handsaw are useful tools.
Although the glue on old chairs takes many years to dry, making disassembly easier, dowels are often very stubborn—be prepared for some to break.
Then you will need to drill a hole for the new dowel right in the place of the old dowel.
See below step-by-step photos on how to make a bench from chairs
View the embedded image gallery online at:
Photo source: www.hometalk.com/4043763/bench-chair-set-diy-how-to
Or this example. Well, how can you throw away such beautiful chairs, even if they were made in the 50s of the last century.
While you may not need a ton of chairs, you can create a comfortable place to sit, as a small bench takes up less space than several chairs.
Instructions for the step-by-step assembly of a bench from chairs are on the website. Although the chairs are different, the essence of the work is basically the same.
A step-by-step master class can be viewed below.
View the embedded image gallery online at:
Photo source www.instructables.com/id/Make-a-Settee-Bench-from-Two-Chairs/
Bench from the back of the bed
The headboard of the bed is an excellent source material for making a bench. You practically don’t have to do anything, just connect the necessary parts into the desired design.
In the photo instructions presented here, the entire process of making a bench from a headboard is shown very well, although there are some nuances that are worth paying attention to. For example, wood glue must be used not only in the holes, but also along all the edges of the boards
You can read all these details on the author’s website, the link to which is located under the gallery.
See step by step photos below.
View the embedded image gallery online at:
Photo source www.addicted2decorating.com/diy-project-turning-a-headboard-and-footboard-into-a-bench.html
Bench from a chest of drawers
Transforming an old chest of drawers into a beautiful garden bench is definitely worth the effort you put into it. This tutorial gives you the opportunity to use your old furniture and transform it into something truly stunning for your garden.
See the step-by-step master class below
View the embedded image gallery online at:
Photo source www.commatose.ca/2013/09/diy-from-old-dresser-to-pretty-vintage-bench.html
Installation Tips
We make the markings accurate in accordance with the drawing parameters. Carefully cut out the details. At this stage, accuracy and precision are the key to success. If you make a minor mistake, the product may lose its stability and visual appeal.
We mark the locations of future holes on the canvas with maximum accuracy. It’s better to double-check yourself once again than to plug extra holes in the finished product.
We assemble the box frame from prepared bars. We fasten the frame with the already cut parts. Remember that the cover is installed last. It can be done at the top or side. There is also a retractable option, but it is more labor-intensive and more difficult to implement. An important detail is that the top door closes silently. For this purpose, special seals and plastic corners are installed on the edges of the box. Decide again whether it is worth attaching the balcony bench to the wall. This increases strength, stability and therefore durability.
Let's start decorating. In a simplified version, you can simply place pillows or a warm blanket on top. There are ideas for using a long-lasting cover like a blanket with elastic bands at the edges. This solution will allow you to conveniently fix the decor on top and easily remove it if necessary. Upholstery made of soft fabrics will help create a pleasant tactile sensation. Here, designers advise using fluffy fabrics, which will give the interior originality and an additional cozy look.
Does a bench need a back? Again, it's up to you. A simple tip. A pillow or other soft elements are simply attached to the wall. This gives the interior an original look and saves you from unnecessary work.
If you have the desire and the appropriate skills, the product can be coated with any material. The technology of work is similar to making a sofa. We measure, cut out, fasten with a mounting stapler. We do the upholstery in such a place that it is not visible from any viewing position of the bench.
We paint the rest of the bench with paint according to your taste. We use paints that match the interior. In a fashionable trend, decoration with drawings made using a stencil.
And at the very end of your work, use your creativity and create a real furniture masterpiece. Small finds and modern interior solutions will highlight your individuality.
For example, additional light sources will add a special atmosphere. Buy solar powered flashlights. And you will get the feeling that nature itself wants to take care of your home. In the evening, the balcony will become a mysterious source of warmth and light.
You can choose scented candles and lamps using healing essential oils. Minutes of restorative aromatherapy will fill you with energy during your relaxation. Including mirrors in the overall design of the loggia will increase its space and protect the house from negativity.
Think up and create beautiful flower arrangements especially for this place. The choice here is large: from potted plants to interior solutions for their artificial analogues. In addition to beauty, flowers have many useful qualities, ranging from air purification to noise absorption.
What tools and materials will be needed?
If you decide to assemble a bench with a drawer for the balcony with your own hands, check that you have all the necessary tools for this.
Indicative list of tools:
- ruler, angle (metal);
- building level, tape measure;
- pencil;
- sandpaper;
- plane;
- jigsaw;
- drill;
- sander;
- fasteners, drills;
- hammer;
- paint brushes.
Depending on the complexity of the bench-box design, the list may be supplemented or, conversely, reduced.
Next, if the box is being made from scratch, you need to buy materials for its manufacture:
- chipboard sheets of suitable thickness;
- bars measuring 4x4 cm for the frame;
- protective primer for wood;
- varnish, paint, etc.;
- fabric, leatherette, printed material - if you plan to make a soft seat.
The most convenient material for making furniture with your own hands is wood. Strong, durable, easy to process, it will help you create a real interior masterpiece.
Preparing an idea for implementation
The first thing you need to decide is where exactly on the balcony the bench will be placed. From here you can choose the optimal size and design of the product.
To ensure that the work goes smoothly, be sure to draw up a drawing that will contain:
- Placement of a bench in space;
- Number and sizes of boxes;
- Product dimensions (be sure to indicate each parameter on paper).
This scheme will help to avoid mistakes when cutting materials, assembling and installing the structure.
Scheme of a garden bench with an opening seat to the balcony:
Front end
Bottom of the benchTop cover of the bench
Think about what design of drawers will be most convenient in your case (pull-out, opening from the top or from the end, etc.), about the presence of a back and armrests. Any additional elements make the bench more difficult to implement and require more materials.
Peculiarities
You need to decide on the design, dimensions and materials from which the bench will be made. Its functionality, ergonomics, as well as whether it will be combined with other furniture or balcony items depend on this.
Here are 5 reasons to make a bench on your balcony or loggia.
A sofa, even a small one, will not fit on every balcony. But the bench will be a compromise option. And such furniture has more possibilities. The bench can be attached to a box, chest or similar object in which tools, vegetables and fruits, and cleaning supplies can be stored.
It's beautiful and fashionable. Benches, undeservedly cast into the shadows for a long time, have always been nice, often authentic pieces of furniture. Now, thanks also to Scandinavian trends, benches are once again becoming part of the interior.
If the balcony is insulated, it can be used all year round . Have breakfast there, read, and relax with your laptop. And a bench will do as a comfortable seat.
It will not take a lot of effort and money to make it . Even an inexperienced person can handle the construction of a bench.
You can find interesting variations of this furniture in any interior style . And the wooden structure is almost universal.
And here’s another argument - the bench can be folding, which means it will definitely fit on any balcony.
Initial steps in manufacturing
Before you make a bench on the balcony, you should choose the place where it will be placed. After this, a special project is drawn up, according to which the production of a bench for the balcony will be carried out. Having completed these steps, you will become aware of such points as:
- the dimensions of all the parts from which the bench will be assembled. All sizes in particular can be individual, it all depends on the total area of the room and the desire of the owner;
- option of placing the structure on a loggia or balcony, visual condition is also important;
- calculations of all materials that are required to assemble the bench.
To make your own type of structure with drawers, you should buy pieces of chipboard sheets on the construction market. To save money on purchasing material, you can disassemble old furniture that was planned to be thrown into a landfill. From these elements you can build a good bench with a drawer.
Overview of species
From sophisticated banquettes to laconic daybeds, from reclining models to rough ones, to the rustic aesthetics of benches, there are many options for a balcony.
A simple bench will suit discreet, minimalist interiors. It is not as comfortable as a bench with a back, but its functionality is enough so that you can linger on the balcony for a while and sit.
A bench with a drawer is installed on the balcony, where something still needs to be stored. You need to think through a system so that the drawer opens easily and two parts of the same furniture do not interfere with each other.
Sometimes paired benches are installed on the balcony - side by side or opposite each other.
Making a universal chest
We propose to make a chest that, thanks to its small size and flat lid, can be placed on the balcony, in the nursery, or in the hallway. It is universal, has a reliable design, and everyone can choose the finishing option depending on their own taste and interior requirements.
What do you need for work?
To make a chest for a balcony, you should prepare tools and finishing materials:
We recommend choosing veneered chipboard (16 mm) or thick plywood as the main manufacturing material.
You need to cut it yourself or order cutting of the following blanks:
For supports, use a wooden beam with a section of 15x15 mm:
You need to cut out the following from a 15 mm board:
In the presented version, square-shaped wooden frames made of boards (9x33 mm) are used as decorative elements. You will need:
You will also need 1 mounting rail (in diagram H) - 80 cm.
The diagram below clearly demonstrates all the components to make a chest for a balcony.
You will also need 3 linear meters of wooden slats (16x4 mm) to make overlays - finishing the box lid. If an edge strip or a special profile is used instead of a strip, the parameters of the cover (G) should be reconsidered and the thickness of the strip should be increased.
Work order
Prepare the workpieces for work: sand their surfaces and ends with emery cloth. After that, start assembling:
glue drying.
Options for arranging a soft bench-chest seat
The box will be more comfortable for sitting if you sew a soft mattress with your own hands. To do this, measure the parameters of the cover and cut out a similar rectangular piece of thick foam rubber. Then you should cut out and sew a cover for it from the fabric. Recessing the stitches into the filling, additionally sew the mattress. This will allow it to better retain its shape. Attach the soft seat to the lid of the chest in a way that is convenient for you. We suggest drilling two holes in each corner to thread the laces that secure the product.
Beautiful bright pillows will make the arrangement more comfortable, in addition, they will decorate your balcony.
Soft products, made by yourself and in harmony with the overall style of the space, can be placed not only on top of the seat, but also made part of a wooden or improvised hanging backrest.
Improvise, use your imagination, and the chest-bench will help you organize the storage of necessary things and sit comfortably on the balcony.