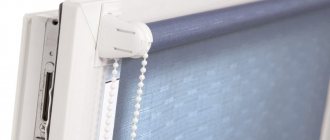
The history of using drum-type window curtains goes back a long way. The mystery of the popularity of such designs lies in their practicality and ease of management. Over time, they learned to make roller blinds aesthetically attractive, and not just utilitarian. This has given rise to a wide variety of models. And if Roman blinds create coziness, then roller blinds have greater functionality, although a number of models are not inferior in terms of design and harmony.
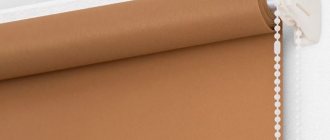
Roller blinds are easy to use, look stylish and modern
Roller blinds: types and features
The operating principle of these convenient curtains is reminiscent of Roman designs and horizontal blinds. Now this version of curtains in combination with the usual curtains is common for apartments and private houses, as well as in business centers. They create a barrier to excessively bright natural light, which not only can interfere with relaxation, but also affects the preservation of the color of the wallpaper and the interior decor.
You can choose rolled products that are suitable in price depending on the purpose
There are several types of roller blinds. Their diversity lies not only in the control method, but also in system features. There are two main types:
- Open control mechanism.
The roller is within visible reach and is not protected by a cassette or other type of casing. Open type roller blind - Closed control mechanism.
The roller is hidden under a housing that secures the canvas quite rigidly and prevents it from crumpling or sagging. The product takes on a more complete and aesthetic appearance. Roller blind with protective box
The operating principle of the design may also vary. There are 3 control options:
- using chains;
- by electric drive;
- using a spring holder.
Roller blind with chain
Curtains with spring mechanism
Electric roller blinds
All methods are convenient in their own way. When choosing curtains, focus on many criteria that are individual for each place and lifestyle.
There are 4 types of fabric used indoors:
- completely transparent;
- dimout (light transmission 20-30%);
- blackout (100% opacity);
- "day Night".
Sheer roller blind
Roller blinds dimout Roller blinds blackout
Roller blinds day-night
Translucent fabrics are used, as well as non-textile materials (bamboo, jute, etc.), which have their own degree of light transmission depending on the model.
On a note! Many options for curtains (plastic, metal or wooden box/roller) of any color, including white, allow you to choose the one that suits your decor.
Fasteners for the lower fabric plumb
For free-hanging roller blinds, it is possible to use additional clamps for the lower plumb of the fabric. Fixation is used to stabilize the fabric and finishing strip of roller blinds.
Magnets
Magnets for attaching the finishing strip of roller blinds
- used to fix the lower plumb of the fabric. This is especially true when the sash is open for ventilation, i.e. Only the top part of the sash is folded back. But sounds that arise from the wind when the window sash is open can also cause discomfort. The lower plumb line hits the window frame. The disadvantages include the fact that fixation occurs only in one position, when the curtain is completely in the lowered final position. As soon as you slightly raise the finishing strip, it will move away from the magnets and will no longer press against you.
Advantages:
- Reliability
- Convenience
- Easy to install
- Installed on Mini and Maxi systems
- There are magnets attached to double-sided tape.
Flaws:
- Additional holes in the window frame (when installing magnets with screws)
- Fixation only in the lowered position of the roller blind
Fishing line or cable
Fishing line or cable to stabilize the plumb line of the fabric
— used on free-hanging roll systems. Thick fishing line is installed on small, light roller blinds, and a cable or strong, braided braid is installed on heavy, massive roller blinds. An undoubted advantage is that the curtains are fixed along the entire height, regardless of the position it is in, closed or half-open.
Advantages:
- Easy to install
- Installed on Mini and Maxi systems
- There are fastenings with double-sided tape
- Fixation along the entire height of the window sash, unlike magnets
Flaws:
- Additional holes in the window frame (when installing fasteners with screws)
- Less convenient compared to magnets, you can accidentally touch and tear or damage the curtain, and it can also be damaged by pets or children.
Plastic fastenings
Plastic fastenings for the finishing strip of roller blinds
— plastic fasteners are used more often with horizontal blinds, but there are rare cases when the problem can be solved only in this way, so I decided to include them in the section with roller blinds. The reason for their rare use on roller blinds is that the fixation occurs as if on a permanent basis. It is often not very convenient to remove and insert the lower plumb line.
Advantages:
- Easy to install
- Installed on Mini and Maxi systems
- There are fastenings with double-sided tape
- Sometimes a problem can be solved only with this type of fastening
Flaws:
- Inconvenience of use (specifically for roll systems)
- Additional holes in the window frame (when installing fasteners with screws)
- Less convenient compared to magnets
- Fixation only in lowered position
Advantages and disadvantages of roller blinds
When preparing to choose a model, you should pay close attention to the advantages and disadvantages of this type of structure.
Roller blinds can be matched to various interior styles
The advantages of roller blinds are as follows:
- Versatility. Possibility of combining models with many interior styles.
- Aesthetics and conciseness. Strict forms in combination with high-quality fabric can transform a living space, attic or loggia into a modern look.
- Practicality. Curtain maintenance is minimal.
- Reliability. High-quality products have a large margin of safety.
- Functionality. With the help of roller blinds you can provide any level of light access to the room.
- Electrically driven models allow you to control them from a distance (for example, while lying in bed).
- Replacement of curtains. Roller blinds go well with tulle, so there is no need for full-fledged curtains.
- Space saving. Such a curtain does not require the construction of curtains extending beyond the window.
- Low cost. You can choose a budget model with a beautiful design.
- For convenience, products are always accompanied by instructions for assembly and operation.
The roller blind fabric can be plain or patterned
The disadvantages of roller blinds are minimal. These include:
- minimalism (not always combined with classic style interiors);
- require special installation for plastic windows and structures with vents (rather not a minus, but a feature).
Tips for use
If you need to wash them, you should:
- roll them up;
- disconnect the fishing line;
- unhook the weight plug;
- remove the protective capsule;
- remove the tube with tissue using a screwdriver.
To pull out a roll of fabric, you need to press on the latches located in the side brackets
Important! This item cannot be wrung out. You can iron the curtain with a slightly hot iron.
The advantages of such curtains include:
- variety of control systems;
- the ability to fix the material at almost any height;
- cleaning with a damp cloth;
- technology of impregnation of the product with a special composition;
- combination with traditional curtains;
- Possibility of placement in doorways;
- large selection of textures and shades.
The only disadvantage is that the working mechanism sometimes quickly fails.
Lubricating the rubbing parts of curtains increases the service life of plastic parts
Design and principle of operation of roller blinds
The bobbin type of design involves the presence of several components. Roller blinds include:
- roller with control unit;
- canvas;
- weight plumb line;
- guides;
- adjustment mechanism.
Roller blind device with body and side guides
Roller blinds work on the principle of winding and unwinding the fabric onto a drum. It is located at the top of the structure. To tension the web from below, there is a weighting agent - U-shaped or a bar, with the help of which the roll does not sag or warp.
The classic mechanism is controlled via a chain. In modern models you can sometimes find magnetic stoppers.
To limit travel, a stopper is installed on the chain
The mechanism, controlled by a chain drive, has its own peculiarity. The balls on the cord are part of the hinge structure when the roller rotates in one direction or another. They also act as a kind of fixative. The finished sample has a chain descent of at least 2/3 of the length of the blade.
Roller blinds are convenient, rising from bottom to top using a spring mechanism. They have good tension. A reliable spring cushions the blade, which can be fixed in the desired position.
Interestingly, curtains with a spring mechanism can be installed in different positions
Roll winding can be direct or reverse. The second option is typical for cassette curtains.
The guides help to distribute the canvas evenly when scrolling. They also cover the sides from gaps.
Cassette roller blind with side rails
Materials, tools, components
Having decided to design a mechanism for roller blinds with your own hands, you first need to think about many things.
Roller blind material
The first task is the choice of material. The simplest are wooden slats or slats, but in this case you will get not curtains, but blinds that transmit light well, but they will not help protect from light, and they also have a considerable weight. Therefore, few people like this option.
The fabric for such products is often:
Another option is combinations. For example, polyester “in company” with viscose, satin or cotton, fiberglass (fiberglass), screen (fiberglass and polymer threads). All the materials listed are practical, reliable, and easy to wash. However, before purchasing, you need to take into account that different rooms have their own “favorites”.
- The living room, office and kitchen need thin fabrics that “obediently” transmit light. For the kitchen room, where curtains get dirty especially quickly, this is a must.
- Children's rooms and bedrooms, on the contrary, need dense material, since protection from the sun's rays, as well as from the light of lanterns, is important.
For a living room, it is better to choose a material that has an antistatic effect, can resist dust, and reflects heat. Fabric impregnated with a composition that reduces the absorption of odors is ideal for kitchens.
Tools and elements
The main task is the choice of material for the shaft. In this case, the assortment is large: it can be a rod made of wood or aluminum, a piece of cornice, a wooden beam with a cross-section of 25-30 mm. Its length should be 15-20 mm shorter than the fabric, the last numbers are the fabric allowances left for the seams.
The first step is measurements for roller blinds. After measuring the parameters of the frame, window, opening, or individual sashes, add 150 mm to the resulting height required for the shaft and weighting material, and a seam allowance of 30-40 mm (15-20 mm on each side). To the width - only reserves for seams on each edge.
You will need a small kit, which includes:
- fastening to an opening or window frame: double-sided tape for plastic windows, a strip with metal corners (screws) for wooden structures;
- hooks, rings made of metal or plastic, a fastener (cord, tape), the length of which is three times the length of the future curtain;
- Velcro is the same size as the strip;
- a piece of fabric cut after measuring the frame area;
- sewing machine.
Mini roller blinds for fixed windows
Fully closed doors sometimes require a uniform design in the form of roller panels. When decorating such openings, you can use curtains with mini-rollers.
The kit includes a roller rod, brackets, fishing line and clamps. To secure a curtain to a blind window, you need to do the following:
- Determine the size of the future roll by width and length.
- Connect the roller and the canvas as indicated in the instructions.
- Secure the open drum or cassette to the brackets using self-tapping screws (suitable for wooden structures), tape or mounting adhesive.
- The excess length of the canvas is shortened.
- A fishing line is threaded along the edges of the roll from the roller to the bottom, which is secured with clamps or simply tied tightly at the ends.
Installation diagram for curtains with fishing line on screws
The configuration of roller blinds for non-standard windows can be ordered in specialized stores or showrooms. They can also help you with installation if independent installation causes difficulties.
Detailed assembly sequence
- First, assemble the bracket and fix the parts until they click.
- Then double-sided tape is glued to the platform (if the installation takes place on it).
- The brackets are connected to the platform until there is a characteristic click.
- The structure is assembled on the windowsill first.
- Place it on the window sash and mark with a pencil the placement of the left and right landings. Then glue the pad into place under the markings.
- The right bracket is installed, and a shaft with fabric is put on it. Next, add the left one, make a note regarding the location of the left site. Then the left one is disconnected from the platform. The empty part must be glued to the marked place on the profile.
- You need to place the shaft in the right one and fix the left one.
- Then release the curtain and mark the position of the latch.
The process of assembling and installing curtains is quite simple, but requires precision and accuracy
Note! It is recommended to attach the curtain to the sash based on the width of the material. Double-sided tape can only be applied once. Although they are installed quickly in this way - in 10 minutes.
If you are not confident in your own abilities, it is advised to turn to specialists. It is recommended to call a surveyor by leaving a request on the appropriate website.
Another roller blind assembly is proposed, step by step instructions below. There are the following stages of installation on a “blind sash” using adhesive tape:
- Use fastenings without self-tapping screws. The window profile must be degreased in advance, markings must be made and the installation locations must be marked with a pencil.
- Then remove the protective layer of double-sided tape and attach the brackets. First, they are mounted where the manual or automatic control element will be placed.
Increasing the rigidity of the web due to the guides
When installing curtains, you can use an addition that will improve the straightening of the roll when unwinding. This is done using the strings that come with a number of models. They are equipped with special clamps, so connecting them is not particularly difficult:
- It is necessary to measure and cut the strings according to the length of the roll.
- At the bottom, on both sides of the frame, clamps are attached (with glue or dowels).
- The string is stretched from the roller to the holes on the bottom bar and clamps. This process is described in more detail in the instructions for the purchased product.
Installation diagram for curtains with a guide line
Properly secured strings allow the roll not to sag or bend, but to be even along its entire length, which eliminates the appearance of negligence and flapping of the web under strong air flow.
Step-by-step instruction
Before assembling the roller blinds, they sew the curtains. After cutting the fabric, a “bag” is sewn from it, it is turned right side out and the area that is not stitched is sewn up.
- In the part that will be the bottom of the curtain, mark a pocket for the weighting material, place the element there, and stitch it on the machine. However, this can be done in different ways: leave both sides open, close only one so that the weight can be easily removed if the curtain is washed. The most impractical option is stitching on all sides.
- The rod shaft is attached in several ways. The simplest is fixation with a furniture stapler (thread). An alternative is to attach it to the fabric with Velcro, one part of which is sewn to the fabric in advance.
- Rings intended for a cord or tape are attached at a certain distance from the sides and rod of the structure - 150-200 and 50-70 mm, respectively. To fix them, use two narrow strips of the same fabric. Another method involves making holes in the fabric; they are camouflaged with eyelet rings.
- Hooks are screwed into the weighting material. Fasteners are attached to them, which are pulled along the fabric, leading through the rings, they are sewn in the upper part. The tape or cord is attached to the wall using a hook screwed into the wall. When the clamps are pulled, the curtain roll will rise up, and vice versa.
- The rod holder is hung on the window - to the frame, opening. In the marked places of the wooden frame, holes are made for self-tapping screws or metal corners are fixed. If the window is plastic, use double-sided tape or plastic fasteners.
- The canvas is pulled over the attached shaft, the ends of the Velcro are aligned, then the mechanism is hung in its rightful place and tested. If the product unfolds (rises) unevenly, a more massive “candidate” is sought for the role of weighting agent.
Photo: roller blinds in the interior
PreviousCurtainsRoller blinds for plastic windows with photo printing
Next
CurtainsHow to install roller blinds on a plastic window
Description
Roller blind guides made of high-quality plastic are a necessary accessory for installing roller blinds. They are fixed along the edges of the window frame to ensure smooth movement of the canvas when lowering or lifting, preventing distortions. Includes 2 strips and double-sided tape for installation. Suitable for white and light-colored double-glazed window frames. The harmonious combination of reliability and durability with a low price makes this product a profitable purchase. Advantages: - aesthetic appearance; — ease of installation; — versatility; - practicality and durability.
