Andrey
11246 0 1
Andrey September 16, 2016Specialization: facade finishing, interior finishing, construction of dachas, garages. Experience of an amateur gardener and gardener. We also have experience in repairing cars and motorcycles. Hobbies: playing the guitar and many other things that I don’t have time for :)
If you decide to equip a private house or even an apartment with a balcony, you need to make a frame, which is the basis of the structure. You can do it yourself, even without the help of specialists, but for this you need to familiarize yourself with the theory. Therefore, below I will introduce you to the most important nuances of this work.
Metal frame for balcony
Materials and tools
Residents often wonder what is preferable: a metal balcony frame or one made of wood. The metal structure has a long service life and stability, but the purchase of materials will be more expensive in this case. If a wooden frame has been chosen for the balcony, the beams and slats used must be treated with antiseptics to prevent putrefactive processes and damage to the material by pests.
You can weld a structure for a balcony from a profile pipe. In this case, you will need to purchase reinforcement elements, corners, as well as a welding machine, which is used to connect the structural components to each other.
The most reliable is a metal profile made of galvanized steel.
The wooden frame is made of a square cross-section beam with a side of 5 cm and slats with dimensions of 2 by 4 cm. You will also need self-tapping nails of 5 and 7 cm, a hacksaw for working with wood, an electric drill with a drill and a Pobedit attachment. If work is carried out in a concrete house, 10 cm anchors will be needed.
Tools for measuring and leveling the structure are also needed - a construction tape or a centimeter, a square.
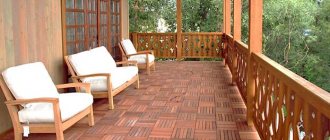
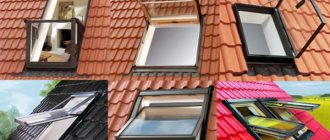
How to sheathe a balcony with your own hands, frame under corrugated sheeting
To cover a balcony, it is customary to use PVC siding, PVC lining or corrugated sheeting. Moreover, a metal frame is often used for outdoor work. And wooden ones are suitable for insulating walls from the inside.
Many craftsmen prefer corrugated sheets. This surface finishing option is the most rational.
After all, the material is made from light but durable sheet metal. Due to its positive characteristics, corrugated sheeting managed to achieve good resistance to external influences.
Related article: Blackout roller blinds - coolness on the hottest day
Corrugated sheeting is extremely popular due to its practicality and durability
When using profiled sheets, installation work is carried out quickly and easily. But to achieve this, it is important to correctly install the metal frame. To create it, profile pipes are used.
There are two types of design:
- Straight frame . It is placed parallel to the walls of the house. After this, the structure is insulated with mineral wool. Then it is necessary to sheathe the structure with corrugated sheets.
- Oblique frame . For its manufacture, special oblique extensions are used, which go in several directions. Some are located on the sides of the room, others in front. This design allows you to significantly expand the balcony.
There are two main types of frame: straight and oblique
A correctly installed frame will ensure quick and high-quality installation work on cladding and insulation of the balcony.
Methods of adding to an already constructed building
In the case where the presence of a balcony room was included in the design of the building, and at its base there are overlapping beams or a slab, the goal of the master is to enclose a certain space. In this case, there are no problems with arranging the frame on the balcony. But what to do when the need arises to attach a balcony room to a finished building?
Read more in the article “How to make a balcony with your own hands in an apartment.”
If it is made of high-strength materials, for example, brick or concrete, you can organize a suspended structure on brackets. The load in this case will fall on the walls. For dwellings made of building materials that are not durable (for example, slag and aerated concrete), a configuration based on one or two pairs of pillars is suitable.
It is also suitable for brick or concrete walls that have corrosion damage.
The base is an important part of the greenhouse
The base of the plinth will be the MZFL shallow-depth strip concrete foundation (since the greenhouse is light). In principle, a columnar foundation with a grillage made of timber, or even a foundation made of cinder blocks, would be quite suitable, but as usual.
It should be cast directly into the trench (with formwork installed above it), correctly laid in it and tied with reinforcement wire.
The ratio of cement and sand in the solution is 3 to 1 or 4 to 1 by volume. The formwork above the ground does not have to be made high - 20-30 cm is quite enough, and the rest of the base can be made from a block (but again ask yourself the question - do you need a high base?).
Pouring the greenhouse foundation into formwork and trench (directly into the ground)
After the mortar has completely hardened, we lay out the first row of blocks (piping) along the perimeter of the foundation. Starting the next row, in one of any walls of the greenhouse, leave an opening for the door. During laying, it is necessary to constantly check the correctness and verticality of the corners.
To securely fasten the corners of the trim into the base, we embed pins or plates. We level the surface of the base with a layer of mortar, creating a slope to the outside to drain the water.
Preparatory work
Before you start making the frame for the balcony, you will need to prepare the room. All things and furniture must be taken into the rooms. Remove cobwebs and dust, sweep floors, and wet clean. You also need to block off the area under the balcony so as not to cause injury to others.
To create the frame you will need to prepare metal profile pipes. It is necessary to ensure that the dimensions of the horizontal structural elements are the same. If it turns out to be high (more than 0.5 m), you can equip it with additional pipes. Those elements that will serve as a fence are welded to the bottom of the frame base.
It is recommended to first prepare the fence and only then weld it with the sectional components.
Is a balcony needed in a frame house?
There are three questions that call into question the idea of arrangement:
- how to choose a reliable mechanical fastening of the console to the ceilings;
- how to protect a structure from wind and snow loads;
- how to make waterproofing to protect the wooden frame elements from becoming saturated with moisture.
Doubts discourage builders from any desire to build a console: “Well, what the heck with a balcony,” you can hear the opinion of professionals about frame houses with a balcony.
However, the arguments for architectural decoration are much more significant.
- Firstly, houses with a terrace and a balcony look stylish. It's just beautiful.
- Secondly, an attic without an open outdoor area looks like a closet. It’s one thing when a homeowner observes the surrounding landscape from the attic through a narrow window. And it’s completely different when the world is under your feet. In addition, console extension problems can be solved quite simply. Therefore, the clarified question is: how to make a balcony correctly.
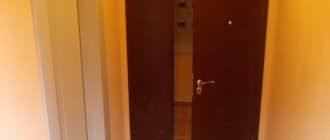
Dismantling the old frame
In the case where the loggia was already glazed, this part will need to be dismantled. Since it is risky to remove the bases along with their contents, individual glass elements are removed separately. Care must be taken to ensure that the glass is not damaged.
Sometimes window glazing has a device that is problematic for dismantling: there are many small elements tightly sealed using a special compound. This design is not easy to remove. It is recommended to seal the glass joints with adhesive tape to prevent them from falling out.
For dismantling work at high altitudes (above the second floor), you should not choose a time when there is a strong wind blowing outside. When removing an old metal fence, you will need to secure it with a rope.
Installation of a metal structure
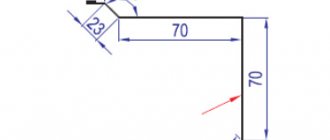
When performing work that does not involve expanding the area, it is necessary that the fence being mounted is flush with the concrete slab. Its height is usually around one meter. First you need to weld a subframe shaped like the letter P. The vertical posts are made from corners with a square section with a side length of 4 cm.
Welding the balcony frame will also require a crossbar - a 2 by 4 cm piece of metal profile is suitable for it, in which you will need to make holes. Sloping profile elements are attached to the sides. It is advisable to ensure that all corners of the frame are straight. This requires the use of a square during the assembly process.
A Complete Guide to Pipe Sizes and Specifications - Free Pocket Chart
The pipe specification number is a standard method for determining the thickness of pipes used in process plants.
Standardization of Forged Steel Pipe specifications and sizes begin with the era of mass production. At that time, the pipes were only available in three sizes: standard weight (STD), extra strong (XS) and double heavy duty (XXS), depending on the iron pipe sizing system (IPS).
Due to the modernization of various industries and the use of pipes with different pressures and temperatures, three sizes are not enough to meet the requirements. This will lead to the emergence of the concept of specification number, which combines wall thickness and pipe diameter.
Currently the pipe size is determined by two sets of numbers
- Pipe diameter/nominal diameter
- A pipe specification, which is nothing more than the wall thickness of the pipe.
What is the nominal pipe size?
Nominal Pipe Size (NPS) is a number that determines the size of a pipe. For example, when you say "6" pipe", 6" is the nominal size of that pipe. However, for pipes sized NPS 14 and above, the outside diameter is the same as NPS. To understand this concept, you must study how pipes are made.
Pipe production from NPS ⅛ (DN 6) to NPS 12 (DN 300) is based on a fixed outside diameter (OD). Thus, as the wall thickness increases, the internal diameter (ID) of the pipe decreases. So the NPS will be somewhere in between the outside diameter and inside diameter of the pipe.
Making pipe rated NPS 14 (DN350) and above is the nominal pipe size. The example below gives you more clarity on the concept.
| Outside diameter inches | External diameter mm | Thickness inches | Thickness mm | Inner diameter inches | Inner diameter mm |
| For NPS 2 Schedule 40 pipe | |||||
| 2,375 | 60,3 | 0,154 | 3,91 | 2,067 | 52,5 |
| For NPS 14 Schedule 40 pipe | |||||
| 14 | 350 | 0.438 | 11,13 | 13,124 | 333,3 |
From the above table, you can see that for NPS 2 the inside diameter of the pipe is close to the NPS of the pipe, and for NPS 14 the outside diameter of the pipe is the same as the NPS.
You can easily convert the size from inches to mm by multiplying it by 25.4 and rounding as shown below;
- Outside diameter over 16 inches is rounded to the nearest 1 mm
- Outside diameter 16 inches or less rounded to the nearest 0.1 mm
- Pipe wall thickness is rounded to the nearest 0.01mm
What is the diameter of the pipe (nominal hole)?
NPS is often referred to as NB (nominal bore). So there is no difference between NB and NPS. NB is also an American way of referring to pipe sizes. I have also seen that when pipe sizes are given in mm (DN), people refer to pipe sizes in NB. So when someone says 25 or 50, they mostly mean DN.
What is DN (nominal diameter) pipe size?
DN or nominal diameter is an international designation (SI or matrix designation) and also the European equivalent of NPS for indicating pipe sizes. You should note here that DN shows pipe dimensions differently than NPS.
A 2-inch pipe is simply referred to as DN 50. You can get any NPS or DN value by multiplying it by 25. Please see the table below for easier understanding. When you use DN, the other dimensions do not change.
| Nominal pipe size | Nominal diameter | Nominal pipe size | Nominal diameter |
| NPS (inches) | DN (mm) | NPS (inches) | DN (mm) |
| 1/8 | 6 | 20 | 500 |
| 1/4 | 8 | 22 | 550 |
| 3/8 | 10 | 24 | 600 |
| 1/2 | 15 | 26 | 650 |
| 3/4 | 20 | 28 | 700 |
| 1 | 25 | 30 | 750 |
| 1 ¼ | 32 | 32 | 800 |
| 1 ½ | 40 | 36 | 900 |
| 2 | 50 | 40 | 1000 |
| 2 ½ | 65 | 42 | 1050 |
| 3 | 80 | 44 | 1100 |
| 3 ½ | 90 | 48 | 1200 |
| 4 | 100 | 52 | 1300 |
| 5 | 125 | 56 | 1400 |
| 6 | 150 | 60 | 1500 |
,
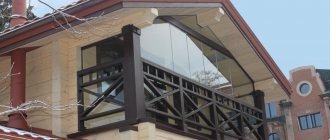
Roof assembly
It can be made of wood or metal. The first option is often found more attractive due to the lighter weight of the material. Since the strength factor is much more critical for the frame itself, a mixed version is often practiced, when it is made of a metal profile and the roof is made of wood.
Suitable logs can be purchased ready-made. They must be treated with a composition that prevents rotting and damage to the material by fungi. The required height of the front bar is 2 meters.
First, prepare the support for the structure. To do this, two-meter logs are nailed vertically to the wall, and then horizontal elements are placed between them. You also need to nail the beams on the sides. A board is attached at their height - it needs to be at the same level as the beams along the upper edge. Then vertical corner supports are made. They must be attached to the railings using corners.
The supports must be lined with bricks at the bottom and coated with diluted cement. The cross beam is also reinforced with corners. Then the inclined elements are installed. One end of them should be connected to the support beam, the other to the plank. The finished frame is coated with a stain and varnished.
Read more in the article “How to make a roof on a balcony.”
Installing sheathing on walls
Installation work depends on the material and design of the balcony parapet (fencing). If it is brickwork, which is quite rare, it is enough to screw bars of the appropriate section to it with dowels (the height depends on the intended insulation). For leveling, just like on the ceiling, you should use spacers or secure them with galvanized hangers.
In case of large differences, we attach them to drywall hangers
A more common situation is when a welded metal structure is installed as a fence, insulated with glass wool and sheathed on the outside with flat slate (built during the USSR). In such cases it is necessary:
- Partially disassemble the fence (remove insulation, sheathing and cut off some metal elements with a grinder);
- Install vertical bars. Fixation is carried out using metal corners, which are attached from below - with self-tapping screws - to the concrete (via a dowel) and to the beam, and from above - to the window sill.
- Cover the outside of the fence. For this, galvanized steel sheets can be used, onto which a mounting beam is pre-attached. After the preparatory work, the assembled structure is screwed with self-tapping screws to the previously installed vertical blanks on the inside of the balcony.
- Next, the horizontal elements of the sheathing are mounted (20x40 lath). The distance between the slats is no more than 40 cm, while a gap of 1 cm should be left between the bottom rail and the floor.
It is not always necessary to disassemble the outer casing; in such cases, installation work will be limited to points 2 and 4.
If there are door or window openings to be lined, the sheathing should be installed along their entire perimeter (except for the floor), as well as on slopes.
Installation of galvanized profile sheathing
On the side of the walls, at the corners of the balcony and on the door/window openings, U-shaped guides are mounted vertically. A rack profile is inserted into these guides (thus it is fixed at the edges). The profile is fastened along its entire length on mounting hangers using special self-tapping screws at intervals of 40-50 cm.
For more tips on installing beam sheathing, watch our video:
Subscribe