A greenhouse and a mini-greenhouse for seedlings are indispensable assistants for every gardener. In specialized stores they are not cheap and do not always fit in size. Therefore, the ideal option would be to make mini-structures with your own hands. The article will provide detailed instructions on how to do this quickly and with minimal financial costs.
What is it needed for
Mini-greenhouses are used for growing cultivated plants not only in a summer cottage, but also within the walls of a city apartment. It is suitable for planting whimsical and heat-loving varieties.
- Protects young plants from winds, drafts and precipitation.
- Provides the necessary climatic conditions for plants.
- Young seedlings do not get sick when transplanted into open ground, as adaptation occurs slowly and gradually.
- Caring for plants is quite simple.
- They are easy not only to install, but also to store.
Most summer cottages are small in area. Installing a full-fledged greenhouse is impossible. Since such structures occupy most of the site.
You may be interested in:
How to make a greenhouse with your own hands Building a greenhouse with your own hands is not the easiest task. But today there are tips on the Internet...Read more...
Features of planting and growing seedlings
To properly grow seedlings, you need to know some of the features of planting them.
How to choose a suitable place for a greenhouse
The main thing to consider when installing a greenhouse is good lighting of the area. If you plan to place it near the house, then it should be on the sunny side.
Optimal design location:
- the location of the bed is on a hill;
- if you need to install it in a lowland, then the soil must be drained;
- the orientation of the structure is from east to west;
- to protect from the wind, build a hedge or install a barrier up to 150 cm high and at a distance of 7–10 m;
- for a convenient approach, make paths of stone or gravel.
Preparing soil mixture for a greenhouse
At the selected location, you should dig a small pit 50–70 cm deep. Cover its bottom with layers of crushed stone (10 cm) and sand (10 cm) to create thermal insulation. Place humus or straw on top. The last layer is biofuel (manure). Install a greenhouse on this pit and fill it with light soil with added minerals and organic matter. The soil must also be water- and breathable. It is best to use the following mixture: peat, turf soil, forest leaves, humus (3:1:1:1).
Timing for planting seedlings
The exact timing of planting seedlings depends on the type of crop. But in general, you need to focus on the warming of the soil and air. The average air temperature should be +15...+18°C, soil temperature should not be lower than +15°C.
Seedling care
The most important thing in caring for seedlings is watering, fertilizing, loosening, and weeding. The schedule of watering and fertilizing depends on the crop, since some of them are more moisture-loving than others, and each plant has its own needs for nutrients. The main thing when watering is to carry out irrigation procedures with warm water and in the morning or evening. For fertilizing you need to use organic matter and mineral complexes.
Weeding and loosening of the soil must be done after each watering.
Did you know? The ancient Romans were the first to use greenhouses. These structures were mobile; they were taken out on carts to sunny places to better warm the plants.
Differences between greenhouses and greenhouses
All gardeners know that there are two irreplaceable structures on a personal plot for growing not only seedlings, but also adult plants. But there are significant differences between them:
- Height no more than 0.5 meters.
- It has no windows or doors.
- The greenhouse is heated naturally. For this purpose, sunlight and biofuels are used.
- You can change their location.
- These are temporary structures that are used mainly only for the summer season.
- Year-round use is possible in indoor conditions.
Kinds
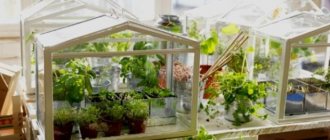
There are many types of miniature greenhouses. They may differ in size, shape and covering material. We present to you several popular types that can often be found both in the apartment and on the site.
"Home"
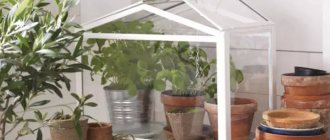
The design is small in size. Fits on any windowsill. Used for growing seedlings at home. The design is similar to outdoor greenhouses, but in miniature. Installation in several levels is possible. You can construct it yourself or purchase it at a gardening store.
Portable plank structure
It is a box-shaped structure that does not have a bottom. Polyethylene film or glass is used as a covering material. Its convenience lies in the fact that, if necessary, it can be installed anywhere on the site. Its main use is to protect plants from frost.
"Belgian"
To build this model you will need to dig a ditch. Build ridges with fertile soil in it. Cover the top with polyethylene, framed glass or a polycarbonate sheet.
Important!
It is best to construct this type with a pitched roof. You save space on your site.
Model "Butterfly"
Named after a small feature, which is the opening of the doors on both sides. They are visually similar to a butterfly. The main advantage is access to the plants, which is possible from both sides. It can be of any size, but in most cases they use small structures that do not take up much space on a personal plot.
Model "Breadbox"
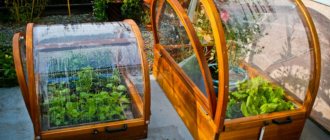
It has one sash that rises completely to the top. The roof is semicircular. The sash is opened by sliding it behind the main part of the roof. Access to plants is easy. Doesn't take up much space on the site.
"Shelf"
To build this type of greenhouse, an unnecessary rack or cabinet is suitable. The cabinet is left without a back wall and covered with polyethylene or covered with polycarbonate. Instead of doors, they use frames with the same covering material that covers the back wall. Visually, this design resembles a shelf from a store. Easily installed on any balcony or loggia of a city apartment and used all year round.
Model "Wall"
This miniature structure is installed near the walls of outbuildings or a house. Compact. Great design for small areas. The roof is mainly of a pitched type. There is a minus, but not significant. In winter it is necessary to constantly clear the snow.
Hi-Tech: technologies of the future
What you see is not screenshots from some science fiction film about an apartment of the future, where even greens for soup grow right in the kitchen in some kind of space device. These are actually real structures!
NIWA
So, one of the most famous inventions is the NIWA mini-greenhouse, developed by Nazaryuk and Morila from the city of San Francisco. Such a baby is capable of completely independently caring for any plant - maintaining its optimal temperature, humidity and light. All you need to do is plant the seeds and occasionally add water to the tank.
This is not only an interior decoration, but also sometimes the only way to grow a particularly capricious plant. How well the plant feels and how it grows can be seen directly from your smartphone. From it you can remotely control the necessary parameters. And the dimensions are only 46 cm long and 21 cm wide, and almost a meter high.
Already this year, the structures can be found on sale in Russia, and they cost approximately the same as a smartphone itself.
Smart Hetb Garden
Another similar development is Smart Hetb Garden based on the Click & Grow system. It automatically feeds the plants with moisture and fertilizers. This device runs on batteries, and to grow a certain variety you need to purchase a ready-made cartridge with that variety.
At first glance, this is a stylish plant pot. But in fact, such a mini-greenhouse consists of as many as six automatic interchangeable pots. Each of them has a special built-in lamp for illumination. The height of the lamp can be adjusted, covered with blinds and thus control the amount of light for the seedling. Moreover, such lighting can completely replace the sun for a plant.
There is no soil in this design - instead there is a water pump with a nutrient mixture for the roots. Those. The principle of hydroponics is fully involved here. You can grow both greens and berries, flowers and even fruits and vegetables.
Aerogarden
This is also a good home structure that allows you to grow something all year round. A person will have to spend no more than 10 minutes a month on monitoring plants, as the manufacturer assures. Cherries, fresh herbs, flowers - and any other vitamins.
Special lamps are built here that accelerate the growth and development of the plant. A smart microprocessor monitors all the needs of the plant, and a special system supplies oxygen directly to the roots of the plants. Greens can already be harvested 4 weeks after planting, and cherry tomatoes after 14 weeks. It turns out that after planting in such a unit, plants begin to develop 5 times faster.
Many people like this mini greenhouse because of its stylish new design. But there is no way to buy such a gadget in Russia - you can only order it from abroad. Although there is no doubt that soon craftsmen will learn to make something similar and cheaper.
Groubox: It's all about the rotation
But this is a complete miracle of technology. It was invented by an inventor from Canada. It is a wheel that occupies only 2 square meters of area. The plants are hydroponically and constantly rotating. The space savings are amazing!
Rotation also has its own meaning. So, thanks to changing gravity, moisture and nutrients are better distributed throughout the soil.
This thing can even be placed in the pantry. You can grow up to 30 kg of greens or lettuce per month, which is enough for a large family.
From scrap materials
A good solution for arranging a personal plot would be small greenhouses that do not require any financial investment. And they will take up very little space on the site.
Plastic bottles
To build this mini-greenhouse you will need a simple bottle of 5 to 10 liters. Making a greenhouse out of it is simple:
- Cut a rectangular hole. There is no need to cut one side. This will be the door of the future greenhouse.
- Fill the bottle with nutritious soil.
- Plant seeds are planted.
- After pipping and rooting of the seeds, the greenhouse is opened.
Important!
Don't forget to make several holes in the side of the bottle that is parallel to the door. This is a drainage system to remove excess moisture.
Old tin barrel
From an old barrel that has not been used for a long time, you can make a mini-greenhouse. This process is simple and consists of several steps:
- Cut several holes from the sides of the barrel.
- A dense covering material, for example, double folded polyethylene film, is attached to the upper edge of the barrel.
- The holes should be located at a level at which it will be convenient for you to monitor the plants.
- Fill the barrel with soil and plant plants in it.
Window frames
A mini-greenhouse made of this material is installed once and should not be moved again. Old window frames are heavy and massive. To install them, you will need to build a foundation. Further, construction is carried out as follows:
- Window frames are cleaned of old paint and coated with a product to protect the wood from rot and insects.
- For the frame you will need a stand (1 piece) and a pair of straps.
- The floor is concreted.
- The roof is made of a gable type.
Rules for caring for seedlings
Transplanting grown seedlings into a greenhouse is not difficult, but properly caring for them throughout the entire ripening period is a much more difficult task. Here are some tips to help you grow strong, healthy plants:
- Do not rush to pick seedlings (transplant them from small individual containers to large ones). Not all crops tolerate this operation well. In most cases, you can do without picking at all.
- Harden off the seedlings before planting in the greenhouse. The minimum hardening period is 3-4 days. On the first day, the plants are kept at a temperature of 11-15 degrees for no more than 2 hours, on each subsequent day one hour is added, without lowering the temperature.
- Don't follow a strict irrigation schedule, instead check the soil moisture daily. In several places, dip your finger into it 1.5-2 cm - if it remains dry, then it’s time to water the seedlings.
- Do not use fertilizing and fertilizers for the first month after planting seedlings if you added manure or compost to the soil.
- Mineral fertilizers should contain approximately equal parts of nitrogen, phosphorus and potassium and be applied according to an individual scheme for the variety, usually every third or every fourth watering.
About flower seeds
Before sowing, it is recommended to soak flower seeds in water for 12-24 hours, and you can safely use growth stimulants.
Materials for production
Construction of a mini-greenhouse is a process that is based on the use of improvised means. It can be created from anything. Mainly used:
- plastic;
- metal profiles;
- wooden bases;
- plastic film;
- polycarbonate sheets;
- glass.
If the design of your mini-greenhouse has an arched shape, then its construction requires the installation of a flexible frame. Common materials for such bases are plastic and metal profiles. Wood can be used, but it is highly susceptible to rotting. An indispensable, modern covering material is polycarbonate. It is also possible to use plastic film and glass.
Glass makes the structure heavier and therefore, first of all, you will need to take care of strengthening the frame or installing the foundation.
Professional gardeners use a certain covering material for certain models of mini-greenhouses:
- Polycarbonate sheets are suitable for the “Butterfly” and “Breadbox” models.
- Polyethylene - for those structures that will be located in an apartment, house, or on a balcony.
- Glass - for stationary greenhouses on a personal plot.
How to make a dome greenhouse with your own hands from film with a wooden frame
pinterest.com
- Assembly difficulty: high.
- Foundation: desirable.
- Cost: high.
- Variations: the film can be replaced with polycarbonate or glass, and the frame can be made of profiles or pipes.
A domed or geodesic greenhouse attracts primarily with its unusual appearance: it consists entirely of many triangles and hexagons. Other advantages include high structural strength and best light transmittance. The geodesic dome has only one drawback: it is difficult to manufacture.
- The dimensions of such a greenhouse are selected individually, based on the required area. Since the frame design is quite complex, calculations are the most time-consuming part of the project.
- In order not to get confused and take into account all the nuances, it is convenient to carry out the calculation using a special calculator. In it you can set the dimensions, select the “thickness” of the frame and get a list of all the necessary parts for assembly with dimensions, as well as their approximate cost.
- Regardless of its dimensions, a domed greenhouse is highly durable and is not afraid of winds, so there is no need to make a foundation for it. However, since the construction of a structure is very labor-intensive, it is rational to extend its service life and equip a lightweight strip foundation for attaching the frame.
- The ribs of the structure consist of triangles, which, in turn, are assembled from a wooden batten according to a template. First you need to prepare the required number of such triangles.
- The greenhouse is assembled like a magnetic construction set from childhood. Starting from the bottom, rows of triangles are assembled one after another, which are fastened together using self-tapping screws and form a dome. If everything is calculated correctly, it will close at the top and will be perfectly shaped.
- One of the triangles in the roof is made folding or removable to provide ventilation. The door is either installed in a polygon shape, or made in a traditional shape with a mortise frame.
- The film covers the finished dome or is stretched over each triangle at the assembly stage. In the first case, it will be easier to replace the film when it breaks. The second one gives a more aesthetic appearance. Which one to choose - decide for yourself.
Main disadvantages
Like any design, a mini-greenhouse has not only positive aspects, but also negative ones. These include:
- do not tolerate strong winds well;
- the range of plant varieties grown is narrow, since the height of the greenhouse is small;
- It is difficult to replace the covering material if it is damaged, since the attachment to the frame is complex.
How to choose a design
Each garden, country house or other plot of land is unique. It may differ in the landscape features of the area, its size and, of course, the composition of the soil. In order to create ideal conditions for plant growth, you should carefully choose the design of a mini-greenhouse. To do this, you need to consider:
- individual characteristics of the land plot;
- what area will be allocated on the site for it;
- what lighting will be used;
- what volumes of seedlings or plants will be grown.
Taking into account all of the above, you can choose the desired type of mini-greenhouse for your plot and seedlings.
What do we grow in a mini-structure?
First of all, seedlings. An indoor greenhouse will save a passionate gardener who misses his beds and garden greenhouses from the winter blues. There are many vegetables that you want from the very early spring. A mini-greenhouse will allow you to grow garlic all year round , enjoy fresh herbs, cherry tomatoes by spring, and ripe strawberries by early summer.
A mini-greenhouse installed on the site can be used for experiments by enthusiastic breeders and for growing flowers and low-growing vegetable crops.
A mini-greenhouse will also be a good help for keen gardeners, especially those who like to experiment and grow flowers from seeds.
Installation of different types
Mini-greenhouses, depending on the type of supporting structures, can be built using several different methods. For greater clarity, let's start step-by-step construction recommendations with a mini-greenhouse that does not have a frame.
Such a greenhouse consists of beds covered with plastic film or other identical material. Sow the seeds and cover them on top with covering material, and press them along the edges with bricks and wooden slats.
Arched mini-greenhouse, instructions
To build an arched greenhouse you will need to follow the following instructions:
- For construction, you need 5-6 arcs made of plastic or metal profile, plastic film, a couple of meters of wire and about 20 clamps.
- Arcs are made with your own hands or bought in a store.
- They are installed at a distance of 35–45 centimeters from each other.
- To strengthen the frame, wire is pulled between the arches.
- Cover the resulting structure with film. Then they attach it on one side with clamps.
- On the other side, the film is attached to a wooden batten. It is from this side that your greenhouse will open.
- The sides of the structure are also covered with pieces of polyethylene and pressed to the ground with a brick or wooden beam.
Portable polycarbonate, instructions
To build a portable greenhouse from polycarbonate leaves, a more labor-intensive, but no less interesting process. To do this you will need:
- wooden slats;
- self-tapping screws;
- awnings;
- lever.
Instructions that must be followed when building this mini-greenhouse:
- They make a base frame. It should resemble a box with a slanted top.
- A frame is assembled from slats. It is used to create a greenhouse roof.
- A piece of polycarbonate sheet is inserted into the frame.
- A support for the frame - the roof - is constructed from a wooden block.
- Attach a hook to the lid to secure the frame to the block.
These construction methods are very simple to install, but they provide seeds and seedlings with optimal climatic temperatures and humidity for germination and further growth.
How to make a glass greenhouse with a metal frame with your own hands
juliana.ru
- Assembly difficulty: high.
- Foundation: required.
- Cost: high.
- Variations: to make the structure lighter, you can make the top from polycarbonate or film.
The most correct, but rather labor-intensive and expensive option for a greenhouse. The main advantage of glass is its excellent light transmittance and durability. However, due to the heavy weight of the structure, a strong metal frame and foundation are required. In addition to arranging a strip foundation, the difficulty also lies in the need to use welding.
- When it comes to choosing sizes, a glass greenhouse is no exception - everything is strictly individual and taking into account the available materials.
- The impressive weight of glass and metal frame requires a full foundation. Usually a trench 30 cm deep and 20 cm wide is dug around the perimeter, wooden formwork 20 cm high is installed on top and the whole thing is filled with concrete. Also, before pouring, anchor bolts are inserted into the formwork to secure the frame.
- A metal channel or corner is attached to the resulting base using anchors. Then racks 1.6–1.8 m high are welded to this frame from two folded corners 45 × 45 mm. At the top they are fastened with longitudinal sections of the corner.
- Next, rafters from the same double corners are placed on the resulting box. At the bottom they are welded to the posts, and at the top - to another corner, which acts as a ridge beam.
- A door is inserted into one of the walls, and a window is installed in the lid or wall for ventilation.
- The glass is installed in the frames obtained by using double corners and secured with homemade gluers - thin aluminum or steel plates bent in the shape of the letter Z. The gluer is attached to the corner with one hook, and to the glass with the second.
