What time of year is a greenhouse needed? 2. Making a mini-greenhouse 3. Ways to increase the usable area of a window sill 4. How to make a home shelving unit 5. Choosing lighting
There are many ways to make a mini greenhouse.
Advice Knowing that the sowing of main crops begins in February, purchase and prepare in advance all the necessary material for making a home greenhouse for seedlings. Slow, careful and attentive work always brings more benefits and joy in the future.
What plants need a mini-greenhouse? It can be used to grow any young plants.
How to make a mini-greenhouse for seedlings with your own hands
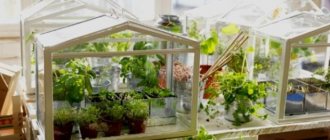
A greenhouse for a window for seedlings is easy to make from available materials. The shape of an indoor greenhouse can be any. Designer - in the shape of a bread box or a house - or very simple - from ordinary food plastic containers.
It is advisable to make the lid removable to facilitate maintenance and watering. Most often, gardeners create a mini-greenhouse in the shape of a house. They can be understood. This is a comfortable, stable design with transparent walls. With proper care, it will last more than 10 years.
The shape of the structure depends on your desire and design talents.
A mini-greenhouse in the shape of a breadbox is made of thin PVC and polyethylene pipes. Any pallet or plastic tray will serve as the bottom. A greenhouse-house will look beautiful, made of wood and plexiglass or real glass.
Requirements for a mini-greenhouse for seedlings
In order for a greenhouse to bring benefits and aesthetic pleasure from its contemplation, it must meet the following requirements.
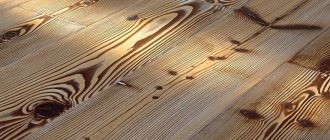
- Choosing the right material for manufacturing. It should not overheat, quickly rust, mold or swell from moisture. The required material should help maintain a comfortable microclimate in the greenhouse. Treated (protected) wood and plastic are considered ideal. The metal heats up quickly and is susceptible to corrosion.
- A home greenhouse must be made of high-quality materials and made to the highest standard so that it lasts for many years.
- The appearance of the mini-greenhouse should be attractive and neat. So that it decorates the interior, and does not turn it into a utility room.
- Easy and free access to plants. Young shoots require a lot of attention. Daily ventilation and frequent watering should not cause difficulties.
A home greenhouse must be made of quality materials.
How to make a mini-greenhouse: useful tips
A homemade mini-greenhouse can be easily made from available materials.
- The walls of a mini-greenhouse can be made from thin PVC pipes, wood, dense polyethylene, polycarbonate, glass or plexiglass.
- Transparent walls look very beautiful, they are easy to care for, retain heat well and will last a long time.
- The use of polyethylene on the walls makes this greenhouse inexpensive, easy and quick to manufacture. When the time comes, it will be easy to change it to a new film. And your mini-greenhouse is like new again!
- The bottom can be any pallet or plastic tray.
- Make a sketch of the future greenhouse with exact dimensions. Consider the thickness of the walls so that the structure is stable. Pay special attention to the height of the greenhouse. It must match the height of the plants being grown.
When there is not enough space on the window sills, a shelving unit will come to your aid. A shelving unit is a structure that occupies the entire window space. Consists of several parallel shelves mounted on vertical posts.
Many gardeners prefer wooden structures.
Why are greenhouses needed?
What is a greenhouse? It is a structure for the best cultivation of seedlings. It can be built from available materials. They also come in big and small. They are able to provide good growing conditions.
Several requirements for a greenhouse:
- Easy portability (depending on the size of the greenhouse).
- The required dimensions are small and large.
- Availability.
- The strength of the structure.
- There is no need for constant heating.
A couple of types of greenhouses:
- A small greenhouse is a small structure that is suitable for compact growing. Its compactness allows you to place it on a windowsill or other small spaces. Another plus is its portability. Often, a special slope is made to ensure that the rays hit the seedlings. It is effective for growing seedlings at home.
- To make a strong greenhouse you need wood, it needs to be assembled like a lattice. That is why this makes the greenhouse durable and long-lasting.
- In order not to bother with a large greenhouse, you can simply build a convenient and easily portable greenhouse. This greenhouse does not have a bottom, which allows it to be moved without any difficulty. The plants will feel great and will accelerate the growth process. Therefore, a portable greenhouse is an excellent structure.
- Shelves help well with a large number of seedlings. Usually there are four shelves, but you can build them yourself. This is one of the types of greenhouses that take up little space but can accommodate a huge number of seedlings. But there is also a huge disadvantage: the rays from the sun may not reach the seedlings and thus the growing period will increase.
What are we growing?
The choice is great and it depends only on your enthusiasm for selecting varieties of vegetables that can grow in a mini-greenhouse on the windowsill.
- greens - onions, dill, parsley, celery, mint, etc.;
- tomatoes of the Balcony Miracle variety - yield up to 2 kg per plant (the weight of 1 fruit is no more than 30 g), suitable for fresh consumption, canning and freezing;
- hot peppers. A bush with fruits can become a decoration for your interior, it looks so beautiful; leaf salads - watercress, arugula, spinach;
- early radish;
- seedlings
Some craftsmen even manage to grow cucumbers on their windowsills.
Why a greenhouse?
In an apartment, it is best to do seed forcing in a mini-greenhouse . Some will ask: why? After all, the apartment is already warm and light, let it grow the old fashioned way in boxes! They've been growing this way for decades! That’s right, but how much effort can be saved during care and how much the quality of seedlings can be improved if you use a mini-greenhouse for this!
The conditions in the apartment are far from ideal - the central heating dries out the air, winter-spring sunlight is insufficient for plants, cold air blows from the window, etc. And tender seedlings need greenhouse conditions.
How and from what to make: options
In addition to purchasing a ready-made greenhouse, you can make it yourself at home. It can be a small structure or a large rack, it all depends on what exactly will be grown. For orchids or other flowers that need to be sprouted from seeds or bulbs, plastic bottles are suitable: they are cut into pieces and a greenhouse is assembled from them. The lower part serves as a base where you can pour soil or put peat tablets, and the upper part is put on the plant and creates a suitable microclimate. It can be easily removed for ventilation and watering.
If you need to grow more plants, you can use an old aquarium with glass walls and a lid that allow sunlight or artificial light to pass through well. If there is no aquarium itself, any box covered with glass will do, through which the necessary light will shine through. The most difficult thing is to create a rack greenhouse, but the harvest will be much greater than with any of the above options.
To create a rack, you need to think about its dimensions and the materials from which it will be made. It is best to use plexiglass for shelves, but you can also replace it with regular chipboard or plywood. On the finished body, you need to put on a plastic cape that has zippers or think about another option for how to quickly get inside for watering. Be sure to make such a rack with lighting from above, so that you can always compensate for the lack of sunlight.
If there is a lot of crop to be germinated, then it is most convenient to use a rack, since here everything can be watered and ventilated at one time. The same applies to lighting: if there are transparent shelves, it reaches all plants evenly. The rack itself can be of any size and dimensions, depending on the availability of space in the room and the number of crops to germinate. A design with three plexiglass inserts will be the most optimal, because it will not take up much space, will be easy to care for, and all plants will have the same and optimal germination conditions.
The nuances of the differences between a greenhouse and a greenhouse
If we consider only the design, and not the technical equipment, then a greenhouse differs from a greenhouse in size and method of arrangement.
An ordinary greenhouse literally “spreads” above the ground and has a temporary frame of separate sections without a base, which is installed directly on the ground. Its task is to ensure the growth of greens, vegetables and root crops in the spring, when the probability of night frosts is high. More often the frame is covered with film, less often with sheet transparent materials. Maintenance of the greenhouse and care of seedlings occurs “from above” with the covering partially removed. When stable warmth arrives, the greenhouse is dismantled until the next season, and the plants remain in the open ground.
A conventional greenhouse has a more solid design. It may have a small foundation and a stationary place assigned to it on the site. The dimensions of the greenhouse in length and width can be any; the shape and type of the roof also differ for different models, but at the highest point its height should ensure free movement of a person. The most “advanced” samples can have their own heating, lighting, ventilation and irrigation systems, with automatic temperature control and regulation, a timer for turning on the fan, lamps and automatic watering.
The mini greenhouse occupies an “intermediate place”. It is also low and compact, like a greenhouse, and is served “from above” or “from the side”. The translucent material can be film, cellular polycarbonate or glass. Its design is more rigid, although even when assembled it is “mobile” and can be easily moved.
The differences from a greenhouse in the simplest models for a summer house and plot are so insignificant that many manufacturers and sellers call this category a “mini-greenhouse greenhouse.”
A technically equipped mini greenhouse can have its own “life support” systems, including growing plants using hydroponics and aeroponics technology.
Home greenhouses
Anyone who has been involved in gardening and home floriculture for a very long time remembers the times when seedlings had to be manually knocked together into wooden boxes and covered with glass or plastic film. Bulky, heavy and inconvenient, they also did not last long, since the wood quickly rots due to contact with wet soil. Today, a variety of plastic containers or packaging can be used for mini greenhouses - light, transparent and absolutely unaffected by moisture, it is used with pleasure by those who like to grow a vegetable garden on the windowsill. And for those who approach any task thoroughly, manufacturers offer ready-made designs of varying degrees of complexity - from simple containers with a translucent lid to automated devices that can independently maintain specified growing conditions.
How to increase the usable area of the window sill
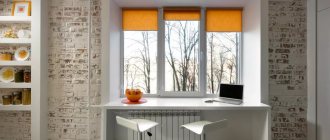
Avid gardeners and flower growers know that there is never too much space. I would like to plant as much as possible, but often the space does not allow. Even the widest window sills cannot cope with this task. I propose to consider several ways to increase the useful area of window sills.
Projecting edge
The easiest way.
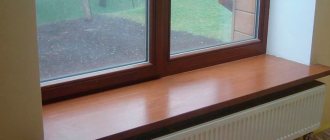
- A solid sheet of plywood, chipboard or other material that will be at hand is placed on the windowsill. It should be a single piece that will extend 40–50 cm beyond the edge.
- We choose a material at least a centimeter thick. If it is thin, for example fiberboard, then do not place long seedling pots on the protruding edge.
- The fiberboard sheet will easily support cups of seedlings. The protruding edge will also protect the seedlings from hot air flows from the battery.
Plywood can easily support small cups of seedlings.
Creating an additional top shelf
- We make reliable fastenings above the window. We attach a rope or cables to them, on which we install the shelf.
- On the side of the shelf you can screw in self-tapping screws with a loop through which the rope is threaded.
- This entire structure must be very durable and withstand a load of at least 9–10 kg. The width of the shelf should be wider than the glass in the window, so that the shelf does not press on the glass with its weight, but rests on the frame.
Rack with tiers
On a wide window sill you can make a high rack with several tiers. We place the tiers at a distance of 40–60 cm from each other. The width of such a rack also varies from 30 to 50 cm.
The shelving looks impressive.
Preparing to create additional space on the windowsill
- Select the desired window sill. Ideally, these will be southern windows or those facing southeast. We will arrange additional lighting on the window sills on the north or east side.
- We do general window cleaning. We carefully clean the glass to allow as much light as possible. Wash the frame. In winter, condensation forms on frames and glass. High humidity causes mold to appear in the corners and bottom of frames. We thoroughly wipe and dry everything so that the plants come into a clean space. For those who don’t have this, just wash the windows.
- If there are gaps in the frames, then we carefully seal everything.
- You can insulate a window by placing another glass along it. The second glass will protect the leaves of the plants from contact with the main, cold glass, and will not allow the root system of those plants that will stand near the glass to become overcooled.
Types of greenhouses
Greenhouses for summer cottages come in a wide variety of shapes. To decide what type of greenhouse yours will be, you should get acquainted with the main ones.
Table. Types of greenhouses.
| Type of greenhouse | Description |
| Breadbox | A greenhouse that opens like a regular bread box. It can be factory-made or home-made. It is convenient because the lid does not tend to fall down and does not need supports, unlike, for example, a “butterfly”. |
Arched, arc | One of the simplest greenhouse options. Several plastic or wire arcs are stuck into the ground along the bed and covered with spunbond or polyethylene. It is quickly disassembled and assembled, and this process can be carried out by almost any gardener. |
Thermos | The lower part of this structure - the base - is recessed into the ground; only the greenhouse lid is on the surface. This method of arranging a house for plants allows you to retain heat inside the structure longer. |
Butterfly | The greenhouse is arched or like a house, has two doors that open outward. Can be produced in a factory or made by hand. Provides uniform access to plantings on both sides. |
| House, gable | One of the simplest types of greenhouse is two battens connected at the ridge and covered with polyethylene or other material. It is installed quickly and easily, but is unstable and is used more often as a temporary portable structure. |
Each of the above types has certain variations, supplemented by one or another element. For example, an ordinary greenhouse-breadbox can be installed not on the ground, but on the base, thereby making it taller. There are also a lot of greenhouses made with your own hands from scrap materials - for this you use ordinary sports hoops, window frames, headboards and much more. Sometimes it’s enough to rummage around in the barn at the dacha, where unnecessary things are stored, and find several items that can easily get a new life in the form of a greenhouse frame. All you need is a little skill and imagination.
Greenhouse-breadbox on a wooden base
Cheap greenhouse made from scrap materials Greenhouse made from an old barrel Greenhouse made from straw and a glass frame
Tips for choosing materials
In order for a home structure to meet all the requirements for growing plants, when making it yourself, a key role is played by the selection of suitable materials.
The most practical and convenient option for a mini greenhouse is a shelving unit mounted on a window and secured around its perimeter. To ensure that the structure lets light into the room, it is better to make the shelves not from wood or plastic, but from plexiglass. It is transparent, but at the same time quite durable, but when purchasing you should choose sheets with a thickness of 10-12 mm.
If you want to make a closed greenhouse with your own hands, buy plastic containers with a transparent lid or special containers with peat tablets inside in advance.
Self-production of a film greenhouse
A greenhouse that is not inferior in functionality to commercially available ones can be made with your own hands.
Preparation of materials and sizing calculations
To create a balcony greenhouse you will need the following materials:
- aluminum, steel or metal-plastic pipe d 10-25.4 mm;
- mounting fasteners (sheet plastic 20-30 mm);
- bolts with nuts and washers – d 6-8 mm;
- polyethylene film (preferably reinforced);
- double sided tape;
- Velcro tape;
- plastic or metal grid for arranging shelves.
Plastic pipes for frame
Tools:
- metal saw;
- pipe cutter for m/p pipes;
- drill-driver;
- set of metal drills;
- file;
- screwdriver with a set of bits;
- retractable construction knife.
The dimensions of the greenhouse are chosen arbitrarily, taking into account the size of the balcony (loggia) and the expected number of seedlings that you are going to grow.
Considering the design of balconies, most of which have a parapet that blocks natural light, light film greenhouses should not be placed on the floor, but in such a way that the lower tier of plants is located at the level of the upper edge of the parapet. If you plan to place the greenhouse on the floor, you will definitely have to arrange additional lighting for the lower shelves.
Assembling a frame from pipes
Assembling a greenhouse on a balcony with your own hands is done from pre-prepared (cut to size) pipe sections. If metal pipes are used, it is convenient to use rectangles sawn from sheet plastic, 20x40x40 mm in size, with holes drilled at the ends equal to the diameter of the frame pipes as fastening elements. The ends of the pipes are inserted into the holes of the plastic fasteners and, if necessary, secured with short self-tapping screws.
Arch frame option
Diagram of a mini-greenhouse made of PVC pipes
The shelter is cut according to the assembled frame. Allowances should ensure free, effortless installation of the shelter on the frame and its easy removal.
Manufacturing and installation of the roof
The roof of the greenhouse for the balcony is made flat, since there is no threat of water accumulating on it after precipitation. Four strips corresponding to the width of the sides of the frame are cut out. Using double-sided tape, they are attached to the roof sheet on one side. The three panels are fixed together using double-sided tape.
Assembling the frame - step-by-step instructions
The front strip of the film is made folding. To do this, Velcro tape (the fleecy part) is glued to the sides with double-sided tape. Additionally, it should be secured with stitching on a sewing machine or using staples with a stationery stapler. In the same way, the second part of the Velcro tape with hooks is attached to the edges of the film sheets.
In the area of the roof, four ribbons are glued with tape to tie the rolled up front sheet of film during watering, weeding, and ventilation.
You can take a reduced diagram of a garden greenhouse as a basis.
In terms of its characteristics, a self-made structure will be in no way inferior to “industrial” greenhouses purchased in a store. Its big advantage will be its dimensions, taking into account the size of the balcony and the number of plants.
Homemade zipper cap
Primary requirements
It is quite possible to build a high-quality home greenhouse yourself, but it is very important to remember that it must meet a number of specific requirements.
Let's get acquainted with them before moving on to a closer acquaintance with mini-greenhouses.
- Such a design must necessarily create the most comfortable conditions for the plants being grown, creating an optimal microclimate for them. Only in such an environment will the plantings actively grow and develop, and then produce good and healthy fruits.
- The greenhouse must be accessible for caring for planted plants. The owners should freely inspect and water the seedlings, as well as loosen the soil in the selected container when necessary.
- In addition, a small greenhouse should look neat and aesthetically pleasing, fitting harmoniously into the existing interior. If you neglect this rule, then the atmosphere in the room can literally be ruined by a mini-greenhouse.
- A small greenhouse must be as reliable and durable as possible. Ideally, such designs are made with the expectation of repeated use.
- Before you move on to arranging a greenhouse on the windowsill, you must make sure that it is located in optimal isolation from the windows. Otherwise, the cold air entering the room can lead to the death of the plantings.
- Mini-greenhouses should never be located next to permanent heat sources.
- It is permissible to place a small greenhouse in the chosen place only after making sure that accidental movement of household members will not knock it over and disturb the seedlings.
You also need to take into account that such grounds for young plants should not make the living space darker. A home greenhouse should not cause discomfort to those in the room. That is why such products are best placed on the windowsill in rooms that household members rarely use.
However, if we are talking about an apartment of a modest size, then following this rule will not be so easy. For this reason, owners often have to put up with certain inconveniences that mini-greenhouses can cause. You can also equip a small greenhouse that will not be tied to a natural light source.
Requirements for home greenhouses
Whatever the design of the home greenhouse, it must meet certain requirements:
- Create comfortable conditions for the cultivated crop, provide it with the most favorable microclimate;
- Be easily accessible for plant care: inspection, watering, loosening, etc.;
- Look aesthetically pleasing and fit perfectly into the interior of the room;
- Have sufficient strength and reliability. Ideally, a greenhouse should be designed for repeated use.
It is also advisable that the “nurseries” for your plants do not shade the room and do not create discomfort for those who are in it. Therefore, it is best to arrange a mini greenhouse on a window in little-used rooms. But it can be difficult to do this in a small city apartment, so you have to either put up with temporary inconveniences or construct a greenhouse without reference to a natural light source.
Vegetable garden on the windowsill
We will describe the most popular and convenient designs below. Among them there are both finished products offered by well-known domestic and foreign manufacturers, and greenhouses that are easy to build with your own hands.
Purpose
Small home greenhouses are made in order to provide an optimal microclimate for plants of various types grown in apartment conditions. The first greenhouse structures were used back in the 18th century, but many historians believe that they were used earlier. If you approach the arrangement of a small greenhouse competently, then the owners will have an excellent opportunity to grow even the rarest plants in any quantity without leaving home.
A microgreenhouse can be used not only for growing healthy fruit or vegetable seedlings, but also for growing various varieties of flowers, for example, tulips or orchids - it all depends on the wishes of the owners.
Characteristics of greenhouses for seedlings
In order for seedlings to grow quickly, it is necessary to comply with the requirements. An important factor is the environment. The greenhouse will help maintain the environment, and the seedlings will grow rapidly if, of course, the requirements are met.
For many people, a greenhouse is necessary because it allows them to grow seedlings quickly and efficiently.
- Most often, people who want a convenient and easily portable greenhouse choose a mini greenhouse. Plants and seedlings also have their own requirements to grow well.
- The advantage of a greenhouse is that the cost of consumables is low. Therefore, anyone can build a greenhouse. You can even build it from leftover materials.
- A huge amount of time will not be required for production. It all depends on the size of the greenhouse. This must be taken into account. So for many this will be a huge plus.
- For many beginners, devices and structures for growing seedlings and plants will be necessary. But when choosing an auxiliary structure, you need to analyze whether it is needed at all. A greenhouse is a necessary structure that can be easily portable, but also not movable and huge.
The existence of greenhouses is extremely popular among gardeners since the greenhouse has everything necessary for high-quality cultivation.
But a greenhouse and a greenhouse are two different things. The size of a greenhouse is small, up to 1.5 m, while the size of a greenhouse is huge, from 6 m.
But there are also similar designs to greenhouses and greenhouses. Some people use them all year and equip them as needed.
Types of mini greenhouses
If you are thinking about creating a greenhouse at home in order to be able to grow fresh herbs and prepare seedlings for planting in a garden bed, you need to consider all types of modern designs and decide which one will be most convenient in a particular room. For an apartment, the best location for a greenhouse for young plants would be a window opening on which you can build both shelving and a small greenhouse.
Parsley, dill or onions are usually grown on the window, which is what is most often used for food. If the purpose of the greenhouse is to grow seedlings for the garden, then it is most convenient to move the entire structure onto the balcony. In this case, you can afford a more bulky greenhouse, where it is possible to place a large number of trays with soil, where the seeds will already be sown. A balcony greenhouse will produce results when all the conditions for the growth and development of plants are present. If there is not enough light or the air temperature is below normal, seed growth will be difficult, if not impossible.
Simple greenhouse designs
To create a greenhouse at home, you can buy a simple greenhouse and start growing any greenery. The simplest design involves a reduced variation of country greenhouses, where instead of a large room made of polyethylene or glass there is a small rack on which a special polyethylene cover is placed. Usually the frame of the rack is made of metal, but at home you can also make a wooden version. For ease of care and watering, the polyethylene cape has zippers. By unfastening them, you can get to the required area without opening the entire greenhouse.
Racks can have a wide variety of dimensions, which are selected individually based on the available space at home. The height may also differ, depending on the tiers of the structure; there may be two or more of them. Usually, racks with more than five shelves are not used, because it makes it difficult to care for plants and view their condition.
If there is no need for a large greenhouse, you can use a tabletop type, which is somewhat reminiscent of an aquarium, but is made on the principle of window frames for outdoor polystyrene structures. If you want to purchase something more powerful, then in this case automatic systems will be most productive.
Automatic
If a simple structure is a home for plants, where a comfortable temperature is created for them, and all care is done by a person, then automated greenhouses take on these functions. Such systems can be partial (with a certain set of functions) or complete, where a person is not involved at all in the process of caring for plants. These devices contain phytolamps that provide the necessary light for growth; an automatic watering system that allows you to dose the moisture supply; ventilation, which renews the air and provides the full range of conditions that are necessary for the proper growth of plants.
The advantages of such systems are that there is no need to look for a convenient or suitable place for them, since they can cope with any location, be it a window sill or a basement.
There are several options for such automatic greenhouses.
- Grow boxes are a closed system with autonomous lighting, air supply, and light reflection. An important feature is the ability to choose the type of operation of the device depending on what exactly will be grown in it. Plants can be planted in such a box either in a nutrient mixture or in hydroponics.
- Thermoboxes are convenient to use in apartments. They can be placed both indoors and on the balcony. This device is not afraid of even negative temperatures and can independently regulate the microclimate inside so that the seedlings are comfortable. The device independently waters the plants, controls the supply of nutrients, and turns the lamps on and off at the required time. You just need to place the seeds in the box, and then the machine will do everything itself.
- Aerogarden is a tabletop mini-greenhouse where greenery grows using aeroponics (drops of a solution with nutrients in which the root system of the seedlings is located). The device not only helps to create ideal growth conditions, but even speeds it up several times, thanks to which you can get the finished product much faster.
Greenhouse on the windowsill
In the past, seedlings were also grown in apartment conditions on window sills, without using special devices for this. But, if you want to get truly high-quality and healthy seedlings, it is better to use special small greenhouses.
Their advantage is that an optimal microclimate is created inside for the development of crops. No matter how hard we try, it is difficult to ensure stable temperature, humidity and lighting in a city apartment, and only a special small greenhouse can cope with this task.
Note: Modern models for window sills are designed in such a way that growing plants in them does not cause inconvenience. They do not block the light from the window, but at the same time provide easy access to plants and are durable enough for repeated use.
This design can be made either with your own hands, or you can buy a ready-made greenhouse equipped with everything necessary for growing plants (Figure 1).
The most popular types of window sill greenhouses include:
- “House” - in design, such a greenhouse resembles an ordinary greenhouse that is built in a country house, with the only difference being that the model for a window sill is much smaller. Depending on the model, the front wall or the back cover can open. As a rule, such models are used for growing already picked seedlings, but fresh herbs can also be cultivated in them all year round.
- A bread bin is another model that is perfect for a windowsill. In shape and design, it really resembles an ordinary bread box. As a rule, such greenhouses are made of transparent material, and the front wall can be easily opened for plant care and ventilation.
- A container greenhouse is the simplest model of a home greenhouse, which is easy to make with your own hands. For this purpose, ordinary plastic food containers are used. It should be taken into account that the container must be deep and its lid high enough so that the grown seedlings have enough free space. You will also need a tray with drainage holes to catch excess water.
Figure 1. Types of greenhouses for the home: house, bread box and container
If you don’t have the opportunity to buy a special greenhouse for the windowsill, you can easily make one from an old aquarium. You just need to come up with a lid made of transparent plastic or glass for it. The only drawback of this design is that it is not very convenient to care for the plants, since access to the beds is only in the upper part of the greenhouse.
Conventional and automatic mini greenhouses
Since growing fresh vegetables, herbs and seedlings in a city apartment, not only ordinary greenhouses have appeared on the market, but also automatic structures that make caring for seedlings much easier.
The simplest design is a greenhouse cabinet (Figure 2). The necessary microclimate inside is provided by a special cover with a zipper, and inside such a cabinet there are several shelves for placing plants. Unfortunately, the size of this structure does not allow it to be placed on a windowsill, but it can be placed on a glazed balcony or loggia.
Figure 2. Types of greenhouse cabinets
It is much more convenient to grow plants in automatic mini-greenhouses of the following types:
- Thermobox: the design is a special closed container in which the required temperature can be maintained, regardless of the ambient temperature.
- Growbox: these mini-greenhouses can be open or closed. Outwardly, they resemble a display case or an aquarium. As a rule, such a container contains not only sensors to maintain the temperature, but also lighting lamps, so the grow box can be placed even in a room, away from the windowsill.
- Aerogarden: this is the most modern development in which the process of growing plants is fully automated and carried out without human intervention. The system is equipped with a ventilation system and special sprayers that deliver beneficial substances directly to the roots of plants, so crops can be grown in such devices even without soil.
Figure 3. Automatic designs: thermobox, growbox, aerogarden
Such automatic systems are expensive, but at the same time they allow you not only to cultivate your own seedlings, but also to grow fresh herbs, vegetables and flowers all year round (Figure 3). At the same time, when buying a thermobox or grow box, you should pay attention to what kind of soil it works with. Some models are designed for growing plants in a substrate, while others work on the principle of hydroponic installations.
Accommodation
A small greenhouse in an apartment can be placed not only on the windowsill, but also in other equally convenient places. For example, there are greenhouses, which are full-fledged cabinets in which seedlings can be displayed on several shelves. There are also wall-mounted options, the name of which speaks for itself. They are attached to one of the walls in the room. Usually choose the floor that receives the most sunlight.
It is permissible to place a small greenhouse in a balcony block or loggia. Moreover, in such conditions, not only compact options are often installed, but also the above-mentioned examples in the form of cabinets. The main thing is that the loggia or balcony block is glazed with high quality. Often, separate racks are designed specifically for seedlings, which are placed near a window or on a warm, glazed balcony. Since these structures are open, they are characterized by excellent light transmission, and plants grow well on them.
Where to place a greenhouse for seedlings
The best solution would be to place the greenhouse in the west or east, this will help reduce the chance of shadows and rays will fall into this position.
Also, the position in which the greenhouse will be placed should be level and slightly windy. The sun's rays must fall on this place.
It is also necessary to constantly maintain heat inside the greenhouse. Heat is the most important factor for a greenhouse. And electricity helps to retain heat, but you can simply clean the covered film or glass, depending on what you have.
Lowland is an unsuitable place for some plants; it is recommended not to place a greenhouse in this place. And these conditions are not suitable for some plants.
Suitable soil for a greenhouse is sand or sandy loam. But it is necessary to prepare the excavated soil in advance if the base is made of clay soil.
- The slope of the site is a problem because if the angle is high, an additional foundation will have to be built. The greenhouse must be on a flat surface. But it is worth remembering that if you warm up the soil without building a foundation, there may be unevenness.
- The distance between the buildings and the greenhouse should be decent since the roof can obscure the greenhouse, so the necessary light from the sun will not fall on the seedlings or plants. Also, during winter, ice can fall from the roof and damage the structure.
Lighting
For seedlings that grow in an apartment greenhouse, it is very important to provide good lighting, especially when it comes to the winter season, when the sun's rays appear infrequently and for a short time. If you have placed the plants on the shelves of the rack, then they can be supplemented with special phytolamps. Such products do not affect the air temperature in any way. In addition, they are environmentally friendly, durable and very economical.
Popular LED lamps boast approximately the same characteristics. If you install these devices, then choosing the appropriate light spectrum is not difficult, as is the level of lighting intensity. Experts advise using low-power cold-light fluorescent lamps for additional illumination of the shelving structure. In addition, it is permissible to refer to linear, xenon and halogen options. Some users are confident that lighting in the form of two or three low-power incandescent light bulbs will be sufficient for a shelving structure. These specimens are the most affordable, but their effectiveness leaves much to be desired. They emit heat energy in a large volume, but they produce only 5% of light, which is very little.
New products regularly appear on the modern lighting market. The choice of optimal options depends on the preferences of the owners.
Step-by-step instructions for making a home shelving unit
Step 1. Selecting materials for the shelving
Wood is considered the best material. It is an easily accessible and durable building material. They sell ready-made bars that you only need to cut to your size. Ready-made wooden panels, which are already available in stores, are suitable for shelves. Now it is possible to cut materials to your size right in the store.
The white design has many advantages.
The wood will need to be treated with impregnation or painted to protect it from moisture. A protected tree will last for decades. Nowadays it is very fashionable to paint everything white or stain like oak or larch.
A structure made in white will be less noticeable in the room and will not look bulky. Also, all dirt and the possible appearance of mold are immediately visible on the white color, which will help maintain perfect cleanliness. And this is so important for our housewives and for plants!
You can also use metal or plastic frames. Shelves can be made of tempered glass or thick plexiglass. “Home inventors” create many crafts from fiberglass pipes, which are also suitable as a frame.
Important. The main condition for the durability of such a rack is good protection of the surface from environmental influences - corrosion, sunlight, moisture, etc.
Step 2. Take measurements
You need to measure the height, width and depth of the window opening. Then we determine the distance between the shelves. We divide the height by the number of shelves and get the desired distance. You can place the shelves at equal distances from each other. You can make the lower shelves at a greater distance - for heavy and massive seedlings, and the upper shelves at a shorter distance - for small containers and cups.
Having accurate measurements, you can cut the required number of panels or bars right in the store.
Be sure to measure the window before making the shelving unit.
Step 3. Making racks
The entire structure can be made monolithic (not collapsible) or collapsible.
Having taken all the necessary dimensions, draw the future rack on paper to scale. This will help you to see any shortcomings at an early stage and think through the sequence of stages of the upcoming work.
The complexity of the design depends on your skills and imagination. Shelves can be attached to the corners directly to the side walls or attached to the sides of the slats. Shelves will be placed on them. Use self-tapping screws of the longest possible length. This will make the structure stronger.
DIY greenhouse
If you have favorable conditions on your balcony for installing a greenhouse, then you can either install a ready-made one or create it yourself. This process is actually not as complicated as it seems.
Before turning your ideas into reality, it is advisable to create a drawing of your future mini-wig on paper. Consider how many floors it will have and how it will fit into the dimensions of your balcony.
Creating a wooden structure is not that difficult. To do this, you will only need smooth boards and the required number of nails. Pin the boards together properly to create a stable and practical shelving unit.
Clear polyethylene is attached to the back of this finished structure. This should be done not with nails, but with staples and a special stapler. Instead of film or polyethylene, you can also use durable glass.
If possible, it is also advisable to install several lamps on the sides of the greenhouse. They will ensure normal growth and development of your plants. You can buy such lamps at almost any hardware store. And installing them is not such a difficult process.
When the base of the greenhouse is ready, you can begin planting. First of all, prepare the soil. Do not use only clean soil. In order for plants to grow quickly, the soil must consist of several layers. Sand is placed at the bottom of the box in which the plants will be planted, which is covered with drainage and only then with a thick layer of soil.
8 photos
After this, the plants themselves are planted in the prepared soil. One shelf of a simple shelving unit can usually hold about ten standard boxes of plants. But, depending on your individual calculations, the figure may be different.
When the plants are arranged, the front of the greenhouse is covered with film or glass. This is done in order to create an ideal microclimate inside. However, if you have installed lamps, then this is not necessary.
A greenhouse on a balcony is an ideal solution for those gardeners who live in a small apartment and do not know where to apply their talents. This type of balcony design receives extremely positive reviews from gardeners. Therefore, you can safely decorate your balcony in this way, using it to the maximum benefit.
Types
There are a great many types of mini-greenhouses on the windowsill, from simple cookie containers to complex automatic designs produced by industry.
Greenhouse from a container
It's easy to make mini-greenhouses for sowing seeds from plastic food containers.
Such a container should be deep enough and have a convex lid so that the seedlings have room to sprout. And they look neat and are easy to care for. They need a tray where excess water will drain after watering. At the bottom of the container, just make a couple of drainage holes - and the greenhouse is ready. If you make a neat rack around the perimeter of the window, you can fit many of these greenhouses on its shelves. The seedlings will grow in them until the time comes to plant them in separate pots.
"Houses"
If the window sill is wide, you can put a miniature copy of a garden greenhouse on it - a small house with an opening front panel.
In it, already picked seedlings can be grown in cassettes. In addition to seedlings, in such a greenhouse you can grow herbs, salads and even radishes all year round.
Breadbox
A greenhouse-bread bin would look great on a window. Transparent from all sides, it will provide good lighting to the plants. For maintenance and ventilation, it can be opened with one movement of the hand. If the window sill is fully adapted for a mini-garden, it can be made to its full length.
In this mini-greenhouse you can even grow early radishes in cassettes.
Old aquarium
If you need a mini-greenhouse, but don’t want to waste money and time, use an old aquarium (if, of course, you have one in the house).
The only thing you have to do is a transparent cover. Such a greenhouse is good for everyone, one inconvenience is that you will have to get to the plants through the top.
Heating a mini-greenhouse with biofuel
Biofuel will help insulate the greenhouse and provide it with additional heat. Its role is perfectly fulfilled by manure, straw, and old leaves. Setting up such a heating system for a greenhouse at the dacha is quite simple.
Step 1. In the place where the greenhouse will be installed, make a small hole or trench in the shape of the future structure.
First you need to dig a small hole
Step 2. Fill the hole about 2/3 full with the biofuel mixture. To do this, mix leaves, straw, manure with soil.
Biological fuel
Step 3. Fill the “bed” with water and cover it with fertile soil, filling the trench to the edge.
Step 4. Place a greenhouse on top of the structure.
Greenhouse diagram
Due to decomposition processes, biofuel will heat up and give off heat more actively, and the greenhouse will accumulate it. This is how a natural heating system will operate in any greenhouse.
Which backlight to choose
In January and February it is necessary to use additional lighting. With insufficient lighting, the seedlings stretch out, their immunity and growth rate are weakened. They take root less well when transplanted; the main trunk becomes bent, which subsequently leads to damage from the weight of the fruit and inconvenience during care.
For lighting, phytolamps, low-power cold-light fluorescent lamps, halogen lamps, and ordinary low-power incandescent lamps are used.
In winter, when there is little sun, plants need lighting.