We repair a concrete window sill ourselves
Window sills in today's new buildings are made of plastic. And private developers don’t really bother with this topic, and order them complete with double-glazed windows. But in many Soviet high-rise buildings, a concrete window sill is a common occurrence.
And concrete, like any other material, tends to wear out and lose its original “sales appearance.” Especially if such a window sill is used on the street or balcony.
You can dismantle it, which is quite difficult. It is also quite possible to carry out its repair without large labor and financial costs. In addition, restoration of a concrete window sill does not take much time. Let's consider the option of a light repair, since major damage to a concrete structure is akin to pouring it again - a process that we will also consider.
Have cracks appeared or don’t like the “bubbles” on the windowsill? A problem that our short instructions will help you solve.
Useful tips
- Since concrete hardens quickly, do not mix too much mixture at one time, especially if you have little experience in finishing work.
- Before applying the protective layer, wipe off any sanding dust from the surface.
- When drawing up a drawing, take preliminary measurements (if the window sill block turns out to be too thick, cracks will appear on its surface in the future). The protrusion at the top should be moderate so that the heat from the batteries flows upward without hindrance. Other data depends on the size of your window.
- Since the poured concrete will be subject to grinding, make the board with a small margin.
We offer you to learn how to update, repair or install different types of window sills on a balcony, in a house or apartment - wooden, PVC, heated. Our experts will also give many useful tips on installing slopes and leveling different types of window sill blocks.
The window sill is the very element of the window that is difficult to do without. When making it, you should listen to the advice of the craftsmen and choose materials that suit all parameters. Concrete will help create a durable, beautiful window sill that will last for many years.
Ready solutions
Reinforced concrete window sills are not only decked structures on site. First of all, these are finished products of standard size and modifications. To make them, special molds for window sills made of concrete and the solution itself are used in a special ratio. The result is structures of various modifications that are completely ready for installation. Moreover, the weight of a concrete window sill of this type depends on its size. All that remains is to buy and “plant” such a structure in place.
If we compare a concrete window sill of a factory and a self-produced one, the second one clearly wins in economic terms. Its price is slightly lower than the cost of a finished product.
Regarding the quality aspect: a monolith in construction has always been considered more reliable than prefabricated structures - although factory-produced concrete, as a rule, has a higher level. Therefore, the choice depends only on you, which is more convenient and profitable to choose in each specific case.
Peculiarities
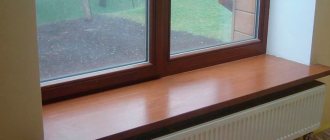
Plastic windows are in incredible demand due to their high technical characteristics, ease of installation and long-term operation. Along with them, plastic window sills are installed that match the overall style and provide comfort in use. Together with PVC windows they create a common and unified composition.
As for the features of plastic products, they are distinguished by their affordable cost and the absence of additional work (painting, treatment against rotting, corrosion). High-quality products comply with all GOST standards. It does not emit harmful substances and can be used in residential areas.
How to make a window sill from concrete
Window sill is an important structural element of a window in the interior of a building. It is installed below the window frame and serves to increase the air gap and more. At the same time, it is used as a work area. This is very important if you have a small kitchen or room and you need to make the most efficient use of every centimeter of space. It should also help in the operation of window openings, and as a result, withstand the weight of a person. Due to the demand for this element, manufacturers offer a large selection of materials and colors, but we will focus on the production of concrete window sills. Why a concrete window sill? Concrete window sill pros and cons Concrete, although an artificial material, has all the properties and characteristics of natural polished stone. 1 . Durable 2. Frost-resistant 3. Attractive 4. Pleasant to the touch 5 . Doesn't fade 6. Does not emit phenolic fumes 7. It is a breathable material that conducts heat. Another plus is its size. There are unified templates, but if desired, you can make them directly to your dimensions
The disadvantages include the weight of the product. Although this is a plus as it ensures the monumentality of the interior with a concrete window sill
Tile
In general, we admit that it is wrong to include ceramic tiles and mosaics as a separate type of window sill finishing. For such a coating you need a base. It can be concrete, wood, plastic. That is, tiles can be used to decorate, for example, an ordinary plastic window sill, but they cannot be used as an independent material.
This option has many advantages - resistance to damage, easy maintenance, beauty, durability, the ability to replace individual parts in case of damage. But you should pay special attention to the seams between the tiles, because they are often responsible for the durability of the entire coating.
Mold for concrete window sill
This is one of the main elements in the production of a concrete window sill that will affect the final appearance. Therefore, its production must be approached as responsibly as possible. The first thing you need to know is the thickness and depth of the product, and the width is the width of the window + 20 cm. The material for the mold should not be deformable when in contact with water and alkalis. The seams between the edges must be sealed with sealant to prevent moisture from leaving the concrete. Otherwise, the concrete will crack. After finishing the work, you need to cover it with film and leave the concrete to mature for seven days.
Material for a concrete window sill The binder is M 500 cement, and white or gray is up to your taste and the surrounding interior. Then fine-grained dust-free sand 0.63 mm and filler at a rate of 1:2. If everything is clear with the first one, then the filler will affect the texture of the window sill. It could be marble or other natural rocks that will reveal themselves after polishing. You can also use a concrete dye to add veins or change the color of the product.
We offer
Window sill Sanded
Dimensions: 200x50x5 cm Weight: 118 kg
Artistic concrete Price: RUB 3,720/piece.
Ordinary concrete Price: RUB 3,050/piece.
Window sill Sanded
Dimensions: 180x60x6 cm Weight: 129 kg
Artistic concrete Price: RUB 3,800/piece.
Ordinary concrete Price: RUB 3,100/piece.
Window sill Not Sanded
Dimensions: 200x25x4 cm Weight: 40 kg
Artistic concrete Price: RUB 1,300/piece.
Ordinary concrete Price: RUB 1,050/piece.
Window sill “Universal” – Sanded
Dimensions: 160x60x4 cm Weight: 77 kg
Artistic concrete Price: 2560 RUR/piece.
Window sill “Universal” – Sanded
Dimensions: 160x60x4 cm Weight: 77kg
Ordinary concrete Price: 1940 rubles/pcs.
Window sill – “Dark gray” – Sanded
Dimensions: 160x25x4 cm Weight: 32 kg
Artistic concrete Price: RUB 1,066/piece.
Ordinary concrete Price: 808 RUR/piece.
Window sill – “Light gray” – Sanded
Dimensions: 160x25x4 cm Weight: 32 kg
Artistic concrete Price: RUB 1,066/piece.
Ordinary concrete Price: 808 RUR/piece.
Window sill – “Graphite” – NOT polished
Dimensions: 160x25x4 cm Weight: 32 kg
Artistic concrete Price: 916 RUR/piece.
Ordinary concrete Price: 658 RUR/piece.
All products are made from architectural concrete
(white cement and natural stone),
and from ordinary concrete (ordinary cement and crushed stone)
Window sills made of artistic concrete in Sevastopol at an affordable price
TERRAZZO technology is used for the manufacture of risers, cladding slab risers, and window sills. Such elements will be an excellent addition to staircases and flights in office buildings, retail facilities and private homes. These products are available in Sevastopol and other large Russian cities in Crimea.
Product Features and Benefits
The presented products are made from concrete, which is reinforced with reinforcement or mesh to give additional strength. Thanks to this, these products perfectly withstand any operational influences. At the same time, it retains its original appearance for 10 years or more.
Tools for making concrete window sills.
1 . Parquet 2. Roulette 3. Square 4. Mixer 5. Grinder with water supply and speed control 6. Capacity 20 liters 7. Spatulas, rollers Polishing a concrete window sill After removing the formwork, you can begin polishing the product. You can polish using wet or dry methods. Based on the selected grinding option, you need to select the appropriate pads. If you sand without water, then you need an industrial vacuum cleaner. We begin to remove the weak layer with polishing discs with a diameter of 50, at a diameter of 400 we add a hardener and finish at 800 or 1500.
Making a concrete window sill with your own hands
Korovin Sergey Dmitrievich
Master of Architecture, graduated from Samara State University of Architecture and Civil Engineering. 11 years of experience in design and construction.
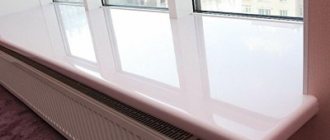
A treated concrete window sill looks sophisticated and elegant at home and in formal office settings. The relevance of manufacturing the structure is due to practicality, fire resistance, and frost resistance. Such window sills can be painted in different colors, are easily restored and are environmentally friendly. Creation and installation has several stages.
Materials and tools
Reliable concrete window sills require the use of high-quality building materials and professional power tools. A set of various devices for creating a window sill:
- construction vacuum cleaner;
- Bulgarian;
- drill, screwdriver;
- laser level;
- putty, spatula, masking paper.
- wooden structures of various widths and lengths for formwork;
- metal grid;
- roulette;
- screws and other fasteners.
For decorative purposes, nitro enamel or colored varnish is used, for protection - linings (running elements from scratches, chips and other damage).
Surface preparation
Before making the window sill, the window sill part is prepared - it is cleaned. If the installation is carried out after plastering the slopes, a recess is made for the panel along the slope, as well as on the front of the wall, 6 cm on each side . They are performed under the so-called windowsill ears.
The length of the window sill recess is 6 cm
The corner is cut to the same level as the bottom of the window block. The laser is installed, the distance from the bottom of the window block to the red line produced by the device is measured, and the dimensions are transferred to the outer corner.
When making concrete window sills, it is important not to miss this moment. This is done in order to eliminate poor-quality alignment of the outer corner between the slope and the wall after installation of the structure.
Measurements are taken using a laser level
The first picture shows how the distance between the infrared beam and the window frame is measured. The second shows that a similar action is performed in relation to the outer corner. It is noteworthy that in both cases, the distance should be the same, for example 7.2 cm.
The distances near the window and the outer corner must match
Related article: How to make a workplace out of a window sill
After excavating and processing the outer corner, the window sill is cleaned from dust, debris and dirt. A brush and broom are not effective. Cleaning is done with a vacuum cleaner. At this stage, the preparation of the working surface is completed.
Installation of window sill boards
There are two ways to make a high-quality concrete window sill yourself. In the first case, the window sill board is cast separately. In the second, it is manufactured immediately on site. By choosing the latter option, the problem of how to make a concrete window sill is solved in a comprehensive manner.
Components of the window sill board:
- formwork;
- cement mortar;
- metal grid;
- power tools and connecting elements (screws, bolts).
Making concrete window sill boards with your own hands begins with formwork. It is recommended to make a form for pouring concrete on site - the window sill . This is the best option, allowing you to install a concrete window sill with your own hands in a short time with a minimum of cost.
Formwork
When making formwork, the width and length of the future product are measured. For example, at 17 cm, the width of the board should be 2-3 cm, the height – up to 4 cm. This is enough for the window sill to be of standard dimensions.
The connection of wooden structures is made with self-tapping screws using a drill and screwdriver.
The figure below shows the finished structure adjacent to the working surface. The difference is that the window sill in the photo is open.
After excavating and processing the outer corner, the window sill is cleaned from dust, debris and dirt. A brush and broom are not effective. Cleaning is done with a vacuum cleaner. At this stage, the preparation of the working surface is completed.
Finished design
The photo shows the formwork from the inside of the window sill. This is the look the finished structure should have for pouring a window sill indoors.
View of the formwork from the inside of the window sill
Iron fixing elements are used to install the formwork. They allow you to reliably install the product.
Iron staples are used to secure the formwork.
At the bottom of each element, two holes are made for self-tapping screws for installing the formwork. The work uses screws (used ones are allowed) and a screwdriver. The finished formwork looks like this:
Fixing the formwork with self-tapping screws from below looks like this.
Fixing the formwork with self-tapping screws
To prevent the cement mortar from leaking out, additional structures are nailed to the sides. This concludes the production of formwork.
Preparing the surface for pouring cement
After cleaning the window sill part, a structure of the required width is made from the mesh. It is needed for high-quality filling. Folds in half and is secured with wires for reliability. Each piece of wire is lowered into a brick hole and secured to the mesh.
For high-quality filling, a mesh is fixed to the window sill
If there are gaps between the formwork and the window sill, silicone is used. It will help avoid leakage of the solution.
Cement mortar
To make the mixture, cement, sand, and crushed stone are used. The proportions for the solution are one to two, that is, 1 hour of cement / 2 hours of sand. It is recommended to use grade 400 concrete . The resulting mass should not be very thick.
After preparation, the solution is poured in, initially filling the holes in the brickwork.
First, the mortar is poured into the holes of the bricks
After filling you should get a picture like this.
Subsequent finishing of the window sill is carried out only after the concrete has completely dried
After this, the surface is left to dry completely. After which the surface is polished, decoratively processed, and overlays are installed.
Pouring stages
Before moving directly to the filling. Let us note several main stages:
- surface preparation;
- assembly of the window sill (installation of the board);
- formwork;
- preparation for pouring;
- preparation of cement mortar;
- decoration.
It is necessary to create the correct shape of the window sill. So that it is symmetrical on both sides. To do this you need to use a level and a tape measure. On the walls on both sides we measure 6 centimeters. Next we work on the height. Professionals recommend no more than 3-4 centimeters.
The shape of the future window sill can be made from wooden beams. They are fastened together with self-tapping screws. After the mold is ready, pour the mixture.
Formwork
It is necessary to measure the length and width of the formwork structure. For example, let's take a width of 17 centimeters. Then the width of the board should be at least 3 centimeters and the height up to 4 centimeters. These dimensions are designed for a standard window sill.
We connect all wooden parts with self-tapping screws. For quick installation, use a drill or screwdriver. After installing the formwork, we clear the window part of debris. You can use a broom, but it is better to use a construction vacuum cleaner.
Preparing the surface for concreting
Preparing the surface for concreting is one of the main and important stages. It needs to be cleaned. There is one caveat. If the installation of the window sill occurs after plastering the slopes. Then for the board it is necessary to provide recesses on each side.
At this stage, a construction grid is used. It is calculated based on the width of the product. For reliability, the mesh is folded in half and secured with metal wire.
If you find gaps between the formwork and the window sill. Then use silicone. Once dry, it will prevent concrete from leaking. The surface must be cleaned of debris, preferably dust.
Concrete mortar
The service life of the window sill depends on the quality and correctness of the concrete solution. This stage is the most important. Professionals recommend using cement group 500. Drying time and appearance depend on the consistency of the solution. If you overdo it with cement, cracks will form on the surface when it dries. Recommended proportions: 1 part cement and 4 parts sand.
Therefore, during the preparation of the mixture, add a plasticizer. This component will make the solution plastic and it will not “shrink” and delaminate.
Decorative treatment of a monolithic window sill
Before decorative treatment, the surface should be sanded to remove roughness and bumps. As a result, the surface should be flat and smooth.
Putty will help achieve the desired result. It can be plaster or acrylic. At least two layers should be applied. After complete drying, sand the layer with fine sandpaper. After this procedure, it is necessary to remove dust. Then prime again.
The surface should be perfectly flat and smooth. Only after this can you move on to the next stage - painting. It is recommended to choose light colors of paint. Water-based enamels do not have a strong odor.
Protective treatment
Protective treatment involves painting or varnishing. The paint and varnish will protect the structure from mechanical aggressive influence. Which enamel is best to choose? It is best to choose shades from oil enamels. Preference is given to light shades. If the window sill is painted in a non-residential area, it can be painted a dark color.
Decorative treatment of window sill
After the surface has dried, all sagging, roughness and protrusions are removed with a spatula. Below in the photo is the window sill after drying.
After drying, the surface is leveled with a spatula.
Then final leveling is carried out using putty (gypsum or ready-made acrylic). The number of layers of the composition is at least two . The main thing is to achieve a smooth final surface.
After the putty has dried, the surface is sanded with fine sandpaper. Next, dust is removed from the window sill and primer is applied again.
A perfectly flat surface is shown in the photo.
Final leveling is carried out using putty
After final drying, the surface is painted. Take light-colored enamel or a water-based version - it does not have a pungent odor. Painting is done in several layers with a brush or narrow roller.
Protection
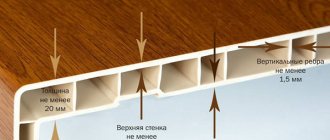
There are several types of window sill covers. Available with a bluish and pinkish tint, similar to wood. Installation of thin plastic profiled sheets begins with cutting out the desired shape. To cut them evenly along the edges, use a jigsaw and a paper template.
Before sticking, the window sill can be degreased. The overlays are attached to the surface using mounting adhesive. The adhesive composition is distributed over the surface, first in a solid line, then in a zigzag, rings and other patterns. The main thing is to fill all the space.
The prepared overlay is placed on the coated base and pressed with something heavy. After the glue has dried and the weight has been removed from the window sill, side plugs are installed . This completes the installation of the overlay.
The photo shows a finished window sill with overlays. The elements not only protect the window sill from deformation, but also give a glossy effect. Due to this, the window sill looks presentable.
If it is necessary to repair the window sill, carefully remove all elements from the window sill in the same sequence. Hardened concrete is removed using a hammer or sledgehammer.
Preparing the formwork
To give the future tabletop a certain shape, formwork is made. To do this, take a plywood sheet and lay it on a flat, flat surface. Make sure that the plywood does not bend or warp anywhere. Install and secure a 50 mm high beam around the perimeter. This is the optimal value so that the finished tabletop is strong enough and does not collapse under its own weight. All joints are fastened on the outside of the beams with corners or self-tapping screws. Do not try to fit them tightly together at this stage. All cracks and unnecessary holes are then filled with sealant.
You need to install a sheet of plywood on a horizontal surface, which must be level. Place the boards on edge along the edges.
Then place plastic film in the formwork so that there are no creases or folds. Any unevenness will be reflected in the future concrete surface. You can lubricate the inside of the polyethylene with technical oil to make the concrete structure easier to remove.