The material was prepared with the participation of specialists from VEKA Rus.
“Nothing compares to the feeling when on a winter Sunday morning you stand with a cup of coffee in your hands in front of a glass portal and look at the smoke from the chimneys of neighboring houses, at the sparkling snow... and you are in shorts and with aromatic coffee,” - this is the FORUMHOUSE member with the nickname val-lel describes the experience of using a glass portal in the dining room of his country house.
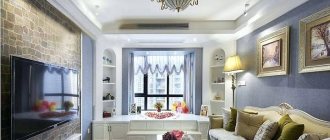
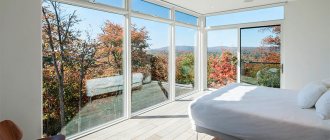
Large-format glazing elements are a confident architectural trend of recent decades. “Floor windows”, “disappearing walls” and other structures of this kind blur the boundaries between the house and the site, fill the room with light and give a feeling of freedom and comfort.
But until now, not only ordinary consumers, but even professional architects and designers have some skepticism regarding large-format structures. Skeptics believe that large forms always mean large heat losses and insufficient safety.
Everything is completely different - proven by FORUMHOUSE participants who built houses with such designs and never regretted it.
VEKA Rus specialists will analyze for FORUMHOUSE readers persistent stereotypes about panoramic glazing: which of them are true and which are not.
Stereotype No. 1. Panoramic glazing - always large heat losses through the glass unit
A FORUMHOUSE participant with the nickname Forumchanka from a city in Eastern Siberia wants to build a frame structure with a large panoramic window at the end (width 7,500 mm, height two floors).
In terms of solar insolation, her city ranks second in Russia (after Sochi), but the forty-degree frosts have not been canceled. Not everyone at FORUMHOUSE approved this project. They wrote to a forum member: “Well, yes, panoramic windows are just right for Eastern Siberia! Or are you hoping for the magic of energy-saving double-glazed windows against frost?”
There is no magic, there is an indisputable fact: glass production technologies are developing at cosmic speed.
Nowadays, even the most large-format translucent structure with a large number of opening doors can provide heat transfer resistance comparable to a wall.
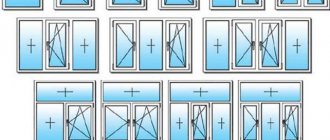
This design will work consistently well and for a long time. The main thing is to understand that this is not “an ordinary blind window, only a large one.” This is a separate type of translucent structures that works fundamentally differently and ALWAYS requires competent design. And simple double-glazed windows cannot be installed in such structures.
Andrey OkulovHead of technical department.
The window design must be designed for wind loads, taking into account the wind region, the installation height of the structure and the type of terrain (urban buildings, open areas), the overall dimensions of the opening sashes and the weight of the double-glazed windows used, heat and sound insulation requirements. The design must be easy and convenient to operate, and, if necessary, provide special requirements for protection against burglary, child safety and protection against accidental loss.
The design of a double-glazed window must take into account the requirements of heat and noise insulation, safety and deformation stability.
In the design of the window and the room, it is necessary to provide for how the room will be ventilated, heated and protected from overheating.
If the solution is not professional, then it will not be possible to ensure a comfortable microclimate in the room.
Therefore, according to our expert, for ANY climatic conditions you can choose a double-glazed window in such a way as to not only avoid heat loss, but even reduce it due to solar radiation.
Andrey Okulov
There are many options for solving such structures on the market. I would especially like to note in this context the lifting and sliding structure VEKASLIDE with a width of up to 6.5 m and a height of up to 2.7 m, in fact a sliding “glass wall”.
How to protect yourself from the sun with roof windows
With skylights, there is always a lot of light in the rooms. Usually this is good. But on a summer morning, when you want to lie in bed, the sun is right in your eyes and the stuffiness is annoying.
Make your attic more comfortable. Protect yourself from the sun:
- Fabric roller blinds . Thin curtains are attached directly to the attic window. They provide soft, subdued light or complete darkness. They won't protect you from the heat.
- Marquisettes . They are attached to the outside of the window. The heat is retained by the glass and the room heats up much less.
- Roller shutters . Metal shield from the sun, heat and light. Closes the window from the outside. Impervious to light. The room is dark and cool, even when it's Mexican heat outside.
- Regular curtains . Ineffective solution. Suitable for vertical windows only.
An alternative option is to glue a sun protection film to the glass. Retains up to 89% of infrared radiation. Cuts off the ultraviolet spectrum by 99%. The main disadvantage of the tint film is that it works constantly. While the window is closed, the light is dim . Therefore, the film is well suited for work offices. It is better to install awnings and roller shutters in the bedroom, children's room and living room. To adjust the light. We have prepared a detailed overview of all ways to protect the attic from the sun. So that you choose the right one.
Stereotype No. 2. Panoramic glazing - always large heat losses through the profile
No, heat loss through the profile will not be large if you choose it correctly. And this depends on the size of the structure.
Andrey Okulov
The design of a panoramic window can be made from various materials, usually wood, aluminum and PVC profiles. Each of these materials has its own characteristics that must be taken into account when designing
The PVC profile allows you to make a structure in a single frame: up to 8 m2 in area or, when using special facade profiles, a much larger area. Temperature compensation connections must be provided in the design. The WECASLIDE design can be 2.7 m high and 6.5 m wide.
The choice of panoramic glazing material is made on the basis of a technical and economic comparison, taking into account the design of the structure and color schemes.
A structure with a width of 7.5 and a height of 2 floors would be optimally made from an aluminum profile.
Tips for window decoration
For construction, select construction, how to choose window size? Window decoration is one of the main points in creating an interior design, which, as a rule, becomes the final component in a project for decorating a private home.
When choosing a specific window decoration option, you should take into account the type of room, dimensions and style of the window. The most basic principle that should be used when choosing is a harmonious combination of the surrounding interior and window design.
If the room is decorated using many original details, then the best solution would be to leave emphasis on the most unusual and striking interior details. In this regard, it is advisable to choose a simple design and fabric for curtains, without bright patterns and decorations. Here the main task is to choose the required texture, color of the fabric, and its quality. If any specific style in the design of the room is not visible, or its furnishings are standard, then such an atmosphere must be enlivened with spectacular curtains.
The most affordable and currently in demand method of window decoration is curtains made of thick material, which hang freely from the eaves to the floor, and under them there is a curtain - a transparent and light curtain made of tulle, mesh or lace.
Stereotype No. 3. Heating costs will increase
Properly designed panoramic glazing does not significantly increase heating costs. For many participants of our portal who installed “floor-to-ceiling windows”, large sliding elements, “disappearing walls” and other large-format structures, this was a pleasant surprise:
ExpressForumHouse Member
Winter has passed and I see: HEAT RECEIPTS from the sun far exceed losses. It heats up a room with a window so much during the day that it lasts all night.
val-lelFORUMHOUSE Member
The portal has been in place for three years (this winter will be the third). I did not do any additional insulation. No additional heating costs were noticed.
Vostok03FORUMHOUSE Member
There are two large windows in the kitchen, one of them is panoramic. But there are more advantages - if most of the windows are on the sunny side, this means big savings on lighting and is very warm even in winter
Communications center
As practice shows, one of the most complex planning elements of a house is the staircase. The convenient and safe design has an inclination angle of 30º and occupies approximately 5 m² on each floor. This element, connecting the floors of the building, may be located in the center of the building. In this case, an expressive two-light space is often created. The staircase itself takes up quite a lot of space and turns into a central part of the interior. The staircase adjacent to the wall is just one of the planning modules. In most cases, it is a simple two-flight structure with winder steps. The owners, trying to plan the area as rationally as possible, place a pantry, dressing room and workplace underneath it.
The optimal slope of the stairs is 30°, the width of the tread (horizontal plane of the step) is 34–37 cm, the height of the riser (the vertical part of the step covering the gap between adjacent treads) is 14–17 cm
Stereotype No. 4. Panoramic glazing is unsafe
Transparent structures that visually blur the boundaries of the house with the outside world seem vulnerable to penetration by strangers. Whatever one may say, glass is not concrete; you throw a brick at it, and it crumbles. This worries many homeowners who dream of sliding glass walls.
NikasanForumHouse Member
How might thieves act? I went up to the fence, threw a stone, glass fell out, go in and take what you want. And if the glass doesn’t break, then there’s no point in walking around and throwing things at all the windows.
In fact, there is no reason for such concern: as our expert says, in panoramic glazing it is possible to use special glasses that are indestructible under such influence.
And a whole range of additional measures can enhance protection:
- triplex;
- film;
- roller shutters;
- alarm system (with stickers on the fence indicating that the house is guarded).
AntonShar Member FORUMHOUSE
I have a hardened eight and the film is in place; during installation I personally threw a brick and it holds fine. But I did this only to protect myself from the small ones, he usually walks around with a hammer, but I would have made do with triplex.
More about the strength of such glass: a member of our portal with the nickname Apn8 jumped, as if on a trampoline, on a “tempered ten” measuring 2400X1200, placed at the corners on bricks.
Apn81FORUMHOUSE Member
I jumped to the ceiling, the glass bent, but did not break.
The majority of FORUMHOUSE participants who have chosen panoramic glazing consider such expensive solutions to be redundant, since in fact large-format structures are no more attractive to intruders than ordinary small windows.
GagsuvForumHouse Member
I think few people would break a huge panoramic double-glazed window for the sake of theft.
Usually FORUMHOUSE limits itself to triplex to protect large structures.
SegamegaFORUMHOUSE Member
To cut a hole in the triplex 44.2 large enough to enter the house, you need to diligently swing an ax for about 10 minutes. During this time, the police will even have time to arrive on skis.
Features of the layout of a two-story house: what to consider
Construction of a country cottage is a responsible task that not everyone is able to undertake. There are a large number of nuances, failure to comply with which will lead to unpleasant consequences. These little things are especially important for those who are planning to build a dream home with their own hands.
Layout of a two-story cottage Source Layout of a two-story cottage
Stereotype #5. Panoramic windows mean condensation and icing are inevitable
Condensation will never appear on properly designed and installed large-format structures. Risks can only arise if errors are made during design and installation.
Andrey Okulov
Since we have large structures, in addition to calculating the glass unit for heat transfer resistance, it is necessary to calculate its deformation resistance. If this is not done, then due to the difference in temperature and pressure, the interglazed distance in the double-glazed window may increase or decrease, which can lead to the formation of condensation or even icing, as well as the effect of “distorted mirrors”. If the glass is selected correctly, if everything is done correctly, then the risk of condensation and ice formation is minimized.
One of the most common reasons for the formation of condensation is the use of an aluminum spacer frame in a double-glazed window (low temperature on the surface of the glass unit in the area of the spacer frame) and the lack of warm air circulation, especially in the lower horizontal parts of the structure.
Andrey Okulov
When using warmer spacers in a double-glazed window (steel, TPS, etc.), the risk of condensation is significantly reduced (increase in temperature in the spacer area).
Another anti-condensation solution is the optimally selected installation depth of the double-glazed window. Depending on the installation width of the profile, you can choose an installation depth of 18 mm, 21 mm or 25 mm.
The deeper the glass unit is in the profile, the lower the risk of condensation formation.
Andrey Okulov
For panoramic walls and other large-format structures, we recommend making thermal convectors. The directed flow of warm air from bottom to top eliminates the formation of condensation during any temperature changes. Our practice of operating panoramic structures shows: if this is done, then there will simply be no condensation formations, much less ice.
Finishing the second floor in a private house + photo
Two-story houses are not only practical, but also beautiful. When choosing the method and materials for finishing the second floor, you should familiarize yourself with some advice from professional builders. The architecture of the attic can amaze the imagination with its non-standard and originality.
Before decorating the attic of a private house, you need to get acquainted with the features of facing work. Photos of the decoration of the second floor in a private house will help you choose a more suitable room design.
Preliminary work
During preliminary work, before finishing the attic, low walls are built along the edges of the room. At the same time, installing ceiling windows is a fairly practical solution.
The attic is a full-fledged living space, so for the comfort of living in it it is necessary to carry out insulation. Finishing will make the premises more comfortable. With a complete renovation and finishing of the attic space, the owners of the house receive additional living space.
During finishing work, it is important to adhere to the following principles:
- Stingrays must be protected as much as possible from wind and precipitation. It is necessary that they withstand serious temperature changes.
- Thermal insulation of the roof is carried out both indoors and outdoors. This increases the protection of premises from freezing and drafts.
- To insulate the attic, in addition to the insulation material, it is necessary to prepare sheets of plasterboard. Cement particle boards are suitable for finishing.
- The insulation pie includes a vapor barrier and a windproof layer.
Elements of the rafter system can become a decorative decoration for the attic space.
Floor finishing
To properly finish the floor of the second floor of a wooden house, you should create a layer of sound insulation inside the ceiling. For this purpose, you can use any soundproofing material. Insulation such as mineral wool copes with this task quite well. It is laid between the floor beams. Before laying the insulation on the beams, it is necessary to spread the film. You can lay mineral wool 5-10 cm thick. Expanded clay, as well as granulated penoizol, are excellent for insulation.
Advice! To soundproof walls during finishing, you should not choose foam plastic. It has a low level of sound absorption. At the same time, small rodents love it.
Finished floors are laid on top of the beams. When the beams are located less than 40 cm from each other, plywood sheets can be laid on them. If there is a large distance between the beams, boards are first mounted on them. They must have a thickness of at least 3.5 cm. The main condition is to maintain the shape of the boards when walking. The floor should not bend under the weight of a person’s body. Plywood sheets can then be laid on these boards.
Finish floor covering
A variety of materials can be used for finishing the floor in the attic. Their choice depends on the chosen style of the room and the characteristics of its use. Quite often, carpet, linoleum, and laminate are chosen to cover the floor in the attic. If you are installing a bathroom on the second floor, you will need to lay ceramic tiles.
To install parquet, you must first lay the underlay on the floor. This will ensure the necessary shock absorption and sound insulation of the floor. To lay the tiles, you will need to create a cement screed. It must be reinforced.
Interior finishing options
When creating living quarters in the attic, it is necessary not only to finish, but also to insulate the walls that are formed by the roof of the house. To do this, mineral wool or penoplex is installed between the rafter legs. On the roof side, the insulation is covered with a waterproofing layer, and on the room side - with a vapor barrier.
Before finishing, the rafter legs are covered with plywood. It is important to properly secure the vapor barrier film. To do this, you should carefully study the instructions for finishing the room using a vapor barrier.
As a result of this work, the roof slopes will be well insulated. Finishing of the attic can be carried out after the roof construction is completed. With this solution, the insulation material is hemmed from the side of the room. Gable walls are insulated in the same way.
Finishing the attic with plasterboard
Plasterboard sheets have many advantages. When using this material, home owners are in the black. This is due to the ease of installation of the material, ease of processing, the possibility of insulating walls and wide scope for design solutions.
Thanks to the use of drywall, you can create niches, arches and columns. The technology for installing such material in the attic is quite simple. Simple alignment of walls and ceilings is another advantage of using plasterboard sheets.
Plasterboard slabs must be fastened to the frame using a screwdriver. Before finishing, the sheets are pre-cut into elements of the required dimensions. To obtain smooth edges, trim them with a plane. Drywall sheets must be firmly fixed with screws. The step between the fastening elements should be 20-25 cm. When finishing a door or window, fastening is also carried out along the perimeter of the opening. If the sheathing is single-layer, the screw must be screwed in 1 cm. For double sheathing, it should be mounted 3.5 cm.
Important! It is better to leave a gap of 5 mm between the edges of the plasterboard sheets during finishing. This is necessary to compensate for roof swings. Subsequently, they must be puttied and sealed with reinforcing tape.
As you can see, finishing the attic with plasterboard is quite simple. Numerous videos will help you understand the finishing technology in more detail. Further decoration of the room can be completely different. You can wallpaper or lay tiles on drywall.
Finishing walls and ceilings
Eurolining has gained wide popularity when finishing attics. The use of this material has not lost its relevance for many years. Eurolining is practical and durable, and also looks beautiful. Cladding attic rooms with wood is a rather interesting option.
Installation of this material will not be difficult. You just need to secure the boards with their ends facing each other. They are hemmed directly to the rafters. Eurolining is fixed directly to the walls. In this case, there is no need to create a frame.
When using wood when finishing the attic, the room can be decorated in different ways:
- To make the interior more impressive, you can paint the boards in dark tones mixed with light ones. This will highlight the decorative cladding in the interior of the room.
- When using a block house, the room can be successfully divided into different zones. Elements of the system that are visible can be selected in such a way that they contrast with the walls. Quite often, stain is used to color them.
- Wallpaper with silk-screen printing on the entire wall is suitable for such rooms. Such decoration should be framed with molding.
- Furniture made in an antique style looks quite impressive when decorating walls with this material.
Advice! If the interior lacks original solutions, it can be revived with the help of decorative stone. They should decorate a small section of the wall.
Lining with eurolining
Sometimes fixing eurolining to a frame is a convenient and practical solution. The work is performed in a certain sequence:
- Light-colored types of eurolining are selected. Among them it is worth highlighting maple, fir, ash and spruce. Thanks to this, the space will visually expand.
- Prepare slats with a width of 5 to 5 cm.
- The covering parts are connected by tongue and groove.
- Before installing the facing material, it is necessary to fill the frame with 15x45 mm slats. There should be a distance of half a meter between them.
- The lining is attached to special brackets. Small nails can be used to secure the planks to the frame.
- The surface of the slats is covered with stain or mastic.
To dilute the monotonous interior of the walls, MDF sheets should be used. At the same time, you can create a harmonious interior, as well as increase the durability of the surface. The bottom of the wall, decorated with MDF panels coated with cork, looks very impressive.
As you can see, the second floor of a wooden house can be finished in many ways. Numerous photos show that creating an original home decoration with your own hands is quite simple. The main thing is to use your imagination and be careful. In this case, you should remember the recommendations of experienced builders.
bouw.ru
Internal protection from external light
If there is no better option for external protection than roller shutters, then there are much more of them on the room side:
- The most optimal solution, suitable for most interior design styles, are minimalist blinds or roller blinds with curtains. This design looks quite aesthetically pleasing, and in case of excess lighting it shades the opening well.
- A small lambrequin leaves room for street light and harmoniously combines the elements of the corner structure.
- A living room or bedroom will be perfectly complemented by airy tulle - the opening will remain visible from the room, and the room will become lighter and brighter.
Curtains
There are two types of curtains - common and separate:
- Common curtain. Usually the main fabric is made of a light, maximally transparent material of a light shade (tulle, organza, veil). It allows outside light to pass through well and highlights the surrounding decor. To tightly close the opening, curtains made of heavier materials are hung on the sides. The color of the side curtains, as a rule, is chosen darker than the base, but so as not to disturb the harmony with the interior of the room.
- Separate curtains. There is no main canvas in this design option, which has a positive effect on translucency and allows you to fully observe the external landscape. Side curtains can be the same in color and shape, or different - it all depends on the preferences of the residents. The length is usually designed to slightly overlap the opening.
Layout of a two-story house with a garage and veranda
A two-story cottage with a built-in garage and a comfortable veranda is a popular solution for a modern person. It is distinguished by an attractive appearance, a balanced set of technologies used, as well as a convenient and functional layout of the premises. The presence of a terrace in the layout of a two-story house significantly increases the usable area of the building. A garage equipped with a separate entrance to the living quarters will show its advantages during the off-season.
More than 100 m2
House plan with a garage and a veranda of more than 100 m2 Source aiamaja24.ee
Project of the first floor of a house with a garage and veranda. Area more than 100 m2 Source m.domain.com.au
Project of a second floor house with a garage and a veranda. Area more than 100 m2 Source www.domofond.ru
- Total area: 131.4 m2.
- Living area: 104.5 m2.
- Ground floor area: 54.5 m2.
- Second floor area: 50.0 m2.
- House dimensions: 13.44*8.94 m.
- Ground floor: no.
- Garage: 20.8 m2.
- Garage type: 1 passenger car.
The kitchen is interestingly presented, partially closed and separated from the main living area. The partition between them performs a double function, forming a dining and food preparation area. There is a fireplace near the outer wall, filling the room with living light and warmth on cold winter evenings. An additional storage room in the garage reduces the load on wardrobes and closets; tools and gardening equipment can be stored there. Continuing the line of the load-bearing wall of the house, this practical room increases the area of the second floor veranda to almost 40 m2.
The sleeping area is traditionally located on top. 3 isolated rooms: 2 children's, 1 adult with access to the terrace and dressing room.
More than 150 m2
House plan with garage and veranda of more than 150 m2 Source m.domain.com.au
Project of the first floor of a house with a garage and veranda. Area more than 150 m2 Source www.pinterest.com
Project of a second floor house with a garage and a veranda. Area more than 150 m2 Source m.domain.com.au
- Total area: 162.5 m2.
- Living area: 137 m2.
- Ground floor area: 68.2 m2.
- Second floor area: 68.8 m2.
- House dimensions: 12.48*11.58 m.
- Ground floor: no.
- Garage: 19.1 m2.
- Garage type: for 1 car.
The design of this cottage is distinguished by the severity of its façade lines. Geometric and proportional shapes create a harmonious silhouette. A feature of the house is a covered balcony on the second floor and a large veranda.
The first floor is used as a day area: a spacious, cozy and bright living room with an area of 42.7 m2, combined with a dining room, kitchen and reception area. Although all this is concentrated in one room, thanks to competent, rational zoning, it looks impressive. The functionality of the room does not suffer at all. Access to the garage directly from the house allows you to maintain constant cleanliness and order in almost all technical rooms.
The layout of the second floor consists of three bedrooms, a dressing room and a bathroom.
