Beton-House.com
Website about concrete: construction, characteristics, design. We combine the experience of professionals and private craftsmen in one place
Design of an opening in an apartment
When remodeling your house or apartment, when you need to install an additional arch or door, you often need to create an opening in the concrete wall that corresponds to the chosen project.
In order to avoid deformation or destruction of the building wall when performing work, it is necessary to take into account certain conditions and carry out all operations in compliance with technology. The article will tell you the basic provisions of SNiP that must be observed before starting work, and the rules for their implementation.
Building Code Requirements
Competent redevelopment is based on compliance with standards 3.03.01-87, municipal rules. During the development, SNiP 31-01-2003 and SNiP 21-01-1997, which was amended in 2003 and some updated editions of the codes of rules, are taken into account.
Advice: The engineering calculation of the project should be legalized by a licensed organization. They can also develop an action plan that will take into account numerous factors identified during the inspection of your apartment and those adjacent to it.
Organizations will be issued a list of restrictions, requirements and recommendations.
Below are some of them:
- The existing redevelopments in the apartments located below and above are taken into account, which may complicate the development of a project on your floor. In this case, it is possible to obtain permission, but only if the sizes and vertical positions of the openings in adjacent apartments match;
- You cannot make two openings side by side. The distance between them should be as wide as possible;
- It is not permitted to construct openings in concrete closer than one meter to the outer wall of the house;
- Work that could compromise the integrity of columns, floor slabs, and beam joints is excluded;
- In panel houses it is allowed to make standard doorways in concrete with a width of 900 mm, rarely up to 1200 mm. It depends on the number of floors of the building, the condition of the walls and ceilings.
The principle of reinforcing a floor slab with carbon fiber
Monolithic and hollow-core floor slabs experience bending load: at the bottom (ceiling) in tension, at the top (floor) in compression. For concrete and reinforced concrete structures, the maximum compressive load is tens of times greater than the maximum tensile load. But there are methods for creating pre-stress to reduce the compression force, which leads to an increase in the efficiency of measures to strengthen the slab from below in tension. To do this, use a bidirectional fabric (for example, CarbonWrap Fabric 450/1200), which is located along the long side of the slab with a certain step of several layers. After laying the web on top and “setting” the reinforcing layer, similar work is carried out from below, where a unidirectional web can be used (for example, CarbonWrap Tape-230/600).
Types of cutting an opening in concrete
Before making an opening in a concrete wall, it is worth getting acquainted with the methods of cutting it, which are presented in the table:
| Cutting method | Peculiarities |
| Widening a doorway in a concrete wall using diamond cutting is one of the most popular methods. Its advantages:
Disadvantages of the method:
|
| This is a fairly popular method of cold cutting a concrete wall by exposing the cut site to a jet of water in which abrasive particles with a diameter of up to 0.4 mm are mixed. In this case, ordinary water enters the tank under pressure, here it is mixed with sand, and then exits through a special nozzle, the speed of the mixture is approximately 1000 m/s per cut material. To extinguish the residual force of the jet, a special water catcher is used. If the pressure is not too high, the concrete can be removed without disturbing the reinforcement. At high pressure, the slot is made through. Advantages of the process:
Disadvantages: high cost of abrasive and large installation dimensions, which makes it difficult to use this method in residential buildings. |
| The photo shows a method of cutting concrete using oxygen-lance drilling. In this case, an oxygen lance is used, which is a thick-walled metal pipe saturated with oxygen. Wherein:
The disadvantage of this method is that it can become dangerous for workers due to the scattering of heated slag particles in different directions over several meters. |
| Rope cutting of concrete can be used to cut complex openings. But the wall thickness cannot be more than 700 mm. Advantages of the process:
|
How to expand a window in a brick house
When permission is received to expand window openings, the question arises of how to do this.
If the technical specifications allow, you can increase the window opening both in width and in height.
If you wish, you can combine two windows by making a panoramic window and thereby increase your view.
Previously, houses were built with small window openings to retain heat in the room.
And now large windows are in fashion, sometimes occupying almost the entire wall area. You can give your home a modern look by enlarging the windows. Where the size of the new opening will depend on the new layout of the room, on the size of the window profile.
And also on where the heating system, heating radiators, and so on are located. Most often, the batteries are located under the window, so you should plan to move them in advance.
Technical methods for increasing window openings
It is possible to expand window openings in a brick wall in several ways:
- Impact-dynamic cutting. Punch the desired hole using various available materials, such as a hammer drill, an electric jackhammer, and so on. This method is not suitable for everyone, since you need to have great physical endurance to work with these tools. In addition, when expanding openings in this way, a huge amount of dust, brick chips, and other construction waste is released. Another important factor indicating the disadvantages of this method is the creation of strong noise when the tools are operating. If the house is an apartment building, then the neighbors may not like it.
- The most effective tool for enlarging window openings in a brick wall is a modern cutting tool with diamond blades. With this method, the level of noise, dust, and debris is less than when working with a jackhammer. And the edges of the opening, when using diamond cutting, turn out smoother and neater.
Safety
Whatever tool you use to expand window openings in brickwork, you must not forget about personal safety.
When cutting brick, small fragments fly off, which can injure a person. Use personal protective equipment to protect you from injuries and scratches.
The worker must have:
- Protective overalls;
- Glasses, mask;
- Respirator;
- Mittens;
- Headphones.
That is, it is advisable to cover open areas of the body to avoid injury.
Sequencing
- Remove furniture and things that cannot be taken out - pack them hermetically.
- Also, if possible, cover the walls and floors with film, this will protect them from dust and dirt.
- Remove the old window frame.
- Mark the boundaries of the new opening.
Before you begin to widen the openings in a brick wall, you should strengthen the upper part of the opening. This will prevent the wall from collapsing.
For example, you need to widen the opening half a meter to the left, you can’t just take it and cut out this piece of the wall. Since in this case the existing jumper will fall.
Accordingly, the masonry will collapse and the floor slab will sag. In order to expand the window opening in a brick wall correctly, you should build a new, wider lintel higher than the existing one.
To install a new lintel, you should knock out a row of bricks in the upper part of the opening, to a width exceeding the size of the intended opening, about thirty centimeters.
After this, the wall above the opening is strengthened using a special beam on which all rows of bricks above the window will rest.
Thus, we remove the load from the old beam and transfer it further to the brickwork. Then you can remove the old lintel and remove the unnecessary part of the wall.
To do this, you can start expanding the opening using the first or second method.
Execution of work
It is strictly not recommended to widen the opening yourself, according to your own design, with an angle grinder or a chipper.
You also cannot hire private specialists who can do the job, perhaps no worse.
The thing is that when you agree on the final layout, you will need to provide the contractor’s approvals, that is, without them, you will not be approved in the end.
Conclusion
In conclusion, I would like to say that it is best to entrust the expansion of a window in a brick wall to specialists.
You should not skimp on your safety. And although, at first glance, it seems that enlarging a window opening in a brick wall is not a difficult matter, in fact it is not so.
Choosing a concrete cutting method
If you need to make any opening in concrete with your own hands, you should choose the right tool and cutting method. The main indicator for this is the thickness of the wall.
Wherein:
- For a slot depth of up to 80 mm, you can use a grinder;
- For concrete thickness of 80 - 100 mm, it is better to carry out the work with a machine with high power;
- Walls 150 - 160 mm thick are cut with a circular saw. In this case, the tools should have a diameter of 350 - 400 mm. If a grinder is used, the work is performed in several stages, which can lead to overheating of the disc;
- Concrete with a thickness of 300 mm or more is cut through with a special wall-cutting tool, which can be manual or mechanical;
- Punching an opening in a concrete wall up to 600 mm thick is done with a chain saw or ring cutter;
- A concrete wall with a thickness of more than 600 mm is cut by machines, with discs with a diameter of 1000 mm or more installed on them, or by wire cutting.
Conclusion
Today there are a lot of methods for making openings in durable materials, but the most highly effective is diamond cutting. Thanks to this method, it is possible to quickly make openings in various materials (concrete, brick, stone, etc.), with virtually no noise and minimal dust formation. Therefore, if you need to quickly and accurately cut out any type of passage or window in the wall, then this method will be the most optimal for you.
At the same time, you need to remember that you must have permission to redevelop the premises, since all technical standards for load-bearing structures must be met. It is best to entrust this work to competent companies who will independently prepare all the necessary documentation, after which specialists will be able to quickly cut a passage or window of the required configuration in residential and non-residential premises.
Preparing to cut a concrete opening
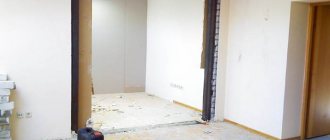
Punching openings in reinforced concrete walls begins with marking, strictly according to a previously developed project, where it is planned to be cut out.
To do this you need to purchase:
- Construction or laser level;
- Roulette;
- Marker.
Despite the simplicity of the marking process, it should be approached with special care.
For this:
- The distance from the wall is measured with a tape measure, strictly observing the requirements of the project;
- Using a level and a marker, draw a vertical line;
- The distance along the width of the opening is measured from the vertical;
- A second vertical line is drawn;
- The distance along the height of the opening is set off from the floor;
- By controlling the level, a horizontal line is drawn.
Marking is carried out on the other side of the wall.
For this:
- According to the applied markings, two through holes are drilled in the upper corners. These will be control points when drawing the outline of the opening on the opposite side of the wall;
- Using a level, focusing on these points, mark the hole on the other side of the wall.
Important! It is almost impossible to mark both sides of the wall without drilling through holes. This is due to the fact that a layer of plaster or other finishing material applied to the wall can noticeably distort the opening, which will not allow its markings on different sides of the wall to match.
And you can carefully cut a hole only if the lines on both sides coincide.
- The entire contour of the door is divided into several segments, most often 9 - 12, which depends on the size of the hole, which will subsequently be sequentially removed after cutting.
Tip: You cannot cut a hole in a concrete wall in one solid “one piece” and then break it into separate fragments with a hammer. This may damage the building structure.
What to do with a DP if there is a door in it?
In this case, it is advisable to use the simplest options. It is worth considering where this structure is located.
The easiest way to finish a DP is with a door frame and adjacent elements. You must:
- Install the box. It can be with or without a threshold.
- Use extensions for facing slopes. The standard sizes of these parts are 12-15 cm.
- Secure the extensions with the groove on the box. If it is missing, self-tapping screws are suitable for fixation. Make a hole for them through the end of the part.
- Exterior finishing is done with platbands. They will frame the DP.
This technology is suitable for cladding non-expanded structures.
Cutting process
How to make a doorway in a concrete wall
To make holes in any dust-free walls, even heavily reinforced ones, manual electric or gasoline disc wall cutters with diamond wheels are used. Such specialized devices, whose power is 3 - 6 kW, have a water supply system to the cutting area.
This allows you to almost completely avoid the formation of large amounts of dust. Some electric models designed for dry cutting can be connected to a construction vacuum cleaner, which significantly reduces dust formation. When installing a diamond wheel Ø=400 mm, the cutting depth can be approximately 160 mm, which will be sufficient to make an opening in a wall 320 mm thick, when cutting it from both sides of the wall.
Tip: When working with a tool with water supply, you should ensure that the floor is well waterproofed so as not to flood the apartment from below.
Work instructions:
- All marking lines applied on one side are cut through up to ½ of the wall thickness;
- On the other side of the intended opening, only one marked fragment is cut to ½ thickness;
- The completely cut element is removed;
- The next sector of the opening is completely cut through and dismantled;
- In this way, all the building material in the intended opening in the wall is sequentially removed.
Tip: When removing separately cut fragments of an opening, you should start from its top row.
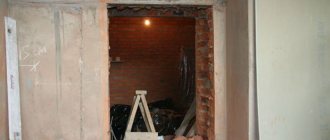
Cutting through concrete on one side of the wall
Hole cutting sequence
You can learn how to make window openings in aerated concrete and walls made of other materials by carefully watching the video in this article.
Common Mistakes
The most common mistakes that inexperienced builders make:
- Non-coordination of upcoming work with supervisory authorities. For many years, changes may go unnoticed, but when the apartment is sold, all alterations will be obvious to the housing inspection staff. As a result, they will have to be eliminated and a fine paid.
- Using a percussion tool to work with monolithic walls. This threatens the appearance of cracks and even the collapse of part of the structure.
- No temporary bridge when working with a load-bearing wall. It must not be weakened, otherwise deformation will not be avoided.
- Carrying out massive work on a dry wall. This leads to the formation of dust and dirt, followed by lengthy cleaning.
- An attempt to knock down unnecessary material using a hammer drill. This is what inexperienced craftsmen most often do. To remove an unnecessary section of the wall, use a hammer drill to only make holes, placing them close to each other. After this, armed with a chisel and hammer, the opening is calmly expanded.
- Removing material from bottom to top. You need to start dismantling from the ceiling.
Strengthening the opening
After cutting holes for installing doors, the project provides for their strengthening. Some projects provide for preliminary strengthening before the start of work, which depends on the material of the walls in the room and the ceilings.
In this case:
- On both sides of the future hole in the wall, technological telescopic racks, at least 4 pieces, are installed, which, when arranging the structure, will take on the loads from the floor;
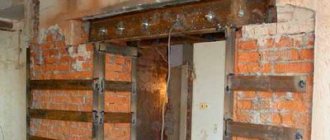
- After the construction of the reinforcement for the opening from any elements of metal structures, which can be angles, channels, I-beams connected by plates, technological racks are removed;
- Sometimes for walls, reinforcement is done before cutting the hole, with powerful I-beams that exceed the width of the opening on each side by 150 mm - 250 mm. The elements are installed above the upper cut of the hole on both sides of the wall in grooves. Then the beams are pulled together with pins and scalded. After removing the building material, the beams are fastened together by welding, using additional metal plates.
Important! It is necessary to strengthen the opening in strict compliance with the requirements of the project. Changing technology or using materials with lower characteristics will reduce the strength of the entire building.
Strengthening the structure
Reinforcement of monolithic slabs with carbon fiber
Varmastroy specialists have introduced a more advanced and modern method in which the monolith is reinforced with composite material in the form of carbon fiber fabric canvases. If we talk about their properties, you can find many advantages:
- High strength. It is approximately an order of magnitude higher than the strength of steel. Accordingly, it is possible to achieve an increase in this most important characteristic of reinforced concrete floors by 6-10 times. The unidirectional fiber structure of the composite perfectly relieves fatigue stress;
- Small weight and dimensions. These are very important qualities, because monoliths have a large own mass, which it is very advisable not to increase. By comparison, carbon fiber is two orders of magnitude lighter than steel;
- Chemical inertness. This means that carbon canvases are not susceptible to the corrosive effects of acidic, alkaline environments, salt solutions and gases. Moreover, the material is not destroyed by water, frost, or hot steam;
- Long service. Once you have reinforced a monolithic floor slab with composite carbon fiber, you can forget about the problems associated with it for at least half a century.
The final stage
After strengthening the structure and its acceptance by the commission, signing the acceptance certificate for the redevelopment of the apartment, finishing work is carried out:
- Weld seams are thoroughly cleaned;
- All metal parts of the structure used to strengthen it are coated with anti-corrosion paint;
- The cavities between concrete and metal are filled with cement-sand mortar. In this case, it is better to take the concrete grade M200 or M300;
- The walls are plastered;
- The door frame is installed;
- The door is attached.
Openings in concrete walls, the cutting of which must be approved by the relevant authorities, can be done independently. But at the same time it is necessary to adhere to the above recommendations. This will allow you to avoid fines and major troubles when remodeling your apartment yourself, which will save not only money, but also nerves.
Finishing and acceptance problem
The reinforcing structure is completely hidden under the finishing. This gives rise to the problem of control of the finished opening by supervisory authorities (the same housing inspection). They must first check the quality and integrity of the reinforcing structure, and it cannot be seen under a layer of plaster, putty and drywall. Here is the time to show a document that can be issued by the organization that was involved in strengthening the opening (for this it must have SRO approval). The document is called an act of inspection of hidden work - it describes all stages of the construction of a reinforcing structure and contains its drawing.
Fill
Monolithic concrete walls have exceptional seismic resistance and strength, and therefore can be used without restrictions for the construction of important capital structures.
The technological process of their installation is quite complicated and consists of 3 stages:
- Welding work to create a metal frame;
- assembly work on formwork;
- filling the formwork with concrete and thoroughly compacting it.
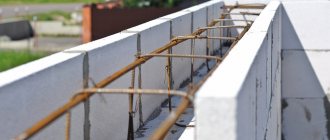
Metal frame or skeleton of a monolithic structure, made of:
- beams;
- transverse location;
- columns of vertical type and a reinforcing mesh connecting them to each other.
Columns and beams are also knitted from 4 rods of 8-12 mm, connected with thinner wire up to 8 mm, at a gap of 20 cm. Transverse and longitudinal reinforcement is tied at intervals of 20 cm using thin hardened steel.
The formwork or external frame of a monolithic wall is made of wooden elements, and recently the most common are aluminum removable panels and permanent formwork, which will serve as a thermal protection during the operation of the house.
The frame is installed in such a way that the panels do not touch the reinforcement skeleton of the product. Formwork leveling is carried out using water and laser levels; for individual low-rise construction, beacon cords are used.
The pouring process is carried out quickly from the corners, smoothly moving towards the center of the structure. To ensure speed of pouring, ready-made concrete is delivered to the construction site by truck.
Next comes the process of vibration of the concrete solution that has not yet hardened, as a result of which the concrete is compacted and becomes even more durable. For high-rise construction with large volumes of production of monolithic concrete walls, the vibration of the solution is carried out by a deep vibrator.
Step-by-step instructions for insulation
In order for Penoplex to be able to effectively protect the house from cold and summer heat throughout the entire standard period of operation, which is at least 50 years, at least as its manufacturer claims, the entire technological cycle will need to be carefully completed:
- Preparatory work. All layers down to the cement are carefully removed from the walls: paint, putty, wallpaper. Use putty to smooth out any unevenness on the walls, otherwise the insulator will not stick tightly, and in the future it will crack from any pressure. Permissible deviation - no higher than 10 mm per m.p.
- Impregnate the walls with an antifungal solution with deep penetration.
- The walls are primed, and the iron parts that are planned to be covered with thermal protection are painted or covered with anti-corrosion mixtures.
- Smooth insulation surfaces are treated with a needle roller.
- If the building material chosen for thermal protection of the house for finishing is plasterboard, block house or false beams, then its fastening will require installation where climatic conditions allow, you can use a wooden structure. But in a humid environment, the timber either swells or shrinks, thereby moving the slabs from their place.
- If the insulation is attached without a structure, then a special strip is nailed underneath. It will become a support for the initial row and will hold the Penoplex.
- The slabs are installed from below, at the very corner with maximum solar illumination.
- The plates have grooves for tight fastening. Before applying glue, the compatibility of the locks of the previous slab is checked, and the cut parts are adjusted with maximum precision.
- Coat the sheet along the edges, applying a few strokes in the center.
- Press the insulation sheet against the wall using a rotational movement, thereby distributing the glue, and press it with force for 30 seconds.
- They check the accuracy of installation of each sheet with a building level.
- Gaps in butt joints or any flaws are immediately sealed with pieces of Penoplex, selecting them according to their shape.
- The slabs are laid in a bandage, with the seams staggered.
- In openings, Penoplex is installed with the release of material onto the slope line.
- An adjacent profile is mounted to the openings and only after that the sheets are glued tightly.
- After final setting, which can take several days, proceed to additional fixation of the sheets with disc nails. The length is determined by the thickness of the slabs plus 1 cm additionally for the thickness of the glue and 5 cm for the wall. For Penoplex 80 mm, nails should be 80+10+50= 140 mm.
- After final fixation of the insulation, the surface is reinforced with fiberglass. To do this, it is cut into sections of no more than 1 m2. Apply 3 mm glue to the wall, glue the mesh onto it and level it, without gluing the edges to connect them to the next section.
- When there is not enough glue, add more until the mesh is completely covered with the solution.
- Secure the new part of the mesh, placing the edges overlapping.
- After the reinforcing layer has completely set, the edges are cleaned with sandpaper. Next, a leveling adhesive layer is applied.
- Then the dry surface of the walls is plastered.
What do you need to know?
The design of the window determines the operational purpose of the room. Sunlight enters the room through the window, but there are no barriers to cold and high humidity.
If the installation is carried out incorrectly, dampness and mold will quickly appear in the room.
When preparing window openings, pay attention to the material from which the walls are built. For a brick stone or concrete block, the element is made according to the same parameters, but for a log house there are different standards.
The current restrictions on opening areas for windows are practically not taken into account by developers of private housing. As a rule, owners determine the shapes and parameters of windows based on their own wishes. This leads to a situation where the finished window turns out to be very small or excessively large, which is accompanied by warping of the frame structures, loose fitting of the sashes, and the appearance of condensation inside.
It is most correct when the opening area for the window appears during the process of removing the masonry. This will ensure:
- correct installation of the frame;
- sealing;
- moisture removal;
- isolation from extraneous noise;
- decoration of facade walls.
reliable fastening of the entire window structure;
The frame should fit easily into the opening intended for installing a window. Window sills inside and outside are secured with a thin layer of mortar; a niche is provided for cladding.
Most often, PVC window blocks are installed. It follows that it is reasonable to define such products to standard sizes, and it is easy to adjust the masonry of the window opening from facing bricks to the intended design.
Comprehensive protection with insulation
Considering the expensive price of sound protection systems, it is practically not used anywhere in its pure form. Despite its good strength properties, concrete is a cold building material, so even in the southern regions it requires insulation. According to modern urban planning standards, insulation and waterproofing of such structures is mandatory.
The most common complex material for several types of protection is mineral plates. Today, after the release of a new soundproof modification of Penoplex, it is becoming a real competitor to mineral boards, especially for external wall protection. This is a complex insulation material with good heat-, water-, frost-resistant characteristics and noise protection.
