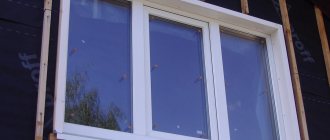
The structure is a structure of beams, racks, lintels connected into a solid structure, sheathed with OSB boards, clapboard, plasterboard, cement-bonded particle boards.
But at the same time, there are nuances regarding the features of the openings of such structures: here the quarters are made somewhat differently, casing, as a rule, is not used, and there are extended recommendations for deepening the window.
Let's consider the rules for choosing windows and methods for installing them in frames, the features of enclosing structures associated with this type of structure, how to arrange installation joints, insulation, and waterproofing.
Features of window openings in frame structures
Frame houses must be distinguished from timber houses: if the latter are similar to log houses, then in this case it is a system of relatively thin lintels, racks, covered with sheets (boards) of cladding and insulation.
The walls in this case are multilayer: the standard set of external ones includes 9 layers (heat, waterproofing, OSB boards, etc.), internal ones - 4.
The regulatory framework for openings for window structures is standard (there are no separate documents specifically for frame objects): GOST 30971, R 52749, SP 52.13330.2011 and 23.102.2003.
The skeleton (frame) of the frame is calculated for the maximum permissible loads, especially on the corner parts. They make both the upper and lower trim with a strut spacing of about 1 m, but where the openings are not possible to maintain this gap, the distance will be wider, and the pressure will increase accordingly. The problem is solved not only by lintels, but also by reinforced support posts (walls) of the opening.
If the length of the window exceeds 120 cm, then this complicates the design, you will need to make individual changes to the project, and additionally strengthen the beam. This is important, since frames are designed strictly for certain loads.
All their elements must be exactly in their places and they are interconnected to a much greater extent than in other structures; uneven load (lack of reinforcement) in one place will significantly affect the entire structure.
Openings in frame buildings for windows and doors are made in two ways:
- With headers . These elements are most similar to jumpers. The rack-walls of the opening, if these parts are present, are often additionally reinforced - double, triple.
- With crossbars . This is a strapping of long and thick dimensional boards along the top of the entire wall, the perimeter of the house. The posts at the walls of the window opening can be single, since this design is more stable and durable.
A header is a transverse beam, it is a lintel in the literal sense of the word that serves as the upper wall of the opening for a window block. Its ends on both sides rest against the double side posts.
Both the crossbar and this crossbar can be adjacent closely to the top trim. But the second is only the upper, relatively short wall along the width of the opening, and the first is a kind of belt along the entire length of the wall.
The header usually consists of 2 - 3 boards nailed down and installed on an edge , and here the load is distributed evenly by the short posts running from above it to the frame (bearing beams) and at the bottom of the opening. There is also an option when this part is a solid board, closely adjacent to the upper belt.
Interesting! The hider design is typical for the Canadian technology of assembling frames, the crossbar design is typical for the Finnish one.
If you install standard windows, then there is not much difference in reliability, but if you install particularly heavy standard sizes, then it is preferable to use the latter. The crossbar device has an advantage: with it the racks are thinner, there are fewer of them, therefore the likelihood and number of cold bridges is reduced.
Crossbar - large, as long as possible, solid, supporting beams connected into a belt , on which other load-bearing and other parts rest; often they seem to cut into this reinforcement.
This is the base above the opening in the form of thick long boards fastened together, mounted on edge. Such a belt closely resembles a harness in appearance and function, and can be adjacent to it, be its continuation, or reinforce it.
For a window opening, the crossbar is placed at the top of the frame racks along the length of the wall and, as a rule, there is only one. Supports and other parts are attached to it and tied into a durable structure that evenly distributes the load, thereby reducing it in the area of window and door blocks.
Between these racks there is an opening, but they are often single, and the lintel above it is the same - ordinary, relatively thin, since there is no need to install more reinforced elements.
The average parameters for the opening pillars are as follows::
- for external walls 150×50 (40);
- for internal 100×50 (40).
The boards must be at least 2 times as wide as they are thick. But in the end, the wall itself, or the window opening, can be much thicker, taking into account the layers of insulation, insulation, cladding, and the size of this pie affects the depth of the glass unit in it.
Casing
For houses made of timber, a casing is often installed to compensate for the loads during shrinkage of the structure (frame, deck, carriage, box), but for frame buildings it is, as a rule, not used: it is not necessary, since the frame for the opening is designed initially and the posts are immediately are made with the necessary parameters for filling.
Deformation also occurs here, but such houses are light and the window frame and its fastenings easily resist influences, although minimal changes are not excluded.
For the frame frame, much better dried wood is used , the structure is lightweight, the elements are more dependent on each other, which makes the distribution and compensation of loads optimal. Therefore, such a house gives minimal shrinkage, and the window frame is able to withstand deformations of the enclosing structures. To protect it, a header with reinforced posts (double, triple) or a crossbar is sufficient.
Theoretically, it is possible to make a pigtail, but then you will have to strengthen the lower and upper racks and increase their number.
Quarters
The opening for windows in frames, as in all other buildings (stone, timber, logs), can be equipped with or without quarters. A quarter is a U-shaped protrusion around the perimeter of the opening , behind which the window frame is hidden.
The role of the quarter as a barrier to the glass unit falling out is secondary, since even without it it will be securely held by screws and plates. It will, of course, complicate the extrusion of the structure, but its main tasks are: to simplify and increase reliability, stability of fixation, and most importantly, to improve heat capacity, insulating properties, and protection of the assembly seam, which is the main weak point.
This element is not mandatory and there are many houses without it, but most experts consider it as a desirable part of the structure. In addition, the quarter acts as a convenient basis for finishing external slopes (putty, plaster, panels); a window can be rested against it, which is convenient during installation.
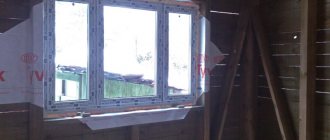
For frame frames, quarters are not made when assembling the structure, since its size will depend on the depth of the filling, the width of the frame, and the installation seam. These details are created during the window installation process, after the product is ordered, it is determined how it will be placed.
These protrusions are made of the same frame sheathing, from foam plastic, timber, boards, and secured with glue and screws. The thickness of the quarter is at least 4 cm , since it should cover the mounting seam (which is about 2.5 cm) and there should still be room for the frame to rest (several cm). The width corresponds to the distance of the structure from the edge of the opening, that is, it depends on the distance of its recess.
The photo below shows the traditional way of creating quarters in frames: when an opening is cut out in the sheathing, it is made along the top and sides narrower than the width of the installation gap (2-2.5 cm) plus 1-2 cm to stop the frame. The window is always placed close to the ledge, but before that, PSUL tape is glued to the frame at the joint, which expands and penetrates into the gaps, creating a reliable seal.
In this case, the quarter serves as a barrier to prevent the window from falling out and to prevent water from getting inside until finishing. Then it will be possible to replace it: cut out 2–3 cm in it and install counter strips covering the joint.
Cladding slabs
The wall in frame buildings is usually tightly covered with OSB panels and only then (according to SP 31-105-2002) openings are sawed through them. That is, they do not install ready-made panels with cutouts along the opening. This is always done in order to hide all the joints and strapping, and also so that the slabs additionally tighten the skeleton of the building and become full-fledged elements of the frame’s rigidity.
This is achieved due to the fact that the shields are attached directly to the racks, but with a gap of 2-4 mm, since they are initially dry and will expand slightly during precipitation. When the environment is humid, the slabs swell and there are practically no gaps. At the same time, there is an additional plus - slanting rain will not penetrate inside, since all the joints have been tightened.
Cutting methods
To cut a doorway with your own hands, you will need a tool, but you can choose it correctly after determining the method of work being carried out. The method depends on the wall material. It is not advisable to chisel and sledgehammer, as the integrity of the entire partition will be compromised. You can carefully cut the opening using diamond, laser, waterjet or oxygen cutting.
Diamond cutting
For concrete partitions, the method of diamond cutting of a doorway using a grinder or circular saw is used. The cutting element of the tool is a metal disk coated with diamond.
The diamond cutting method has many advantages:
- low level of vibration eliminates the appearance of cracks even on loose partitions;
- during the cutting process, an accurate thin cut is entrusted along the marked contour and at the desired angle;
- the noise level of a working tool does not exceed the permissible threshold specified in sanitary standards;
- a small amount of debris due to the absence of chips, which is impossible to achieve when using a hammer drill.
Among the shortcomings
highlight the costs of purchasing expensive diamond blades. During work, the concrete wall is moistened with water, but fine dust still spreads into the room.
Laser cutting
Expensive equipment is used for laser cutting of openings. Previously, it was bulky and was used only in production. Modern laser cutting equipment is compact, but its high cost and specific purpose have made it popular only among specialized repair teams. The cutting of a concrete wall is made with a laser cutter due to the gas-discharge action.
Before starting work, the parameters of the wall
:
- thickness;
- the presence of a reinforcing frame;
- passage of communications inside the partition;
- grade of reinforced concrete wall.
Additionally, the floor of the apartment building where cutting is planned is taken into account, as well as the admissibility of wetting the concrete structure with water.
Waterjet cutting
Cold cutting of an opening in a wall refers to the waterjet method. A special installation is used for work. It creates a strong stream of water at a speed of 1 thousand m/s. The liquid in the tank is mixed with abrasive particles with a diameter of about 0.4 mm. The prepared mixture is fed through a nozzle onto the reinforced concrete structure and destroys it at the point of contact. The cutting force depends on the pressure. At the maximum power of the equipment, a reinforcing frame made of steel rods is cut along with the concrete.
The waterjet cutting method has the following advantages:
- precise cutting of concrete according to markings;
- the environment is not polluted due to the absence of chemical impurities and harmful gases;
- the concrete partition is not subject to mechanical and thermal stress;
- no wall vibration;
- low noise level;
- The method allows you to cut out a section of the partition at any angle, as well as make a doorway of complex shape.
Disadvantage
is the formation of dirt, the high cost of consumables, and the large dimensions of the equipment. Waterjet cutting is used on construction sites that have not been put into operation.
Oxygen cutting
The oxygen cutting method is also called spear drilling. To cut out a doorway, a machine with a metal tube is used. Oxygen is supplied through the spear under high pressure. At the same time, the jet is heated inside the tube to a temperature of 1400°C using a gas burner. After the spear has ignited, the external heating source is turned off. When the temperature reaches 2000°C, the tube is leaned against the concrete surface and turned slightly. During cutting, you cannot move the spear away from the concrete, as it cools quickly.
The disadvantage of this method is considered to be a fire hazard, as well as the possibility of getting burned. During cutting, hot slag particles scatter throughout the room.
How to insert correctly: important installation nuances
If for houses made of timber or logs it is advisable to wait at least a year, and ideally 2-3 years, and use casing, since shrinkage and deformation are significant, then in frame frames window structures are often installed at the construction stage - after finishing the walls with slabs OSB.
Some building owners wait 1 year for the building to stabilize as much as possible, and fill the openings with temporary filling (cheap structures, stretch film). But usually the windows are installed immediately, as we indicated.
The frame, of course, shrinks and deforms over time, but due to the lightness of the building, the intense interconnection of all the racks and lintels, the changes have a weak force, are compensated by the entire structure, and are not able to affect the window unit.
Installation immediately after sheathing with slabs is also due to the fact that it is necessary to create a closed loop of hydro and vapor barrier. Not always, but often, a special membrane is placed between layers of materials throughout the house, the allowance of which is wrapped inside the opening and secured with a stapler. And when the window is installed, protective films are glued onto it, the edges of which are turned away and overlapped with the protection described above.
Installation depth
The rules for the installation depth of window structures are standard . In a solid, homogeneous wall, it is optimal to place the block along an axis running at 2/3 or 1/3 (usually this interval is taken) of its thickness. In a layered fence (sandwich, if there is a thermal insulation layer, a ventilation gap) - in the insulation zone, flush with the cladding or a little further inward, for example 5 cm.
The challenge in choosing the right recess is to move the dew point outside the frame without making the window too cold.
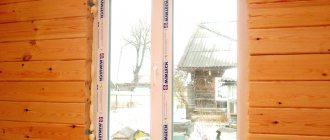
In the photo below there is an option when the block is installed immediately next to the cladding, but you need to take into account that there will also be cladding with its own insulating layers.
If the enclosing structures in stone and other houses are large and a window block can be placed deep there, then in our case the thickness of the racks often does not exceed 15–20 cm, and the window profile itself is about 7 cm, leaving approximately 13 cm.
The question arises where to install it. The greater the depth, the more intense the wall and slopes will freeze . And the closer to the street, the more the window freezes, and the likelihood of condensation increases, including on the frame inside.
You can place it almost close to the street, almost flush with the edge of the wall, in the middle or even near the inner edge of the opening. But making a random or unreasonable choice is not the answer; we need to find a balance.
It is advisable to install it with a depth of ⅓ or ¼ . In our case, we chose the golden mean: the windows will be in a warm zone, where the heat from the house warms up the counter and the double-glazed window, which will no longer be so cold, like a piece of frozen plastic. The design will not fog up or “cry”. That is, there is no need to try to place it closer to the street, it is better to deepen it, but not excessively, by about 5 cm. The photo below is the best option.
In general, the most popular general rule for recessing is 1/3 of the opening width.
Advice! If you plan to insulate with a thickness of 11-12 cm, then the edge of the glass unit should be placed at a depth of 3...4 cm from the outer edge of this insulation, otherwise you can get to the dew point and the “crying” of the structure is guaranteed.
Measurements
Measurement rules:
- Width is measured both from above and from below; height - along the edges on the right, on the left. Next, select the smallest value.
- The size of the installation seam is subtracted from the width, usually 2–4 cm. From the height it is the same, but if the stand profile is not removed, but placed on wedges, then it is also subtracted - about 3 cm. But most often the gap is the same along the entire perimeter - 2- 2.5 cm.
- If there are quarters, then they are not taken into account - the counting is carried out precisely from the walls of the opening, subtracting the thickness of the gaps for the installation seams.
Example : if the seam around the entire perimeter is 20 mm: the opening width is 755 at the top and 750 mm at the bottom. We take into account the smaller number, minus 20 mm we get 730. You can take a value a few mm less within reasonable limits, for example, 725, since the gap can be slightly increased. The same with the height: on the left - 1280, on the right - 1278 mm, from which we subtract 20 mm, the result will be 1258 mm (you can round down - 1255).
How to choose the type of window opening?
Wooden, PVC and all possible types of windows are installed in frames. There are no special restrictions, except for minor, general ones, which we describe below.
Standard opening placement:
- The height above the floor is 80–90 cm, which will provide optimal visibility for a person sitting on a chair or in a standing position. In the kitchen this figure is 105–110 cm for better lighting.
- From the top edge to the ceiling a maximum of 30 cm.
It will be most convenient to take standard parameters and organize openings according to them. This is what they do in most cases. The sizes can also be any - you can make any window to order, but this will somewhat complicate the house design and increase the price.
According to GOST 11214-2003, SP 52.13330.2011 and 23.102.2003, the standard sizes of windows for housing, regardless of the building material, are as follows:
- Width from 87 cm to 2.67 m; height from 1.16 to 2.06 m.
- The optimal glazing area in relation to that of the floors of the room is in a ratio of 1:8; for bathrooms, utility rooms, non-residential parts - up to 3%. These are average parameters, rules and calculation formulas are in SP 23.102.2003.
Manufacturers focus on such standard characteristics of PVC windows:
- Height: 60; 90; 120; 135; 150 and 180 cm; width: 60; 90; 100; 120; 135; 150 and 180 cm.
- Typical: 700x1350 mm, with two doors - 1300x1400 mm, with three - 2050x1400 mm.
Restrictions for installation of non-standard double-glazed windows:
- The area of fixed windows should not exceed 6 m2 due to increased wind load.
- The maximum height of models with opening parts is 2200 mm.
- The minimum parameters for fixed structures are 300×400 mm, for casement structures – 400×500 mm.
When choosing windows for private housing, the area of the room matters. For example: if the bedroom and children's room have standard sizes of 10 - 12 square meters. m, then one product 900×900 is enough, if it is 2-3 times more, then it is recommended to increase the number of openings.
Let us remind you : there are cameras in profile (from 1 to 6) and in glazing (1, and more often 2, less often 3 or 4), they must be distinguished when purchasing a product.
If we consider the heat capacity and insulating properties for external openings, then the rules are as follows:
- In a southern climate there are at least 3 cameras in the profile; there may be 1 in the glazing.
- For moderate conditions in the central strip, the previous option is often used, but it is better to choose a model with more than 3 cameras in the profile and 2 cells in the glazing.
- For Siberia and similar cold regions, there may be at least 3 chambers in the profile, but 3 are highly desirable in glazing.
- For interior rooms, a product with a minimum number of chambers in the profile (usually two, since there are almost no windows with one) and glazing is suitable.
Plastic window frame dimensions
The size of the window opening determines the level of natural light and living comfort in any home. If the owners of multi-storey buildings cannot choose the windows themselves, then the owners of private cottages have the right to experiment with window sizes.
But when implementing bold design and architectural solutions, you should remember the requirements of building rules and regulations.
When choosing an individual size of window structures, be sure to take into account the following rules:
- The optimal solution is considered to be a situation where the total glazing area does not exceed 18% of the wall surface.
- In pursuit of convenience, one should not forget about safety. Different regions of the country have different weather conditions, which must be taken into account when designing a window opening.
- In case of severe wind or snow loads, it is better to give preference to standard-sized structures.
If we are talking about large-sized blocks, they must have partitions, and the area of one door should not exceed 2.8 square meters. In addition, large frames with two or three chamber double-glazed windows have a lot of weight, under the influence of which the sash can “lead”, which is why it begins to creak and is difficult to open or close.
Tools, devices, materials for work
You will need the following tools:
- A screwdriver with bits (including Torx), drills for 6, 10 and 12 or others for the anchors used, for drilling (it will be enough for tightening self-tapping screws to create holes).
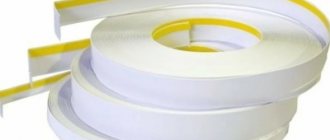
- An inner vapor-permeable insulating film (usually foil) and an outer film, similar to it, but sometimes also called moisture and wind protection, with a butyl rubber layer. Instead of the latter, diffusion material is also used. You can further enhance the insulation with Steez group sealant.
- PSUL tape. Placed on the frame at the junction with the quarters, as well as on the stand profile;
- Mounting polyurethane foam.
- Yellow self-tapping screws (pins) for concrete. Standard sizes can be: 7.5×95; 7.5×132. The length depends on the installation gap. But usually 92 mm is used for side fastening, and 132 mm for bottom fastening; they may have a Torx head, which is why such a bit is needed. To fix the ebb, you can use such short parts (6×60).
- Typically the plate is secured with one self-tapping screw and two black screws. The first ones are recommended in the sizes indicated above with a drill and a press washer, and the second ones are 4.8x90 or 4.8x110.
- Plates for fastening windows (purchased at hardware stores). You need to choose stronger ones, since they are often excessively flimsy, to the point that craftsmen make them themselves from pieces of steel.
- A simple construction level and a laser level (optional).
- Square, tape measure, metal ruler, folding meter, pencil.
- Plastic wedges: stand (support), spacer and/or stand profile (may be included with the window).
- A chisel or spatula for snapping off glazing beads.
- Pneumatic suction cup (optional) to hold the glass unit when unpacking.
- Low tide. This is a steel strip, also often called a window sill or drip edge, located on the outside under the window.
- Hacksaw, hammer, mallet, nails - for auxiliary work.
Important! For a screw or self-tapping screw for concrete 7.5 mm thick, first drill into the profile with a 5-6.5 mm drill. Do not overtighten the dowels; this will cause the frame to turn inside out and cracks to appear in the plastic.
Tips and recommendations for arranging openings in a frame house
What you should pay attention to when arranging holes:
- The distance between the posts must correspond to the width of the slabs of heat-insulating material;
- There is no need to get carried away with a large number of racks. The minimum step between them should be 60 cm. If there are too many of them, this will a priori lead to the appearance of a large number of so-called cold bridges;
- To fix various corners and posts in a frame house, you can use the most ordinary self-tapping screws (usually mounted with a screwdriver). The optimal length of self-tapping screws is 75 mm; you should not take large ones, as they can damage the wall pie. For simple rack structures, 4 to 6 ordinary self-tapping screws will be enough; if you take corner rack structures, then 10 pieces will be enough. For greater reliability of fixation, it is best to fasten the screws “obliquely”. Why use this fixation method? It’s just that in this case it will be possible to do without a metal profile and plates, which, firstly, will simplify the task of fastening, and secondly, will save money (a metal profile is expensive today).
Installation of corners in a frame house
How to do it yourself: step-by-step instructions
As with buildings made of stone materials, for wooden frame buildings there are two ways to attach window blocks :
- On dowels, that is, only on self-tapping screws (those for concrete are used).
- On plates that are screwed with self-tapping screws and black wood screws.
Common points for all methods of fastening to frames
For the installation of windows there is GOST 30971, but it does not mention frame structures, that is, it is common to all buildings, there is no separate regulatory act. They are guided by it. However, the installation methods are similar, only minor nuances differ.
The preparatory stage consists of unglazing or unpacking: snap off the glazing beads on blind windows, remove the chambers (block with glazing), and if there are sashes, remove them. Place these elements in a convenient place so as not to touch them during work, place them on substrates (stand profile, soft rags can be used).
Careful handling is especially important in winter, as plastic becomes brittle in the cold.
The assembly seam consists of layers:
- internal – vapor-permeable membrane;
- central - foam (inside the joint between the window frame and the opening pillars);
- external – external moisture, wind, vapor protection.
The thickness of the installation seam according to GOST is from 15 to 50 mm. Usually it is made at 2-2.5 cm.
There are rules for the pitch of fasteners on the window frame (counted from its inner corner, sometimes the numbers differ slightly in different schemes):
- between the screws the maximum step is 70 cm for white and 60 cm for colored profiles;
- from the corners no less than 15-18 cm;
- from imposts maximum 15 cm.
Several features regarding the membrane, which is installed during the assembly of the frame (between its cladding):
According to GOST, installation must include the presence of window sills, slopes, seals, and drains.
Stand profile or wedges (stands)
Often the stand profile, also known as the clover, which comes with the window, is thrown away. They forget that this part is intended not only for protection during transportation of the product, but also has practical significance for installation. The stand profile can be used instead of support wedges - this is its second direct function. The height of the part is already optimal for the thickness of the gap according to GOST.
Important! There is no particular difference between using a support profile or support wedges (you can use two at the same time).
There are approximately equal numbers of supporters of the two options. But if clover is used, then its internal cavities must be foamed, and it must also be removed, a tape placed at the junction with the PSUL frame and quickly, before it has time to expand, installed on the profile again.
Moreover, the PSUL is placed in the middle, so that it is not visible, and the tape is pinched between the chambers of the stand profile, which, after installation, is screwed to the frame with two self-tapping screws.
Plate mounting
Let us first describe the mounting on the plates. There are such variants of these brackets (clips): with a butterfly, which snaps into the groove of the profile (must be selected for the specific dimensions of the double-glazed window) or universal ones, attached directly to the frame with self-tapping screws. The part can also fit into the internal groove or into the outer recesses.
The plates with the butterfly have a hole, so they can be additionally secured with a self-tapping screw. Some craftsmen make them with their own hands, cutting them out of strips of steel and drilling holes in them for hardware.
You will need at least 2 pieces. plates on each side. We indicated the diagram and step above.
We glue two vapor-permeable tapes:
- Foil (internal, Robiband NL is often used) on the end facing the inside of the room.
- The outer one with a butyl rubber layer (it is also called wind and hydro protection, this is Robiband BC) on the outer end.
We leave half the length of the tapes with a protective film - this part will be glued to the walls of the opening after the window is inserted into it. We fix it on the protruding walls of the profile groove.
There are other options with steam-hydroprotection, for example, when the opening is completely covered with it (super-diffusion tape is used). But this solution seemed dubious to us: the foam does not adhere well to this material, and besides, it will need to be immediately covered with slopes so that it does not deteriorate from ultraviolet radiation. Why use this option if there is a more convenient effective method described above.
So, we snap the plates into place, and sometimes we also put plastic clips on the sides in a similar way - the sandwich panel will fit onto the slope behind them, thus improving its fixation. The latter are not always used; this is one of the optional improvements, but we indicated it because we considered it very convenient.
We place wedges at the bottom of the opening, set it to 20 mm (or the selected thickness of the gap), you can instead use plastic and polyurethane foam blocks (steps of about 30-40 cm) or a stand profile.
We insert the window and check the level for evenness. First, we fasten the plates with a black wood screw, make sure that there are no distortions, and fix the yellow, more durable screws. In the penultimate photo you can see the black clip into which the sandwich panel will go. Next we foam the entire perimeter (inside and outside the room).
In the photo above, steam and waterproofing tape were not used, which is regarded as a mistake . But we showed this option because it shows a convenient solution with a plastic clip for finishing the slope. Below is a similar installation algorithm, but there is a vapor-permeable outer and inner tape (we have already described how to glue it), as it should be.
The foam is cut off, the material is fixed to the wall of the opening, and it can additionally be glued with tape. Then, when finishing, the house's waterproofing membrane, if any, is overlapped.
Installation of double-glazed windows on dowels (with self-tapping screws through the profile)
Our opening is closed with a moisture- and wind-proof membrane at home. We cut a hole in it for the window, leaving 6–7 cm at the edges, since it will overlap a similar butyl vapor-waterproofing tape. This material is installed during the assembly of the structure and goes throughout the house outside between the posts and the sheathing.
Advice! It is advisable to install mosquito net fastenings immediately.
Next, we remove the sash: we hit the pin with a nail, install a handle to open it, pull it up and remove it. In blind windows, we remove the glazing chambers: we simply snap off the glazing beads with a spatula, use a chisel, and pull them out.
We place the frame on support wedges and wedge them on top with spacers as well . The boundaries of the recess are pre-marked, and the window is set according to these marks. We check the evenness with a laser level, and use a regular level to determine the plane of the frame. If there is any unevenness, then lightly tap it with a hammer. In the photo we see the location of the wedges.
Next - markings for self-tapping screws: 15 cm from the bottom (inner corner) of the frame, from above the same, marking the center. The distance between the marks should not be more than 70 cm (60 cm for a colored profile). We have given the diagram for fasteners above.
Using a 5 mm drill, we drill through the frame, after which we expand only the upper wall of the plastic by 12 mm, so that the head of the screw goes inside and stops there near the metal strip in the profile. Screw it in, hide the holes with plugs (can be sealed with sealant).
We install the sashes and double-glazed windows (place them inside the frame, snap the glazing beads into place). There are wedging inserts inside the profile groove - we don’t touch them, we leave them. The top two, which were removed before unpacking, lie under the frame; we insert them during the installation of the glazing. We snap the glazing beads into place and tap them with a mallet or the handle of a hammer.
The sash is inserted like this: first the lower hinge, then the upper hinge, and we push the shaft (pin) into it. The stand wedges can be removed before foaming; sometimes they are left in place (but the side spacer wedges are always removed).
As you can see, the vapor barrier tapes have not yet been installed - they are installed a little later, that is, after installing the window in the opening, before foaming. And this is a completely reasonable option: seals and insulation will not be destroyed by sunlight as long as they remain uncovered during other work, and the risk of damage during manipulation is also eliminated.
Let us remember that the vapor barrier is attached to the end from the inside of the gap so that its edge sticks out parallel to the slope into the room . Outside, a similar membrane is fixed in a similar way, but specifically for the street. Here, too, they do not foam yet for the reasons stated above.
In the third photo we see the depth of the window. It then shows how the remaining outline of the house membrane (see the beginning of this section) will be overlapped and glued to the butyl rubber external vapor barrier (there is none yet).
Once again about the installation depth: a finger shows where the warm circuit ends, in this gap there is cross-insulation. If they were installed end-to-end, then in addition to deteriorating heat capacity, it would be impossible to create attractive slopes, and the ebb would be too narrow or protrude excessively.
The third photo shows how much space is left in the opening : the protrusion is 75 mm, but there will also be external finishing, which is another 50 mm, which is ideal for the 150th window sill. The installation seam is 2 cm everywhere, that is, it is canonical, and foaming will be the same everywhere. Also in the last photo you can see that the stand profile was not removed - both it and the wedges were used.
Crossbar in Canadian technology
In Canadian housing construction, door and window openings are arranged as follows. The main racks (they are called solid racks) are mounted along the width of the opening. A crossbar is placed above a window or door (in this case it is also called a header, which is basically a type of crossbar). It is made up of two or three boards knocked together, so that the thickness of the overall board is comparable to the width of the rack.
Under the crossbar, the solid racks are reinforced with additional racks - the same boards. They are nailed to each other.
Installation of crossbars and strengthening of racks according to the Canadian version
Additional shortened racks are installed under the window. Sometimes shortened racks are nailed between the crossbar and the floor beam - if the window is placed much lower than the ceiling. It is advisable to hammer two nails side by side at the top of the board, then downwards with a spacing of 60 cm, the bottom nail can be driven in the center 15 cm from the floor.
Schematic arrangement of the crossbar using Canadian technology
Crossbar in the Canadian version
Thus, the load from the rafters is transferred to the crossbar, and the load from the weight of the window itself is transferred to the lower shortened racks. In general, the weight of the roof and windows is distributed evenly across the wall, just as it would be distributed if there were missing studs.
Finishing after installation
We install the ebb (the width can be chosen tightly or with a protrusion of 1–3 cm according to the preference of the home owner):
- We measure the opening between the trims, take a value 1 cm less so that the part fits in easily and presses.
- We mark 1.5-2 cm on the sides of the ebb for bending.
- Using metal scissors, we make cuts along the marks on both sides, but only on the curved edges; we cut off these pieces altogether.
- Using a corner, draw an oblique line along the remaining protrusion (45° angle), starting from the end of the cut. We do this only on one side, the one that will be adjacent to the house. We bend the protrusion with pliers, clamping it in two blocks of wood. We do the same on the other end.
- We place the ebb on the window, you can screw it to the profile with short self-tapping screws with a press washer (3-4 pieces are enough) or insert it into the lower groove, which is provided specifically for this part.
- It is advisable to treat the gap between the wall (bottom of the opening) on which the ebb is placed, and it with Stiz sealant, and also foam it, in the way we will describe later for the window sill (with fixing blocks).
Slopes:
- The interior is paneled and plastered.
- External ones can be decorated with platbands and overlays, which will also create a pseudo-quarter.
How to install a window sill:
- We screw two blocks to the side walls from below so that they hold its top exactly at the level of the cutout in the window profile, that is, so that it does not fall behind or go higher.
- We insert it from below. There will be a small gap along the entire plane, since the installation seam cannot be accurately calculated to fit the window sill.
- We press the window sill to the blocks with clamps, and where they cannot be installed, we screw it in with self-tapping screws - one on each side is enough, you only need to hook the very top, that is, screw it in shallowly.
- Next, we place a board along the entire length that will keep it from rising when the foam expands, and secure it to the wall with screws. We put a second one on it, a little shorter, so that it fits between the blocks. We fasten it with self-tapping screws to the first board. We foam the bottom and install a decorative trim like a plinth.
It is advisable to treat all joints, especially where there is foam, as well as the plane on which the ebb is installed, near the window sill (this is especially important here) with Stiz sealant for external and internal work (there are compounds marked A, B, D depending on the purpose) . It is also advisable to apply this substance to surfaces before foaming, which will increase adhesion.
Manufacturing of casing
The casing consists of two sidewalls (side posts), a top - the top board and a window sill or threshold (also called a bottom). It must be said that the lower part is not always present: it is often not made in interior doors. In some cases (when installing PVC windows, for example), they do not make a window sill, but simply a lower embedded board, to which a “standard” window sill is then attached.
Also note that the top does not rest against the top edge of the window or door opening. There remains a gap of 5-7 cm between them - for shrinkage of the log house
This gap is then filled with insulation and covered with platbands and finishing materials.
What does a casing box consist of?
The most questions arise when forming the locks necessary for joining parts of the casing. These elements are especially difficult if a quarter sample is required. It’s difficult to explain in words, let’s provide drawings. Take a look at them and maybe you’ll understand what’s what. But the final understanding will come in the process: when you put the bottom and attach the side posts. They are traced with a pencil, then gradually cut out
In this process, it is important not to cut off the excess - it won’t be possible to grow it and there will be unsightly gaps
Drawings of casing/jamb locks
Before installing the casing, the window/door opening is treated with an antiseptic. Then two layers of insulation are laid. The structure is “dressed” on it. The procedure for assembling the casing on the windows is as follows:
- The lower part is installed.
- Place two side panels and check that the locks match accurately. You hit it well on the sides.
- Place the top. Often it “doesn’t fit” - the racks are closer than necessary. Don't take up the saw right away. Take spacers of the length that the opening should be, and with their help bring the window to the required dimensions. First, place it diagonally, then, knocking it out, straighten it out. The sidewalls crush the insulation and occupy the required position. After which the apex falls into place.
Possible difficulties and errors
Let's list common mistakes:
- The use of non-special vapor-permeable film (external, external). Using polyethylene and the like instead is a gross mistake.
- Failure to comply with the rules for installing insulation (the tapes are glued carelessly, are not smoothed, and the ends are not overlapped).
- Non-foaming of the support profile inside, if one is used.
- Poor quality foaming. This procedure must be done slowly, carefully, so that there are no voids or cavities.
- PSUL tape is applied long before installing the window and pressing it to the quarter. This material expands over time, so it must be fixed immediately before inserting the glass unit into the opening.
- Incorrect depth selection and fastener spacing.
- Checking the level of evenness of the position of the window block is ignored. This must be done often several times at each stage of work.
Attention! If wedges are used, then a good solution would be to take even ones so that they can be placed not across, but along the opening - this way the foam seam will be unbreakable, as required by GOST.
The bottom of the opening is insulated especially carefully:
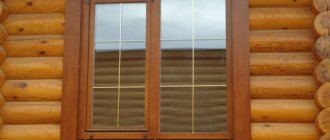
Which windows to install - wood or plastic?
To get an answer to this question, it is necessary to compare their technical and functional indicators.
Scheme of a wooden corner in an aluminum frame
Advantages of wood windows:
- environmental friendliness;
- beauty of wood pattern;
- price of windows (pine is the most inexpensive material).
Minuses:
- susceptibility to rotting;
- short service life;
- requires continuous maintenance (insulation, painting, etc.)
Advantages of PVC windows:
- high resistance to atmospheric influences (dampness, temperature fluctuations, etc.);
- decent service life, minimum 25 years;
- do not require maintenance or insulation (you just need to wash them from time to time);
- high noise insulation (due to the special glass unit design);
- windows are made of plastic, even over a long service life, the frame does not lose its rigidity.
Minuses:
- high price;
- complex and costly repairs when any element of the window structure fails.
Based on the information received, we can say that plastic windows have more significant indicators and will be a good solution for any frame house.
Have you decided to install plastic windows? Read what PVC profiles are available and how to choose them correctly.
Find out why plastic windows sweat from the inside in a private home and what measures need to be taken to avoid this.
About the use of double glazed windows for the home https://oknanagoda.com/okna/plastik/ispolzovanie-dvoynykh-steklopaketov.html.
Polyurethane foam
Using polyurethane foam, it is necessary to foam the block. At this moment, the window must be closed, otherwise the mounting foam will “burst” the window frame, and after completion of the work you simply will not be able to close it.
Window installation diagram: 1 – block; 2 – insulation; 3 – seam sealing with foam; 4 – wooden pads 10 – 20 mm; 5 – polyethylene 0.15 mm, glued with non-drying sealant.
If the block does not have a protective shipping film, it must be covered with masking tape around the perimeter from the outside so that the foam, as it expands, does not fall on the binding. Removing dried foam is quite difficult, and this can negatively affect the appearance.
After the foam has dried, you need to carefully remove its excess, trying not to damage the film. From the outside, the seam between the wall and the window block is taped with a special tape. The ends of the tape must overlap each other. First, glue the bottom strip under the window, then the vertical stripes; the final step is to apply the top strip, covering the ends of the vertical strips. Additionally, the entire tape must be shot with a stapler.
This design completely eliminates the penetration of moisture between the opening and the window frame.