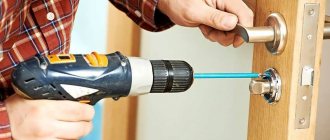
Installing a door leaf is a matter that requires accuracy, precision, and adherence to phasing of actions. However, without a lock, the door will not fully function. It will also be impossible to open it without a handle. That is why inserting a new lock into a wooden door will protect owners from unauthorized entry, make the interior more interesting and keep the interior warm during the cold season. Choosing the most suitable locking mechanism and its correct installation is the key to home security. But it is not always necessary to invite a specialist for this work; to save money and time, you can install the structure yourself.
How to choose a locking mechanism?
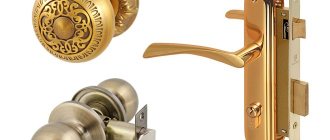
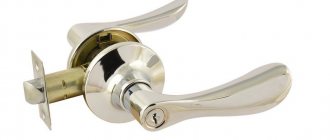
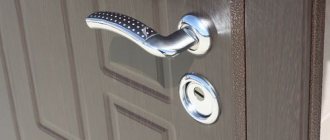
Handles with a built-in “tongue” latch are the most common, relatively popular way to close interior doors. They prevent drafts from opening them, and if there is a latch lever or key, you can lock the room.
List and photos of castles:
- “Knob” (spherical shape - “pippy, bambosha”)
- L-shaped (standard lever)
- Is there a lock (key) or not?
- With different types of locking (simple lock or key)
It is common to see a simple L-shaped design with a tongue in interior doors. It is installed only to prevent accidental opening of doors (draft). Or to be able to cover it tightly if silence is needed in another room. But if the room is an office, a parent’s bedroom, a boiler room, a bathroom, a toilet or another room where you need to lock the door, then a turnkey lock is installed.
The key hole can be double-sided, or only on one side, and on the other there is a latch lock (manual lock).
Curious! When the latch “tongue” enters the groove, a characteristic clanging sound is heard. To prevent it from annoying you can find a plastic latch.
How to change the larva
Replacing the cylinder cylinder mechanism begins with dismantling the lock itself. To do this, unscrew the screw located at the end of the structure. Then you need to press on the part, pulling the cylinder towards you.
The old larva is replaced by a new analogue. It must clearly match the parameters of the previous larva . A screw is used to secure the device. To fix the larva, the core is inserted into the nest. Then the lock is tested. The key should turn silently and smoothly.
The new lock cylinder must be similar to the old one
If you need to replace the cylinder in the cross-shaped mechanism, then it is recommended to install a new system. This is explained by the low reliability of this mechanism. A similar situation occurs when repairing a disk lock. Replacing the cylinder in the pin mechanism is carried out according to a similar scheme as in the cylinder lock.
To replace the larva in more complex mechanisms, the help of professionals will be required.
We purchase and prepare the tool
It will take about 40 minutes to cut a lock into a door with your own hands, and that’s taking into account a complete lack of experience. The main thing is to have minimal carpentry skills, understand the sequence of work and purchase a good tool.
To cope with the task you need:
- Screwdriver with charger or mains connection.
- A drill, or you can also use a screwdriver with various attachments.
- Feather drill 0.16 cm and 2.2-2.3 cm.
- Drill - “crown” or “crown” 2.5 cm.
If the lock and its elements are much smaller, then consumables of a smaller diameter will be required (20, 16, 14 mm). These “spare parts” are necessary for accurate formation of holes.
- A mallet (rubber hammer) together with a chisel (optimally an “inch”). Needed to deepen the groove for the lining with a latch. And also install a plate on the jamb into which the “tongue” fits. Instead of a mallet, you can use a regular hammer.
- Drill (1 mm). It is needed if there are no self-tapping screws and you need to drill holes in the door leaf.
- Self-tapping screws for wood, they have sharp ends, so they can be screwed in with a simple screwdriver without much effort. By the way, any screw is difficult to screw into a door made of birch; here you need to use a screwdriver with a special attachment.
- Screwdriver (phillips) to screw in the screws. A special cross pad in the drill, so as not to work manually.
To embed a lock into an interior door with your own hands, you need to prepare a ruler (from 100 cm), a tape measure, a pencil or marker, and a carpenter’s triangle (“corner”).
A selection of locks for wooden doors
Buying a lock is an important step in ensuring the security of your home, but before you make a choice, you need to answer a few questions about it.
- Does the degree of protection against unauthorized entry into the premises matter?
- What shape should it have: mortise or overhead?
- What should the design look like: dimensions, colors, shape?
- How will it function from the inside?
The answers to the questions listed will help determine the lock model, since they differ in cost and function. It should also be taken into account that wood is a relatively soft material, it lends itself well to processing, but for inserting a locking mechanism, it is better if the master responsible for installation has experience working with wooden panels. It is necessary to take into account the wood species from which the door is made, its properties and performance characteristics.
There are several types of design:
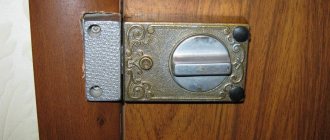
- rack lock - the simplest model, has a primitive appearance, often breaks;
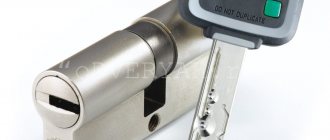
- cylinder - a structure consisting of several cylinders located at different levels. If these elements are not in place, it is impossible to open the lock. It has a long shelf life and easy replacement of components. Attackers usually drill out the body or knock out the core. But in good models, manufacturers add special alloys that are resistant to drilling, or special plates that block direct access to the cylinder;
- lever - a reliable lock that is almost impossible to break;
- coded – to open you must enter a certain code. Such structures are not mounted into a wooden door leaf. More suitable for iron entrance doors;
- electronic – differs in that the door can only be opened from the inside. In order to unlock from the outside, a signal must be given from the premises. Such locks are also rarely used on interior doors; these models can be found in factories or hospitals where access to unauthorized persons is prohibited.
When purchasing a locking mechanism, it is important to consider the orientation of the door leaf - left or right. As a rule, the technical data sheet of the product indicates on which side it is designed for installation. Although there are also universal locks on sale that are suitable for both left-hand and right-hand positions.
Once the lock has been selected and purchased, you should prepare the necessary tools for the work of installing it in a wooden door. It is recommended to do this in advance so as not to interrupt your work later to find a hammer or drill of the required diameter.
Underwater rocks
For a non-professional, working with a “pen” or a “crown” can be difficult and unusual. But they are needed to ensure that the holes are relatively even and there is less waste. It’s easier and faster to work with a crown-shaped drill; it causes fewer chips to fly to the sides. It takes longer to work with a “pen”, there are more chips and you have to periodically pick them out of the hole, but the drilling process itself is much easier to control.
It is optimal if the “crown” is placed on the door leaf, and the “feather” is used in the end part.
For anyone who starts cutting a lock into a wooden door with their own hands, an unpleasant moment will appear. The standard “crown” is sold at 2.5 cm, and the hole needs to be made with a tool at 2.2-2.3 cm. With a wide end, these 2 mm can be successfully hidden with a decorative overlay or putty. But if the width of the door itself is narrow, these “extra” millimeters can significantly thin out the door leaf and become critical to its strength. It can be knocked out with a kick.
Do not drill holes with a chisel. So, especially with an inept approach, you can “damage” the door, break off a solid piece from it, and then hide the gap poorly.
Handle insert - latches
First, let's look at how to install the handle-latch. First of all, marking should be done. Having decided on the height of the handle, place the lock mechanism on the door leaf flush with the edge, circle it, mark with a pencil the place where the eyelet is located - this is where you will need to drill a hole for the handle pin.
Using a carpenter's square, the horizontal lines of the lock's outline on the door must be transferred to the end of the door. Using a tape measure, find the middle of the horizontal lines at the end and draw a vertical line with a pencil. The middle of this axis is the center of the future hole for the lock mechanism. You can do it easier and use the door mechanism itself to mark the location of the handles.
Having completed the markings, drill a hole in the door leaf for the handle using a crown mounted on a drill with a diameter of 6 mm.
Important! To avoid chipping and other damage to the decorative layer, drilling is performed with a crown on both sides. When the end of the pilot drill goes through the door and the crown is about halfway through the door, start drilling on the other side of the door, inserting the drill into the hole. The size of the crown is selected in such a way that nothing interferes with the lock mechanism’s normal functioning, while the hole must be completely covered with decorative overlays of the handle-latch.
At the end of the door, a hole for the latch is drilled with a feather drill of a suitable size or a small crown. If necessary, the recess can be expanded with a chisel.
Then insert the latch mechanism into the hole in the end and trace the outline of the strip. It must be installed flush with the surface, so you will have to make a recess under it using a chisel. For a veneered door, the veneer layer is first removed in the marked place.
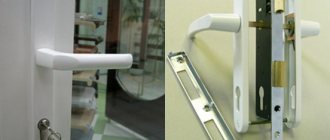
Next, the handle-latch is installed. The mechanism is inserted into the hole and secured to the end with standard fasteners using a screwdriver or screwdriver. The handle should be disassembled according to the diagram provided by the manufacturer.
Pay attention to the location of the latch tongue and the handle on which the door closing button is provided. After installing the decorative trims, pass the pin through the hole in the latch mechanism and secure the handles by tightening them with screws (in some cases, additional holes must be drilled for the tightening screws). Make sure the lock-latch is functioning properly.
At the final stage, a strike plate is installed on the door frame to secure the latch tongue. Carefully closing the door with the latch exposed, mark the location for the hole. Using a chisel, make a recess, attach and trace the contour of the striker - you will also need to make a cut under it in order to install it flush. Secure the bar with standard self-tapping screws.
How to hollow out a place for the “tongue”
Installing a latch lock on an interior door begins with defining the contour. The future recess for the locking part is drawn on the door. That is, in fact, the holes where the “heart” of the castle will be mounted.
Procedure:
- Mark the required height on the end of the door.
- Take a square (angle ruler) and transfer marks with a pencil on both sides of the door. Do not press too hard so that unsightly slate lines and indentations do not remain.
- The lock is applied to the drawn line so that it is in the middle of it. Draw a mark for the width of the lock, mark the level where the lining ends.
- The 0.16 cm feather drill is prepared for work in a special way. It is applied to that part of the lock that will be located inside the door leaf. Use electrical tape to mark the place on the drill where the inside of the lock ends. The mark will allow you to stop in time and not go extra centimeters from the door. This fact is especially relevant if the door leaf with transitions from the wide part to the narrow part is equipped with glass or decorative elements in the middle.
Next, sequentially, several holes are made, one under the other, using a “feather”. Their number depends on the size of the inside of the castle (from 4 to 10). Since a feather drill makes round holes in the wood, the unevenness will have to be smoothed out (cut) with a chisel.
Sometimes it is advised to take a 1.6 cm drill, insert it into the drill and go back and forth along the internal irregularities. This is faster, but there is a risk of taking too much and then the lock in the door will not fit tightly. In this case, you will have to underlay a piece of wood, which is already considered a defect in the work.
The lock is inserted “for fitting”, pressed tightly and secured to the door leaf using self-tapping screws. Then trace the overlay with a simple pencil. Unscrew the lock, take it out and use a chisel or a utility knife to slightly deepen the opening by 1-2 mm along the outlined contour. This is necessary so that the lock does not rest against the doorway and is flush with the end of the door to the thickness of the decorative strip. If this is not done, the metal strip will “slap” back and forth along the ceiling and ruin it.
The last stage of the lock installation
For the wooden panel to function fully, all that is missing is a hole on the box, and if you miss this point, the panel will not fit tightly and will not close properly. Knocking out a hole on the box occurs after the functioning of the lock on the door has been checked.
To mark the hole on the box, a small amount of chalk is applied to the lock tongue, after which the door is closed. As a result of this manipulation, a mark will remain on the box from the required location of the hole, where you should start knocking it out.
Cutting occurs on the same principle as making a hole for the locking mechanism itself, so even a beginner can handle it. To do this, you should take a hammer with a chisel or a drill. Actions must be careful so as not to spoil anything. If the marking and cutting are done correctly, the lock tongue will fit into the prepared hole without any problems.
At this stage, the installation of the lock can be considered complete and the door is completely ready for use.
There is nothing complicated in installing the mechanism and absolutely anyone can install it without resorting to the help of a specialist. The main thing is to read the instructions and procedure before starting work, which will allow you to install the handle and lock as accurately and correctly as possible, and will also guarantee to extend the life of the structure. If any problems arise, then you should seek advice from specialists.
How to install the handles?
The last stage in installation is the formation of holes for the handles. For such work, maximum precision will be required so that everything looks beautiful and the lock works well.
Self-tapping screws are included with the door lock, but they are (as a rule) made of soft metal, so it is better to immediately replace them with hardened ones 1 cm long and 1.5-2 mm in diameter.
Work order:
- The lock will have to be removed from the door again, or marks must be made in advance. Place the lock (see photo) on the side surface of the door, exactly aligning it with the grooves. A mark is made with a pencil through the slots where the pen will go.
This action is done on both sides of the door.
- Installed on a drill “crown” or “feather”. A drill is placed in the center of the marks on the door and a smooth, round hole is made. It must be done on both sides; it is not recommended to drill through it in one go, otherwise it may turn out uneven.
At the final stage, all chips are removed from the holes, the locking plate is mounted in place and secured with self-tapping screws. The handles are taken, the clamping screws are loosened, the movement of the central rod is checked, it should not jam, and the handles are installed in place.
The final touch is the installation of decorative elements, if any, and screwing the structure with self-tapping screws.
Maintenance of the entrance lock
To care for the door device, a special lubricant is used, which can be of the following types:
- silicone;
- lithium;
- oil
Constant lubrication of the lock will ensure long-term operation of the mechanism.
Each composition is characterized by certain valuable properties. If the lock is constantly lubricated, then it will function without problems. At the same time, it is recommended to lubricate the hinges. To increase the service life of the lock, it is recommended not to apply force to the cylinder itself during its installation, when turning or inserting the key.
You cannot insert 2 keys on both sides of the door at the same time. It is also not recommended to insert various objects into the cylinder. It is forbidden to turn the inserted key if it has not reached the stop. If the device jams, it is recommended to clean it from dirt and dust.
We mount the “reciprocal” part
We are talking about the part where the “tongue” enters. It is located on the ceiling and installation requires a certain precision so that the doors do not dangle.
The doors are covered in such a way that the “tongue” rests against the jamb. Using a sharpened simple pencil above and below, mark its position. Lines are drawn using a triangle ruler.
On the door you will need to measure the exact distance that runs from the middle of the tongue to the edge of the door.
This distance is transferred to the ceiling, against which the door leaf rests. Take a drill or “feather” (1.4 cm) and make a hole in the jamb, slightly deeper than the tongue. The hole is leveled using a chisel, the strike plate is installed and the lock is checked. The play should not be large.
Instructions for inserting the lock cylinder
Many people are interested in how to install locks when the fittings (handle) are installed on the door. You can insert a lock with a cylinder. They are rectangular in shape, but a standard set of tools is suitable for installation.
See the installation plan in the table below.
| 1. | It is necessary to draw a straight line along the end at the intended installation location. |
| 2. | We limit the height by placing the lock on the surface. |
| 3. | We drill holes close to each other using longitudinal lines. |
| 4. | Then you need to drill a longitudinal hole so that it fits the dimensions of the lock and remove the excess parts with a chisel. |
| 5. | We insert the lock structure into the prepared place, fasten the screws and use a stationery knife to cut the edges on the surface. |
| 6. | Then the lock is removed and the hole is picked up with a chisel. |
| 7. | Now you need to attach the lock to the door, use the tip to mark the place for the cylinder and trace the entire contour of the cylinder with a simple pencil. This is done on both sides of the doors. |
| 8. | The next step is to drill out a place for the larva, slightly wider than the marked outline. |
| 9. | Drill the holes for the screws with a drill with a diameter of 2-3mm, install the lock and attach the screws. |
| 10. | Fasten the cylinder in the lock, check the operation and install the covers on the screws. |
The counter part is installed in a similar way: the places of the retractable rail, decorative trim are marked and cut on the jamb, then holes for the rails and screws are drilled, the decorative part is secured and the functionality is checked.
Installing a door lock on interior doors: necessary tools
In order to independently install the locking mechanism, you need to prepare the appropriate tools. Installation of such devices does not require a large number of devices and accessories. The minimum set includes the following elements:
- pencil (for marking);
- measuring tape;
- drill;
- screwdriver;
- construction knife;
- chisels (10 and 20 mm);
- set of drills;
- masking tape.
Before starting installation, it is recommended to study the step-by-step instructions that will help you figure out how to install a lock on an interior door. It is worth noting that currently on sale you can find special kits that are used to insert locking mechanisms into panels made of various materials.
In order to install a lock with your own hands, you need to have all the necessary tools.
Kits for inserting locking devices, as a rule, include a feather drill with a cross-sectional index of 22 mm. This part is not suitable for organizing a hole for a latch. In this case, it is recommended to use a chisel.
Standing or lying down?
You need to know how your lock is disassembled and installed even before you approach the door with the tool. But let's get back to the topic. The first issue that is important for the quality of work that needs to be resolved is to remove the door from the hinges to insert the lock (to insert it “lying down”) and work in place (“standing”).
Experienced craftsmen, for whom time is money, who own power tools (see below), always work lying down. Those who are also experienced, but who do mortise locks manually from time to time, also prefer to work while lying down. In both cases, the speed, quality and stability of the work results more than pays for the time spent removing and re-hinging the door, see for example. video:
Video: inserting a door lock while lying down
A novice locksmith who intends to make money/earn extra money by cutting locks must also immediately get used to working while lying down, otherwise you won’t be able to fend off customer complaints. For the home craftsman, the “lying” method will be more convenient, firstly, when completely replacing a door with a jamb. Secondly, in the process of arranging and finishing a new house/apartment, because... The most tedious task of removing old doors is eliminated. But it is better to do a one-time manual insertion of a lock into an existing door while standing, see the video:
Video: inserting a door lock while standing
Required Tools
The list of necessary tools consists of:
- pencil for marking;
- joiner's triangle;
Triangle
- roulette;
- screwdriver;
- flat and Phillips screwdrivers;
- a feather drill, a 0.6 cm wood drill and a suitable crown;
Feather drill
- hammer and chisel;
- chisels;
- slipways;
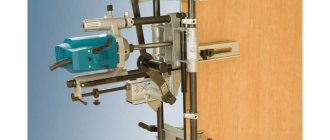
- manual electric milling machine.
Bit
Chisel
Today there are tool sets on sale with the required drills and crowns.
How to embed a ZM with a milling machine
Attach the lock to the door at a distance of 1 meter from the floor. The handle can be mounted at a different height, depending on your preferences. Now decide on the depth of the mortise: measure the lock body with a triangle and mark the depth with a pencil, outline the upper part of the lock.
Determine the location where the keyhole and latch will be located. Measure the lock from the end to the center of the hole, make markings on the door. Next, use a feather drill to make holes for the well and latch.
Now mark the future recess for the ZM. Lean it against the end side of the door leaf with a crossbar strip. Insert the appropriate bit into the router and make a recess. Make sure that the bolt entry into the door is full.
Now make a notch for the ZM. “Charge” the router with a groove cutter and cut the groove with it (it should clearly fit the lock mechanism). To make the edges of the recess aesthetically pleasing, process them with a chisel and hammer.
Remove any shavings from the recess and place the lock there. Attach the crossbar strip with self-tapping screws to the side of the door and install the door fittings.
How to install a ZM without a router
Count 0.7-1 meter from the bottom of the door, mark the location of the future lock. Place it sideways and mark the inside and mark the width of the back. Based on the markings, drill holes. Then use a drill to make a recess in the door. Hold the drill at an angle when performing this step.
Using a chisel, level the socket so that it can completely accommodate the ZM. Place the latch on the “face” of the door and mark where the handle and core will be positioned. Then make the corresponding holes and align them with files. Perform a similar procedure on the other side of the door leaf. Insert the structure into the groove, thread the rod onto which you attach the handles.
Move the locking tab outwards. Place marks for it on the door jamb, using chisels, make a recess into which the lock plate will fit. After you secure the bar, the ZM can already be used.
How to remove the door handle of an interior door (round with a button): detailed instructions
To dismantle such a round door handle, you first need to find the button. It is located on the inside. In some cases the button is below the level of the hole. It is worth noting that access to this element sometimes requires twisting the fittings. How to remove the round door handle of an interior door? The main thing you need to do at the initial stage is to gain access to the button. After this, you should press it with any suitable object, for example, a screwdriver. Then you can proceed directly to removing the door handle mechanism.
In order to remove the round handle you need to find the button located on the inside
Note! In some cases, it takes a lot of force to press the button.
Then the decorative element should be dismantled. Any metal element that has a small thickness, for example, a knife or a construction ruler, is suitable for this task. Using such an object you need to pry the cover and remove it. It is worth noting that some decorative elements have a special recess, which is used for quick removal.
In order to answer the question of how to disassemble the round handle of an interior door, it is recommended to study video materials on this topic. After removing the cover, access to the locking elements opens. They need to be unscrewed. This is how the round handle with the button is dismantled.
Principle of operation
First, determine the location of the handle.
You should not attach it far from the edge, as this will complicate the operation of the door. Consider the distance required for the length of the tongue and the dimensions of the locking mechanism. It is important to calculate the installation height; as a rule, the handles are located at the level of an adult’s belt. If we are talking about a children's room, then be guided by the child's data
First, determine the location of the handle. Do not mount it far from the edge, this will complicate the operation of the door
Next, we prepare holes for installation. We measure approximately 60 mm from the edge of the door - this is the standard length of the tongue. It may differ, so it would be useful to clarify this question. In order to determine the dimensions of the mechanism, it is freed from the linings and applied to the door, outlining the boundaries.
If, in addition to the handle, another element is present, markings are also carried out for it
On the end of the door, mark the place for the tongue to enter; it is important to place it exactly in the middle part of the door leaf and make all the marks as carefully as possible. The canvas is drilled with a drill with a crown to half the required thickness, and then work continues on the other side
You should get an absolutely even hole located strictly perpendicular to the surface of the canvas. Keep the drill level, you can’t deviate even a millimeter, otherwise you risk getting skewed, which means the handle won’t work properly. You need to be just as careful when making a place for the tongue. It is best to do this with a chisel. Before installing the handle on the interior door, you need to mark the locations for the bolts. Drill each halfway, then check the result; if it’s straight, drill all the way.
The next step is to create a groove for the tongue. There are two ways to mark its location in the box:
Apply any coloring substance to the dog, for example, chalk or a drop of paint. Close the door and rotate the handle a little, the mark left will be the mark; close the door and insert a ruler between it and the frame, along which to put marks-levels.
Once the job is complete, make sure the handle is attached and functioning properly. If you make a mistake and you have to install a new handle in place of the old one, then consider the following:
- the new element must match the dimensions of the existing holes;
- the same applies to decorative overlays, otherwise a gap will be visible, which will ruin the entire appearance of the door;
- You can reduce the hole using putty, but such a “patch” will have to be cleaned and, most likely, adjusted to the color of the canvas; if, on the contrary, the new mechanism is larger, then you can increase the space for it using a chisel.