Door installation tool: 7 main tools
Before using tools for installing doors, you should read the instructions on their use. Choosing and purchasing the door you like is quite easy, but installing it correctly is a more complicated matter. To competently implement this process, you must have all the necessary tools and devices, and also possess certain construction abilities. From time to time, special equipment may come in handy - you also need to have it on hand just in case. So, what should be available for a high-quality installation of door panels?
What kind of router is needed to install a lock?
The insertion of hinges and locks requires samples of very different sizes. For loops – shallow, according to the thickness of the loop web. Under locks – a large and deep selection. Therefore, professionals who install doors most often use two different routers:
- easy to select for hinges;
- powerful with a large cutter for selecting fits under locks.
When choosing a router for inserting locks, the first thing to determine is its ability to complete the task, that is, to reach the bottom of the planting in depth. The following milling cutters are suitable for this:
- cutter stroke from 70 mm and above;
- shank size (collet fit) 8-12 mm, preferably 12 mm;
- cutter length from 110 to 130 mm.
As a rule, milling cutters with such characteristics in terms of immersion depth have a power of more than 2 kW and a weight of about 6 kg. They easily cope with the task, but they are not very convenient to work with due to their large dimensions and weight. Therefore, other, lighter options are selected with the same depth indicators, which are convenient to choose for locks and hinges.
As an example, BOSCH GOF 1600 CE PROFESSIONAL:
- electric motor power -1600 W (1.6 kW);
- cutter speed - from 10,000 to 25,000 rpm;
- the amplitude of the cutter's stroke up and down is 76 mm;
- replaceable collets for cutters with shanks - 8 mm, 10 mm and 12 mm;
- weight 5.8 kg.
There are models with characteristics suitable in depth with the same or greater power, up to 2.5 kW, and from many other brands.
A more powerful and heavier router is less convenient for such work due to its greater weight and dimensions, but it copes with the task more easily, since when cutting deep niches for locks and latching handles, the router experiences significant loads.
To limit the sampling depth, an adjustment stand with three screws at different heights is used. This function is available on almost all models, so when choosing it it is not highlighted as special or separate.
Conductor for inserting locks Gidmaster pitfalls
Attracts with its affordable price compared to Virutex. From 10 to 12 thousand rubles. However, the conductor is not universal. Used only as a template for inserting locks.
Moreover, all work will have to be done with a drill. It is extremely inconvenient, the speed is too low, you can damage the door - you often end up with chips and torn edges on the door. Especially if it is covered with enamel.
- An obvious drawback is that it is difficult to set the size correctly.
- Works only with cutters with threads on the collet.
- It is impossible to embed hinges, strikers and crossbars.
Which cutters to use
To insert a lock into an interior door, groove end mills with a cutting edge on the sides and end are used.
There is a specialization - cutters designed specifically for this operation. They meet the requirements for the depth and width of the cut, the cutters are made of hard alloys (type VK8), which equally well select grooves in wood of any hardness, MDF, plastic and composite materials, and cut through laminate well.
These cutters are available in different sizes. Average values:
- height of cutting knives 30 mm;
- diameter of the working part of the cutter is 12 mm;
- total length of cutter 120 mm;
- shanks in three options - 8 mm, 10 mm and 12 mm.
When the cutter stroke on a router is 70 mm, such a cutter can select a groove for a lock with a depth of about 90 mm.
Large cutters are also available:
- working part diameter 16 mm;
- total length 130 mm.
Their cost fluctuates around 1500 rubles, plus/minus 300-500 rubles. But there are copies costing only 150-500 rubles. and over 3000 rub.
The leaves of many modern doors made of MDF, blocks (not solid wood) may have a small thickness of the side bar into which the lock cuts. For example, 50 mm, beyond which the void begins. For such doors it is not necessary to use long cutters with a large cutting depth.
Overview of species
A set with a router may contain a cutter, which is equipped with protectors and rods for performing the same type of work. The convenience of a manual router is that, if necessary, you can buy various types of sets of wood cutters that cut the required holes quickly and easily.
There is a huge range of cutting tools available for sale. They can be purchased at specialized construction stores or at the construction market. According to their purpose, cutters are divided into groups. For example, a spiral cutter will be needed to make a round hole in an interior door for mounting a handle. The classification is truly impressive; there are even devices for making lining.
According to their design, cutters are divided into the following types:
- with replaceable cutting edges;
- monolithic;
- prefabricated
Grooved
Based on the name, it is not difficult to guess that the main purpose of this cutter is to make grooves on wooden surfaces. You can also make recesses, grooves and recesses using a groove cutter. To embed a locking device into interior doors, you will have to use this particular type of cutter during the work process. For the best quality of work, you will need a groove cutter that is ideal in length. It will help to make the optimal recess at the end of the door.
There are 3 types of slot cutters:
- structural – will help to make such types of connections as “swallow tail” and “P” type groove hole;
- straight – mainly used in processing straight grooves;
- fillet – produces decorative carvings.
To produce grooves of different sizes, it is necessary to change the equipment to a larger size or adjust the router.
Edge
An edge cutter is used for making various carved elements and patterns on the area of the material being processed; it will also help in making the edges of products.
There are 4 types of edge cutters:
- straight – used in work using templates;
- edge cutter with a disk shape - this type has high accuracy and is used when making rebates;
- horizontal edge cutter – used for decorating edges;
- shaped type of edge cutter - will help in processing baseboards, facade frames and panel edges.
Almost always, this type of equipment is equipped with a bearing, which allows processing of ends and edges.
Curvy
Figurine cutters are used for cutting out various decorative elements on furniture and doors. Milling cutters of this type are equipped with a bearing - this allows you to work not only with straight workpieces, but also with a curved edge, which is very convenient.
There are 2 types of figurine cutters:
- horizontal;
- vertical.
In turn, the horizontal view is divided into 2 more types:
- one-sided;
- double sided
The difference between the devices is that single-sided cutters process the edge on only one side. Double-sided ones are designed for simultaneous processing both from above and from below. Vertical figurine cutters are used for deep milling of panels and are used to create skirting boards.
Templates
One-time work can be accurately completed without special complex templates, using only a parallel stop, which limits the displacement of the cutter beyond the markings to one side.
But for professional work with large volumes, special templates are often used. These can be either sets of templates for different configurations of fittings, or universal ones with adjustable sizes.
Both homemade and factory-made ready-made options are used.
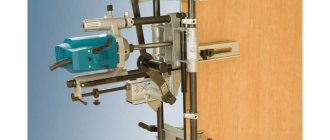
An example of the design of one of the factory templates:
The device makes it possible to install and move the router in the position required for sampling exactly in place.
Example of homemade templates:
It makes sense to make such a device when there is a large amount of work to be done.
How to choose a milling fixture
Experts note that it helps speed up the work process several times. Moreover, the prepared niche turns out much smoother and neater than when using hand tools. When reading reviews, you need to immediately find out whether both of these parameters are provided or not
There are different types of locking devices, but they do not replace each other - so this point is worth paying special attention to. Vertical, also known as submersible, the device allows you to select grooves of arbitrary depth
At home, it is better to use a specialized router. At the same time, it does not require particularly high power; on the contrary, it will only unjustifiably increase the weight of the machine. But the option of adjusting the rotation speed of the cutter is very valuable for amateurs. It will help you complete all planned work more accurately.
Important: in a good machine, such a switch is placed in a safe place (even when working, you can stretch your hand there without fear) and allows you to regulate the speed of rotation smoothly, and not stepwise
Another significant factor is how far the cutter can extend beyond the clamp. Usually this indicator is illustrated by numbers in the model name, and is expressed in millimeters. But it’s still worth reading the technical documentation to eliminate errors as much as possible. In addition, you need to look at whether it will be convenient to use the router.
This is determined by:
- network cable length;
- location of knobs and other controls;
- list of functions performed.
Before purchasing, you should start the machine. If it is of high quality, the head should move completely freely. The slightest distortions and backlashes are unacceptable. The less noise the better. Also worth looking at:
- Is there a wide view of the working surface?
- is there any additional lighting provided?
- Are there auxiliary attachments, holders, etc.
How to install a lock on an interior door
Inserting a lock into an interior door always begins with markings. To prevent the cutter from tearing out the edges of the laminate, the slot location is sometimes covered with masking tape and markings are made on it. Or cut with a sharp knife.
The selection for locking is done in 2 levels:
- a small sample for the overlay strip, to the depth of its thickness.
- deep sampling under the body of the castle itself.
First, the height of the lock is determined. Then a lock is applied from the bottom mark upwards, and marks are made along its cover plate.
The markings for the lock itself are applied after a small sample has been made for the overlay strip. The markings for the lock itself are done like this:
- The center of the door leaf is located in thickness. For example, if the thickness is 37 mm, the center is marked 18.5 mm from the edge.
- The thickness of the lock is measured. If it is 18 mm, 9 mm are marked on both sides from the center of the canvas.
- Several such markings are made, then they are connected by a line of a pencil or marker.
The length marking is made according to the actual size of the lock, it is applied and the markings are made according to the fact.
Instrument setup
The setup is carried out two times:
- For shallow cutting under the lock trim plate, the cutter extends beyond the support platform to the thickness of this strip. For example, 2 mm. A parallel stop is set so that the cutter cannot go beyond the edge of the marking on one side, but follows exactly along the marking. The second marking line when cutting without a template is controlled manually, visually.
- After shallow sampling, the cutter is released to the required depth under the deep sampling, under the lock itself.
An approximate progress of work on such an insert can be seen in the following video.
It is approximate because the marking sequence is different here - all the markings for the overlay plate and the lock body are applied at once. But after selecting a niche for the bar, the markings for the lock itself are removed. Therefore, it is better to adhere to the markup order described above:
- Marking for the bar.
- Sample.
- Marking for the lock itself.
Selecting a lock using not just one parallel stop, but a double-sided adjustable template is shown and understood from the following video:
Homemade and insertion templates for inserting loops
You can make a template for inserting loops yourself. You will need a lot of them, for all the variety of existing models of fittings. Therefore, there is a risk to seriously and for a long time engage only in manufacturing. And then get disappointed and start looking for where to buy. For this reason, it is better to look at the options for templates with inserts.
But you will have to face the fact that this will take much more money than you originally expected. You need to buy a lot of insert strips for inserting fittings, which will be installed in a special template holder.
A pair, a three, or even more sets - it definitely won’t fit all doors. And more and more varieties of accessories appear. Accordingly, the number of inserts is growing. And now the accumulated pile is difficult to lift, and Finding something in it is even more difficult.
The price of each insert is 270-290 rubles, the price of the template where the inserts will be inserted is 6000 rubles. With a minimum set of 5 models of fittings (lock, hinge, hidden hinge, strike plate, latch), the price is RUB 13,250. An average set will cost you about 60,000 rubles.
In addition, all flaws appear in the work. Any fittings are not ideal in size and are produced with a length and width tolerance of 0.5-1.5 mm. Even half a millimeter of discrepancy with the insert template - it will either install with gaps, which is very visible, or you will have to expand the recess manually using a jewelry chisel.
Disadvantages that you definitely need to know about when working with insert templates for a router:
- There is an error when inserting fittings, provided that if the fittings are expensive and made in Italy, the error may be minimal.
- Simultaneous insertion of hinges into the frame and door leaf is not provided
- It is not possible to install locks on an installed door
- The template is fixed with clamps, this is not reliable and safe
- There is no mount for the router; there is a risk of injury if a paper clip or knot gets caught in the door leaf.
What cutters should I use to install hinges?
The hole for the hinges can be made with the same large cutter as for the lock. But, as a rule, groove cutters with a cutting edge at the end and sides of a smaller size than for a lock are used for this.
A special loop cutter looks like this:
It has a shorter shank and a wider cutting part than the locking cutter.
Professionals who have to work with dozens of doors every day use not only a separate cutter for hinges, but also a second lightweight cutter. On it, the required depth is set once according to the thickness of the hinge, and there is no need to change the adjustment for the lock and back for the hinges each time. This speeds up the work.
Cutting holes
You can use a straight mortise bit to cut holes in wood pieces. If the hole has a complex shape, then it is cut with a router according to a pre-prepared template using a copy ring. The latter is attached to the base of the milling cutter and, when the unit is operating, sets the movement of the tool in the desired direction.
So, to cut a hole in a wooden piece, you need to perform the following operations:
- secure a straight slot cutter in the collet of the machine;
- attach a copy sleeve to the router sole;
- place the workpiece in which you want to make a hole on the workbench;
- place small pieces of chipboard under the workpiece to slightly raise it above the table (this is required for the tool to come out when cutting through the part);
- place the template with the already prepared hole on the workpiece and press both parts to the table with clamps;
- set the minimum value of the cutter overhang (about 3 mm) relative to the base of the device;
- turn on the router and carefully lower it onto the template so that the cutter gently enters the material;
- mill along the entire perimeter of the template;
- lower the cutter another 3 mm and repeat the above operation;
- Continue adding 3mm depth at a time until the cutter goes right through the workpiece.
In the same way, you can cut a round hole according to the appropriate template. But in order to cut a circle in a workpiece, there is a much simpler way. Most models of routers already include a compass device. It consists of a rod with an adjustable (pointed) screw on one side.
The rod is attached to the sole of the unit, and a pointed screw is inserted into a hole that serves as the center of the future circle. Next, you need to set the desired radius taking into account the diameter of the cutter. The following figure shows how to correctly calculate the radius of a hole.
Milling is carried out in the usual way in several stages, each time deepening the tool by 3 mm.
You can also use a router to drill holes, for example, for installing furniture hinges. This is done as follows.
- Clamp a Forstner drill of the required diameter into the collet of the unit.
- Set the spindle speed to minimum.
- Place the router on a flat surface.
- Lower the cutter so that the spike in its center does not reach the table surface 2-3 mm, and fix the drive on the guides.
- Next, lower the depth stop onto any step of the turret stop and secure it with the locking screw. Thanks to the depth limiter, the cutter will not be able to drop below the required level.
- Remove the drive lock so that it can move freely up and down along the guides.
- The center of the future hole should be marked on the workpiece.
- Place the router pad on the workpiece and lower the cutter so that the tenon located in its center exactly hits the intended location on the part.
- Raise the cutter slightly above the workpiece, turn on the unit and, after reaching full speed, smoothly begin to plunge the tool into the material until the depth stop reaches the stop. At this point the drilling operation can be considered complete.
Before drilling on a workpiece, you should perform the same operation on some unnecessary piece of wood or chipboard of similar thickness.
If you need to make a through hole, then it is not necessary to install a depth stop. For a “clean” cutter exit on the back side of the workpiece, drilling must be carried out in 2 stages. At the first stage, the cup drill is immersed into the workpiece until a small hole from the tenon is formed on its reverse side. Next, the workpiece is turned over, the drill spike is installed in the resulting hole, and further drilling is carried out. This way, the edges of the hole on both sides of the workpiece will be smooth and without chips.
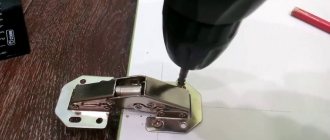
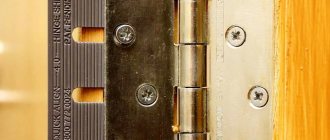
How to embed hinges with your own hands
Setting up a router comes down to two steps:
- setting the cutter to the required depth according to the thickness of the loop;
- if the sample is made with fixtures, install a parallel stop or a double-sided template to the required dimensions, exactly according to the width of the sample.
The cutter can be easily adjusted in depth using the following technique:
- The clamp for fixing the platform in height is released, and the router is placed on a flat surface.
- A loop is placed on the platform strictly horizontally (without lifting due to the bushing).
- The router is lowered so that the cutter touches the loop.
- The position is fixed.
The loop can be placed not under the cutter, but on the depth limiter regulator on the platform, then everything is the same.
The loops are placed at the location. The main thing is to maintain the alignment of the loops, the axes must be on the same line. If the hinge axes are fixed crookedly relative to each other, when opening/closing the door the hinges will break off, the door will open tightly or not close completely.
To control alignment, you can use a flat corner or block, the length of which is enough for 2 loops. The dimensions to the edge of the door leaf at both ends of the marking are also verified, that is, both hinges must be strictly parallel to the door leaf and located at the same distance from the edge.
The contour is marked by cutting through the perimeter with a sharp chisel, mounting knife or chisel. A deep slot is desirable, then the laminate will not tear during sampling. The marking must remain on the canvas, since it is initially applied outside the loop.
There are loops with rounded and right corners on sale. The cutter leaves a semicircle at the corners of the sample. If the loop is rectangular, the roundings at the corners of the sample are selected using a chisel.
Ideally, the loop should not dangle in the niche, but should sit tightly under light blows of the hammer.
The fit on the door frame (post) is marked and selected in the same way. The whole process can be seen clearly and clearly in the video below; it shows the complete insertion process, and sampling on the box (stand) starts from the 15th minute.
If the canvas is several mm shorter than the rack (permissible gaps), the difference is divided in half at the top and bottom. That is, after installing the door in place, there should be equal gaps at the top and bottom of the door leaf, for example, 2-3 mm.
As a result, a manual electric router is a modern tool that is great for inserting locks and hinges into interior and other wooden doors. The master’s task is only to correctly set the milling depth, guide and hold the cutter within the markings.
Tools required for tapping
It’s good if there are a few additional tools that may be needed during the work. These could be files, a set of drills, a tap for cutting threads.
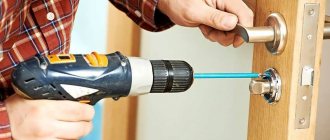
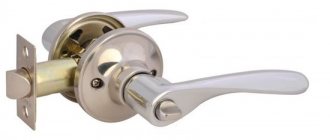
To assemble the door latch (lock), you will need to prepare all the necessary materials and components. These include:
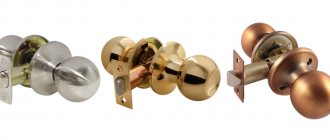
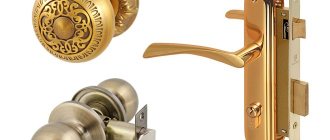
- Two handles. You can give preference to any shape (round, L-shaped and other types).
- Fastening elements (screws for connecting cylinder mechanisms).
- Cylinder mechanism complemented by a spring.
- Crossbars.
- Two sockets to hide the cylinder device.
- A measuring device (for example, a tape measure).
- Pen, felt-tip pen or pencil for making marks.
- Drill.
- Stationery knife.
- Masking tape.
- Chisel (size 0.1 and 0.2 centimeters).
- Drills (feather 2.3 centimeters, regular 0.2 cm).
- Crown (dimensions depend on the thickness of the door leaf). The most commonly used are 5 or 5.4 centimeters.
- Hammer.
For convenience, you can use a special tool for inserting the lock.
This is a list of tools required for high-quality installation of a door lock. If certain components are missing, you will need to purchase them or rent them for a while.
To make it convenient to work and not have to constantly be distracted by holding the door, it is better to secure the door leaf.
Nuances of choice
When choosing tools and cutters, you should pay attention to several points. First of all, it is necessary to consider the frequency of use of the router. If the amount of work is small, you can choose inexpensive models
If you purchase a tool for frequent or professional use, it is best to take a closer look at more expensive and branded models. Milling cutters are often sold in sets that are designed for specific types of work.
If the amount of work is small, you can choose inexpensive models. If you purchase a tool for frequent or professional use, it is best to take a closer look at more expensive and branded models. Often, cutters are sold in sets that are designed for specific types of work.
Regarding the selection of cutters, the following factors must be taken into account:
- the material from which the equipment is made;
- soldering quality;
- thermal strength;
- type of connection between the shank and the cutting part;
- size compatibility between tool and cutter;
- shank size;
- blade position.
When choosing equipment for a tool, you should inspect the cutters to check the quality of soldering and eliminate defects. The soldering of the equipment must be made so that the router does not lose its longitudinal stability during long-term processing
This is especially important if you have to work with hard wood.
Let's pay attention to the solder. The highest quality brands are PSr40 or PSr37.5, which contain increased levels of copper and silver. Additions in other brands usually contain nickel, which negatively affects the strength of the connection between the cutting part and the shank
Additions in other brands usually contain nickel, which negatively affects the strength of the connection between the cutting part and the shank.
The characteristics of the base metal are divided into 2 types:
- designation HM - classified as high-speed, used in working with soft wood, but can be used in processing aluminum;
- designation HSS - made of hard metal alloy, used in working with hard wood, bronze, metal and plastic.
If possible, it is better to choose products with the HSS designation. They are more expensive than high-speed cutters, but the characteristics of such cutters are much better. The connection between the cutting part and the shank should under no circumstances be made by welding.
A fairly simple and important detail that you can forget about when checking is the dimensions. The equipment must be suitable in size for the tool. In the set, the router is equipped with collets or bushings with which the cutter is secured - the size of the selected equipment depends on their parameters. The size is indicated in millimeters or inches. The blades can be positioned at an angle or parallel.
This leads to physical difficulties during the work process, and the surface will need to be sanded. It follows from this that it is best to use equipment with vertical blades for preliminary work, and use inclined blades at the final stages of work. A good, high-quality cutter will not cause problems in operation and will not become dull during the first uses. As for choosing a manufacturer's brand, it is best not to purchase cutters from unknown manufacturers. Beginners and amateurs should consult with the seller or read reviews of brands before making a purchase.
