In the 21st century, it has become obvious that the construction of new buildings, as well as the reconstruction of previously erected buildings, must comply with modern increased standards of energy efficiency and energy saving in construction. In order for a house to meet increased energy saving requirements in a new building under construction or an old one being reconstructed, heat loss must be kept to a minimum. This can be achieved by insulating the walls and roof of the building with additional layers of thermal insulation. This will keep the heat inside and protect the house from the cold outside. When thermally insulating a new or reconstructing an old building, special attention should be paid to the so-called “cold bridges” - windows and doors. In energy-efficient buildings with three-layer walls, windows are mounted behind the main wall in a layer of thermal insulation. Installing windows in the insulation zone ensures a very good distribution of isotherms in the wall, better lighting of the room since the window is placed closer to the outer surface of the three-layer wall. This position of the window ensures correct installation. to RAL standards, transferring static and dynamic loads from the window block to the wall of the window opening. The direction of isotherms, when installing a window block in the insulation zone, the entire wall has a temperature close to room temperature, this prevents the effect of a cold corner, which makes it impossible for moisture to appear in the insulating material of the wall and the formation of condensation. The thermal balance around the window is also improved.
Many window installers believe that dowels provide greater structural stability than anchor consoles. However, dowels should not be used to secure the bottom of frames and sills. Open chambers of frame profiles are difficult to protect from the penetration of rainwater or moisture. Thanks to anchor consoles produced by the German company KNELSEN, plastic windows can be installed without compromising the integrity of the frame. Therefore, they are more aesthetically pleasing, since when using dowels you need to drill holes in the window frame. On the other hand, installing a window using anchors is more labor-intensive. Anchors must be screwed to the profile with self-tapping screws, and they must be secured to the walls at two fastening points so that they cannot change their position. KNELSEN adjustable anchor consoles are used for “warm” installation of windows, when the frame must be mounted beyond the wall surface line into the insulation zone. Anchor consoles are fixed to a window sill covered with a leveling layer. When the wall is made of porous or perforated material, additional mounting brackets must be used to ensure the stability of the window structure. Supporting consoles are used with “warm” installation technology and allow you to place the window behind the surface of the outer wall so that it is in the insulation zone. Consoles are attached to the wall around the window or just below the window. The KNELSEN system for extending a window into the insulation zone consists of consoles of various lengths (allowing the installation of a window into the insulation zone with an extension from 10 mm to 160 mm) with additional fastening elements - anchor dowels, anchor plates, corners, corner posts, supporting and reinforcing elements. A single cantilever consists of a flat or U-shaped channel bolted to the wall and a height-adjustable support corner or flat platform on which the window rests. Fastening points should be installed at a distance of 10-15 cm from the corners of the window, as well as fixed imposts with a maximum pitch of 70 cm (for a PVC profile window).
Installation of a plastic window in a multi-layer wall
We bring to your attention a photo report on the work done on the high-quality installation of plastic windows in multi-layer walls. To be more precise, in this case, we will figure out how and where to correctly install plastic windows in a multi-layer wall.
As an example, we provide photographs of the reinstallation of plastic windows in an apartment building with multi-layer walls.
Today there are many different types of multi-layer walls. The most common option is a multilayer wall, where on the room side the wall is formed from foam blocks, on the outside there is a facing brick, and between the brick and the foam block there is insulation and a ventilation gap.
Most often, when installing plastic windows, we encounter just such multilayer walls and, as a rule, they require serious preparation before a plastic window can be installed correctly and efficiently.
In order to correctly choose the method of fastening and installing a plastic window into a multi-layer wall, I suggest turning to GOST 52749-2007.
From which it becomes clear that before installing a plastic window in a multi-layer wall, it is necessary to consider the following points:
1-Preparation and organization of the base for installing a plastic window frame. 2-Preparing and sealing the sides of the window opening 3-Preparing and sealing the upper part of the window opening, in the area of the lintel
Preparation and organization of the base for installing a plastic window frame.
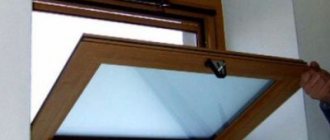
As a rule, the window opening after completion of construction work looks like in the photo.
That is, given that we must install a plastic window in the insulation zone, we have neither support nor the ability to secure the windows in the opening.
In such cases, the base for attaching a plastic window to a multi-layer wall either needs to be provided in advance or modified before installing the windows.
There may be several options:
1-Use of metal plates on which the plastic window is mounted.
In our case, the builders of the apartment building used exactly these plates.
2-Use of antiseptic bars or boards or OSB, depending on the thickness of the insulation and the ventilation gap.
3-Use of reinforcement and concrete to organize the base.
When preparing the lower part of the window opening, it is necessary to ensure that the level of the facing brick does not exceed the level of the prepared base.
It is acceptable if the base is 1-2 cm higher than the facing brick
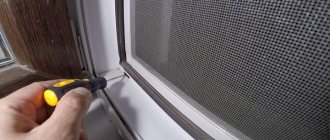
Preparing and sealing the sides of the window opening
Sealing the side part of window openings is a very important stage, since if these places are not organized correctly, the installation seam may freeze, with all the obvious consequences.
It also makes sense to take into account the fact that even in cases where there is no ventilation gap, foam cannot be applied to soft insulation, because there is no adhesion of polyurethane foam at such junction points!
Therefore, taking into account the recommendations of GOST 52749-2007, it is necessary to install wooden boards, bars, OSB or penoplex treated with an antiseptic into the wall.
In our case, when reinstalling plastic windows in a multi-layer wall, penoplex was used. Penoplex is easy to use, effective and relatively inexpensive.
The thickness of the penoplex in our case is 50 mm.
All gaps and cracks between the penoplex and the main wall material must be sealed with polyurethane foam.
Preparation and sealing of the upper part of the window opening, in the area of the lintel.
Preparing the upper part of the window opening in the lintel area is no different from preparing the side parts.
In some cases, the window opening does not have an upper quarter, beyond which the plastic window will go. In such a situation, it makes sense to form a quarter from a steel corner in advance or order a corner when placing an order for plastic windows. Thus the issue will be resolved.
Installing a plastic window in a multi-layer wall also has some features.
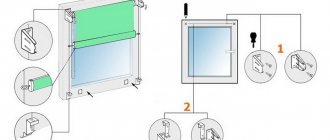
There are several options for mounting a plastic window in a multi-layer wall:
1-On the mounting plates
2-For MRS concrete screws
3-Combined installation, when both MRS and plates are used.
To attach the plates to the foam block, it is possible to use long self-tapping screws, MRS concrete screws or dowel nails.
In all cases where fastening through a frame is possible, it is better to use MRS concrete screws.
If we are talking about large structures where large wind loads are expected, it is better to use stronger and stiffer stainless steel plates.
The installation of a plastic window into the opening is carried out in accordance with the recommendation of GOST 52749-2007.
That is, the number of fasteners and support blocks should directly depend on the size of the window or door. We also recommend taking into account the linear expansion of plastic due to temperature and humidity effects when calculating the amount of fasteners.
As a result, if you follow these simple rules, you can count on high-quality installation of a plastic window in a multi-layer wall. If you are not going to install windows yourself, entrust this work to professionals.
Our company’s specialists are ready to come to your site at a time convenient for you, agree with you on a list of work to prepare window openings, discuss the configuration and characteristics of your future Veka windows, and also offer options for rational savings when glazing.
For more detailed information, you can contact the managers of the Veka window office in Klin.
Offers
- Plastic windows
- Plastic doors
- Glazing of balconies
- Roof installation
- Double-glazed window
- Roto fittings
- Glazing of cottages
- Casing - Okosyachka
- Roller shutters
- Lamination and painting
- Stock
Additionally
Clients about us
Irina: Good afternoon, I want to express my deep gratitude to the employees who installed the windows in my apartment perfectly, quickly, efficiently, and carefully. I was very pleased, Veka windows, excellent windows.
read more →
Share link
© 2005–2018 IP Pokhodilov. OGRN 312505017300082, INN 505203191709 Veka windows in Klin - high-quality plastic windows at affordable prices
Dowel for attaching thermal insulation: Strezzar thermal dowel.
The production of thermal dowels, as well as dowels for aerated concrete, has reached a new level in Ukraine, thanks to a large-scale expansion of its product range. Its main novelty was the Strezzar façade fastener, which is a disc-shaped dowel for insulation. Moreover, the Strezzar thermal dowel is suitable for fastening both foam plastic and mineral wool.
states that the originality of the new dowel for fastening insulation is emphasized by its high reliability and durability. For example, if the walls are built of aerated concrete, and 50 mm thick mineral wool is used as insulation, then this plastic dowel with a size of 10x160 and a metal nail can withstand a load of up to 44 kg . Considering that the standard according to GOST is 25 kg, the strength of the material from which Strezzar dowels are made becomes obvious. It can easily be used with aerated concrete blocks AEROC, UDK, Stonelight density D300/500. The scope of application is not limited even to suspended facade systems that have ventilated air gaps. The type of dowel design completely protects the metal rod from corrosion without creating cold bridges. The calculation of heat loss per 1 dowel is reduced to zero, because its thermal head tightly closes the entire plastic shaft from cold entering the wall.
What is remote installation in the insulation zone?
Traditional window installation involves positioning the window in a wall cavity around the perimeter of the opening. The window is located directly in the wall cavity (with or without a quarter), and its support is the outer wall itself. This location of the product inside the wall gives rise to a number of significant disadvantages associated with the presence of contact zones and cold bridges, as well as the direct influence of the wall temperature on the product. The main disadvantage of building bricks or concrete is the high thermal conductivity of walls. Due to this situation, large energy consumption (thermal energy or heating) is required. Insufficient heat and constantly present cold zones and condensation accumulation lead to the formation of mold, ice, etc.
To eliminate these programmed installation diseases in the wall cavity, window products are installed in the so-called. heat-insulating (warm) remote zone behind the wall opening (from the outside). Thermal insulation of a wall means one or more layers of insulation, due to which the thermal conductivity of the wall is noticeably reduced and the penetration of cold and heat from outside into the wall is reduced. This warm area outside the wall is meant to be a layer of thermal insulation from the wall insulation on the outside (stone wool, warm plaster, foam polystyrene). This remote installation in the thermal insulation zone virtually eliminates the occurrence of cold bridges and their accompanying effects.
The warm layer of insulation of the walls outside from the cold from the street simultaneously plays the role of a heat insulator for the window structures located in it. In addition, the insulation layer effectively protects walls and windows from overheating in the summer. Thus, with the help of external wall insulation, optimal insulation of the facade from the cold is realized, and the window becomes part of the warm facade solution. Thanks to this technology, the cost of heating the building is reduced, and the window is maximally protected from hypothermia or overheating.
Preparatory work
Before the main stage of slope insulation, several preparatory measures must be completed. First, you should seal the seams, especially the external ones, to avoid blowing through the windows. It is important to ensure that the voids are well sealed with the foam used during installation of the structure.
Visual inspection of the window system is a mandatory stage of preparation, regardless of the method and material of thermal insulation. If the installation of a double-glazed window was carried out a long time ago, and the installation seam is not processed, the foam layer may collapse and crumble. Defective areas are determined by using a lighter, which is passed around the perimeter of the window. When identifying cold bridges, you need to clean such sectors and re-treat them with the composition. Excess foam should be cut off.
Insulation of slopes of plastic windows from the inside
Before starting the operation, you should find out where exactly the penetration of air masses occurs. For this:
- With a wet hand, walk along the window sashes. In a place where a temperature difference is felt, the tightness of the structure is broken;
- determine where the cold air is coming from. Place a small piece of plastic film against the sash, the space between the frame. Where the seal is broken, the film will begin to sway in the wind;
- if a draft comes from the frame, you need to place a sheet of paper in the open sash. After closing the window, try to remove it. If the sheet is pulled out, this indicates a sealing problem.
If the main flow of cold comes from the space between the frame and the slope, you will need to additionally insulate this area. The process must begin with the preparation of technical equipment. You will need sandpaper, a utility knife, a brush and a plaster spatula, a trowel and containers for solutions.
Insulation of window slopes is carried out according to a strict algorithm:
- It is necessary to clean the window and window sill from dust and dirt. If dirt gets into the insulation, it can cause rotting. This will break the seal.
- You need to go around the perimeter of the window with polyurethane foam. After hardening, the protruding edges are trimmed with a stationery knife.
- The surface of the window is treated with a primer mixture. An antiseptic is used to increase protection. It will prevent the occurrence of corrosion processes, the formation of mold and fungi.
- The plaster solution is mixed in a separate container. It is necessary to follow the information on the packaging; the proportions of water and mixture are observed. The substance is thoroughly mixed with a construction mixer until a homogeneous composition without lumps is obtained.
- Plaster is applied to the slope with a spatula. After completing the work, the surface is leveled with a trowel. The plaster should not be smooth. Otherwise, adhesion to the insulation will be minimal. After hardening, the surface is treated with a primer.
- The insulation is cut into pieces. Each individual element is coated with glue and pressed tightly against the window opening. There is no free space between the pieces of insulation.
- After the glue has dried, the top layer of insulation is treated with a primer.
The final stage of insulation is decorative finishing. It is allowed to use water-based paints, plasterboard sheathing and decorative plastering.
A new modern technology in the design and construction of private low-rise buildings is the installation of windows using the method of moving them beyond the wall opening . This solution can be successfully implemented both during the construction of new buildings and during the repair and rehabilitation of old buildings. What is important is that the structural composition of new or old walls, regardless of materials, as a rule, allows the use of this installation method. It is also used for the shell of buildings with ventilated curtain facades.
The remote mounting technology is based on the use of a very durable, warm and at the same time quite lightweight innovative material COMPACFOAM ® , produced at the plant of the same name near Vienna in Austria. An extruded profile based on pure polystyrene, regardless of the size and cross-sectional shape, retains heat well, insulates the living area from the negative effects of weather conditions and, in general, performs both important functions of both insulation and continuation of the cavity of a monolithic wall section.
My wide wall is my fortress: is that good?
(Previously, this question would have been answered unequivocally - yes! These are the walls, you can sleep on the windowsill!)
Typically, during installation, the windows or doors of a building are placed directly in the wall opening, and its lower inner part is at the same time a place for positioning the product and a support for the heavy window structure. With such an installation, usually, there are no questions about the load-bearing capacity of a part of the wall (made of brick, foam blocks or concrete monolith) with a window. Despite all the tradition and proven over the years, this approach to installation has a number of significant drawbacks.
Basically, these bottlenecks are associated with the emergence of natural cold bridges at the points of contact between the structure and the wall itself, but concrete and brick walls themselves have very high thermal conductivity, which is why they are insulated with various options. Such a building, even with a wall of great construction depth, requires a huge amount of thermal energy to maintain a comfortable temperature in the room. Otherwise, condensation accumulates on windows and adjacent areas, creating draft effects, which leads to the formation of ice and mold.
It would also be useful to recall those new approaches that for modern high-tech construction, both single-story and multi-story, there is no need for walls of great construction depth for reasons of saving materials, labor costs and time, design, ergonomics and energy efficiency.
A fundamental change in the approach to the installation site of windows
To eliminate these disadvantages of windows that accompany traditional installation in an opening, installing a window on the outside of the wall in a warm, so-called, wall is intended. remote zone. In this case, the thermal membrane for the load-bearing wall consists of one or several layers of insulation, which do not allow the cold to penetrate inside or the sun to overheat the walls. Stone wool, warm plaster or polystyrene foam (not extruded as in COMPACFOAM®), polyurethane foam and similar polymers are used to create this warm zone. This option for installing window structures completely eliminates the occurrence of cold bridges and brings with it a lot of both purely operational and installation advantages.
The outer insulating layer of the wall, sufficiently deep in width, plays the role of a heat insulator not only for the walls, but also for the windows located in it. Thus, an optimal and effective option for thermal insulation of the facade is created, where the window becomes in it, and not in the wall, a functional element of protection from cold air along with insulation. The use of this technology minimizes energy costs for heating the room, and the window becomes protected from both hypothermia and overheating.
The only logical question(s) remains with this generally understandable approach to installation - how to fix a window or door behind an opening in the insulation zone? This is the first question. And the second question is how to minimize losses in the thermal insulation of the wall at the junction of the insulation with the window?
What to mount or not to mount windows in the insulation zone - that is the question?
Installation of windows on the outside of the wall behind the window opening in the insulation zone can be done, naturally and logically, only in the variants of fastening to the outer surface of the wall or to the cavity of the wall opening along its perimeter. One of the first and currently operating such methods is the use of special metal brackets of different shapes, lengths and designs with adjustments as fasteners, which allow windows to be moved outside the brick or concrete walls. On one side these mechanical fasteners are pulled securely to the wall by anchors, and on the other to the window. Insulation is laid between them.
The apparent simplicity and clarity of such a remote window installation hides a lot of inconvenience, risks and losses. Such an installation requires great precision and thoughtfulness when determining the placement points of the brackets, taking into account uneven wall surfaces, loads and the amount of insulation. High-quality and reliable metal brackets with evidence of resistance to weight and wind loads, which are meant to be resistant to corrosion, are quite expensive, weigh a lot and require serious labor costs.
Preparing to install a window structure
After you remove the old window, you will need to inspect the resulting opening, remove all parts that may fall off or collapse; if there are protruding elements, they should be knocked down. Then clean the opening from construction debris and dust. If there are large depressions, it is better to cover them with cement. You can also treat everything with primer.
The base will need to be cleaned before installation.
Having finished working with the opening, you need to prepare the PVC window, which is to be installed. To do this, you need to remove the window sashes; if it is solid, double-glazed windows. If your frame has small dimensions, then you can install it without removing the double-glazed windows and sashes . The outer part of the frame should be freed from the film that protects it.
Remote warm installation of windows
Nowadays, in the field of construction, when the issue of saving heat comes to the fore, the understanding that it is necessary to apply energy saving technologies comes to the fore.
Remote warm installation in the façade insulation area
The widespread use of various types of insulation when arranging the facades of buildings, both old buildings and modern high-rise buildings, has led to the emergence of remote installation of windows or, in other words, installation in insulation. Removing windows into an insulating layer and thus integrating them directly into the façade system is a big step towards increasing energy efficiency.
The window structure using this technology is mounted not into a window opening that already exists in the wall, but on remote high-strength polystyrene profiles, which are carried outside the opening into the insulation zone and attached to the outside of the wall along the perimeter of the window opening.
Remote mounting elements:
Expanded polystyrene profile The main element of remote installation of window structures. Made from moisture-resistant, high-density, non-flammable material.
Polymer adhesive-sealant A polymer sealant substance ensures reliable fixation of the profile to almost any flat surface, as well as tightness, which is important for thermal insulation.
Fixing screw Specialized screw FK-T30 for final fixation of foam polymer profiles for remote installation of windows.
PSUL Self-expanding pre-compressed sealing tape for installation work.
The profiles on which the window is mounted are made of high-density polystyrene foam. The strong and stable profiles are characterized by quick and easy installation and are very well integrated into all façade systems – an ideal system even with double brickwork.
They are ideally combined with the location of the fastenings, allow high loads with their subsequent transfer and optimal reduction of stable thermal bridges based on excellent insulating properties.
Stages of remote installation using the example of a facility in Germany:
- Preparing the window opening: remove excess debris and prime the opening.
- We make the correct cutting of the polystyrene profile according to the dimensions of the opening, and apply polymer adhesive-sealant to the thermal profile.
- We proceed to installing the polystyrene profile itself. The thermal profile is made of high-density polystyrene foam, so it can be easily cut with any suitable cutting tool. It is recommended to begin installation with the installation of the lower profile, since to create a closed contour, the side profile on both sides is installed flush against the lower profile.
- We check the correct installation of the thermal profile using a building level.
- We apply markings for final fixation of polystyrene profiles using special fastening screws.
- We prepare metal-plastic structures for installation: we glue PSUL self-expanding pre-compressed sealing tape around the perimeter.
- We mount the window on remote high-strength polystyrene foam thermoprofiles.
- Completion of work: sticker of specialized steam-waterproofing tapes.
Advantages of remote window installation:
- The most important advantage is the high conservation of heat energy compared to other types of installation of the building envelope. Correct remote installation will save you up to 55% of energy losses, since the difference in heat transfer is about 0.41 W/(mK). In other words, heat loss through windows with such installation is reduced by half, provided that the outer wall is also insulated in compliance with passive house technology.
- Elimination of all cold bridges and transfer of the dew point to the zone of effective wall insulation, thereby eliminating the problems of mold and mildew in the slope area.
- Waste-free installation of profiles, thanks to the dovetail connection, no scraps.
- Class B1 building materials – flame-retardant (according to DIN 4102 standards), class E (according to DIN EN 13501-1 standards).
- 100% recycling of materials, environmentally friendly.
- Excellent long-term insulation.
- Burglary resistance thanks to the use of a hybrid polymer that fixes the profile to the facade.
- Simple and quick installation (provided the façade is suitable for installation using this technology).
Disadvantages of remote installation of windows:
- Initially, the cost is quite high due to the use of modern, high-tech materials. The technology is effective only if high-quality components are used: polystyrene profiles, sealants, mounting tapes. All this leads to higher installation costs. But the costs are quickly recouped by reducing heat loss (and therefore saving on energy costs for autonomous heating).
This technology requires a high level of responsibility and highly qualified craftsmen. This means that remote installation can only be entrusted to experienced specialists who know the specifics of installation work in this technology.
An example of a “living” object with remote installation of windows before the façade cladding:
Thanks to initially seemingly large investments, Customers receive an annual return on previously invested funds in the form of significant savings in energy resources - natural gas, electricity. Like any investment, after a certain time (depending on the thickness of the main wall and the insulation on it, from 5 to 9 years), it will make a profit. By investing in this project once, you will receive not only an economic effect, but also comfort from living in this building.
Insulation of window slopes from the street
The entire process of insulating windows from the outside consists of the following steps:
- Preparatory work;
- Cleaning slopes from dirt and foam residues;
- Applying a primer to the surface;
- Installing insulation with glue;
- Sealing cracks with glue;
- Arrangement of corners;
- Installation of polymer mesh;
- Plastering.
Important: When installing insulation, it must be laid so that it partially covers the window frame, and the installation seam is completely closed.
First you need to cut off all the remaining foam. The slopes are treated with an antibacterial primer mixture. Tiles equal to the size of the slope are cut from penoplex. They are smeared with assembly adhesive and pressed to the surface. Here you can use dowels. The corner is installed. A fiberglass mesh is placed on the tile over the applied adhesive. You need to give it time and apply glue on top again. Upon completion of the insulation work, water-based paint must be applied to the surface.
Important: Paint is applied only after the glue has completely dried.
Thanks to external insulation of windows, condensation does not form.
Insulation of ebbs To insulate ebbs of plastic windows, you need to fill all the cracks with heat-insulating material and foam them. To prevent water from getting on the insulating material, a metal strip should be installed on top of the flashing. The angle of its installation should be more than five degrees, and the horizontal edge should extend twenty to thirty millimeters beyond the facade, while the side edges should be turned up. The places where the plank is adjacent to the surface must be covered with a hermetic mixture.
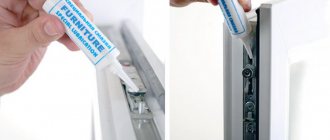
Insulating windows from the inside Work on insulating a window unit from the inside of a house may include: replacing a worn rubber seal, adjusting fittings, sealing joints, replacing a double-glazed window with an energy-saving one, insulating with film. The role of the rubber seal is quite significant; it ensures the tightness of the window. It is therefore extremely important to regularly inspect the seal and properly care for it. Sealing of joints is carried out by applying sealant to the blowing points. Today on the building materials market there is a huge selection of sealing compounds of different types - for different wall materials, for different temperature conditions, etc.
Additional methods of window insulation These methods include primitive window washing. After all, if the glass is dirty, then it does not fully transmit the sun's rays. You can use thick fabric for curtains, which will also help retain heat inside the building.
For insulation, it is possible to use available materials - foam rubber, soaked paper, window tape, etc. Energy heating of a window or double-glazed window can also be arranged. To do this, a heating cable is placed around the perimeter of the window, and a special conductive film is placed on the glass.
Using heat-saving film Insulating film for windows helps keep the house warm. To create the desired effect, you first need to properly prepare the surface. The tools we need are a hair dryer, scissors, and a knife. The surface is cleaned of dirt, the glass is well rubbed. Double-sided tape is glued around the perimeter of the glass box. The film is separated using a stationery knife, cut to the required size and pasted onto tape. The film is blasted with warm air from a hair dryer. If small swellings form, they will need to be burst with the tip of a knife. This is perhaps the most economical method of insulating plastic windows. In any case, for a high-quality result you need the right integrated approach.
Materials and tools
To insulate a PVC structure you may need:
- construction knife;
- soap solution;
- spray;
- rubber spatula;
- clean napkin or sponge;
- polymer panels (polyurethane foam, polystyrene foam, penoplex);
- panel adhesive;
- self-tapping screws;
- mushroom dowels;
- putty knife;
- double sided tape;
- reinforcing mesh;
- heat reflective film;
- perforator;
- sandwich panels;
- construction (or regular) hair dryer;
- vapor barrier film;
- plaster;
- sandpaper;
- screwdriver;
- PVC corners;
- set of screwdrivers and hexagons;
- water-repellent film;
- rubber compressor;
- silicone sealant.
How to protect insulation from destruction
Thus, the insulation must be somehow protected from the penetration of direct moisture or water vapor into it, and the moisture that does get into the insulation must be given the opportunity to evaporate outside so that none of the described problems threaten the installation seam. For this purpose, special vapor barrier and waterproofing vapor-permeable materials have been created, which we produce. The first ones are installed from inside the room and prevent the penetration of moisture contained in the room air into the installation seam, that is, to the insulation. The second ones are installed outside. These materials protect the insulation from the penetration of direct moisture (water) from the street. And also, which is very important, being vapor-permeable, they ventilate the inside of the assembly seam, allowing it to breathe. Thus, condensed water or water vapor that got there from inside the wall (from its condensate plane) is removed from the seam. Stagnant processes inside the insulation are eliminated, figuratively speaking, it “breathes outward.” This is the mechanism of action of special materials to protect the main element of the assembly seam - insulation from the harmful effects of moisture.
However, moisture is not all that can affect the insulation and the entire installation seam. Let us dwell on two factors that have the most critical impact after humidity.
In second place is ultraviolet solar radiation. This radiation destroys the insulation (polyurethane foam, used in almost 100% of window installations) in a very short period of time. Thus, in the southern regions of Russia, the process of almost complete destruction of polyurethane foam can occur in a couple of months. In the middle zone it will take a year to a year and a half, depending on the direction of the world where the window structure is facing.
Conclusion - the insulation needs to be protected from the harmful effects of ultraviolet radiation. The problem is successfully solved by the same vapor-permeable waterproofing tape, which protects the insulation from direct exposure to water from the street.
In third place is the linear expansion (movement) of the window structure due to temperature fluctuations (thermal expansion). And such movements are significant and can reach from 5 to 10, and in some cases even 15 percent of the width of the installation seam itself! In this case, the insulation does not suffer, since it is well resistant to deformation loads and, in addition, is glued to the wall and window frame. It is clear that the means of protecting it must be resistant to such colossal deformations.
Imagine, if you use a plaster solution or a solid sealant, at what point will it collapse or tear off the smooth plane of the plastic window frame? (GOST allows the use of certain types of acrylic sealants to protect the outer contour. These must be elastic (not dry completely), vapor-permeable materials with good adhesive abilities). Here again the same vapor-permeable waterproofing tape successfully solves the problem, since it is not afraid of movements of 15 or even 30 percent.
bik ton
The best option for cladding aerated concrete walls are hinged ventilated facades. Such facades, due to their “breathing” properties, enable the blocks to fully demonstrate their vapor-permeable properties.
What can you say about aerated concrete?
Aerated concrete is one of the types of cellular concrete containing cement and quartz sand with gypsum or lime additives; the stone is distinguished by spherical pores ranging in size from 1 to 3 mm distributed over the entire area. Depending on the region where construction is taking place, the thickness of the wall material is selected taking into account weather conditions.
The material has a high-quality thermal conductivity characteristic that is comparable to natural wood. When building houses, the common diameter of the logs used is 26-30 cm, and the thickness of the blocks is 37-40 cm, that is, the aerated concrete wall is stronger, which means that energy savings will be greater.
Ventilated facade for aerated concrete walls
Aerated concrete absorbs moisture well, so when installing a ventilated structure on a façade made of this material, it is necessary to provide additional protection to allow moisture to penetrate into its cells. If the installation is carried out without insulation, then the normal functioning of the vapor barrier characteristics of aerated concrete will be guaranteed by the gap between the cladding and the surface of the walls. Thus, heat is distributed throughout the room much faster, and bills are received less.
The use of ventilated facade technology will make it possible to heat the house without loss of heat.
How to choose insulation?
When designing work, it is important to choose the right thermal insulation material for ventilated facades on aerated concrete. Experts recommend choosing only those types of insulation that have high-quality vapor-permeable properties, for example: mineral wool, suitable for external use in terms of rigidity and density.
ADVICE:
When installing the facade, it is necessary to use a vapor-permeable membrane, which will prevent the insulation from getting condensate into it and allow warm vapors to escape.
It is worth noting that when installing the facade, it is not recommended to use polystyrene foam, since it poorly transmits steam, due to this the basic characteristics of aerated concrete are violated.
Advantages and disadvantages
The advantages of a ventilated façade for aerated concrete buildings are:
Insulation and high-quality sound insulation;
Dew point offset.
“Dew point” is the cooling temperature of the surrounding air at which water vapor is formed. In the case of finishing using ventilated facade technology, this point will be in the inner surface of the cladding, which will make it possible to remove vapors to the outside due to air circulation.
A huge selection of materials for facade cladding for any architectural and design structure;
The service life of ventilated facades is up to several decades, depending on the choice of cladding material;
High-quality protection of aerated concrete walls from external climatic conditions;
It is easy to install a ventilated façade regardless of the weather.
The disadvantage of using this technology is the property of aerated concrete to absorb moisture. Therefore, it is not recommended to use a ventilated façade near bodies of water, as well as in regions with heavy rainfall.
Installation features
Installation of a ventilated façade on aerated concrete always occurs as standard, but you need to take into account the specifics of the blocks, which may affect the further operation of the building. Installation of external work should be carried out only after finishing the interior decoration of premises that are provoked by moisture accumulation: plastering walls, screeding floors, laying tiles.
How to properly insulate the slopes of plastic windows
Internal and external insulation of windows can be carried out using the same material. The installation technology is approximately the same, only the final finish is different.
Using such a universal, pliable material as polystyrene foam, you can easily make insulated slopes on PVC windows yourself, without turning to specialists.
How to insulate the slopes of plastic windows inside
It is recommended to begin installation of warm slopes immediately after their installation, until the construction foam collapses under the influence of moisture and loses its thermal insulation qualities. The work order is as follows:
- Trim off excess polyurethane foam remaining after installing the windows.
- Treat the slopes with a primer containing an antiseptic. It will prevent mold from appearing.
- Plaster the slopes, leveling the surfaces. This will ensure a better fit of the insulation.
- After the plasters have dried, the surfaces are primed again to improve the quality of adhesive application.
- Prepared pieces of foam are made less smooth by treating the surfaces with sandpaper. This will make it easier to glue them to the slopes.
- Cut the foam into the required pieces according to the previously measured dimensions, leaving small allowances.
- The foam parts are glued to the prepared slopes using mounting adhesive. Wait for the glue to dry completely, then trim off the excess foam.
- The corners can be puttied or decorated with decorative corners, which will make them smoother and more beautiful.
- The inside of the window openings is plastered or plasterboard is glued, then putty is applied, the surfaces are primed and painted.
- Decorate the outer parts of the slopes.
You can purchase ready-made foam parts. They are sold as a set, have standard sizes and are easy to install on slopes.
How to insulate the slopes of plastic windows from the street
The outer side of the slopes is insulated using the same technology. For outdoor work, it is recommended to use a more durable composition - polystyrene foam, which does not collapse under the influence of high or low temperatures, precipitation and wind. Progress:
- As with internal work, the remaining foam is cut off and the surfaces are treated with an antiseptic primer.
- If the surfaces have curvature, then they are plastered to level them.
- Cut out the necessary pieces of insulation and glue them to the treated surfaces using mounting adhesive. You can further strengthen the material with dowels with wide heads.
- The corners are decorated with special decorative corners.
- The insulation must be reinforced on top with a reinforcing fiberglass mesh to protect it from the destructive effects of precipitation.
- External slopes are plastered, treated with putty and a layer of water-repellent paint is applied.
For additional protection against the formation of condensation due to temperature differences, it is recommended to regularly open the window or provide ventilation under the window opening to regulate the level of humidity in the room.
Difficulties and errors
When insulating plastic structures, the following problems may arise:
- The biggest difficulty may arise when insulating PVC windows with polymer boards (expanded polystyrene or analogues) if the room is located above the second floor. Processing external walls or slopes in this case is not possible without the use of special equipment (truck crane or climbing equipment) and specialists in high-rise work.
- Finding the right seal, as well as its incorrect installation.
- When gluing the film, wool, dust or debris may get underneath it, which can cause unevenness and bubbles to appear during shrinkage.
- Some types of protective films have low strength, which is why it can tear when smoothed.
- If the fittings are adjusted incorrectly, the window may not close, and the rubber bands, hinges or locking mechanism may be damaged.