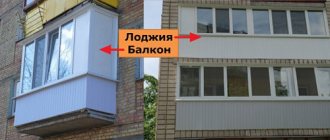
A balcony or loggia in your apartment is priceless square meters that can be used usefully and not cluttered with unnecessary things. It’s good that many owners of this type of premises have understood how to properly manage non-residential space. But in the process of equipping a balcony or loggia for living space, one has to deal with a considerable number of misunderstandings and questions. I consider one of the most popular and exciting: “Is it possible to put the battery on the balcony?”
So is it possible or not to take the battery out onto the balcony?
In accordance with the Housing Code of the Russian Federation, Article 15, paragraph 5, a balcony or loggia does not belong to living space, and therefore reconstruction is prohibited here. At the same time, there are nuances that, with great effort, still make it possible to legalize the transfer of the battery to the balcony.
I said earlier in my blog that a balcony without heating will never become truly warm, and therefore using it as a living space will be almost impossible. Insulation and glazing with metal-plastic profiles serve as good thermal insulation, protecting the space from cold air entering inside and heat leakage to the outside. But to keep your balcony or loggia warm at any time of the year, you need to think about heating. At this stage of repair, many people are thinking about the heartbreaking question of whether it is possible to take the battery out onto the balcony.
Requirements
There are a number of strict requirements that must be met in order to achieve excellent heat transfer:
- you need to retreat at least 2–3 cm from the wall;
- place the supply pipes at a slope of 5–10 mm per linear meter;
- 10–12 cm from the window sill;
- 12–14 cm from the floor;
- the battery is placed evenly in all directions (use a level);
- the window sill covers the battery;
- to regulate the temperature on the loggia and the supply of coolant water, you need to make a jumper with a ball valve;
- You cannot bend the pipes too much or too often: these bends cause air pockets that block the supply of boiling water and have a bad effect on the operation of the entire heating system as a whole.
To comply with all these requirements, it is necessary to check each action using a tape measure, ruler and level. It is advisable to attach a screen wrapped in foil to the wall to better retain heat. The foil will glow and direct warmed air into the room.
Heated balcony floor Source kapiteltk.ru
Why you can’t install the battery on the balcony
Why you can’t take the battery out onto the balcony, even if there is an emergency need:
- You can flood your neighbors on the floor below.
In winter, when the temperature outside drops below zero, there is a risk that the heating battery installed on the balcony may freeze and burst under high pressure. In Moscow, even after insulating a balcony or loggia, permission to move the battery is not issued. - Additional load on central heating.
If one or more elements are added to existing radiators, the water pressure will weaken and lead to cold radiators throughout the house. So you risk not only getting a fine for a battery on the balcony, but also conflicts with your neighbors. - Heating cost.
The cost of “utilities” for central heating in a house is calculated per square meter for everyone living in the house. Therefore, by connecting the battery to the balcony, the price of heating will increase for all residents of the apartment building. If discovered, they have every right to sue and are likely to win. Of course, this fact can be hidden, but living in constant fear that a deception will be revealed is a stressful and risky business. - Problems when selling an apartment.
When selling square meters, you are required to give the buyer a technical plan (technical passport), which, in addition to the layout, also indicates the thermal circuit that you changed when you decided to install the battery on the balcony. There are two options here - return everything as it was or seek legality for the removal.
Possible connection diagrams
In the loggia, the battery can be connected in three ways:
- With jumper and tap. An excellent solution for this room, because all the heat will pass through the radiator without any loss;
- With jumper, but without tap. The presence of a jumper allows you to close the flow of hot water when the air in the room gets too hot;
- Without jumper, but with tap. The presence of such a solution allows not only to shut off the flow of water, but also to temporarily dismantle the radiator to carry out the necessary work.
Removing the battery allows you to make a full-fledged room in the loggia for permanent residence or solving any other problems. Of course, everything must be coordinated with the housing inspection and other regulatory authorities.
If permission has not been obtained from the authorities, then as an alternative option you can consider installing a heated floor system, which is also ideal for loggias and balconies.
If possible, it is best to entrust the work to professionals who are familiar with the features of installing heating radiators and putting them into operation.
In what cases can it be legal to install a battery on a balcony?
In case of obtaining permission for redevelopment and the status of residential premises on a balcony or loggia.
It is possible to install a battery on the balcony without violating the legal framework, but with great effort and time. If you are ready for this, then I will tell you how to do it.
- To move a heating radiator to a balcony, you must obtain permission from the housing inspection. And it doesn’t matter whether you are taking out the old one or are going to install a new element in the heating system. If you begin to dismantle the radiator and install a new one without obtaining permission, you are already breaking the law. I would like to note that this procedure is a bureaucratic hassle that can last more than one month. If repairs are made, it will stretch, which is very unpleasant. Therefore, I often come across cases where they first install a radiator on a balcony, and then seek permission. But I want to note that there is a high probability that they may refuse to receive it.
- Before you go and ask for that very permission, take care to make accurate calculations. You must have accurate calculations on hand regarding the number and size of sections, their location, pressure in the pipeline and temperature. You can’t do this yourself without the proper skills, so you need to turn to professional designers. Such an extensive collection of information for the BTI will indicate the safety of your decision to place the radiator on the balcony, and therefore the likelihood of getting the go-ahead is higher.
- Before installing the battery on the balcony, it is necessary to make insulation. Without it, it is not advisable to carry out the transfer, since on a cold loggia all the warm air will go outside, and besides, in this case you will not be able to prove that the temperature on the balcony in winter will be acceptable for installing the battery.
Documents for obtaining permission:
- Calculation of thermal conductivity;
- An official conclusion from experts, which confirms that the water in the battery will not freeze;
- Developed planning project - you can contact the design company.
Depending on the region where you are going to install a heating radiator on the balcony, the housing inspection may modify and add an additional list of papers.
In order not to delay the repairs, some decide to install the battery on the balcony without obtaining the notorious permission, and only after the completion of the installation work begin to make the design. I warn you, this is risky, because there is always a possibility that BTI services may refuse a decision.
On the Internet and on various forums, I came across advice from owners of such apartments who decided that they could install a battery on the balcony without any paperwork. They say they live for 10 years and even manage to sell them. I want to assure you, firstly, not to listen to anonymous users who are not responsible for what is written (very sorry), and secondly, to approach your situation individually, because you will never know what and how others really had it . Perhaps their heating system is not central, but individual; the neighbors don’t mind or don’t care about what’s going on in others’ apartments; “The hour has not yet struck” and the discovery of an illegal layout remains a matter of time.
Think with your own head when reading such recommendations, and remember that if something happens, it is you who are responsible for what you have done, and not anonymous Internet users.
Stages of work
Before heating the loggia, it is necessary to dismantle the old radiator in the room, if planned.
To complete the work you will need: pipes, brackets, a hammer drill, fittings, a grinder, a soldering iron.
In most cases, installation of a heating radiator in a loggia is carried out in the following sequence:
- The first step is to cut off the battery in the room (kitchen, living room, bedroom). You need to cut in two places: near the battery and the pipe (about 100 mm from the intended connection area). After this, you need to drill holes in the wall with a diameter of 20 mm, which will allow you to carry the riser into the loggia. First, the roll is removed, after which the fittings, connections, and finally the riser itself are installed.
- A good solution would be to choose polypropylene pipes, which have excellent performance characteristics. In addition, when using them, it will be easier to complete all installation work yourself.
- Next, you need to attach the new battery to the wall in the loggia in order to use a level to mark the areas for future fastenings. Then the brackets are installed. It was already noted above that it is necessary to install two lower and one upper bracket. For a small radiator this will be quite enough.
- Hanging the battery on the loggia on the installed brackets is quite simple. After installing the radiator, Mayevsky plugs and taps are installed.
- If polypropylene pipes were used, then various elements (fittings, connections) were attached to them.
- After this, the taps are installed and the pipes are connected. It is imperative to check the tightness of the installed pipes and all connections.
What does the law say about removing heating radiators?
If, despite the fact that you have fulfilled all the requirements and there are no compelling reasons for refusal, you are still given a negative answer, be prepared to defend your position. And for this you need to have a good understanding of the bills that regulate this issue.
Study in detail these 2 laws of the Housing Code of the Russian Federation: Article 25, paragraph 1 and Article 15, paragraph 5.
Briefly about the essence of these resolutions:
Article 25, paragraph 1
“Types of reconstruction and redevelopment of premises in an apartment building” states that it is permitted to replace and relocate utility networks, which include heating. But there is a note that this condition applies to residential areas.
Article 15, paragraph 5
“Objects of housing rights” regulates the procedure for recognizing premises as residential. And therefore, it is important here to prove that the loggia or balcony, after redevelopment and integration with the living room, also became part of the living area.
Warm floor
A thrifty owner takes care of all heating, regardless of costs. Typically, heated floors are made using an electric heating tool, but you should not spend extra money if you have centralized heating. It’s really possible to make a warm floor with your own hands, and then enjoy it on long winter evenings, covered with a blanket, looking out the window. For a warm floor, you will need insulating material: cotton wool, padding polyester, foam rubber, ordinary unnecessary rags. A large number of wooden beams and cleanly planed boards. The strength of the floor and the coating as a whole depends on the wood chosen. Next is a matter of technology. Connect a separate pipe, install a distributor and run two parallel pipes in a zigzag pattern across the floor. Install wooden beams between the pipes, easing the severity and preventing the possibility of flooding. We lay insulation material between the beams, carefully fix it, or cover it with a moisture-resistant solution. Boards are laid on top of the beams and can be connected to each other. If desired, lay parquet, linoleum, carpet.
Penalties and fines in 2022 for removing a battery
Illegal redevelopment carries with it penalties, and taking the radiator out onto the balcony and making the loggia part of the living space without permission is precisely an illegal action on your part.
If detected, the fine for illegal redevelopment, including for a battery on a balcony, in 2022 in Moscow and the region is:
For individuals – 2500 rubles;
For legal entities – 70,000 rubles.
Payment of a fine is not the only punishment. After this, you will be forced to return everything back. Therefore, in addition to the cost of the fine, you will also have to spend money on dismantling. At the same time, you can challenge the decision and file an application with the court with the provided evidence that such redevelopment with the radiator moving to the balcony does not pose a danger or any inconvenience to the residents of the house. To confirm this, it is necessary to collect the signatures of all neighbors. After this, the court makes a decision either on the legality of the repair or on dismantling.
know more
You have questions?
Write!
I'm in touch right now!
Bureaucratic issues
The housing inspection will require apartment owners to:
- Professionally performed thermal conductivity calculations;
- A professional opinion from specialists that the water in the heating radiator will not freeze outside the apartment;
- The redevelopment project and a number of other documents, the list of which must be clarified with the regional housing inspection.
Moreover, the most difficult stage will be the development of a redevelopment project, which involves changing the status of the loggia.
From a non-residential premises it must be transformed, strictly according to the documents, into a living room. The author of the apartment building project (usually a company or design institute) is responsible for issuing such documents.
It is worth noting that the development of the status change project itself is carried out by specialized firms.
In a project, the specialist responsible for its development must take into account all the nuances and standards (construction, sanitary, fire safety, engineering, communications, etc.). Of course, before developing a project, it is necessary to properly insulate the room and take into account possible risks.
The design institute usually gives such permissions if the removal of the central heating radiator does not affect the condition of the entire building. That is why, in most cases, there are no problems with obtaining permission in new buildings and relatively new houses, while in houses of the old housing stock it will be practically impossible to carry out such work officially.
After all this, it is necessary to develop design documentation, which must be agreed upon with Rospotrebnadzor and the fire service. At the end of everything, it is necessary to register the redevelopment with the BTI, where the corresponding changes will be made to the title documents.
Types of heating batteries for removal to the balcony
Once you have received everything you need to install radiators on the balcony, you need to select the type of device. True, if you are moving a battery that has already been installed against the wall of the balcony block, this issue is irrelevant for you.
Types of batteries and radiators are divided by class and materials of manufacture.
| Class | Materials for production |
| Economy | Cast iron, steel |
| Middle | Tubular steel, aluminum, bimetallic |
| Premium | Improved bimetallic, designer cast iron, cast aluminum |
In terms of performance characteristics, namely a long service life, cast iron battery models have. Their main drawback is that they heat up slowly. But at the same time, they cool slowly, prolonging the warmth in the room.
Steel batteries have a slightly shorter service life - 10-15 years. Steel radiators include tubular and panel radiators. The latter are in greatest demand. Steel ones will be more expensive, but the variety in shape and color allows them to be used for arranging designer balconies and loggias.
Aluminum batteries have an average service life of about 20 years. Light weight, compact dimensions (which is very important for installation on balconies) and variability of models have made them “favorites” among those who want to place the battery on the balcony. In addition, they also heat up quickly and have excellent heat transfer, which is also a positive indicator.
A good option for city apartments would be bimetallic options that are resistant to water hammer, inexpensive and have good heat transfer.
Sequencing
Important! First of all, it is necessary to thoroughly insulate and install double glazed windows!
So, the legal and technically correct sequence of actions if you want to place a heating radiator on the balcony consists of the following steps:
- insulation of external walls;
- coordination of redevelopment, obtaining relevant permits and conclusions;
- choosing the optimal type of radiator and installation method;
- wall preparation - installation of thermal insulation, finishing;
- direct installation.
If you are firm in your intentions, then for apartment buildings it is recommended to move the radiator from the room to the balcony, and not to install an additional one , which will immediately significantly reduce the efficiency of the general building system - this is unlikely to please the neighbors and will entail inspections.
Installation and self-installation of a heating battery on the balcony
Studying what has already been written on this topic on the Internet, I found many articles that give some instructions for moving the battery to the balcony with your own hands. Such information content, on the one hand, benefits readers - after all, you don’t need to go anywhere and find out something, just take it and do it, as they say. But on the other hand, for some reason many do not take into account that this set of works is quite complex to perform and carries a lot of danger. One wrong step and you risk flooding the residents on the floor below.
Such work should be carried out exclusively by masters and specialists in this field. Even if you are not a “noob” at repairs, this does not mean that you can cope with connecting elements to a central heating system. The question is different - professionals absolutely refuse to carry out this kind of work if the customer does not have permits in hand. In fact, this is what encourages “home craftsmen” to do everything with their own hands. My recommendation is to still get permission, even before starting the repair, so that you don’t “stand idle” later, or, if you were not given permission, find an excellent alternative to moving the battery to the balcony - installing a heater.
How to heat a balcony in winter: brief conclusions
A balcony with an installed heater can become a full-fledged additional room. Heat can be transferred into it in different ways, both simple and exotic. When using solar panels for an apartment, all the electricity for heating the loggia will be free, but the installation will be too cumbersome.
Innovative warm plinth - the ideal solution for the smallest balconies. According to the experience of most, the simplest way to heat a small room is a conventional battery, but you must obtain permission from the BTI for its installation.
Alternative solutions for heating balconies - heaters
When it comes to heaters on balconies, apartment owners are skeptical about this - they consume a lot of electricity, take a long time to heat up, and are ineffective.
This was the case 5 years ago, when basically you could only buy a fan heater, popularly called a “wind blower”. They really consumed a lot of electricity, and after they were turned off, the room cooled down again. With the advent of infrared heaters, the situation with heating on the balcony has changed significantly for the better. They quickly heat the room, consume little energy, are safe to use, they can be left on overnight, and when the required temperature is reached, the system automatically turns off the device. If, in addition to such a heater, you install a warm floor, you can spend time on your balcony in complete comfort. Regardless of the temperature outside the window.
I talk more about the types of heaters in this article.
If you still have questions or need help regarding heating your balcony, you can always contact me by phone, email, or through social networks. Best regards, Vladimir Kozhushko!
How to heat a balcony in winter: popular options
Before installing heating on the balcony, it is necessary to finish it and insulate it. How to make it suitable for living all year round? You can use one of seven options.
Traditional steam heating
Installing an additional battery for a balcony or loggia is a great idea, because this method is simpler than others and has no equal in terms of efficiency. But there is a big disadvantage - this is the possibility of encountering legal problems. The fact is that removing the battery will probably be illegal. It is futile to hope that no one will notice anything.
When one of the residents of an apartment building has an individual battery on the balcony, residents of neighboring apartments may feel a decrease in heat transfer from their own radiators. The reason lies in the design features of central heating. However, this method should not be written off prematurely. Such issues are discussed with housing and communal services employees - with their help you can obtain the necessary permission.
Electric heating
The balcony heater can also operate using electricity. This is equipment such as a convector or oil heater. Easy to install, it is ideal because it can be turned on and off as needed. But there are also significant disadvantages. The first and main one is an increase in energy costs.
The second drawback is the unpleasant odor that appears due to low air humidity in such a small room as a loggia or balcony. It is enough to install an air humidifier in a heated balcony to prevent this from happening. The third disadvantage is the increased fire hazard. Installing an oil heater is justified where they do not spend too much time on the loggia.
Infrared heating
A rather innovative way to make a balcony or loggia warm is with ceiling and wall infrared panels.
The effect of infrared heat on the surrounding space is similar in its properties to sunlight. Modern infrared heaters for the balcony will not only make it suitable for permanent use in winter, but will also have a very positive effect on the walls and floor.
Infrared light will prevent condensation from accumulating on the walls and prevent the possibility of mold or mildew.
This is one of the cleanest methods of heating a loggia from an environmental point of view. In addition, it is very economical.
But the installation itself cannot be called cheap. In addition, if the loggia is large, then the infrared heater may not be able to adequately heat the room.
Warm floor
If you want to include floor heating in your loggia heating, then this option is best suited. There is just one important point: the heated floor is laid before pouring the concrete screed. Read more about this method here.
If the balcony is small, then one heated floor is enough to heat the entire room. The method is good for its effectiveness, but difficult to install. There is also some fire hazard (for the electric type).
Warm baseboard
This is a modern balcony heating that came to us recently from European countries. It is installed instead of a regular baseboard, but has a heat exchange heating module inside. Usually these are two copper tubes with brass lamellas. This type of balcony heating includes a distribution manifold, from which the coolant is supplied to the heater. Like the floor, a warm baseboard can be powered by electricity or water.
Solar panels
Solar panels for apartment heating have appeared quite recently. Heating on the loggia using solar energy is convenient for owners of private houses. It is problematic to implement this in a city high-rise building, but it is possible. But still, a solar battery on an ordinary balcony is a rare occurrence. In the Russian climate, the option of such heating is, of course, controversial.
In addition, this is one of the most expensive ways to heat a balcony - it all depends on the cost of solar panels. The solar battery itself on your balcony will not create a warm atmosphere: it only collects solar heat, which is converted into electricity through a special device. The electricity can then be used to power a heater.
The principle of operation of a solar battery
Preparation for installation
Preparatory activities include several mandatory steps.
Radiator selection
You need to choose the type of radiator based on its technical characteristics , the most important of which is operating pressure. It must comply with the pressure drop limits in the heating system of the house. As a rule, in old five-story buildings the value of this indicator is 6–8 atmospheres, and in multi-story buildings (10–14 floors) the pressure level reaches 12–15 atmospheres.
The second important indicator is resistance to water hammer . The service life of the radiator and the quality of heating depend on this characteristic. With a centralized heating system, it is almost impossible to avoid water hammer, so when choosing equipment you need to pay attention to this technical characteristic. Additional important factors include lifespan, ease of installation, and heatsink design.
Types of radiators
Types of batteries and radiators are divided according to classes and materials of manufacture:
- Cast iron. They have the longest service life (up to 35 years). The main disadvantage is the long heating and cooling time.
- Steel panel. They will last about 15 years. They are valued for their high heat transfer rates and other technical characteristics, as well as their low cost.
- Tubular steel. They are available in a variety of colors and designs, allowing you to match them to any interior. They have excellent consumer properties. The disadvantages include high cost.
- Aluminum. Average service life is 15 – 20 years. They are characterized by high thermal conductivity and low weight. The main disadvantage is the sensitivity of the filler to the PH, therefore they are recommended for private houses with an autonomous heating system.
- Bimetallic. The best option for an apartment, as they are unpretentious in terms of the composition and quality of water, have good heat transfer, and are resistant to water hammer.
Calculation of the number of sections
All types of radiators are composite, so you can select the number of sections needed to heat a particular room, depending on the area.
The calculation must be made on the basis of generally accepted standards:
- one aluminum section per 2 m2;
- one bimetallic section per 1.5 m2;
- add 1-2 sections for reinsurance.
Selecting a connection option
You can consider the following connection methods:
- Side. The most common installation method. The inlet and outlet pipes are mounted on one side of the radiator. The main requirement is to maintain the distance between the fittings, otherwise the radiator will not warm up sufficiently.
- Lower. With this option, both pipes are mounted at the bottom of the radiator - inlet on one side, outlet on the other. The main disadvantage is low heat transfer.
- Diagonal. The input is mounted on top on one side of the radiator, and the output is mounted on the bottom on the other. With this method, the least heat loss is achieved, so it is considered the best.
Which pipes to choose
For work , it is recommended to choose reinforced polypropylene pipes because they :
- easy to bend, allowing installation of any complexity;
- do not deform during operation;
- do not require welding - flux is applied to the joints and sealed with a special blowtorch;
- have a high heat transfer coefficient.
It is possible to use copper pipes, but this is a more expensive and difficult to install option. Ordinary propylene quickly deforms and loses its attractive appearance.