It would seem that what could be easier than understanding the principle of operation of a concrete contact and using it according to the instructions? Bought it, mixed it, applied it, and then do whatever you want: plaster, tile, apply any finish. However, practice shows that in reality everything is not so rosy. Repairs using concrete contact soils sometimes turn into real torture. In this article we will tell you which surfaces need the use of concrete contacts, and where you can do without it. We’ll also talk about the cost and economical application of this type of primer.
What is the difference between Betonokontakt and quartz primer?
The Betonkontakt primer contains much more binders, but much less pigments, unlike quartz primer. The fraction of the same filler (quartz sand) in the Betonkontakt primers is from 0.3 to 0.6 mm, there are quartz primers with a finer filler, 0.2 mm for example.
Interesting materials:
How much does 1 meter of stretch ceiling cost? How much does IQOS cost in Italy? How much does the bus cost to Rosa Khutor? How much does gasoline cost per liter in America? How much does an hour for a teacher cost? How much does a cup of Luwak coffee cost in Moscow? How much does dextrose cost? How much does a high-tech house cost? How much does a kitchen apron cost? How much does Gaba cost?
Frequently asked questions about concrete contact
How to apply concrete contact to a wall?
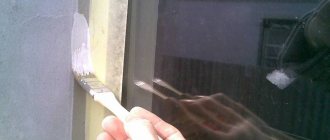
To apply primer to walls, it is recommended to use a paint roller, and in places where a roller cannot reach, a brush is used. Some experts recommend spraying it with a simple primer. You cannot do this with concrete contact!
If the task is to prepare painted walls for laying tiles, then concrete contact will be the optimal solution. If the paint adheres confidently to the walls, then you can safely apply a primer over it without fear of peeling in the future.
How to apply the solution correctly
The liquid substance in its original form or diluted is applied with a wide brush or paint roller. A thicker consistency is spread with a spatula.
After the first layer has completely dried, immediately apply a second one to improve the performance of the wall, floors or ceiling.
Use under tiles
Application of concrete contact under the tile is required if the bases are not resistant to moisture, are not hygroscopic, or have low adhesion to the facing material.
Tile layers try to do without applying such substances. Using the substance in extreme cases, when finishing problematic, non-absorbent surfaces. The use is justified if you need to cover the plasterboard with tiles, which was used to level the walls.
In other cases, they resort to using primers with the desired characteristics.
Application to painted walls
This type of primer is universal. It can be used to cover surfaces painted with oil paint. Concrete contact does not necessarily require the removal of any type of old finish, but this is not entirely true.
The mixture can be placed on any type of base, but this does not guarantee the quality of fastening of the cladding. In other words, the primer may apply perfectly, but will not hold the applied finish layer.
There is no exact data on this issue. The ability of the coating to hold the tile layer together with the tile adhesive is greatly questioned.
If you need to apply concrete contact, it is better to cover the base with notches, or remove the finishing layer. An ax or chisel with a hammer is enough for the job.
Primer
Walls made of cinder block and concrete are treated with a primer composition. This product improves adhesion for painting, plastering, wallpapering or other interior cladding methods.
The question of the features of the work that should be taken into account and why such surface treatment is needed at all is discussed in the following video:
preparing a wall for tiles - questions
Jorge wrote: The horizontality of the pipe has already been checked - it is almost vertical!
07/26/2010 at 14:56
Bath. The walls are plaster + reinforcement. I won’t lay the tiles myself - I’ll invite a specialist.. But I’m thinking about leveling the walls myself (although there is an opinion that the one who lays should level them, but I think I’ll save on this by doing it myself) Tell me in my case how to level the walls .. What primer? Rotbantom? (They have the same composition with plaster..)
what are the features of alignment?
07/26/2010 at 16:47
The bathroom is usually plastered with a sand-cement plaster mixture. Rotbant, like gypsum plaster, is not recommended. Although you can use a Rotbant, as proof, you have an old plaster wall. Features: it is necessary to maintain the verticality of the walls and the angles of 90 degrees (well, at least in those corners where the bathtub will be located.) Apply plaster to the size of the new bathtub, if it is adjacent to opposite walls. Any primer.
07/26/2010 at 16:58
If the walls are smooth, there is no need to plaster.
I was plastering in the toilet according to the beacons, there were differences. Ground concrete contact.
07/26/2010 at 23:17
Opinion does not “exist.” Just a tiler, having figured out what he wants and what, where, will level the walls so that he can glue the tiles under the so-called. “comb”, which is easier, better results, etc. And after your leveling, when you don’t understand the best way to lay the tiles, you simply level according to your own mind, it’s not a fact that it will be possible to glue the tiles “under the comb”, if only because of poor calculation of right angles where necessary. To level with glue, the work costs a hundred or two more per square, with worse quality and greater loss of time. And after some time, the tiles may begin to crack into fine mesh due to the shrinkage of thick layers of glue...
07/27/2010 at 00:00
Are you stunned, or what kind of concrete contact on the plasterboard?? At least you thought you were writing!
07/27/2010 at 00:46
I went through plaster plytonite No. 2 and glued it onto the layer - no problem.
The glaze comes in a grid when the tiles move away from the wall, but they can’t get it out, I saw a toilet like this, there are 20x25 tiles, 10 rows, so 2 rows moved away, two are missing, and so the zebra line goes up to the ceiling. Peeling was determined by knocking. All those that have come off are in cracks, those that have not come off are not. There were no bulges.
07/27/2010 at 11:13
avis wrote: Are you stunned, or what kind of concrete contact on the plasterboard?? At least you thought you were writing!
Before and after concrete contact, I smeared it with acrylic primer. This means I read something wrong, but a lot of time has passed and I haven’t laid the tiles yet. I tried to peel it off, no luck. When do you think things will get worse for me? And everything will fall off one hundred percent? By the way, you won’t understand either - one half of the “masters” say, foaming at the mouth, that you can’t use a rotbow in the bathroom. The other half is what is possible.
07/27/2010 at 11:45
Guest 3 Is it possible to prime a plaster wall with Betonokontakt, for example, and install tiles on tile adhesive? I read that cement is not friendly with gypsum, the answer is sano 3 is needed, it is not friendly, in particular, this is why various soils were invented
07/27/2010 at 12:25
Tell me, I wrote: Before and after concrete contact, I smeared it with acrylic primer. This means I read something wrong, but a lot of time has passed and I haven’t laid the tiles yet. I tried to peel it off, no luck. When do you think things will get worse for me? And everything will fall off one hundred percent?
Yes, not that it will fall off, but simply CONCRETE CONTACT, you look into the name - it is for CONCRETE - i.e. for smooth concrete walls, so that adhesion to the materials applied to it is better. It can also be used on tiles, on old paint - in short, on anything that is a surface that is not convenient for adhesion. Concrete contact is, if you want, something instead of notches (which are long and tedious to do). And smearing it on plaster is, at a minimum, just an extra layer, extra labor, waste of material and time.
By the way, you won’t understand either - one half of the “masters” say, foaming at the mouth, that you can’t use a rotbow in the bathroom. The other half is what is possible.
Rotband began to make walls in bathrooms not so long ago. They do everything, and there are no complaints. And there are voices against it because it is gypsum plaster. But even though it is gypsum, it is of such quality that it can withstand harsh operating conditions, including in tight rooms.
Comparison
Comparing contact group and deep penetration concrete soils is the same as comparing a wheeled tractor and a passenger car. They have in common: an engine, wheels and a cabin. But the tasks are different. In our case, there are several situations when the comparison is correct. For example, which is better, “Betonokontakt” or a primer before decorative plaster. Both options are eligible for use with almost the same quality of finishing. Here you can catch the nuances of the differences. We will compare according to the following criteria:
Which is cheaper?
Life shows that first of all, most buyers look at the price of a product. In this regard, Betonkontakt loses greatly. The minimum price is 50 rubles/kg (“Axton”), the average price is over 130 rubles/kg.
A deep penetration primer can be purchased for 19.5 rubles/l and more (average price - 40-50 rubles/l).
Conclusion: deep penetration primer is in the lead by a huge margin.
Consumption
If you prime in two layers the difference is even greater. At the same time, it is necessary to take into account the following point: on a smooth surface, the consumption for the first and second layers of the concrete contact group of primers is almost the same, but on deep penetration primers you can save money - for the first layer the composition can be diluted with water.
Conclusion: the lower consumption and lower price of deep penetration primers leave Betonokontakt out of competition in situations where it is possible to use ordinary soil with the ability of the composition particles to penetrate deep into the base.
This is where the analysis can end. But curiosity drives progress. So let's continue.
Difficulty of application
Due to the thick consistency and quartz sand in the composition, applying “Ground Contact” is difficult. Primer (deep penetration) has another problem: the indication does not work well - bald spots (unprimed areas) are not always visible.
Conclusion: Despite the difficulties, primers with penetrating abilities still have a slight advantage.
Adhesion force to the base
“Concrete contact” was created precisely to improve adhesion between smooth surfaces and intermediate finishing. Therefore, the deep penetration primer loses significantly according to the above criterion.
Conclusion: in the absence of adhesion between the base and the plaster layer (tile adhesive), there is no alternative to contact concrete soils.
Penetration depth
“Betonokontakt” penetrates a maximum of 2 mm deep into the base, while the primer penetrates at least 5 mm, and on porous and loose surfaces up to 10-15 mm (in wood up to 10 cm)
Conclusion: to strengthen the surface, a deep penetration primer is needed.
General conclusion: it is better to apply “Betonokontakt” to concrete, ceramic and wooden surfaces when plastering with decorative compounds. In all other cases (cement and gypsum plaster, plasterboard, fiberboard, chipboard, OSB, plywood, etc.), a deep penetration primer will do the job no worse, and in some ways better. It all depends on what problem is being solved.
Specifications
The great popularity of the Betonokontakt primer composition is due to its excellent technical characteristics:
5. Color. Concrete contact is a plastic, slightly viscous pink liquid with a characteristic smell of PVA glue. The pink color gives an undeniable advantage to monitor the correct application of the primer layer: gaps and unpainted areas of the walls are immediately visible.
6. Packaging. The mixture is packaged in plastic containers of 5 and 20 kg. Such packaging with different weights allows for more economical use of the material according to the standardized consumption.
The guaranteed shelf life of Betonokontakt in undamaged containers is 18 months.
Betonokontakt - a tool with special capabilities
The treated surface changes in appearance and structure due to additives and polymer additives present in the composition.
After complete processing without skipping areas, a maximum increase in adhesion between the base and the finishing material is observed.
During cladding, the possibility of formation of an erosion layer is eliminated. There is a significant reduction in work time. Significantly less physical effort is required. The service life and reliability of the finish are additionally increased.
Application of the product does not require special knowledge or skills; it is enough to use a brush or roller.
The main thing is not to leave the packaging open for a long time: once opened, the seal is broken. Soon the solution will begin to dry gradually. It can be diluted with clean water to the desired consistency. You need to add moisture gradually, in small portions, thoroughly mixing the solution.
To make the mass homogeneous, it is better to use a construction mixer or an electric drill with an attachment.
Do you need concrete contact when plastering?
In such cases, an ordinary primer is used, but if you treat the walls with concrete contact, it will only be better. Concrete contact can also be applied to gypsum plaster.
What does the procedure for treating walls with concrete contact look like?
- The mixture is diluted according to the instructions on the package, taking into account the size of the surfaces to be treated (about half a kilogram per square meter);
- Pour into a container (ditch) slightly wider than the width of a paint roller;
- The roller is evenly dipped into the primer;
- The mixture is applied to the walls, forming a uniform color (mostly pink) without gaps.
The walls are primed with concrete contact on a clean, dry surface. Before applying the mixture, make sure there is no dust. It is advisable to spray the walls with water and wait for them to dry. Only then proceed to applying the solution. If the room is not dusty, preparation of the walls is not required.
Concrete contact is applied in one layer, after which you should wait for it to dry and then proceed to laying tiles. The applied solution dries within an hour, so you won’t have to wait long.
It is worth paying attention to the color of the solution, because its heterogeneity may indicate:
- about poor quality of the mixture;
- expired;
- violations of storage conditions.
The primer is used both indoors and outdoors. If you need confidence that your walls have good adhesion and the tiles will firmly adhere to them, then this is the best option.
The big plus of concrete contact is that it does not block air access, thereby allowing the walls to “breathe”. The mixture has good environmental performance and does not contribute to the formation of mold or mildew.
Concrete contact can also be used on the ceiling if putty work is planned in the future, or other finishing options will be used (for example, stucco). The use of a conventional primer only removes dust from the surface, forming an invisible film, while concrete contact “looses” the surface, which creates favorable conditions for the ceiling to adhere to cement or gypsum mortar.
The packaging of concrete contact varies from 5 to 40 kilograms. It is advisable to calculate the amount you need before purchasing so as not to leave the solution for storage.
Scope of application of concrete contact
The appearance of concrete contact in the arsenal of means for carrying out repair work has significantly simplified the work of builders and finishers. Most often this composition is used as a primer for
- walls made of concrete, brick or cinder block to increase adhesion capabilities with finishing material;
- drywall to reduce porosity;
- gluing elements with a smooth surface to any materials, incl. glossy;
- ceiling before whitewashing;
- conservation of plastered areas for the winter.
Service life and storage conditions of concrete contact
The service life of concrete contact is approximately eighty years, which is quite an impressive figure. If we draw analogies, then roofing, tiles, stone, etc. will last you much less.
Concrete contact can be stored for a year and only in a room with above-zero temperatures. Be sure to make sure the lid is sealed tightly. If the solution comes into contact with air for a long time, it will become unusable. Everything else is not scary. The main thing is, after long-term storage, thoroughly stir the primer until it becomes homogeneous.
We tried to cover the topic in as much detail as possible. If you liked the article, then tell your friends about it and subscribe to updates!
Concrete contact and adhesion (explanatory information for building materials) part 2
Good day to all.
Today, as promised, I would like to talk about the need to use concrete contact. I repeat once again that this is a universally loved product and customers are ready to use it on everything, everywhere, because, supposedly, “it’s more reliable” and other reasons. Let me note again that almost 80% of buyers use concrete contact before tiling. And now attention again: the adhesion of the simplest tile adhesive is 0.8 MPa.
That is, if you apply tile adhesive to a concrete contact, you will end up with a situation where the tile adhesive sticks to the concrete contact more than the concrete contact to the wall. In this regard, there is a risk that it is the concrete contact that will bring your repair to the cyclical beginning of a new one.
In general, the most disastrous and merciless idea is to use concrete contact in front of self-leveling floors. This is generally the worst thing you can think of. This means that if you pour a layer less than 2 cm, the floors will spread very poorly. Cement floors will not adhere to the base, which can result in unpleasant cracks, buckling, etc. But plaster ones simply won’t spread.
So, let me remind you once again where concrete contact can be used. Wherever there is no other option: smooth concrete, local wooden and iron structural elements with plaster and tiled cladding. When putting putty, I would suggest just buying a better putty.
And in general, if you want to do something on old bases, be it oil paint or tile cladding, just buy products that allow you to do this. Yes, they will be more expensive, but you will overpay once. Almost every manufacturer has options for such products.
Once again I want to note that I am not personally familiar with the entire range of building materials, so I am only talking about what is sold or was sold in our store.
Thanks everyone and good luck with the repair. I will try to answer your questions if you have any.
Source
When can further work be carried out?
The solution dries quite quickly - about 5 hours, some brands even faster - from 3 hours.
But experienced craftsmen allow more time for drying, applying the solution in the evening and leaving it overnight. Concrete contact is a unique primer coating with a “narrow specialization”. The cost is higher than for other types of primers, so before purchasing you should carefully read the information on the packaging and consult with more experienced professionals about the application in a particular case. Such caution will allow you not to spend too much and save on other repair needs.
Methods for laying tiles on tiles
Many owners of apartments and houses who decide to do their own renovations often wonder whether the old layer of tile can serve as a basis for laying new tiles. It turns out that it is possible and there are some ways to lay tiles on tiles that will significantly save time on renovation work, especially in the bathroom or kitchen. Although this may also apply to other surfaces lined with tiled material. For example: floors, building facade, fence, paths, etc. We will give several such methods.
Old layer evaluation
Before deciding to lay tiles on tiles, it is necessary to evaluate the old layer of tiles, because without this, all subsequent actions will not bring the desired result.
There are several criteria for determining the suitability of the base for new tiles:
Removing the glossy surface
One way to install tiles on tiles involves removing the glossy surface from the old tiles. Of course, provided that the tile holds well and there are no voids in the layer, since deglazing is done using a grinder and a concrete disc. During the removal process, the surface layer of old tiles experiences heavy loads.
renting apartments in Armavir without intermediaries
In addition, this method is labor-intensive and occurs when a large amount of dust is generated. But it will still take less time, labor and dirt than dismantling all the old tiles. After the glossy layer has been removed, a new layer of ceramic tiles is laid using conventional technology.
Expert advice
When priming walls with concrete contact primers, there are several nuances that home craftsmen need to know.
1. Deep penetration compounds, which are applied first, will help reduce the consumption of expensive primer by 30-40%. In this case, porous substrates need to be applied 2-3 times, which will allow you to get by with just one layer of “Betonkontakt”.
2. You cannot prime:
3. When applying plaster, the solution should not be more liquid than required by the technology. It will fall off over time.
4. After the primer has dried, you must immediately begin further work. After just 2 days, the surface becomes unsuitable for applying plaster solutions or tile adhesive due to adhering dust. Needs re-processing.
5. The point follows from the previous one - you need to prime such a surface area that can be plastered or tiled within 1-2 days.
6. Beware of fakes. Don’t be lazy to ask the seller for a certificate of conformity.
7. Do not speed up the drying process with intensive ventilation or heat guns - the polymerization process is disrupted. As a rule, this does not lead to good.
Subtleties of the process of applying concrete contact to walls
Often during the construction or renovation process, it becomes necessary to glue two materials that cannot adhere to each other. Until recently, this was an almost unsolvable problem for builders and finishing craftsmen. However, these days such problems can be solved using a special primer called concrete contact.
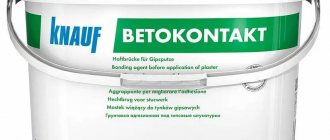
Characteristics
Concrete contact consists of:
- sand;
- cement;
- acrylate dispersion;
- special fillers and additives.
Main characteristics of concrete contact:
- used on non-absorbent surfaces as an adhesive bridge;
- designed to strengthen the surface;
- consists of safe substances;
- does not have an unpleasant, pungent or chemical odor;
- forms a waterproof film;
- prevents the development of mold and fungi;
- for control during application, a dye has been added to the concrete contact;
- sold in solution or ready-to-use form;
- dries from 1 to 4 hours;
- The diluted concrete contact composition does not lose its properties throughout the year.
Suitable for application on the following surfaces:
- brick;
- concrete;
- drywall;
- tile;
- gypsum;
- wooden walls;
- metal surfaces
Some experts note that the composition does not adhere well to bitumen mastic, so it is better not to use the solution with it.
What is it used for?
Concrete contact is a type of primer on a sand-cement base with a large number of polymer additives. The main task of this material is to increase adhesion (adhesion of surfaces to each other). In a few minutes you can increase the adhesion of any material to the wall. To do this, you just need to apply concrete contact.
It is very difficult to apply plaster on a completely flat wall - it will peel off and then fall to the floor. After treatment with concrete contact, the wall becomes slightly rough. Any finish will fit easily onto such a base.
How to prepare the mixture?
Often there is no need to prepare this mixture - manufacturers are ready to sell a completely ready-made solution. When purchasing such a concrete contact, it is enough to stir all the contents until smooth. It must be remembered that it can only be stored at positive temperatures.
Nowadays, few people prepare such mixtures with their own hands, because you need to know exactly the proportions, buy all the necessary materials, and also dilute them correctly with water. Then you need to wait and watch how the solution thickens. This is extremely energy-consuming, so everyone buys ready-made concrete contacts. You just need to read the instructions for use and work with this composition correctly.
Application process
Before applying you need to know:
- concrete contact can only be applied in positive temperatures;
- relative air humidity should not exceed 75%;
- anything can be applied to the solution only after 12 – 15 hours;
- it is necessary to properly prepare the surface.
In the presence of dust, the quality of concrete contact will noticeably decrease. Processing painted walls should take a lot of time. You can also use detergents.
You cannot reduce the consumption of the solution - this can lead to the formation of places with low adhesion on the wall.
After preparing the surface, you can begin the main work:
- it is necessary to remove the old coating. For this work it is best to use brushes;
- the solution must be prepared only according to the instructions;
- This mixture cannot be diluted with water, otherwise the entire product will become unusable;
- the solution must be applied with a regular roller or brush;
- when the material dries, it is necessary to apply a second layer;
- After applying the second layer, you must wait a day to continue finishing work.
With the help of concrete contact, you can prepare the walls for further finishing. The main thing is to use the solution correctly and not dilute it to increase the volume.
How to apply concrete contact Ceresit CT 19, see the video below.
Laying new tiles directly on old ones: a proven method
Is it possible to lay tiles on tiles? This question cannot be answered unequivocally. Because in rare cases you can be sure that the existing ceramics will hold tightly, have no voids and will not begin to fall off under the weight of the new tile.
Weigh the pros and cons and study the surface
In practice, you can put new tiles on top of old ones. But before installation, you should still weigh the pros and cons, and if, for some reason, you decide not to dismantle the previous coating, you need to carefully check whether it has a sufficiently reliable adhesion to the surface of the wall or floor. To do this, tap the tiles with a hammer and inspect them. If it rattles when tapped or has cracks and swellings, then there is no way to put a new layer on it. It will have to be dismantled. If the elements hold tightly, then you can begin work on laying new tiles.
Simple and reliable installation technology
The methods that craftsmen use when laying new ceramic tiles on old ones vary. Many people advise making notches, cutting off the glaze with a grinder, etc. But if you use a special primer, then all these measures will be unnecessary. Concrete contact is exactly what is needed for surfaces with low water absorption.
where to place an air conditioner in a three-room apartment
Before applying primer to old tiles, it is thoroughly cleaned of dirt and grease. Concrete contact is applied with a roller or brush. The material is thoroughly mixed before use and during operation. Do not allow the primer to get into your eyes, but if the mixture gets into your eyes, wash it off with plenty of water.
You need to wear rubber gloves when working with concrete contact. The average primer consumption is 300 g per m².
They produce acrylic-based concrete contact. In addition to special fillers that increase the adhesion of the mixture, the soil contains sand and cement. Any hard-to-absorbent surfaces can be treated with concrete contact. After applying primer to the surface, it becomes rough. When the previous coating is processed, it is given three hours to dry.
After the primer has dried, the surface is suitable for laying new material on the adhesive solution. Read more about how to do this here.
: work technology
Do not forget that if you do not remove the old tiles and lay new ones on them, this will reduce the area of your room. Bathrooms in apartments tend to have a small area, so it’s worth considering whether you need to reduce it even more.
Display all materials with the tag:
Primer concrete contact ST19 and composition ST16.
The CT19 primer is intended, according to the technical documentation, for treating smooth, mainly concrete, vertical substrates before applying cement-sand plasters and tile facings. The composition includes fine quartz sand, which, according to the plan, should create high adhesion of subsequent layers to the surface.
But from the experience of using this material there is a lot that is controversial and incomprehensible. This is most often due to arbitrary interpretation of the above.
Despite the modest list of options for use, this primer is used for many things. According to the principle, you can’t spoil porridge with oil. It is used to treat floors before cement screed, brick walls, foam blocks before plaster, drywall and even metal before fixing tiles.
Concrete contact on sand-lime brick
Concrete contact and iron
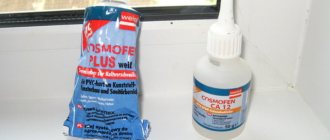
The second difficulty of application is the huge number of manufacturers. The MAPEI concrete contact soil will differ significantly in its characteristics from the Optimist contact soil. Therefore, using an unknown composition with a similar name, you can get a completely unexpected result.
The photo below is not a complete list of this diversity.
Variety of concrete contact manufacturers
Many people forget (or maybe don’t know) that this composition is intended for interior work, and some contact primers, at the slightest wetness, are removed with film.
If water got on the st19 applied to the wall, I think the result would be the same as on the screed.
To understand all the conflicting opinions on this composition, it is necessary to carefully study the technical documentation and answers from representatives of technical departments, as well as reviews from experienced craftsmen on the use of concrete contact (preferably only facts, without fantasies and nonsense).