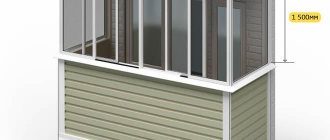
The window opening after installing plastic windows looks unpresentable. Pieces of plaster and polyurethane foam stick out, and the material of the walls is visible in places. To close all this, various methods are used. The most affordable and practical is the use of plastic slopes. It is better to equip them with sandwich panels, when foamed polypropylene is laid between two layers of plastic. They are durable, dense, made of high quality material.
How to make slopes on plastic windows? In total, there are two key methods: with and without the use of a starting profile. Both of these methods are effective and give good results.
What is polyurethane foam?
Polyurethane foam is a type of building material . The material is sold in metal aerosol cans and is kept under pressure. At the moment of foaming, the foam hardens under the influence of air. In this state, it represents rigid polyurethane foam.
Compound
Polyurethane foam is a mixture of two substances, polyol and isocyanate.
But not in its pure form, but with the addition of catalysts, stabilizers and foaming agents. Even slight changes in the ratio of components allow manufacturers to produce foam with different expansion characteristics and degrees of rigidity.
Additives together with substrates form a polymer and a carrier gas . The ingredients are mixed and placed in a container along with the propellant. This is the name for a mixture of gases that displaces other components. At this moment, bubbles form.
Essentially it is a polyurethane sealant. The main chemical reaction occurs outside the cylinder, under the influence of air.
The composition of the material provides it with its basic properties. Therefore, you should learn about the specifics of the foam, which allows you to use the substance as a window sealant:
- Primary extension . This is the name for the expansion that occurs before the polymerization of the foam begins. It is never the same, but always impressive. The volume increases by 20-40 times. Thanks to this, empty cavities are filled effortlessly.
- Secondary expansion . It begins after the end of the primary expansion and lasts until the foam has completely hardened. There is a wide range of indicators among different brands - from 15% to 120%. The lower this percentage, the easier it is to control the effect of the foam. Therefore, it is recommended to minimize the secondary expansion rate.
To do this, you should not blow out a lot of foam at once. This will lead to deformation of the window, cracks in the corner seams, or “breakout” of the fasteners.
Purpose during installation
The main task of foam during window installation is to fill the resulting gaps and ensure adhesion of materials of different structures. It is used to work with wood, plastic, metal and glass. Compatible with almost all building materials, except silicone, polypropylene, polyethylene and other representatives of this series. Therefore, it can be used when installing windows made of different materials.
In addition, the purposes of foam during the installation of structures are :
Sealing . The substance perfectly fills any holes in brickwork, concrete, and drywall. Demonstrates a high-quality compacting effect.- Thermal insulation .
Polyurethane has a low thermal conductivity from 0.019 W/m K to 0.023 W/m K. The indicator can be compared with the thermal conductivity of a wooden beam 19 cm thick or a brick wall 50 cm thick. - Soundproofing . The pores formed in the material after hardening are isolated from each other. The sound wave cannot easily penetrate the foam layer.
Important ! The material retains the listed characteristics for a long time only with high-quality sealing.
Otherwise, the mass will begin to quickly deteriorate under the influence of moisture, ultraviolet radiation and temperature changes.
Photo report 2: installing plastic slopes with a starting profile
The installation of plastic slopes using this technology begins with the preparation of the window opening. We cut off the foam evenly, remove everything that does not adhere well, clean off the dust, and if necessary, go over the opening with a primer that improves adhesion.
Preparing the window opening
A wooden block is attached along the perimeter of the opening, but already near the frame. Choose the thickness depending on the distance: it should almost fit the frame. One side of the block must be worked with a plane, making an inclination. The angle of inclination of this face is equal to the installation angle of the slope. You can saw it off, but it’s more difficult to make it straight unless you have a circular saw with an adjustable angle.
We make a slope on one of the faces of the block
We screw the treated block to the walls around the perimeter of the opening. The mounting method depends on the wall material. If the wall is brick, you can try using self-tapping screws; in a concrete wall, you need to install dowels.
Screwing the block
You buy a starting profile in the store, install it with the long side to the block, and fasten it. It is more convenient and faster to fix it to the bar with staples from a construction stapler; if you don’t have one, you can use small nails or self-tapping screws with flat heads.
We attach the starting profile
When choosing a starting profile, choose a dense one. It’s more expensive, but you only need three meters per window, maybe a little more. A dense profile will hold the plastic well, a soft one will bend and the appearance will be ugly. Another point - when installing the profile, press it as tightly as possible to the frame so that there are either no gaps at all or they are minimal.
At the top, when joining vertical and horizontal profiles, you need to be especially careful and cut them exactly at an angle of 45°. If there are small gaps, they can be sealed with acrylic.
Installed starting profile
Using this technology, it is more convenient to start installing reservoir slopes from the sidewalls. Insert the panel into the fixed starting profile. It is also better to take them from expensive and dense ones, with a thick layer of plastic. If you install cheap ones (ceiling), then the front wall is thin, and in bright light the jumpers will be visible. In addition, such plastic can be pressed even with your finger.
We insert a plastic panel into the profile
The width of the plastic panel should be larger than the slope. If the width of one is not enough, two are joined. But then at the junction you will need an additional vertical strip to which the first strip will be attached.
The panel inserted into the profile is usually longer than the opening. Holding it with your hand, mark the line of the opening. After removing, cut along the marked line.
Cut to size
We install the panel again, move it a little away from the wall and fill it with foam, trying to fill it without gaps, but without excess. To make this happen, we start from the far bottom corner - draw from bottom to top near the nailed bar. By the time we reached the top, the foam below had expanded a little. Draw a line with foam again, but closer to the edge. The closer to the outer edge, the less foam is required - after all, the panel is installed under a slope, so make the paths thinner. Having reached the middle, make a snake on the rest of the surface and press the panel the way it should stand. Align and check. Secure to the wall with masking tape. The second part and then the upper part are installed in the same way. It can also be cut out using a paper template, and the edges can be adjusted to a perfect (or almost) match using sandpaper.
Installed plastic window slopes
Having installed all parts of the slope and secured with masking tape, leave until complete polymerization. Then, in order not to putty the gaps between the slope and the wall, a white plastic corner is glued onto liquid nails. The main task is to cut exactly in the corners. It is easy to glue: apply a thin strip of glue to both shelves of the corner, press it, moving your hand along it, hold it for a couple of minutes. This is how they are installed around the entire perimeter, then, before the glue dries, they are also glued with masking tape and left.
Installed corners along the perimeter of the slope
After a day, we remove the tape, the plastic slopes are ready.
This is what a window with installed plastic slopes looks like
If there are gaps somewhere, they are sealed with acrylic, as described above. Don't use silicone. In the light it quickly turns yellow. In a year or two your windows will look terrible. Look for white acrylic sealant and mask it with it.
Read how to adjust plastic windows here.
Varieties: requirements and characteristics
First, it should be clarified that there are two types of foam - one-component and two-component . The previous description of the composition refers to a one-component foam. It has two drawbacks - hardening time (days) and shelf life. A year after release, the cylinder is no longer suitable for use.
A two-component substance consists of the same components, but they are located in separate cavities of the cylinder. Their mixing is prevented by a shutter at the bottom of the container. To start working with this type, remove the seal from the outside of the container and shake the contents. Advantages of the two-component type:
- short hardening time (20-30 minutes);
- long shelf life.
Disadvantages - high cost, the need for a mixing gun for operation.
By method of application
This is due to the properties of the foam to produce different volumes associated with the design of the cylinder. Polyurethane foam is divided into household and professional .
Household .
Available in cans with a straw. Regular packaging: 300 ml. This is a one-component foam. The household cylinder can be used immediately after purchase. During hardening, the volume can increase by 100%, and the material shrinks by 5-7%. An opened cylinder cannot be stored for long periods of time.- Professional .
This type is intended for a special pistol, has a larger volume (750 mm) and weight. There is a marking on the cylinder indicating the material yield (50, 65, 70). Without a mounting gun, the cylinder does not work. After release, the volume of the foam increases 15-20 times, there is almost no expansion, and shrinkage is no more than 3%. The material can be reused many times. The main thing is to store the cylinder with the gun attached and the nozzle closed. The installation process is much more convenient, but you will need to increase the cost of purchasing a gun and detergent to clean it.
Important ! Even for household use, it will be more profitable to purchase professional foam.
By season
Manufacturers of the material divide their products into 3 types:
- summer;
- winter;
- all-season.
Let's figure out at what temperature you can use polyurethane foam to install a window. Each type works at a certain temperature. Recommendations are located on the cylinder. Differences :
- Summer . The optimal air temperature is from + 5°C to +35°C.
- Winter . According to professionals, this is the best foam option for installing windows in the cold season. It allows window installation at sub-zero temperatures. It has subtypes, one works at -10°C, the other at -18°C. Suitable for use in summer, but requires special additives.
- All-season . Not every manufacturer has this type in their lineup. It is considered a universal foam that can be used at high and low temperatures.
After hardening, the foam is resistant to a wide range of temperatures from -50°C to +90°C, so the material does not pose a risk of fire.
This applies to any option. There is also a division of polyurethane foam according to flammability class :
- B3 - flammable;
- B2 - self-extinguishing;
- B1 - fire protection.
Important ! The temperature of the cylinder should not be lower than +20°C. This applies to all types, even winter ones. The container should be heated to the desired temperature in warm water, but not overheated.
What are the benefits?
Repair is not an easy task, so many people prefer to turn to professionals for help. Yes, installing a new double-glazed window is difficult and too responsible, but any man can foam the slopes.
Attention
Doing the slopes yourself will allow you to save on workers’ salaries and do everything according to your own wishes.
Thanks to the foam, the seams between the window and the wall are hermetically sealed and in the future will not let in either cold air or noise from the street. People often encounter a situation where the master did not fill the space well enough, voids were formed, which then led to heat leakage.
It is impossible to see these errors visually, so experts advise checking the quality of the work performed with matches. You need to bring the flame to the seam: it should not tremble or even tremble slightly. If deficiencies are nevertheless found, the foam is re-filled so that the seams become completely sealed. On the second or third day, the excess foam is cut off and finishing of the slope begins.
The design of slopes is carried out both from the outside and from the inside . Without completing the exterior finishing, you should not move on to the interior.
Selection rules
When choosing a material, you should pay attention to important nuances:
- Foam output . Although most containers are the same size, the amount of foam inside may vary. Usually the actual volume is 10-15 ml less than indicated. When purchasing, you need to take into account that 750 ml of foam weighs 900 g. If the mass of the cylinder is less, then it is better to choose another option.
- Cylinder volume . Standard values are 300 ml, 500 ml and 750 ml. The choice should be based on the amount of work to be carried out.
- Secondary expansion . This indicator is very important for working with windows. If the variety has a high rate of secondary expansion, then it is not suitable for installing window sills. As the volume increases, the parts will rise significantly.
- Brand . It is best to give preference to well-known manufacturers who have proven themselves to be of decent quality.
- Best before date . Most often it is 18 months. You should only purchase fresh products.
- Appearance of the cylinder . There should be no dents or chips on it.
Any brand of foam is suitable for working with windows. But it is necessary to compare the technical characteristics of the material with the conditions of its use.
Instructions for finishing with metal sheets
The process of installing metal slopes is not complicated, but it requires care and precision. To properly insulate a room from the street, it is practiced to place thermal insulation under the sheets.
The work is performed in the following sequence.
- The window opening is measured, and the sheets of metal are cut into strips. The strip for the lower part of the opening is cut with a small margin to form a water drain.
The first part to be installed is the lower part - the ebb. It is screwed to the frame and has small overhangs on the side sections of the window opening
It is important that the ebb is diverted from the window.
- Side stripes are installed. They are pressed tightly against the surface of the opening and cover the curved parts of the ebb.
- At the final stage, the top strip is installed.
- To improve the insulating characteristics of the structure, sealant is applied to the joints of the strips.
Video instruction:
https://youtube.com/watch?v=xMW9JGHqJPk
Terms of Use
Before starting work, you must familiarize yourself with the operating temperature range of a particular type of material .
The process of its hardening directly depends on air humidity. It is different at different temperatures. For example, if the air temperature is -10°C, then one cubic meter of air contains only 3 g of water. When the mark rises to +25°C, the amount of moisture in 1 cubic meter. increases to 20 g.
Moisture deficiency leads to slow hardening of the foam and disruption of the structure . Therefore, you need to use the substance only in the temperature range recommended for a particular type of foam.
Quantity calculation: how many cylinders are needed?
The main parameters for calculation are the index of primary and secondary expansion, ambient temperature and humidity. When filling the seams, 1/3 of the space should remain hollow. Otherwise, the foam will extend beyond the seam.
First you need to measure the depth and width of the installation seam . Multiply the results. The resulting number is the foam consumption in grams per 1 meter of construction seam. Then you need to measure the total length of the seam and multiply by the previous result. The answer you get is the amount of sealant needed to fill the joint.
If you need to foam a triangular seam, then the last result should be divided by 2. This seam is smaller, so less sealant will also be needed.
Some nuances:
- Aerated concrete and brick can absorb foam, so excess consumption should be provided.
- When carrying out work outdoors, you need to apply a magnifying factor of 1.05-1.15.
- A decrease in air temperature by 10 degrees requires an increase in the calculated amount by 1.5 times.
- To foam hard-to-reach places, the amount of material is increased by 1.1 times.
Important ! Consumption rates are indicated on the packaging when operating under ideal conditions.
Non-standard situation with window installation
Sometimes, when installing metal-plastic windows on old houses, it is not possible to use levels and plumbs, because a window installed strictly according to the level will look very unaesthetic and very conspicuous. In this regard, plastering of slopes will also be carried out not according to the level, but based on the installed window. Therefore, using standard construction tools may be inconvenient.
Templates for plaster are usually cut from scrap materials (a piece of plastic or a thin board) so that they can work with the most inaccessible places. When installing metal-plastic windows, these are the sides of the slope closer to the window frame, where the use of a large metal spatula will be hampered by the opening window sash, which protrudes. A correctly cut template will be able to reach this place and, in one movement, along with the entire work area, level it.
Templates are usually used without the use of a level and plumb lines, that is, plastering is done by eye in connection with the above method of installing windows.
How to seal window seams?
First you should familiarize yourself with the safety precautions:
The contents of the cylinder contain isocyanates. It should be kept away from the source of fire.- Do not inhale the vapors of the substance.
- In case of contact with eyes, rinse immediately with clean water and seek medical attention.
- Work only in a ventilated area.
- The used cylinder must not be pierced or burned.
Step-by-step instructions for working with foam:
- Prepare your work surface. It will need to be cleaned and degreased.
- Heat the foam container to room temperature, but not more than 20°. It is forbidden to immerse the cylinder in boiling water or heat it with an open fire.
- Before starting work, shake the foam container periodically.
- Remove the protective cap and screw on the gun.
- If the air temperature is above 0℃, then the working surface must be moistened before and after foaming. It is best to use a spray bottle.
- Turn the container upside down and do not turn it over during the entire operating time. This is because the propellant gas is the lightest component. It needs to be at the bottom to mix the rest.
- Fill cracks to 70% depth. If the gap is wider than 5 cm, then filling must be carried out in several stages - in layers.
- If there is a break in work for about 15-20 minutes, you need to wash the valve and the cylinder nozzle with a cleaner.
- During the foaming process, the container must be shaken periodically to mix the components.
- If the filling is not calculated enough, you can add a little foam. Fresh excess can be easily removed with foam cleaner. Cured material must be removed mechanically (cut).
To prevent foam destruction, the material should be protected from exposure to ultraviolet radiation.
Possible difficulties and errors
Among the most common errors are::
- lack of preliminary calculation of material consumption;
- work in cold weather without heating the cylinder;
- heating on fire;
- foaming without shaking;
- refusal to use protective equipment - foam is difficult to remove from clothing and skin;
- incorrect choice of sealant type;
- incorrect position of the container;
- applying sealant to a dry surface;
- improper storage.
It is not recommended to foam seams thicker than 10 cm. This is irrational. In this case, the seam is first filled with available material (cement mortar, wood blocks). Then fill with sealant.
Further actions
All excess gaps must be filled and leveled. Excess acrylic must be removed with a damp cloth or sponge. This must be done carefully until the surface is completely clean. Manipulation is carried out in small areas. The acrylic should not be allowed to harden, otherwise there will be problems with its removal. It is more convenient to seal cracks immediately. The horizontal slope panel is processed first. After this there are joints, then they move downwards. First close the gaps on one side, then on the opposite. Lastly, the joints with the window sill are processed.
It takes 12 to 24 hours to dry, depending on the characteristics of the sealant. If the gaps are large, the acrylic may be pulled into the seam. All these areas must be worked out again using the same method. After the second layer has dried, if there are unevenness and roughness, you can smooth out these defects with fine-grained sandpaper, folding it in half. It is recommended to carefully level the materials while they are gray, otherwise the plastic may suffer mechanical damage.
The slopes can be considered installed. They should be puttied when the final polymerization of the foam occurs. Their surface should be flat relative to the plane of the walls. After this, the protective blue film is removed.
Panels are considered the most unreliable material for installing plastic slopes. Even wall ones are easily pressed through, and their front layer is imperfect. It is enough to shine light on them, and the jumpers will be immediately visible. This is not observed in plastic window sills and sandwich panels.
How and with what to cover after application?
Due to the fact that the sealant is destroyed under the influence of environmental factors, it needs protection. There are several ways to close material.
Outside
Suitable for these purposes:
- Putty or finishing plaster . The method is labor-intensive and requires experience.
- Polyurethane sealant . It is important to choose quality material.
- Plastic panels . A decorative and quick way to protect the material.
- Acrylate paint . It is necessary to strictly follow the manufacturer's recommendations for preparing the surface and working with paint.
- Window putty . Not a very modern method, but still used in private homes.
Each type is made taking into account the characteristics of the protective element.
Inside
In addition to reliable protection, decorativeness and combination with the rest of the interior are very important here. Basic methods :
Mounting tape . The method is budgetary, but unaesthetic. The adhesive material can be matched to the color of the frame. Before gluing the tape, you need to cut off the foam and sand it.- Plaster . It is also an inexpensive method that allows you not only to protect the material, but also to insulate the window structure. Gypsum mineral materials are used.
- Drywall . A modern method that does not require extensive experience.
- Sandwich panels . The material simultaneously performs a protective, insulating and decorative role.
Important ! Before work, you need to stick masking tape along the edges of the glass unit.
Choosing a method for installing slopes
The impressive cost of plastic windows and the equally significant cost of installing slopes by specialized companies forces us to look for budget installation options. Existing options for plastering and installing window slopes on self-tapping screws and prefabricated ones on a system of profiles are costly and labor-intensive.
In terms of the cost of installation and materials, slopes for plastic windows made from prefabricated plastic sheets are more expensive than plaster ones, but are more affordable to implement.
Have you installed a brand new plastic window in your apartment or private house and after installation don’t know how and what to fill the gaping holes with?
A simple method of installing window slopes using foam, polystyrene foam and a finishing putty solution is intended specifically for do-it-yourself execution.
Pros and cons of use
Spray foam is an excellent product to use when installing windows. With its help you can solve several problems at once. Advantages of the material :
- high-quality sealing of joints, cracks and cavities;
- resistance to repeated changes in humidity, physical activity and temperature changes;
- a significant increase in output volume, which makes it possible to use it for large-scale work;
- formation of a high-quality porous structure after hardening;
- absence of leakage and settling, which makes it possible for vertical application;
- the material is not subject to rotting;
- has good sound and heat insulation properties;
- fire safety;
- strong fixation characteristics.
Minuses:
- instability to ultraviolet radiation;
- cylinder explosion hazard when heated;
- difficulty in removing frozen foam from areas of the body and clothing.
The listed disadvantages do not cover the positive aspects of the material. Therefore, foam remains the most popular means for sealing window seams.
From plasterboard
Drywall is a panel made of gypsum, covered with cardboard on both sides. This material makes the cladding strong and durable. The main advantage of drywall is its low price, which makes it very popular among craftsmen and even beginners.
For plasterboard slopes, experts use moisture-resistant plasterboards, since this is the place that is most affected by temperature changes and condensation forms. Gluing slopes from plasterboard is not difficult, but there are still differences from working with the plastic version.
Algorithm for working with drywall:
- Make all the necessary measurements: width, depth and height. Measure the latter twice - near the window and wall.
- Taking into account the results obtained, cut out the necessary parts from the drywall with a construction knife.
- Apply polyurethane foam to the slope and press the drywall for a couple of seconds. Separate the part and wait for the foam to fully expand a second time.
- Reattach the part and secure it. Can be strengthened with self-tapping screws.
- Attach metal perforated corners to the corners of the drywall.
- Finish the corners with putty. Wait until completely dry.
- Paint the slopes.
Advantages of plasterboard slopes:
- Low price.
- Long service life.
- Small amount of waste.
- Obtaining a smooth surface.
- No additional tools required.
- Versatility.
- Does not require additional use of putty or plaster.
- Protects well from environmental influences.
- Mold and mildew do not grow on it.
- Environmentally friendly.
- Easy to use.
Flaws:
- Fragility.
- Instability to sunlight.
- Inability to replace the damaged area if it is partially damaged.
- Reduces light opening.