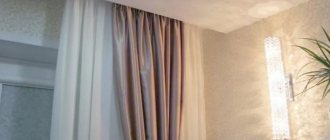
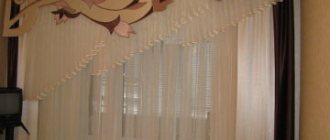
To create coziness in a room or hall, curtains or drapes, curtains, and tulle are required to protect from sunlight. This not only decorates the window, but also creates a unique interior and modern design. For curtains, the market offers a huge number of curtain rods, strips and strings. However, modern fashion dictates its own rules, and for this the cornice or string needs to be hidden. It’s even better to create a plasterboard cornice with your own hands.
An example of how to design a cornice for curtains made of plasterboard with your own hands. To create a cornice, you will need clarity of actions, accuracy in working with plasterboard, and a sequence of actions.
How to attach a cornice to drywall
For this procedure you will need tools: a meter, a level, a screwdriver, a bracket or special corners. And also the cornice itself. Initially, you should carefully measure the distance where the cornice itself will be located, and how the curtain will lie. The cornice should not be an obstacle to opening the window. To do this, you need to measure at least 15 cm along the wall to the ceiling, select the optimal location, and put a mark with a pencil. A clear horizontal line is drawn across the entire window opening along this mark. A level is used to ensure its evenness. The fixing points of the brackets are marked on this line. They should be secured.
Scheme for attaching a cornice to a plasterboard ceiling If corners are used, then you need to proceed in the same way. The cornice itself is hung on corners or brackets. Features of fastening the cornice to drywall:
- In the case of installing a cornice on a plasterboard ceiling, fastenings are carried out in places where the profiles pass. This can be easily checked with a magnet.
- The cornice is attached to the ceiling with plastic butterfly dowels. You should make a hole for them in advance.
Scheme of fastening the cornice with dowels - Heavy curtains are hung on a curtain rod attached to an anchor.
Installation of the frame to a plasterboard surface is simple. You just have to follow some nuances. It will be a little more difficult to make a cornice from plasterboard. To do this, you need to have more tools, and the list of materials also changes.
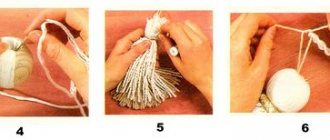
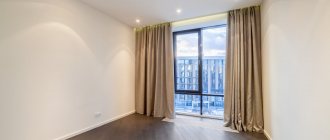
Curtain studio Decor-Expert
Let us assume, for definiteness, that the far vertical wall of the niche lies in the plane of the main wall on which our window is located. wall of the niche closest to us will be its width W. Well, of course, we look at all this from inside the room. First, you should turn your attention to the heating radiator.
Yes, yes - we dance from it, since ignoring its presence is the source of 90% of errors when designing ceiling niches. Check to see if the radiator will protrude beyond the edge of the window sill. If it protrudes, then we determine the first parameter p - the extension of the battery beyond the plane of the wall; otherwise, in an extremely rare case, this parameter will be the extension of the window sill. Extending the niche to one of the walls (or to both), thereby increasing the length L , makes sense in that case , if you want to hide something on the wall with curtains that could not be hidden structurally during the renovation. Well, or maybe you like a beautiful curtain fabric flowing from the ceiling across the entire wall... This size L between the left and right edges of the niche depends on its location - near the window, across the entire wall (the length of the niche is determined by the size of the wall), from one edge of the window to the opposite wall and vice versa.
To be specific, let’s take the “near the window” option. In this case, the niche should extend beyond the window opening on the left and right. The question is - by how much? In my practice, there was a case when in one living room room both alternative ceiling options were implemented for two adjacent windows. Here is the photo: You can use the mouse button to enlarge the image and compare both options.
Which one will be completed for you is up to you to decide. It is often difficult to harmoniously fit the cornices on which the curtains are attached into the interior of the room. The problem becomes more complicated if you plan to make suspended ceilings: you need to think in advance and arrange the fastening of heavy curtains or curtains. In addition, all these elements will be reflected on the glossy surface of the ceiling, which does not look very nice. The solution may be to install a special niche for plasterboard curtains, which will not only hide unwanted elements, but also add elegance to the room.
The ceiling box can have any configuration and size, the main thing is that it fits organically into the interior of the room and fulfills its main task: to hide the suspension elements. Curtains or curtains that fall directly from the surface of the ceiling look very impressive. The plasterboard box for the niche is assembled in the traditional way. Assembly begins with the frame. Markings are made on the ceiling and walls, and the overall dimensions of the box are indicated.
According to the markings, a metal profile is fixed to the ceiling and walls. Then, stepping back 7-10 cm from the ceiling, install two horizontal jumpers and fasten them to the ceiling profile with hangers. Suspensions are made from ceiling profiles. Any profile can be used to create a frame.
But most often a guide profile (PN) is used. On the outside, the shelf is fixed to the frame with self-tapping screws, and on the inside, it is pressed with a second additional vertical sheet of plaster. If you plan to use one layer of drywall, then install the shelf first, and only then install the vertical sheet of plasterboard.
Tools for creating a cornice
Without tools, nothing can be done. Even if there are available tools, they will not be enough to work with plasterboard sheets. How to make a hidden cornice for curtains from plasterboard?
- You will need a knife for cutting drywall. You can have a regular one, but with a sharp edge.
- A set of screwdrivers or a screwdriver.
- Planer for chamfering.
- Set of spatulas.
- Regular roller.
- Scissors for cutting metal.
- Meter, pencil and ruler.
- The level is normal, but it is more difficult to work with than a laser machine.
Manufacturers of hardware
The highest quality products are produced by European manufacturers Hilti and Fischer. These products belong to the highest price category.
Hardware from Sormat, KEW, Ekt, and some other European manufacturers are of good quality. Products from Tech-Krep or Bison can also be used without fear.
Preparatory work
A niche for a plasterboard cornice is usually installed simultaneously when installing a plasterboard ceiling. A cornice or curtain rod is installed in it. Visually, the ceiling does not reach the base (wall) where the window is located.
Scheme for installing a hidden cornice in a plasterboard niche But, if the apartment has insufficient room height, then a plasterboard structure on the ceiling is inappropriate. In this case, often a box is simply made for lighting throughout the room on the ceiling, or a niche for a cornice, also with lighting, is simply separated with plasterboard. Before you start creating a plasterboard cornice, you should know the dimensions of the niche for the cornice. The width should be such that curtains and curtains do not wrinkle due to the small space, and also do not lie on the windowsill.
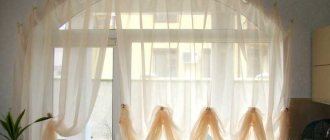
If you plan to hang curtains in 3 rows on the cornice (transparent tulle, light curtains and heavy opaque curtains on top), you should imagine how beautiful it will be and whether it will suit the design of the room.
The video talks about how to assemble a niche for a plasterboard cornice yourself.
Design features: drawings and calculations
In order to start designing on paper, and also begin calculating materials, you should decide on the height of the box for the plasterboard niche. The height of the curtain rod will help with this. If it is a plastic strip attached to the ceiling on which curtains are hung, then you need to choose whether there will be lighting near the window or not.
There is an option when a niche for curtains is made using a figured multi-level ceiling, then the height should not be determined, since the ceiling structure itself will serve as a niche.
Taking measurements
Measurements of the length and width of the cornice are carried out as follows:
- Use a plumb line to find the extreme point of the protrusion of the window sill or battery (this can also be a plasterboard battery box). Mark it on the ceiling.
- A lengthwise line is drawn along the found points.
- From this line you need to measure 3 cm to the center of the ceiling and draw another line (it will be the guideline for the first row of curtains).
- By “trying on” the curtain, you should see how it fits. If a window sill or other object sticks out through the curtain, then the marked lines should be moved to the center of the room by 1 cm.
- Again, you should try on the curtain to the window and accurately determine the intended lines on the ceiling in the box.
The depth of the box may not allow for comfortable installation.
The size of a plasterboard cornice for curtains But you need to draw lines so that later when replacing the curtains with clean ones there will be no inconvenience with removal. Don't forget about niche lighting. This could be an LED strip that needs space for installation.
How to make lighting in a niche with the effect of floating curtains
To illuminate the curtains, an LED strip is glued into the niche on the side of the room. If you choose the option with a profile for two-level ceilings, purchase a baguette with special recesses.
This creates the impression of a higher room. The LED strip can be mounted independently or combined with hidden lighting around the perimeter of the entire ceiling.
Some tips:
- Tapes are available in different colors and even with the ability to change lighting, the latter option allows you to give the interior of your home a different mood;
- for curtain lighting, it is better to mount a separate switch;
- Tapes with a remote control are available for sale, which allows you not only to conveniently turn the light on and off, but also to change the color of the lighting.
https://youtube.com/watch?v=WX58V-0bCzw
Installation of drywall for cornice
After the work has been completed, you can begin installing the cornice. It is carried out as follows:
- The inside of the niche should be treated with a primer and allowed to dry.
- Fix the ceiling profile along the marked line on the ceiling using dowels. The distance between fasteners should be 50 cm.
- Also fix the box on the second marked line.
- Every 30cm. pieces of the rack profile are attached to the guide profile, 40 cm long.
Design of a plasterboard cornice frame - Two more NPs are screwed onto the ends of the rack profiles.
- The ends of the second fixed profiles are attached to the wall.
Attaching the cornice frame to the wall - Drywall should be cut to fit the profiles. All necessary segments are drawn with a pencil on a sheet of gypsum board. Then cuts are made with a knife. Then the sheet of drywall must be placed on a flat surface and pressed on it. The gypsum board will break at the cut points. On the reverse side, cut off the cardboard that holds the pieces.
- These pieces of drywall are attached to profiles. First, the inner side is sheathed. The heads of the self-tapping screws for drywall deepen by 1 mm when fastening.
Assembling the frame for a niche
You need to start assembling the frame on the floor. To do this, prepare two letters “P” from the guide profile. The letter will be unusual: the top shelf is the width of the room (let it be 3.2 m for example), the racks are 8 cm each. The standard profile length is 3 m, so one will not be enough from wall to wall, so you will have to increase it.
This is not difficult to do.
- To do this, we make the missing size (20 cm) from a piece of profile, having previously bent it at a right angle so that a stand is immediately formed. The same must be done with the main profile. It turns out that what will be missing is not 20 cm, but 28. This means that you will have to add a piece of 28 cm, plus a bent part of 8 cm.
- The profile extension must be placed inside the docked parts and attached to the two parts with self-tapping screws (fleas), two for each section.
- Now we lift the entire structure to the ceiling in the living room, attach it to the marked line and use a puncher to make holes in the ceiling every 60 cm. You need to start from the wall at a distance of 5 cm. Special metal dowels are driven into the holes, which craftsmen call among themselves “quick installation” " They are driven into the ceiling like nails with a hammer. Don’t forget to secure the pillars of the letter “P”.
- Now, along one wall surface along the lower edges of the racks, two small pieces of the PN profile need to be installed and secured. They are sized from rack to rack. Fastening is carried out with two dowels. These two cross members are necessary to create the rigidity of the frame.
- Next, we prepare (increase) two profiles. Their length is the width of the living room, where a niche for plasterboard curtains is made.
- A thread is stretched connecting the opposite walls on which the racks of the ceiling structures are fixed. This is the horizon along which the lower element will be aligned.
- The extended profile is installed along the lower edges of the racks and secured to them. It will bend under its own weight. This will be clearly visible in comparison with the stretched thread.
- Pieces of the ceiling profile 8 cm long are cut. They must be inserted into the profile, which is fixed to the ceiling, and attached to it with self-tapping screws. The distance between the intermediate posts is 40 cm.
- Now you need to align the lower PN profile along the thread, attaching it to the lower edges of the PP profile.
So, there are two rectangular structures installed on the ceiling, from which you can already determine the niche for the cornice in the living room. In order for both structures to merge into one box, it is necessary to connect them at the lower edges with crossbars made of PP profiles. The crossbars are installed at a distance of 40 cm from each other.
Finishing
After installing drywall, you need to:
- Cover the entire surface with a primer mixture. Give it time to dry.
- Reinforcing tape (self-adhesive) is glued to the joints and seams of plasterboard. If the tape is a simple sample, then a thin layer of putty is applied, using a narrow spatula, the tape is laid there along the entire length and covered with “Finish” on top, let the “Finish” dry.
- A metal corner should be secured to the corners of the structure.
This is what a reinforced mesh looks like with a corner to strengthen the corners of the cornice - Putty joints are rubbed with a fine mesh to avoid pieces of dry putty and stripes.
- The entire surface is covered with putty. Again it takes time to dry.
- It is cleaned with sandpaper and primed again for further finishing.
Finishing the cornice
In fact, if you follow the instructions, making a plasterboard cornice with your own hands is a simple and relatively quick task. The finished structure is finished individually based on the interior of the room. If there is wallpaper in the room, then painting the cornice will not look good.