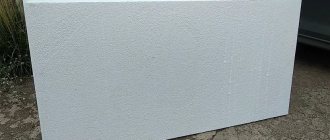
Drywall is a very popular material that is used to decorate walls and ceilings. It has a flat surface, which greatly simplifies the subsequent decorative finishing of the walls. You can attach drywall to the surface in different ways. One of them is foam adhesive for drywall. It allows you to significantly save time when installing sheets, and also take up a minimum of space. To perform installation correctly, you need to know the features of the material, its characteristics and methods of handling it.
How to insulate a wall with penoplex and plasterboard
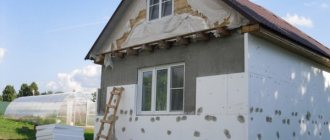
It is preferable to insulate the room from the outside. In this case, a greater heat-saving effect is achieved, load-bearing structures are protected from the influence of the external environment, and the usable area is not reduced. But this is not always possible, especially when it comes to apartment buildings. It is cheaper and more convenient to insulate the walls of a home with plasterboard and penoplex from the inside.
Insulating walls with penoplex from the inside - advantages and disadvantages
Insulation of apartments and houses has recently become widespread, and this is far from a whim or a way of self-expression. With energy prices constantly rising, you have to count your money, which is often spent on heating the air outside. And this is an unacceptable waste, so we have to insulate the walls. This is usually done by specialists from the outside of buildings, and this insulation option is considered ideal. However, it doesn’t always work out the way you want, and there are times when insulation from the outside is impossible for various reasons. In this case, the walls are insulated from the inside - a method of insulation that has many conflicting opinions.
Do-it-yourself wall insulation from the inside
Which is better: heated floors or radiators?
Warm floorBatteries
Benefits of penoplex
For internal insulation under gypsum plasterboards, foam plastic, mineral wool or penoplex can be used. Polystyrene foam does not have the best thermal conductivity, and mineral wool is hygroscopic, so penoplex is more preferable for this method of thermal insulation. This is facilitated by its characteristics:
- Light weight of slabs.
- Easy to process and give the desired shape, which greatly facilitates installation. For example, if there is a window or radiator on the wall, then it is not difficult to cut out a piece of foam plastic of the required size to go around them.
- Good moisture and vapor barrier performance.
- Good noise-absorbing properties.
- Strength, durability, safety.
- The material does not withstand prolonged exposure to the sun. Therefore, you must follow the rules for its storage.
- During operation, it may be damaged by rodents.
- Quite expensive compared to other materials.
How to glue penoplex - we answer important questions
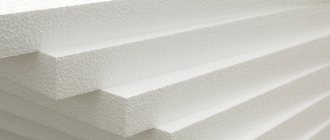
Penoplex is a material that resembles foam plastic in appearance and structure.
For its production, granules of a substance called polystyrene are used. Under the influence of special reagents, they foam, turning into a homogeneous mass. Penoplex is sold in slabs of different sizes. When choosing this material, you need to know for what work it will be used: external or internal.
Penoplex is designed for insulation:
- the inside of the walls;
- facade;
- roofs;
- foundation.
Interesting. Some types of this material are also used in the construction of highways, heating mains, and sometimes runways.
Distinctive features of penoplex:
- resistance to moisture and evaporation;
- low thermal conductivity;
- long service life;
- resistance to deformation even under significant force;
- ease of installation and subsequent processing;
- slight chemical activity;
- high environmental friendliness;
- acceptable cost.
For installation of penoplex during repair and construction work, special glue is used. His choice should be given special attention for two reasons.
- The service life of the insulation depends on the quality of the adhesive mass. In order for the figure stated by the manufacturer to correspond to reality, it is necessary to select an adhesive with a high adhesion rate.
- The health of people who will live in houses and apartments insulated with penoplex depends on the composition of the glue.
A few nuances that you need to know about when installing insulation under drywall
As already mentioned, insulating walls from the inside is not the most optimal solution due to some disadvantages of this method. Let's consider 3 main nuances:
- Dew point offset. It ends up between the wall and the insulation, so the base can become damp from the inside.
- Reducing the size of the room. Thermal insulator, frame, gypsum boards occupy part of the internal space.
- Reducing the permissible load on the floor surface. The insulation may not withstand heavy objects hung on the wall, so if necessary, it is recommended to use anchors.
Vapor barrier
This is a very important point. Vapor barrier creates a “thermos effect”. It is necessary to ensure that moisture from the air on the loggia does not penetrate between the insulation and the wall, so it is attached only to the inside of the loggia, and not between the concrete wall and the penoplex!
The most effective vapor barrier is using foil foamed PE or foil PE film. PE is attached end-to-end to foam boards using double-sided tape or polyurethane glue. The seams between PE sheets, as well as the joints between PE and structures, must be taped with metal tape.
Required materials and tools
To install insulation under drywall you will need:
- Directly the penoplex itself. For internal wall insulation, products marked “C” with a thickness of up to 30 mm are used.
- Reinforcing mesh, plaster and putty. They are useful both for leveling the base surface and for finishing drywall.
- Deep penetration primer and special for gypsum plasterboards.
- Glue intended for fastening penoplex.
- Vapor barrier.
For the frame method of installing drywall, penofol with a foil surface is ideal. It will reflect heat into the room.
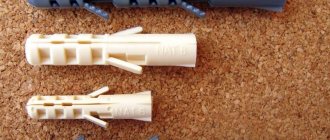
- Dowels. The insulation boards are fastened to their disc-shaped type, and the metal frame profiles are fastened to dowel-nails.
- Guide and rack profile for creating a frame.
- Metal screws for fastening elements, direct hangers and other necessary fasteners.
- Silicone sealant.
- Drill with mixer and container for preparing adhesive solution.
- A hammer drill with a drill for drilling holes for dowels on which we will attach profiles.
- Metal scissors.
- Screwdriver.
- Painting knife.
- Spatulas and graters, sandpaper.
- Roller and brush for applying primer.
- Marking tools: level, plumb line, tape measure, pencil.
How to install lathing on Penoplex?
Special PENOPLEX® FASTFIX® adhesive is intended for installation of PENOPLEX
®.
Recommended method of application: in even stripes around the perimeter at a distance of 1-3 cm from the edge and along the slab in the middle. 3. To attach PENOPLEX
to the facade, in addition to adhesive, it is necessary to also use mechanical fixation.
Interesting materials:
How to reset iPhone 5s to factory settings? How to remove an iPhone via a computer? How to remove iCloud on iPhone 4? How to delete an account on an iPhone? How to delete icloud on iphone 4s? How to erase settings on iPhone? How to remove the password on iPhone 4? How to delete an account from an iPhone? How to reset the system on iPhone 4s? How to delete an account on an iPhone?
Methods for laying penoplex under drywall
There are two installation options: with and without a frame. You can correctly install insulation under gypsum boards with your own hands using both methods, the main thing is to know their advantages and disadvantages.
- The frameless method is suitable for insulating small and flat surfaces. Quick, easy installation of insulation and drywall. Disadvantages: inability to level the base surface, low structural strength.
- The frame method is used if the walls are curved or have a significant area. This type of structure is more difficult to build, but it is more reliable.
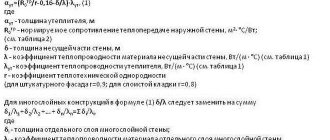
Instructions for insulating walls with penoplex from the inside and how to correctly calculate the thickness of the insulation
- interior wall;
- counter rack;
- waterproofing layer;
- OSB boards;
- penoplex;
- sheathing;
- vapor barrier film;
- finishing materials (plasterboard, OSB, putty).
The most common method of fastening is installation with an adhesive composition and fastening with dowels , which ensures the greatest adhesion and fastening strength. All elements of wooden sheathing should be treated with an antiseptic to prevent the formation of mold and mildew.
- low thermal conductivity;
- lightness of the material;
- environmental friendliness;
- waterproof;
- vapor tightness;
- good sound insulation properties;
- strength;
- can be installed in places with large temperature differences;
- durability.
If penoplex is installed using the frame method (in a timber house), that is, a sheathing is installed, then in this case both a waterproofing layer and a vapor barrier should be installed.
Penoplex insulation under drywall without frame
Step-by-step instructions will be like this:
- At the first stage, the base surface is prepared: the old coating is removed, cracks and potholes are sealed, and protrusions are knocked down. The wall should be as flat as possible.
- The surface is treated with a deep penetration primer.
- According to the manufacturer's recommendations, a special composition is prepared. If you don't have it, you can use tile adhesive.
- The inside of the insulation board is rolled with a needle roller. Another option is to brush it with a metal brush. This will ensure good adhesion to the adhesive solution.
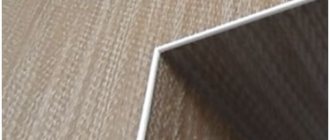
The glue is applied to the surface of the sheet using a notched trowel. It is not necessary to cover the entire slab with the composition: it is enough to coat the perimeter and center, options are shown in the photo.
- A fragment of insulation is applied to the wall and held for a minute. Be sure to check the correct installation at the building level.
- Begin gluing the penoplex from the bottom. It is recommended to move the rows relative to each other so that the slabs are staggered.
For reliability, penoplex is secured with disc-shaped dowels: 4 are placed at the edges and one in the center.
- The seams between the plates are filled with silicone sealant; wide cracks can be sealed with polyurethane foam.
- Drywall is attached to the insulation using glue. The scheme for applying the composition is the same as for penoplex slabs. It is recommended to place a layer of vapor barrier between them.
- After the glue has dried, which will take 24 hours, the drywall is finished. The seams are sealed using putty and serpyanka mesh, rubbed down, after which the entire surface is covered with a double layer of primer.
Carrying out work:
- Any surface can be treated with a deep penetration primer to strengthen, compact the dust layer and make moisture neutral.
- The adhesive solution should be prepared immediately before starting insulation, completely following the factory instructions on the packaging.
- Using a notched trowel, level the adhesive base and lay the foam on the walls, pressing firmly over the entire surface. Use a level for leveling.
- After 12 hours of drying, you can begin installing additional fasteners - dowels for foam plastic. It is better to buy them a few centimeters longer - for reliability. Using a drill and a pobedit-tipped drill, you need to make holes along the length of the nails and the width of the dowel.
- First, a fungus is placed in the hole (just below the surface of the polystyrene foam), and then a metal or plastic nail is driven in (it is better to use plastic, since it does not rust).
- Next, the insulation is covered with a thin layer of cement plaster (you can use an adhesive mixture) and the mesh is embedded into it. The mesh can also be attached with dowels directly to the slabs, and then plastered.
- The finishing touch can be any type of plaster, wallpaper or tile.
The insulation layer conceals the usable area of the home, but will be very important when dampness and mold appear in the corners of rooms located on the ground or upper floors, which is a strong argument for insulating the house using this method.
Insulation with frame
The procedure for choosing this installation method will be as follows:
- The wall surface undergoes minimal processing: poorly adhering elements of the old coating are removed.
- The frame is marked: a strip is drawn on the ceiling, then using a plumb line it is transferred to the floor. These are the guide attachment lines. The location of the vertical posts is marked on the wall in 60 cm increments.
- The guides are secured with dowels. The fastening step is 25–30 cm.
- Vertical elements are mounted. They are screwed to the guides with metal screws. The deviation is adjusted using direct hangers located every 50–60 cm. The position of the racks is checked with a building level.
- Glue the penoplex to the wall in the same way as with the frameless method. The insulation boards are rolled with a roller with needles, and an adhesive solution is applied. Then they are tightly inserted between the vertical posts and pressed for 40–60 seconds.
Advice. Pieces of insulation are placed in the metal profile to prevent heat transfer through the studs. Another option is to fill them with foam.
- Sheets of drywall, if necessary, are cut into the required fragments. Docking of gypsum boards occurs strictly on racks. Fixation is carried out with self-tapping screws in increments of 25–30 cm. In order not to damage the surface of the drywall during installation, a special bit is placed on the screwdriver, limiting the depth of screw tightening. You can find it in construction stores.
- The seams are sealed using reinforcing tape and putty. After grouting, the entire wall is covered with two layers of a special primer for drywall. The second layer is applied after the first has dried.
Thus, it is quite possible to insulate the walls of an apartment from the inside using penoplex and plasterboard with your own hands. If you do everything correctly and carefully, the desired effect will definitely be achieved. The process can be seen in detail in the following video. And if you have any questions during the work, ask them in the comments.
Sequence of work on insulation with penoplex from the inside
Insulating the balcony wall from the inside
As we have already found out, if necessary, you can insulate the walls from the inside, you can do it yourself, but for this it is advisable to use penoplex, which has better properties than the foam traditionally used for this. Just before you start insulation work, you need to familiarize yourself with the technology of insulating walls with penoplex and follow the sequence of work. In this case, special attention should be paid to issues related to the waterproofing of the material and the wall surface. This will help avoid problems associated with condensation. The work must be performed in the following sequence:
- Preparing the wall surface. To obtain maximum effect, it is very important that the wall surface is perfectly flat. Therefore, before gluing penoplex, it is necessary to clean the wall surface of old wallpaper and other facing materials. After this, you need to very carefully examine the wall for dents and protruding fragments, which will have to be cleaned out and the dents plastered over.
- In order to improve the adhesion of penoplex to the wall surface, it must be primed; this can be done twice in succession. A special primer is used for this.
- Considering the waterproof properties of penoplex, you can skip this step, although it doesn’t hurt to be on the safe side. We are talking about the construction of a waterproofing layer. For this, a waterproofing film is used, which is attached to the wall.
- Let's start attaching the penoplex. Previously, disc dowels were widely used for this, which are still used today. However, progress does not stand still, and today the building materials market offers special adhesive mixtures that can be used for this, although better results can be achieved by using dowels and glue at the same time. In this case, you are guaranteed to get a tight and durable connection, which is very important from the point of view of tightness. As for applying the adhesive base, in this case it should be done on the wall and directly on the penoplex.
- Having secured the penoplex to the wall, you can begin finishing work, but first you need to worry about the tightness of the structure, because even a small gap or crack will contribute to the formation of a cold bridge, and this will mean that your work and financial costs were in vain. It is necessary to check all joints and abutments of the insulation to windows and doorways, and if problem areas are found, they must be sealed using sealant, and in particularly problematic areas, polyurethane foam can be used for this.
- The next step may be vapor barrier, which is not necessary in the case of penoplex. For this, a vapor-proof film is used, which is applied on top.
- Finishing work can be done in different ways. Most often, a reinforcing mesh is glued on top of the foam, which is also leveled on top using a layer of adhesive solution. After this, the wall surface is ready for cladding. Sometimes, in order to avoid such difficulties, plasterboard is used to finish walls, where particularly good results can be obtained using plasterboard with insulation.
Attaching foam to the wall
Thus, for those who are familiar with the technology of insulating building facades using the “wet facade” technology, this method of insulation is not something unusual. It’s just that all the work is done indoors. Based on this, the main features and limitations regarding the insulation of walls from the inside emerge. In particular, to insulate walls from the inside, it is not advisable to use slabs made from mineral wool, as they have high vapor permeability. If you have to insulate the walls of apartments and houses built a long time ago, then the layer of penoplex or polystyrene foam should not be less than 70 mm.
We install insulation under drywall without the help of hired specialists
If it is not possible to insulate the outside, then the optimal solution is to insulate the walls from the inside with penoplex and plasterboard.
Many people experience freezing of walls in apartments, private houses, balconies or basements. The problem is solved by installing insulation on the outside of the building, but sometimes it is more expedient, cheaper and more reliable to do it from the inside.
Adviсe
- To insulate the walls of a wooden house, Penoplex is not recommended, since its high density and the possibility of fire are incompatible with such buildings.
- Before insulating yourself, it is better to watch several training videos or videos from YouTube that were filmed by craftsmen on site, directly during the work.
- For long-term service of the inner layer of thermal insulation, the surface of the walls must be dry and without the slightest suspicion of mold, and before insulating the house, you need to weigh the pros and cons.
Choosing insulation
Polystyrene foam, mineral wool, and penoplex are used as heat-insulating materials.
- Polystyrene foam is an artificial material. It is characterized by average hygroscopicity, thermal conductivity and density. Without special additives it is highly flammable. They are used to insulate external walls, balconies, and basement floors.
- Mineral wool is a time-tested material. It is characterized by high hygroscopicity and an average degree of thermal conductivity. Rarely used as insulation under drywall for interior spaces.
- Penoplex is a modern material obtained by thermal processing of foam plastic. It is characterized by low hygroscopicity and thermal conductivity. Has high density. Thanks to special additives, it practically does not burn. They insulate apartments, balconies, and basement floors.
The optimal insulation for interior work is penoplex.
Materials used for internal wall insulation
If it is not possible to insulate the wall from the outside, then it is necessary to do it from the inside. However, given the special specifics, great attention should be paid to the choice of insulation, because in this case not each of them will be suitable for this. As a rule, to insulate walls from the inside, insulation in the form of slabs and roll insulation, made primarily from mineral wool, are used. However, just as when insulating a wall from its outer part, foam plastic and penoplex are often used to insulate walls, and mineral wool is rarely used for this due to its high vapor permeability.
Very often these two materials are confused, although, as it turns out, despite being very similar, these are different materials with significant differences. The only thing they have in common is their chemical composition, where the derivative is polystyrene. Here, perhaps, the similarity of materials ends. During the manufacturing process of polystyrene foam, polystyrene granules are repeatedly steamed, significantly increasing in volume, which leads to the appearance of pores, which ultimately contribute to the breakdown of bonds and destruction of the material. A completely different matter is penoplex, produced by extrusion, as a result of which the material has strong intermolecular bonds, which makes it stronger. In this regard, it is worth considering the comparative characteristics of both materials.
Using penoplex as insulation is more appropriate because it has a number of advantages over polystyrene foam. In particular, penoplex has approximately ten times better performance in terms of water absorption, which in this case is of great importance. In addition, the vapor permeability of the material is 1.5-2 times lower, and the strength of penoplex is approximately 5 times higher. The same applies to the density of the material, which is also 2-3 times higher. All this often leaves no chance for polystyrene foam, unless it has a lower price, which is why it is so widespread.
Insulation from the inside: pros and cons
Insulating walls with plasterboard from the inside is a technology that goes against the basics of heating engineering. However, there are situations when it is impossible to carry out work outside. In this case, this technology is indispensable.
The disadvantages include:
- Dew point offset. There is a high probability that the walls will get wet.
- Reducing the volume of the room. The metal frame, insulation and drywall “eat up” the usable area.
- Reducing the threshold of maximum loads on the wall. Insulation has a lower density than brick or concrete. When installing heavy shelves on a wall sheathed with insulation, anchoring may be required.
Disadvantages and ways to eliminate them:
- The material ignites easily when in contact with direct fire and creates droplets that do not go out when falling; an unfavorable environment with harmful substances may also appear. To prevent a fire, you need to follow fire safety precautions and buy insulation with low flammability, which can be determined by the factory specifications on the packaging or obtained from the store manager.
- The appearance of condensation is most often caused by the incorrect location of the dew point, the contact of cold and heat. If this is not prevented, then there is a high probability of dampness, mold, and mildew. This phenomenon can be prevented by continuously gluing the sheets without leaving voids on the wall.
- Reducing the space during internal insulation of apartments in multi-storey buildings, which belong to communal housing offices, is also controlled by law and local authorities. To make the internal space suffer less, it is better to use foam plastic with a thickness of no more than 20 mm.
Insulation methods
After choosing the material, the question arises of how to insulate a wall with plasterboard with your own hands. In home practice, two methods are used:
Frameless method
A common insulation option. No metal or wood frame needed. It is used for insulating small, flat surfaces: interior walls of apartments in panel houses, basements, garages; balconies and loggias.
Let's consider the sequence of actions for insulation:
- Preparing the wall for pasting with penoplex. For the frameless method, you need a flat surface, without strong potholes. Let's start work on covering the walls with plasterboard and insulation by removing wallpaper, plaster, and paint. If you need to cover an unplastered brick wall, then knock down all the protruding masonry mortar. A loose base of old plaster can be treated with concrete contact. This will strengthen him. We fill potholes and cracks with cement-sand mortar. We mix it on the spot or buy it ready-made in bags.
- Installation of penoplex. For this we use Penoplex-35, which has all the necessary properties. The standard sheet size is 600×1200 mm, thickness is 20 – 100 mm. As glue we use special compounds that can be bought in the store. In extreme cases, tile adhesive will do. Before gluing, treat the surface of the sheet with a stiff brush. This will increase the coefficient of adhesion between the wall and the insulation. Apply the glue in a thin layer over the entire area using a grooved spatula. We start pasting from the bottom corner. First, apply the sheet, press a little, hold for a few seconds. Then we release. We treat the joint seams with silicone glue. If their width is more than 5 mm, then we seal them with polyurethane foam. Additionally, you can secure the insulation with plastic dowels. The number of attachment points is 3–4 per 1 m2.
- Installation of drywall. We use dry glue mixed with water. Apply it with a notched trowel to the entire surface or in strips. It hardens within 24 hours. Drywall with insulation can be separated by a layer of vapor barrier. The best option is penosol. Its shiny surface reflects heat from the interior. No condensation forms. One “but”: drywall cannot be glued to penosol. First you need to mount the frame.
- Finishing. Tape the seams between the sheets with masking tape. Then we putty, paint or wallpaper the wall.
Frame method
Insulating the wall with penoplex and covering it with plasterboard along the frame are relevant for large, uneven walls.
- Surface preparation. It does not need to be cleaned, small potholes do not need to be covered. If necessary, pre-spread the wiring.
- Frame installation. It comes in metal and wood. Metal profiles are popular among consumers. Its size depends on the thickness of the insulation. First we install the lower guides, then the upper ones. We fasten them to the wall and ceiling using self-tapping dowels 40 - 50 mm in increments of 2 - 3 pcs. by 1 m p. Then we install vertical racks. First we insert them into the guide profile. Then we screw it to the wall using hangers. Mounting on hangers levels out all the unevenness of the wall. The installation step of the vertical posts depends on the size of the insulation sheet. In our case it is 600 mm. A wooden frame for insulating walls from the inside with plasterboard is mounted according to the same rules as a metal frame. We treat wooden beams with an antiseptic. This will avoid rotting, the formation of fungus and mold.
- Installation of insulation. We treat one side of the foam sheet with a wire brush to improve adhesion to the wall. Using a notched trowel, apply glue to the sheet. Then we insert it into the gap between the vertical posts, press and hold for several seconds. Then we release. The glue will dry in about 24 hours. We seal the seams with silicone sealant. If they are wide, then we use polyurethane foam. The metal profile is a cold bridge. We fill the profile cavities with pieces of insulation or foam to avoid freezing.
- Installation of plasterboard sheets. We apply each sheet to a metal profile or wooden beam. Then we fasten it with self-tapping screws measuring 20 - 25 mm. A layer of vapor barrier can be glued between the outer skin and the insulation.
- Finishing. We putty the finished surface, paint it, and cover it with wallpaper.
The proposed technologies will help to insulate the wall and cover it with plasterboard. The main thing is to follow the rules and not violate the technology of work.
Types of glue for penoplex
Based on composition characteristics, installation adhesive materials for penoplex are divided into four groups.
- Polyurethane.
- Mineral, cement.
- Polymer.
- Waterproofing.
Adhesives from the fourth group are not recommended for interior use. They contain various solvents and petroleum derivatives, which are very harmful to humans.
Penoplex adhesive for exterior use.
To insulate walls from the outside, cement-mineral compositions should be used. They are characterized by a high rate of adhesion (gluing, adhesion) to concrete surfaces.
For penoplex for interior work.
Installation of insulation on the ceiling and walls inside the building is carried out using glue from the polyurethane or polymer group. This is explained by their technical characteristics and safety for humans.
The most common adhesives for penoplex
Atlas Stopter K-20. Characteristics:
- for external work, including for insulation of facades;
- sold in 25 kg containers;
- consumption 4 kg per 1 m2;
- preparation time for the mixture is at least 4 hours.
- ready mix;
- Sold in a 750 ml bottle;
- there is a special nozzle for application;
- consumption – one bottle per 2 m2.
AtlasPlus. Characteristics:
- versatility;
- good adhesion and elasticity;
- suitable for wet surfaces;
- sold in bags of 5, 10 and 25 kg;
- consumption – 1.5 kg per 1 m2.
- from the group of polymer adhesives;
- Drying time – 24 hours;
- resistance to humidity and low temperature;
- Available in 250, 500 and 1000 ml cans;
- consumption – 250 ml per 5 m2.
- suitable for external and internal work;
- comes in aerosol form;
- prevents the appearance and spread of fungus;
- no noticeable odor, safe to use;
- consumption – one cylinder per 10 m2.
Price range of glue zones
Which is better: heated floors or radiators?
Warm floorBatteries
| Name | Volume | Packing | Average cost, rub |
| AtlasStopterK-20 | 25 kg | Bag | 320 |
| Insta-stick | 750 ml | Balloon | 550 |
| AtlasPlus | 25 kg | Bag | 600 |
| CeresitCT83 | 25 kg | Bag | 400 |
| Titanium | 750 ml | Balloon | 270 |
| Moment | 1000 ml | Jar | 300 |
How to glue penoplex - instructions
Before starting work, prepare the necessary tools and materials:
- foam boards;
- primer;
- roller or brush;
- degreaser;
- spray;
Use step-by-step instructions for gluing insulation.
- Clean the working surface from paint and varnish materials, primer, and dirt. Use a spray bottle to degrease the surface.
- Apply an even layer of primer to the walls/floor/ceiling and allow it to dry completely.
- Prepare glue if required by the instructions. Apply it to the surface, as well as to the insulation board.
- Apply the penoplex to the surface: from bottom to top if it is a wall, or from left to right if it is a floor or ceiling. Hold the stove for so long until it no longer lags behind the work surface at random.
- Proceed to gluing the next slab.
Methods of applying glue depending on the nature of the work:
- Spot. Dense drops at a distance of 30 cm from each other.
- Stripes. Four L-shaped stripes in the corners and two long ones in the center.
- Solid. Evenly over the entire area of the slab, departing from the edges by 3-4 cm.
Please note important tips:
- an assistant will be needed when performing this work;
- read the manufacturer's instructions and glue consumption;
- if you are installing penoplex for the first time, use aerosol glue;
- treat the surface with a primer to prevent the appearance of fungus;
- apply glue evenly over the entire surface in a layer of no more than 2-3 mm;
- level the slabs immediately after contact with the work surface;
- remember the safety measures.
A common question is how to glue penoplex to concrete
There are three ways to install this insulation to concrete surfaces:
There is no consensus on which of these formulations is better. You should choose based on the nature of the work. However, many experts prefer glue that is created specifically for working with penoplex.
Liquid nails can only be used if the insulation is glued to the floor. Foam is suitable for filling joints between slabs.
How to glue drywall foam adhesive: 4 repair tips
Drywall is a very popular material that is used to decorate walls and ceilings. It has a flat surface, which greatly simplifies the subsequent decorative finishing of the walls. You can attach drywall to the surface in different ways. One of them is foam adhesive for drywall. It allows you to significantly save time when installing sheets, and also take up a minimum of space. To perform installation correctly, you need to know the features of the material, its characteristics and methods of handling it.
Step-by-step insulation of a loggia with your own hands: instructions
Preparation of the loggia:
The first thing to do is to prepare the loggia for thermal insulation work. Replace, if necessary, balcony frames. It is better to choose glazing with the following characteristics: the double-glazed window must be double-chamber, with a thickness of at least 32 mm. When installing a double-glazed window, do not forget to install additional expansion profiles on top and on the sides, which will later be used when installing penoplex and the finish you have chosen. Carefully foam all seams and joints.
Surface preparation before installing drywall on foam
Having decided to mount drywall on a wall or ceiling using foam, you need to familiarize yourself with the features of this type of fastening. This is a convenient way to install sheets, since the wall surface may have deviations of different levels. In case of very large deviations, special guides are used for gluing sheets.
It is important that the foam is of high quality: its properties should appear immediately after application.
Fixing drywall must be very reliable, since the properties of the foam affect its ability to push the material away from the wall. Of course, it is better to perform preliminary surface preparation. Walls, ceilings and sheets must be primed.
Preparation stages:
- Remove old finishes from the wall.
- Cover the wall with primer.
- Attach a sheet of drywall to the wall and drill at 9 points.
- Drill holes for fastenings according to the marks.
After completing the preparatory work, you can begin attaching the gypsum board sheets. When installing it yourself, experts recommend first installing one sheet and letting it dry. If the next day you are satisfied with the result, then you can continue working.
Penoplex installation
For loggias that are not attached to the room, it is better to choose penoplex with a thickness of 20-40 cm; for a combined one, the thickness of the insulation should be at least 40-60 cm.
1.Installation of insulation directly to the main surfaces:
The main insulated surfaces are the side and facade walls, the ceiling and the floor, if it is also insulated with penoplex. The slabs are fastened to the surfaces with disc-shaped dowels with plastic cores - plastic “mushrooms”.
2.The next stage is thorough foaming of all joints of structures with polyurethane foam.
Important! The foam should not contain toluene, which dissolves penoplex; usually toluene is absent from summer foams, but is present in universal and winter foams.
3. The joints between the insulation boards must be taped.
- Mistakes when insulating a loggia with penoplex
1. Often, when insulating a loggia with your own hands, the following method of installing insulation is used: install a frame of wooden slats or metal guides, between which foam boards are laid. And often, finishing made of plasterboard, plastic panels or lining is then attached to this frame. Don't do this! This leads to the formation of “cold bridges” and the appearance of condensation on the frame. The manufacturer of penoplex boards strongly does not recommend doing this.
2. Another common mistake is installing a vapor barrier on the cold side of the insulation, between the thermal insulation and the wall - this can lead to the formation of condensation and moisture.
Which is better: heated floors or radiators?
Warm floorBatteries
Drywall on polyurethane foam: what is worth considering
There are several ways to install plasterboard sheets on a wall or ceiling. One of them involves fastening the sheets with screws and pouring foam between the surface and the drywall. Another option involves directly applying foam to the back side of the gypsum board.
It is important to ensure in advance that the temperature of the foam can is not lower than 5 degrees Celsius.
It is best to apply the foam in zigzag lines with a diameter of 3 cm. After applying the foam, you need to wait 5 minutes. After this, you need to firmly press the sheet of drywall to the wall.
Things to consider:
- Weight of a sheet of drywall;
- Foam quality;
- External factors in the room.
After the sheets have dried, the seams and holes between the sheets must be sealed with putty. Irregularities and cracks can also be covered with foam. All work on finishing drywall should be carried out no earlier than an hour after installation.
How to glue drywall to penoplex: stages of work
Penoplex is used to insulate indoor walls. After installing the foam boards, drywall is mounted on it. It can be attached in different ways, one of them is to glue the sheets using glue or polyurethane foam.
The work should be done carefully: all stages of the finishing process should be thought through in advance.
You can achieve even gluing of walls using special bars that will support sheets of drywall. The bars can be prepared in advance - they should be of different sizes. The gluing technology is quite simple.
Stages of gluing drywall onto penoplex:
- Place the sheet on a flat surface.
- Apply the adhesive solution in the form of heaps.
- Press the sheet against the wall.
When applying the solution, it is important to ensure that the distance between the piles is uniform and small. It is better to make piles small. Please note that the glue has the ability to harden quickly, so it must be applied quickly.
Is it worth gluing drywall to foam?
Many people are interested in the question: is it possible to glue drywall to a wall or ceiling using foam. Many masters today advise against doing this, since this process is quite painstaking. In addition, the quality of fastening the sheets depends on the accuracy of gluing and on following the instructions of the master.
It is important to take into account the fact that when gluing drywall to foam, you should press the material against the wall for 15 minutes every hour.
It is also important to take into account that foam tends to expand. It is necessary to carefully press the drywall to the surface so that the foam does not “push it out”. After gluing, there is a possibility that the sheets will come off.
Reasons not to glue drywall to the wall:
- Long process;
- Lumps may appear;
- Possibility of peeling off if done incorrectly.
Polyurethane foam is a fairly durable material. That is why many craftsmen use it for gluing drywall. This avoids unnecessary construction work. The gluing itself takes quite a lot of time, especially if you do it yourself for the first time.
Should I plaster the foam or cover it with plasterboard?
I bought polystyrene foam for internal insulation of the wall of a house (a house made of shell rock), took 50 mm, size: 1*2 m. They advised me to take a thin one. Now I'm wondering if the plaster will come off after I hit my head on the wall?
Which polystyrene foam is better to use for internal insulation than to plaster it, if you can give a step-by-step example from attaching it to the wall and, most importantly, plastering it.
If the foam goes inside the house, is it even possible to immediately apply plaster to the foam? If possible, how can I do it cheaper?
Author: Dmitry Belkin
I have already spoken many times about my negative attitude towards the very idea of thermal insulation of walls from inside the home. Here, read the materials where I pay considerable attention to this issue and put everything in order. At least it seems so to me.
Now about plastering foam plastic. I myself have never plastered polystyrene foam and have not seen a single house with plastered foam plastic or mineral wool. However, I did see a piece of stucco foam at a show as an exhibit. As I understand it, a reinforcing mesh is first glued onto the foam plastic, and plastering is done over it. Moreover, the thickness of the cement layer is at least 8 mm. After reading your question, I think that it is quite possible to break through such a layer with your head. For my part, I could recommend that you not plaster the foam, but cover it with plasterboard. Moreover, the plasterboard is glued to a standard joint filler for the same plasterboard. I myself tried covering walls with plasterboard in this way and was extremely pleased with the result. As a joint filler I used “Fugen Füller” from Knauf. By the way, this funny name is a joint filler translated from German.
I warn you right away. The work of covering walls with plasterboard requires extreme care and preliminary thought. In order to glue large sheets evenly, you need to make sure in advance that there is something to support them from below. For this I used pre-sawn blocks of different calibers. I think you can glue drywall to polyurethane foam. It's a matter of taste and dexterity. Try it!
The gluing technology was as follows. I placed a sheet of drywall on a flat surface (on the floor), on pads, so that it was easy to pick up. After that, I applied the solution in heaps. I tried to make sure that there was not too much space between the piles. 25-30 centimeters. The solution was made a little thinner than necessary. If the solution is too hard, it will be difficult to flatten when you press the sheet against the wall and align it vertically. The smaller the piles, the easier it is to manage the sheet, but you need fairly even walls, and you also need more piles. If a sheet is pressed too hard against the wall, it is better to tear it off and renew the piles, but this problem only happens at the beginning, when there is no skill yet, or with the first sheet on the wall. I saw a particular difficulty in the fact that the solution only lasts 20 minutes. It's really annoying. At first, I had to mix my own solution for each sheet. Another difficulty is that you cannot move the sheet on the wall too much and for a long time to align it. You need to strive to “spandorize” the sheet right away as needed. It is very important to adapt. It turned out that I struggled with the first two sheets all day, but I finished the rest much faster. The ability to simply glue drywall to the wall is a great alternative to plastering.
If you seriously want to test the strength of the resulting coating, cover the walls with two layers of plasterboard. Then you definitely won't get through.
I hope that it was useful to you. Dmitry Belkin.
Source: belkin-labs.ru
Types of foam adhesive for drywall (video)
When we glue plasterboard sheets to the surface of a wall or ceiling, we must adhere to strict rules. It is important to carry out the preparatory work correctly: make the slope correctly, make sure that the previous finish, paint and wallpaper, is removed. Only after this can you begin the main type of work. You should carefully consider the choice of foam adhesive, since how the drywall adheres to the wall depends on its quality. Gluing drywall is a rather labor-intensive process, but if it is done correctly, the finish lasts long and reliably.
Insulating the floor on the loggia with penoplex
Penoplex slabs are laid on the floor slabs. An insulated floor on a loggia can be created in several ways. This is a floor with a wooden base, pouring a concrete screed and pouring a screed with laying an electric heated floor on top of the laid foam boards. When insulating the floor on a loggia with your own hands, you must follow the following rules :
- If you are making a concrete screed, then before pouring it, be sure to install a strip of foamed PE around the perimeter to create a temperature gap. Then you can pour a 4 cm thick screed.
- When installing a heated floor, it is necessary to lay penoplex slabs on the floor panel, and perform a screed with the installation of an electric heated floor according to the instructions from the manufacturer.
- If you are laying the floor on wooden joists, then they should be installed in the longitudinal direction. Then fix it with polyurethane foam and cover it with a tongue-and-groove board.
Since penoplex performs only the function of preserving heat, and not generating it, then to create heat on the loggia, you need a source to generate it. The most effective solution is to install heated floors. You can also install electric heaters on the loggias - electric fireplaces, convectors, infrared and oil heaters.
Penoplex and plasterboard for insulating loggias
Very often, a loggia in a residential building remains an object “for beauty” that does not carry any significant functions. But as soon as you insulate it and finish it using modern technologies, using, for example, penoplex and drywall, it becomes almost a full-fledged part of the apartment in which you can relax, work and have a great night's sleep on a warm summer night.
The first thing they usually do is glaze the loggia. The next stage will be its insulation. To do this, you can use various materials - polystyrene foam, polystyrene foam, finish with plasterboard or siding - it all depends on the preferences and budget of the owner. You may come across such a concept as insulation with plasterboard and penoplex - it is not entirely true. There is a technology for insulating walls with penoplex - plasterboard is used to finish the walls, but in itself it is not an insulation material.
There are questions on the forums: “Is it possible to cover penoplex with plasterboard? Is it permissible to use these two materials when decorating a loggia?” Polystyrene foam, penoplex and drywall are quite “friendly” to each other. Installation of drywall to penoplex or polystyrene foam is carried out using the same technology. We will discuss such issues as how best to attach penoplex to the walls, and drywall to penoplex.
Disadvantages and advantages of insulating walls from the inside
Let's first consider what unpleasant moments await you:
- If the insulation is installed incorrectly on the inside of the room, there is a risk of condensation. This happens in the place where the insulation borders the wall, and nothing good can be expected from this neighborhood. In particular, the following happens: the humidity of the wall increases, which leads to a decrease in its thermal insulation properties and gradual destruction;
- the heat-storing properties of the room deteriorate, and even an open window will contribute to a sharp change in temperature, which is especially noticeable on hot days;
- sometimes the area of the insulated room is significantly reduced. This damage is especially noticeable in apartments that are small in size, and in the best case, these losses amount to 5% of the usable area of the room;
- insulation materials that are used to insulate walls are not always environmentally friendly, and this will be especially noticeable indoors.
However, not everything is so bad, and, as we have already said, there are also positive aspects, and, in this regard, insulating walls from the inside seems possible. In particular, it is worth noting that insulation from the inside is much cheaper, especially if the issue concerns the insulation of apartments located in multi-storey buildings.
In this case, industrial climbers are hired to carry out the work, whose services are expensive. This leads to another positive point - you can insulate the room from the inside yourself without the involvement of specialists. Thus, subject to basic precautions, insulating walls from the inside is acceptable; all that remains is to decide on the materials that can be used for this.
Application for interior and exterior decoration
An expanded polystyrene sheet attached to the frame allows you to protect the room and the building as a whole from the penetration of cold. This idea is a practical option for ensuring a comfortable temperature in the living space. Internal and external finishing of surfaces with polystyrene foam has its own characteristics, which you need to become familiar with at the stage of planning the insulation of the room.
We advise you to look at: insulating a balcony with mineral wool and penoplex.
Installation work for exterior finishing
Insulation of the outside with penoplex should be performed in the following sequence:
- To fix penoplex sheets to the wall, the surface must first be leveled. This is not difficult to do; just remove the flaws and plaster the coating.
- When the plaster has dried, you can begin installing the penoplex. The process is carried out by gluing slabs of material onto a special adhesive solution on top of the plaster.
Useful tips
- In order for the penoplex to be securely fixed on the wall, the sheet coated with glue should be applied at a distance of 20 millimeters from its actual placement. Then, pressing on the plate, move it to the desired place.
Glue on penoplex is applied pointwise or using a construction gun along the perimeter of the sheet - Having attached the material with glue over the entire surface of the outer covering, you should proceed to the next step - attaching the sheet of polystyrene foam to the frame using dowels. To securely fasten the sheets, you should prepare dowels at a rate of 4 pieces per square meter.
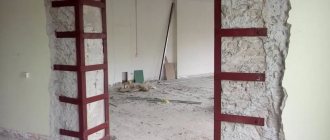
Fastening penoplex to concrete using “umbrellas” for greater strength - In order for the gypsum board and expanded polystyrene to be securely fixed around the perimeter, at joints, corners, near doors and windows, more dowels should be screwed in. You need to calculate so that there are approximately 6-8 dowels per square meter.
The fastening of penoplex differs depending on the location of insulation. - Finishing, in the case of exterior finishing, is carried out in several ways. In this case, you can level the plaster using sandpaper that was applied to a sheet of polystyrene foam. This technique also uses finishing using metal or wooden beams, as well as siding.
Finishing with penoplex and siding of the facade of the house - A reinforcing mesh is applied on top of the plaster or other selected finishing material. It is overlapped so that there are no sections of coverage left without a mesh.
Reinforcing mesh applied to the wall and the process of filling it - Having insulated the outer surface using penoplex, you can proceed to the final stage. Namely, to carry out cladding with the selected material. If these are plasterboard sheets, then they can simply be glued on top of polystyrene foam using a special fastening adhesive for installation work. If another material is preferable, such as wooden beams or siding, then it must be fixed on top of the foam with dowels or screws, passing the fastening element through the foam and the frame. To do this, you need to select fasteners of the required diameter and length.
Penoplex laid under the cladding of the facade of the house - After completion of the work, if the cladding was carried out using a sheet of plasterboard, you need to apply a primer that will protect the surface from corrosion and fungal formations.
- When the primer has dried, the first layer of plaster is applied to the drywall sheets, and then sanded with sandpaper.
- After applying and leveling the second layer, you should begin decorative finishing.
By completing the process in the correct order, paying attention to every detail, you can obtain a reliable, cold-proof exterior finish.
Interior decoration
Various adhesives are used to attach penoplex.
If you glue penoplex on the interior wall of a room, the process is similar to that for external finishing.
The sequence is as follows:
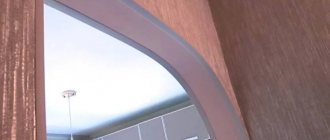
- Sheets of foam plastic are fixed on top of the plastered and leveled wall. How to secure the insulating sheets is up to the owners alone. You can mount foam boards onto frame profiles, or you can attach them with glue.
- Indoors, it is recommended to install a vapor barrier foil film on top of the polystyrene foam before sheathing with dowels or gluing drywall. This will extend the service life of both polystyrene foam and plasterboard construction.
Internal insulation of house walls using waterproofing and several types of insulation - When the drywall is glued to the penoplex or fixed with dowels, it is necessary to plaster the recesses from the screws that hold the drywall to the surface. If the sheets were glued, then the gaps between the sheets should be sealed and the gypsum board surfaces should also be plastered.
The process of filling joints between plasterboard sheets - After the first layer of plaster has dried, it is rubbed down using sandpaper. Then a new finishing layer of the mixture is applied.
- The dried top layer of plaster should also be sanded, and then proceed to decorative finishing (painting or wallpapering).
The process of insulation and transformation of walls can be considered complete.