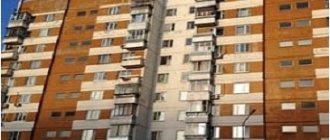
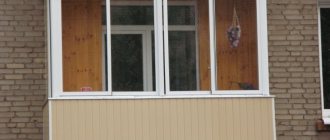
Insulation of walls and floors of a loggia in a panel house
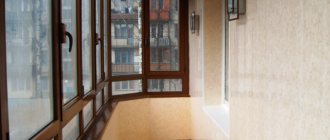
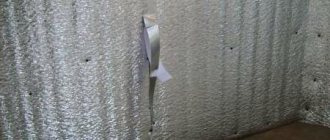
Rice. 11. Insulation of walls using polystyrene foam
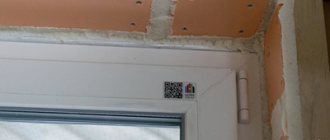
Insulation of loggia walls begins with the installation of a supporting frame. Next, the insulation boards are installed. Most often, polystyrene foam or mineral wool is used for insulation.
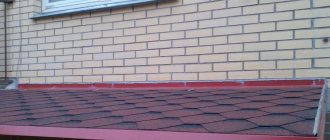
Floor insulation always begins with the installation of waterproofing. For this purpose, polyethylene film is used, which reliably protects the floor surface from leaks. Logs made of wooden beams are installed on top of the film. They must be aligned horizontally. It is between the joists that the insulation is tightly placed. Density is necessary to ensure that cracks do not form in the structure. It is customary to use mineral wool as insulation, on top of which a vapor barrier film and a subfloor in the form of plywood or OSB board are laid. Self-tapping screws are used to secure the subfloor.
Insulation technology
First you need to take measurements of the room in order to correctly calculate the amount of material. You should also remove all foreign objects and furniture so that the space is free and nothing interferes with the work. All insulation activities can be divided into several stages:
- Creating a frame. The lathing is made using dried wood blocks, the thickness of which should be up to 40 centimeters. Frame elements are mounted on the surface of the floor, ceiling and walls (for example, for insulation under plaster or plastic panels) using screws with plastic dowels, it is important to maintain a gap of 50 centimeters. Under the window we place the bars vertically and one horizontally.
- Installation of insulating material. We adjust the insulation sheets to size and attach them to the frame using mounting adhesive. We fill all the depressions and cracks with polyurethane foam, remove the excess with a sponge or spatula. Large recesses can be filled with foam scraps.
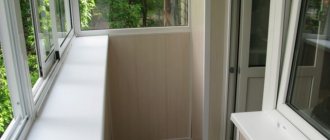
- Surface finishing. Balcony cladding can be made using many materials, it can be lining, plastic or MDF panels. They are secured using self-tapping screws or a construction stapler to a pre-installed sheathing. To cover the floor surface, you can use linoleum, laminate or plywood sheets. The final touch will be the installation of skirting boards.
We have become acquainted with only a small part of the methods and technologies for insulating the balcony space. However, the basic principle of the work remains the same; the video below shows this process step by step.
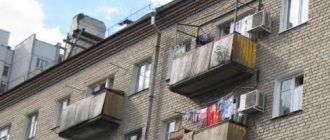
Differences between a loggia and a balcony
The loggia slab is a continuation of the floor of the room, and three sides are closed with solid walls
The loggia has a slab as a base, which is a continuation of the floor of the room, and three walls, which are a continuation of the walls of the house. The upper load-bearing slab serves as the roof of the loggia, the parapet is made of a concrete slab.
The loggia has three sides covered with capital slabs, and only the front part is open. It can withstand significant weight loads. If central heating is installed on the loggia (for this you need to obtain permission from the local authorities), it will be considered a living area.
The balcony is mounted on consoles and has only one common wall with the building
When constructing a loggia, hollow floor slabs measuring 1200x5800 mm are used. The slab length of 5.8 m is enough to build loggias for two apartments - each 2900 mm long.
The balcony protrudes beyond the load-bearing wall of the building, is most often mounted on consoles, has one common wall with the building, and three sides are open. Even if there is no parapet on it, but there is a platform in the form of a protruding slab, such a structure is also considered a balcony.
Central heating is not allowed on the balcony; it cannot withstand significant weight loads. There have been cases when slabs subjected to significant loads in 9-story buildings broke.
Related article: Miter box for skirting boards: how to use correctly
For the construction of balconies, a slab of 800 x 3275 mm is used.
Loggia design solutions
Let's see how we can use the additional space resulting from insulating the loggia. In practice, you have one more room at your complete disposal, and only you can decide what it will be like.
For our part, we can offer several ideas on how to use the new opportunities.
The warmest transformation - the loggia turns into a cozy little corner for relaxation. Here you can enjoy the silence with a good book or crafts. If necessary, there is enough space to install a TV or a small table for a laptop.
If a large family lives in an apartment, it is sometimes difficult to find a comfortable, quiet place for your favorite activity. Despite the small space, your new insulated loggia will allow you to place even two separate corners for activities dear to your heart. For example, a cozy deep chair can be placed in one corner, and a small table for a laptop in the second.
A very stylish modern option, suitable if the exit to the balcony is from the kitchen. You can even transform the loggia into a kind of dining room.
Ideal for parties, especially in the case of high floors and an attractive view from the window, a window sill can easily replace a bar counter.
Using small details, such as lit candles, you can create the atmosphere for a romantic dinner. Fresh fragrant air and watching the sunset on warm summer days, and in winter - cozy blankets, candles and mulled wine.
If you install glass sliding doors instead of standard ones, you can delimit the space if necessary.
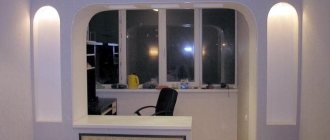
A bold design solution suggests expanding the living room space onto the loggia. The wall that previously separated the rooms has been turned into a comfortable table.
In this case, the area of the former loggia can be used as a study or hobby room.
By combining two spaces, the living room provides access to a large window, which increases illumination; you will feel this well in winter, when there is always not enough light.
It is not difficult to come up with the use of additional warm space, everything is limited only by your flight of imagination. A winter garden, a workshop, an office, even a sports corner - everything is doable.
Therefore, if your apartment has a loggia, and you still haven’t thought about insulating it, get down to business immediately.
Insulation of walls and floors
Let's consider step by step how to insulate the floor and walls of a balcony with your own hands. In the photo below you can see an example of insulation and finishing of a balcony:
An example of insulating a balcony.
After glazing, you need to seal all the cracks with sealant or mastic. It is necessary to start insulating a balcony/loggia from the floor - since after that its level will rise slightly. To insulate the floor, you can use mineral wool or foam plastic (from 5 cm thick).
In both cases, a waterproofing layer is placed underneath (for example, a film, but roofing felt or waterproofing is better). If you use cotton wool, you need to make a wooden crate 5 cm high and fill it with cotton wool.
Important! The sheathing must be perfectly leveled horizontally
Floor insulation with mineral wool.
You can attach the sheathing to the floor using roofing screws, and fill the gaps between the wall and the sheathing with foam. After laying the cotton wool on top, you need to put a layer of plastic film on top and secure it with a construction stapler. Plywood or boards are laid on top, on which the finished floor is laid.
Covering the floor with boards.
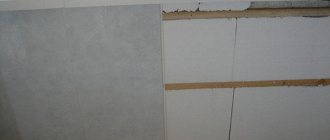
In most cases, polystyrene foam is used to insulate walls, so let’s consider the process with this material. Sheets of foam plastic must be “cut” in advance; fastening to the walls occurs using cement glue - it must be applied both to the edges and to the ends of the sheets. After pasting with foam plastic, a sheet of foam foam is attached to the top for additional heat retention.
Insulation of walls with foam plastic.
Further actions depend on what material will be used to finish the walls. If these are PVC sheets, then it will be necessary to fasten wooden slats 3-5 cm thick to metal corners. If you just want to paint the walls, then the foam sheets need to be puttied using reinforced mesh, primed and painted in the desired color.
In addition to walls and floors, insulation is also necessary for the balcony ceiling. For this, it is most convenient to use foam plastic sheets; the installation technology will be the same as for walls.
Preparatory stage
Before starting work, preparations should be made. It consists not only in selecting tools and purchasing materials, but also in preparing the loggia itself for insulation. The following recommendations must be followed:
- First of all, glazing is installed, and only then insulation is carried out;
- seal all the cracks leading to the street, otherwise the insulation procedure will lose all meaning;
- cut off the protruding excess polyurethane foam flush;
- seal the windows with plastic film so as not to stain them;
- lay all the necessary communications: these include electricity and installation of freon and drainage pipes for the air conditioner.
Often in new panel houses you can find cracks in the loggia, plugged with anything. They should be cleaned and filled with polyurethane foam.
It is also important to remove uneven areas on the walls and ceilings, and carefully remove any resulting construction debris.
What material to choose for insulating a loggia in a panel house
Rice. 6. The insulation must reliably protect the loggia from the cold
After the glazing has been installed and the internal surfaces of the loggia have been puttied and waterproofed, the direct insulation process begins. However, before you start work, you need to choose the type of insulation. Your choice should be made based on the following criteria:
- installation location;
- price;
- minimum values of negative temperatures in the region.
At the moment, the most popular insulation materials are penoplex, polystyrene foam and mineral wool.
Penoplex
Rice. 7. Penoplex
Penoplex is extruded polystyrene foam that is not afraid of dampness and has a high level of density. The main characteristics of this material also include its excellent thermal insulation qualities and minimal cost. Penoplex is easily cut into sheets of the required size. To do this, it is enough to use the most ordinary knife. A special feature of penoplex insulation is that there is no need to install an additional frame. The high density of this insulation allows it to withstand heavy weight without breaking or deforming.
Styrofoam
Rice. 8. Foam
Foam plastic, like penoplex, is characterized by its heat-insulating qualities and lightness. The main difference between this material and penoplex is a higher level of density. That is why polystyrene foam is most often used to insulate loggia walls. It is necessary to fill the frame. However, it is not recommended to use polystyrene foam directly under the finishing floor covering. Under the weight of furniture and people, this insulation can quite quickly crumble and become unusable.
Mineral wool
Rice. 9. Insulation with mineral wool
Mineral wool is an absolutely harmless material that minimizes heat loss. This material does not emit toxic substances and is not afraid of fire, creating a cozy and comfortable atmosphere in the room. Mineral wool is also distinguished by its noise-absorbing properties and the ability to be used for insulating not only floors, but also walls and ceilings.
Choice of insulation
Before choosing insulation, you should first decide how the loggia will be insulated. This is due to the fact that some types of work require the use of a certain category of insulation. Therefore, below are the most alternative types of thermal insulators offered on the modern construction market:
- Mineral wool.
- Expanded polystyrene.
- Extruded polystyrene foam.
- PVC foam.
- Polyurethane foam.
- Polyurethane mastic.
- Bulk expanded clay
- Polyuria (polyurea).
Related article: How to properly caulk a log house
The main coefficients regulating the composition of thermal insulators are considered to be 3 characteristics:
- Density.
- Thermal conductivity.
- Vapor permeability.
The table below shows the average coefficients of these insulation categories.
| Insulation category | Density coefficient, kg/m3 | Thermal conductivity coefficient, W/(m*C) | Vapor permeability coefficient, mg/(m*h*Pa) |
| Mineral wool | 50 — 200 | 0,048 – 0,070 | 0,49 – 060 |
| Expanded polystyrene | 33 — 150 | 0,031 – 0,05 | 0,13 – 0,05 |
| Extruded polystyrene foam | 45 | 0,036 | 0,013 |
| PVC foam | 125 | 0,052 | 0,23 |
| Polyurethane foam | 30 — 80 | 0,020 – 0,041 | 0,0 – 0,05 |
| Polyurethane foam mastic | 1400 | 0,25 | 0,00023 |
| Expanded clay (bulk) | 250 — 800 | 0,10 – 0,18 | 0,50 – 0,70 |
| Polyuria (urea) | 1100 | 0,21 | 0,00023 |
Insulation of walls and floors of balconies in a panel house
The wall is insulated in almost the same way as the ceiling. The instructions differ only in that polystyrene foam options can be attached directly to the balcony frame using special dowels. No additional sheathing is needed. The space between the balcony and the adjoining room is also insulated. If this is not done, the apartment will lose heat. Then you need to treat the floor. There are 2 ways: simply put insulation or a “warm floor” system. In the first case, the step-by-step process includes:
- frame assembly;
- installation of insulation;
- floor covering.
In the second, it is necessary to install an electrical or water system. Electric heated floors can be installed in several ways:
- infrared film;
- heating mats;
- cable insulation.
For underfloor heating systems, it is necessary to make a cement screed. The insulation is placed underneath.
Rice. 9. Insulation of walls and floors on the balcony
General thermal insulation scheme
If the glazing with the profile was done correctly (it does not matter whether it is cold aluminum or we are talking about warm plastic double-glazed windows), then it is worth thinking about such work as the interior decoration of the loggia with your own hands, the main stage of which is insulation.
The insulation process is carried out using various materials, but most often - inexpensive and unpretentious penoplex.
Main stages of insulation
Stages of insulating a balcony or loggia from the inside:
Polyurethane foam is the best sealant for waterproofing
- It is necessary to repair with your own hands all the cracks and microcracks that could remain after the glazing. This is especially true in cases where there are plastic frames. This can be done using any sealing material; the best option is ordinary polyurethane foam. If the gaps are very large, then first they must be filled with some material, for example, plywood. And only then fill it with foam;
- Complete waterproofing of the entire internal surface of the room. For such work, you can use either roll or liquid materials. For example, in the first case you can take roofing material, in the second - penetron. Rolled ones are fixed with an overlap, directly to the base. Liquid ones are applied with your own hands with a brush or the same roller, but always on an already moistened surface. Good waterproofing is especially important in cases where the loggia is located in a panel house;
- One by one it will be necessary to insulate the walls, ceiling and floor on the balcony. This will be discussed in more detail below;
- Arranging a vapor barrier with your own hands using penofol
- Finishing of ceilings and walls with decorative materials;
- Flooring - your choice: laminate, linoleum, parquet. Or simply and angrily: a sheet of plywood, edged boards. An example of a waterproofing device on a balcony
In the diagram above, an "expansion joint" may be an issue. It is also called deformation. It is done in a concrete screed to prevent cracking.
Ways and methods of insulating a balcony
The method and method of insulation depends on how such premises are planned to be used in the future. For example, if the room will be used exclusively for drying clothes and storing various canned fruits and vegetables, the loggia can only be insulated in one layer and not even the entire one, but only the parapet.
An example diagram of a balcony insulation device
Cool storage and drying is important. Such a loggia can generally be used as a refrigerator in winter.
From the author: “I have 2 balconies in my apartment, one of them has an aluminum frame and 1 layer of insulation. The temperature was minus 18-20 on the street - it was +8 on the balcony.”
Foam plastic is usually used to insulate the walls of facades, but balconies can also be
used. If the loggia is used as a living room, then one layer cannot be used. It will be necessary to install two layers of insulation and make sheathing. In this case, great attention should be paid to places that are not glazed: fencing, parapet.
If the room is combined with a room, then on the parapet side the insulation is double, but on the walls, ceiling, and floor - single. In general, if people will often be in the room, you need to insulate with at least two layers, no, one will be enough.
Result
The purpose of insulation is to turn the room into a full-fledged room with favorable living conditions.
- The insulated loggia can be used as a room. The room maintains a comfortable temperature during the cold season.
- An insulated balcony cannot be called a room. Even with the most high-tech materials, it will not be possible to achieve the optimal temperature. It is not suitable for living during the winter months.
Insulating a loggia is a good way to get additional square meters of housing. Insulating balconies in most cases is a waste of money.
Important points
If you insulate your balcony, you will be able to not only expand the living space of your apartment relatively cheaply, but also significantly reduce heat loss from your home. The fact is that it is through the balconies that most of the heat escapes. But in order for everything to be done efficiently, you need to know where to start. With a well-designed scheme, turning a cold balcony into a small, but almost full-fledged room will be much easier.
Comfortable insulated balcony as an extension of the apartment
So, first sketch out a rough work plan - it will include:
- preparation and selection of insulation;
- glazing;
- isolation;
- finishing;
- arrangement of an additional source of thermal energy (if necessary).
Cleaning the loggia
Rice. 3. Cleaning the loggia is an important stage of the insulation process
Before installing thermal insulation material, it is necessary to pay attention to the preparation of internal surfaces. There should be no traces of the old finishing on the loggia
First of all, it is worth focusing on removing crumbling, bubbling and flaking fragments of whitewash, plaster and paint.
In addition, it is necessary to clear the room of old things and everything unnecessary that has accumulated over the years. For ease of insulation, it is recommended to remove the shelves, trim and everything that was not included in the initial configuration of the loggia.
What can be done?
There are several ways to eliminate heat loss through a loggia. First of all, it is necessary to make glazing. After this, experts recommend performing thermal insulation, because the reinforced concrete slabs from which panel buildings are built have high thermal conductivity, which leads to inevitable heat loss.
To give the loggia an aesthetic appearance after insulation, interior finishing will be required. In principle, these steps will be enough to achieve the goal, but some owners additionally spend on the loggia and heating.
Strengthening the balcony slab in Khrushchev
A combined method of attaching a balcony slab to the facade of a building.
The photo shows an option for repairing a balcony slab in a Khrushchev-era building. According to the project, the platform is attached to the brick building using the clamping method. Beams loaded with solid brick are used as pressing supports. To restore the integrity of the balcony slab and increase the load-carrying capacity, a combined method of fixing the platform and railings to the walls of the house was used. That is, a technique typical for beam and suspended systems was used.
Due to the unsatisfactory condition of the structural elements of the balcony and the height of their placement, the work was carried out from scaffolding. Since the design has standard dimensions, the parts used were manufactured in advance.
Photo of a reinforced balcony slab in Khrushchev and elements of the balcony.
Strengthening the balcony slab is carried out using the following technology:
- The unreliable railing is being dismantled.
- The reinforced concrete slab is cleaned from destruction and corrosive wear.
- In the end part, where the platform is attached to the wall, niches are cut out for installing channel-type beams.
- Channel No. 10 is inserted onto the protruding longitudinal part of the slab, beams are inserted into the niches, and all the elements of the resulting reinforcing belt are welded together.
- A fence made of a round metal rod with a diameter of 10 mm and a square profile measuring 20 X 20 mm, a strip of 30 X 3 mm and a corner of 30 X 30 mm is attached to the channels.
- Metal gussets are attached to the brick wall with 12 x 200 mm anchors and welded to the lower outer corners of the railings and channels.
- The scarves are connected to hangers made of rods with a cross-section of 30 mm.
- A metal sheet 3 mm thick is attached to the reinforcing belt from the bottom of the slab.
- The floor covering is restored using a screed. In cases of severe wear of the site reinforcement, additional laying of reinforcing rods is carried out, followed by pouring concrete.
- All metal parts of the new product are cleaned of rust, degreased, primed and covered with an anti-corrosion coating.
Many houses have an unheated room such as a balcony or loggia. How to insulate it and make it suitable for normal use in winter will help.
Residents of Khrushchevkas are familiar with the situation of disorder on the scanty balconies that these legendary buildings of the USSR are equipped with. In order to somehow organize it.
The article talks about the technology of covering the ceiling on a balcony with plastic panels, including preparatory work and installation of the ceiling.
We will show you how to arrange cabinets under the parapet on a balcony with a carry-out, mark and attach frame profiles under the sheathing, and sheathe the balcony parapet.
Let's look at an example of how to make a wooden floor on a balcony without extra money, and correctly determine the location of the load-bearing elements.
The balcony slab is the basis of your balcony. The performance properties of the balcony structure depend on its strength characteristics and dimensions. Read a review of balcony glazing technologies with aluminum profiles.
Specifications
Types of balcony slabs, their main parameters and dimensions are regulated by GOST 25697-83.
Balcony slabs are divided into the following types:
- PB – flat solid beams;
- PBK – flat solid cantilever;
- PBR – ribbed cantilever.
Balcony slabs are manufactured in lengths from 1200 mm to 7200 mm, widths from 1200 mm to 1800 mm. Standard dimensions of balcony slabs: length – 3275 mm, width 800 mm.
The thickness of the balcony slab in brick and panel houses or in Khrushchev varies in the range from 150 mm to 220 mm, depending on the type of slab, its size and weight.
A series of balcony slabs consists of several groups of numbers and letters; the series is deciphered as follows: the main group of letters and numbers is the type of slab, the length and width of the slab in decimeters. Additional groups of numbers and letters may indicate the following information: if the balcony slab is equipped with an emergency exit, then indicate which side of the slab it is located on, left or right; class of prestressed reinforcement, type of concrete, if it is light; for heavy concrete indicates the type of finishing of the upper front surface.
- Balcony slabs PB are reinforced concrete hollow-core floor slabs. Dimensions of balcony slab PB 1: product length 3440 mm, product width 1400, product thickness 160 mm.
- In the monolithic version, the balcony slab can be integral with the floor slab.
- The cantilever balcony slab is fastened by pinching it into the wall on one side or two opposite sides. Suitable for buildings with heavy walls, such as brick with reinforced concrete floors.
How to insulate a loggia from the inside: instructions and which areas to pay attention to first
The loggia could well be called an additional room in the apartment, but, unfortunately, many people use it only in the summer, since it initially does not have insulation, and there are no heating radiators installed there.
How to insulate a loggia from the inside
To know how to insulate a loggia from the inside, you need to consider the different methods and materials that are used for this process.
Expert opinion: Afanasyev E.V.
Chief editor of the Stroyday.ru project. Engineer.
It should be noted right away that heating radiators installed in the apartment are prohibited from being taken out onto the balcony or loggia. Therefore, you will have to make do with other options for bringing the loggia to the state of a full-fledged living room using various insulation materials.
Thermal insulation materials used to insulate loggias
If previously the store assortment of insulation materials was small, today they sell quite a large number. This allows you to choose the appropriate one depending on the planned insulation system and the climatic conditions of the region.
Mineral wool
Mineral wool is a traditional time-tested insulation material. It has not lost its popularity today, especially since in recent years this thermal insulator has been modernized and produced in a variety of forms.
Mineral wool remains one of the most effective insulation materials
Mineral wool can be fiberglass, stone and slag. It is produced in mats and rolls with a thickness of 20 to 200 mm and various dimensions. This material is quite flexible, so it is very convenient to work with. In addition, cotton wool is easy to cut with a regular construction knife.
Its very important properties are low heat and sound conductivity, so cotton wool dampens sounds from the outside well and retains internal heat in the room.
However, it must be remembered that when working with this insulation, it is necessary to provide protection for the respiratory tract, eyes, skin of the face and hands from microscopic particles that are separated from the material. You need to be especially careful when working with glass wool, as its unnoticeable particles can penetrate the skin and mucous membranes, irritating them and causing itching. Basalt stone wool is the least harmful to use.
Foamed polystyrene (foam)
Polystyrene foam is also a frequently used material, since it is affordable and holds heat well in rooms, and is also easy to install on relatively flat surfaces.
Ordinary polystyrene foam can be used to insulate a loggia
Polystyrene foam is an excellent insulation and sound insulator, it is light in weight and has a smooth surface, so if installed correctly, it can even be used to level a wall.
The material is available in different thicknesses - from 20 to 200 mm, and it can also have different densities - this allows you to choose the desired option. You need to know that the higher the density of the foam, the worse the thermal insulation qualities, but material with a high density is easier to install and fasten, and it can also withstand heavy loads.
If the foam plastic is covered on top with a denser material, for example, plywood, then it is better to choose insulation with a lower density - it will better retain heat and soundproof the room.
Under the condition that foam plastic must not only insulate, but also level the surface, you need to choose the option with the highest possible density, or even better, use extruded polystyrene foam.
Extruded polystyrene foam
This type of insulation, in its chemical composition, is, in principle, an analogue of conventional foam plastic, but a completely different technology is used in its production. It is made using the extrusion method, which helps to achieve high density of the material. This type of insulation is often used to cover bulk floors, and it levels and holds the surface well. Unlike ordinary foam, extruded foam is almost not subject to deformation under mechanical stress - even when walking on it, it does not sag, so it is often used for the top floor covering.
Extruded polystyrene foam is much more practical and reliable than polystyrene foam
EPS is produced in different thicknesses, and sheets having 20 mm or more usually have a special tongue to connect the panels into a single plane without gaps.
This material can be cut with a construction knife; thanks to the locking part, it is easy to install; the sheets are usually fastened together using “liquid nails” or polyurethane foam.
The advantage of expanded polystyrene over conventional foam is not only its density, but also its low flammability.
It must be said that this material is quite expensive in price, but for the floor of the loggia you need very little of it, so you can afford it.
Polyethylene foam
This material is produced in mats and rolls. It can have different thicknesses - the thinnest rolled polyethylene foam of 2 mm is used for lining under the laminate, and the thickest, up to 20 mm, is used as an independent insulation or in combination with other materials.
Roll of foil polyethylene foam
The most effective is polyethylene foam that has a foil coating (it is also called a heat reflector), since it is truly capable of reflecting heat flow in the desired direction - into the room, keeping it indoors. In order for the material to work correctly, it is installed or laid with the foil side towards the room.
Polyethylene foam in mats is also used to insulate walls and floors, but less frequently than rolled material. It is mainly used to make rugs of different thicknesses for sports and children's games.
Liquid thermal insulation
“AKTERM Concrete”
- ideal thermal insulation for balconies and loggias.
The ultra-thin seamless coating not only acts as an effective thermal barrier, but also protects the walls from freezing, condensation, mildew and mold. “AKTERM Concrete” - energy-efficient liquid thermal insulation
Ultra-thin liquid thermal insulation “AKTERM” consists of silicone and ceramic microspheres in a high-quality binder. The finishing coating has a durable and elastic base and has minimal thermal conductivity.
The operating principle of “AKTERM Concrete” is to effectively reflect heat from the surface of the applied coating, this makes liquid thermal insulation effective not only for protecting walls and slopes, but also for installing heated floors
on the loggia. The heat generated by the heating elements of the mats will be reflected from the “AKTERM” coating and dissipated in the room, and not in the thickness of the screed. The use of liquid thermal insulation when installing heated floors on the balcony and in other rooms allows you to reduce heat loss and minimize energy costs.
On a note! You can maximize the efficiency of heating radiators in a house or apartment by applying “AKTERM Concrete” to the wall directly behind the heating device . Thermal energy will be shielded from the insulating coating and returned to the room, rather than being wasted on heating the walls.
“AKTERM Concrete” is suitable for external and internal work - insulation of floors, walls, ceilings,
slopes of door and window balcony frames
.
The use of AKTERM Concrete coating is also advisable for the purpose of reducing heat loss through window slopes.
A comfortable temperature in the house will be maintained in any season of the year. The operating range of the thermal coating is -60°C to +150°C.
Liquid thermal insulation is used to protect various surfaces, including “breathable” ones, such as brick, foam block, concrete, wood.
By the way! Thermal insulation “AKTERM Beton” is not flammable, it belongs to the fire hazard class KM1 according to GOST 30244-94.
White liquid thermal insulation can be used as an independent stylish finishing coating or as a base for wallpaper. In addition, “AKTERM Concrete” thermal insulation can be tinted in light colors or, after drying, painted with water-dispersion paints.
The insulation of the loggia is carried out in 3 simple stages.
Stage 1.
Preparing the base.
- Thorough cleaning of treated surfaces. It is important to dismantle all peeling and crumbling fragments, remove any remaining debris, and remove dust from the surfaces with compressed air or any other available method.
- Grease stains and traces of corrosion from metal surfaces must be cleaned. Particular attention should be paid to existing joints, corners and recesses.
- In order to improve adhesion, it is recommended to apply acrylic primer to insulated surfaces in 1-2 layers.
Brick wall prepared for application of liquid thermal insulation “AKTERM Concrete”
Stage 2.
Preparation of liquid thermal insulation for application. “AKTERM Concrete” is supplied in convenient plastic containers. The composition is completely ready for use under a spatula.
If you plan to apply the composition with a brush, roller or spray, you must add clean water in an amount of 5-8% of the total volume to an open bucket and mix the composition manually or with a construction mixer at low speeds (no more than 200 rpm) until a homogeneous creamy mass .
Liquid thermal insulation in a convenient plastic container
On a note! Unlike liquid thermal insulation from other manufacturers, “AKTERM Concrete” does not need to be mixed every 5 minutes; the consistency of the thermal paint is consistently uniform.
To treat hard-to-reach areas, it is advisable to use a narrow brush
Stage 3.
Direct application of liquid thermal insulation is carried out with an airless sprayer, a paint roller, a spatula or a brush with soft bristles on dry surfaces at a temperature within +7...+45°C. The composition is applied in layers.
Important! It is prohibited to apply “AKTERM Concrete” to icy and wet surfaces, over a wet primer, or to unprotected surfaces before precipitation.
An energy-efficient, seamless coating that prevents the appearance of condensation and mold colonies on walls.
Correctly applied protective coating is uniform, without dents or drips.
The recommended thickness of one layer is 1 mm, the optimal thickness of the heat-insulating layer is 1.5-2 mm. The material consumption per 1 square meter is 1 liter with a layer thickness of 1 mm.
The time for complete polymerization of the coating depends on the thickness of the applied layer and the air temperature. At t +23° C ... +35° C, a layer 1 mm thick dries in only 12 hours.
After the thermal insulation has completely dried, the surface can be finished using any of the methods listed above.
The tool is cleaned with running water after use.
“AKTERM Concrete” is an aesthetic, UV-resistant, durable thermal insulation coating with a service life of at least 12 years, which does not weigh down the structure and allows you to save the usable area of the loggia. Liquid thermal insulation is absolutely safe for people and pets, is not a source of dust, and is therefore recommended for insulating both ordinary balconies and loggias combined with living rooms.
Prices for thermal insulation materials
Thermal insulation materials
Preparing the loggia for insulation work
Before repairs begin, the loggia may have an absolutely unsightly appearance.
Expert opinion: Afanasyev E.V.
Chief editor of the Stroyday.ru project. Engineer.
You can decide on insulation only after the insulation method has been chosen, but before talking about its methods, you need to know how to prepare the room for further processes. Whatever thermal insulation technology is chosen, the preparation of the loggia is the same. It must be carried out so that through cracks and crevices moisture cannot penetrate under the insulation, which will then begin to deteriorate, lose its properties, and its functionality will come to naught, which means that all the work will be done in vain. Therefore, you should not neglect preparatory activities or skimp on them.
The preparation of walls, ceiling and floor takes place in a certain sequence.
1. The first step is to clean the surfaces from cement build-ups, old paint and other protruding elements that will interfere with further work. Be sure to remove weak peeling or crumbling areas to “healthy” concrete.
2. Then a thorough cleaning of dust and debris from the floor surface is carried out. Dust must be collected with a vacuum cleaner, as it is necessary to identify cracks of various sizes in slabs and walls.
3. After cleaning, you can proceed to work on sealing various types of holes, cracks at the joints of slabs and small cracks.
- Large and small cracks are widened, cleaned, if necessary, moistened with water and filled with sealant or cement repair mortar.
Sealing cracks with sealant
- The gaps between the plates also need to be widened, sprayed with water from a spray bottle and filled with polyurethane foam.
All seams and cracks must be sealed with foam.
- In addition to these flaws, potholes and chips may be found in concrete slabs - these also need to be repaired. They will not interfere with the evenness of the fastenings, but condensation may collect in them due to temperature changes. To level them with the general surface, a cement mortar with an additive of PVA glue is suitable.
4. After all repaired damage has dried, excess hardened foam and sealant are cut off, and then all surfaces are coated with primer. This composition will strengthen the surface and protect against mold.
Surface waterproofing
Next, it is necessary to carry out waterproofing work on the floor and the lower part of the walls, to the height to which the finishing floor covering will be raised.
Waterproofing is carried out in different ways, and from them you can choose the one that is acceptable for execution:
- Laying rolled waterproofing materials - roofing felt is most often chosen for this. It is glued onto bitumen mastic heated by a burner. Today, an improved roofing material is produced, which has higher elasticity and its own adhesive layer of mastic, which is also heated by a burner.
"Hot" laying of roofing felt
- Impregnation with special penetrating compounds - this type of material is used on concrete surfaces. If the floors are covered with tiles, then this method of waterproofing will not work.
This type of waterproofing is applied in several layers, each of which penetrates a considerable depth into the thickness of the slab, crystallizing inside and closing all the small pores in the concrete.
Apply the composition to floors and walls very carefully, wearing gloves, to avoid getting burned.
- For a tiled floor, covering the floor with liquid rubber is suitable, which is applied with a wide brush on narrow surfaces and with a roller on large surfaces. To do this, sometimes the composition is poured into separate puddles and distributed with a roller.
The applied liquids, when dry, form a film on the floor and walls that will reliably protect the loggia slab from the penetration of moisture from the outside.
- Another way to waterproof concrete surfaces is with waterproof plaster mixtures. They are applied with a brush or spatula, leveling them on the surface.
- The “folk method” can be called covering the floor and walls with thick oil paint. This method is better suited for tiled walls, since a concrete surface poorly prepared for paint will quickly absorb it.
For concrete surfaces, you can use special acrylic-latex based paints.
- An affordable method of waterproofing is laying thick polyethylene film. It is laid on the floor, extending onto the walls, to the height of the future floor. It is very important to correctly lay the material in the corners of the loggia - this must be done in such a way that the film forms a kind of container that will protect the insulation. The film is secured to the walls with construction tape.
Any of these methods will protect against moisture penetration into the loggia room, and therefore against the risk of black mold, which is very difficult to combat.
How to insulate a loggia from the inside - installation work
After the waterproofing has completely dried, you can proceed directly to the insulation process.
Insulating a loggia using lathing on the walls, ceiling and floor is the most common and, perhaps, convenient method today. It can be implemented quite simply and quickly if the surfaces of the room and the necessary materials are prepared in advance.
Approximate scheme for insulating a loggia using lathing
Usually, the insulation of a loggia begins from the ceiling, but this can be done from the walls or floor, each master decides for himself, the main thing is to carry out the work with high quality.
Ceiling insulation
- Thermal insulation work on the ceiling is carried out in different ways, depending on the selected insulation. But first, it is best to attach thin polyethylene foam with a foil surface to its entire surface - this will become a good substrate for the sheathing and a layer of main insulation.
Before attaching the sheathing, it is advisable to immediately lay a layer of foil insulation.
The polyethylene foam is secured with double-sided construction tape or with universal Moment adhesive - it is distributed pointwise on the ceiling, and the insulation is pressed on top. A sheet of polyethylene foam must be folded onto the walls by 150 ÷ 200 mm - this bend will become an additional insulator for the joints of the ceiling and walls.
Since the sheathing will then be installed on this layer of insulation, it must be secured so that it will hold up until it is installed.
- Next, a sheathing is mounted on top of the insulating material. It can be made from a wooden block or galvanized metal profile, which is usually used for plasterboard structures.
Both one and the other lathing are well suited for laying mineral wool or foam plastic between its elements. The sheathing elements are fastened at a distance from each other equal to the width of the insulation, so that it fits tightly between them. When using mineral wool, this interval can be reduced by 30 ÷ 50 mm - this will be even better for the tightest installation.
Laying mats in the cells of the ceiling lathing
- The next step is to install the insulation. Mineral wool is a plastic material, so it fits tightly between the bars. Polystyrene foam has a rigid structure, so sometimes small gaps form between the sheathing elements and the insulation. They must be filled with polyurethane foam to avoid the formation of cold bridges.
Ceiling insulation using foam boards
- The insulation is covered along the sheathing guides with plasterboard sheets or wooden lining.
Durable foam boards can be attached directly to the ceiling surface.
Another method of insulation is to attach extruded polystyrene foam directly to the concrete ceiling.
Dowels “fungi” for fastening insulation
You need to attach the insulation mats to the ceiling with special plastic mushrooms. For these fastenings, holes are drilled through the insulation in the concrete wall, a fungus is installed into it, and then a plastic nail is carefully driven into it.
Insulating the loggia floor
The loggia floor is also insulated in different ways - it can be a dry screed, raising the floor using joists, or simply laying extruded polystyrene foam on concrete. The last method will not give the desired effect, it will simply help make the floor not too cold.
- Insulation using logs is the most widely used and effective method.
The logs can be laid on concrete, or they can be raised to the desired height using various devices - for this, metal holders, studs, adjustable homemade stands are used.
Logs placed on metal U-shaped holders
Metal holders are able to raise the floor guides to a certain height, and if this is enough to solve the insulation problem, then this is a very good option for attaching joists.
If the loggia has a standard width, then it is enough to install three rows of logs.
The holders are attached to the concrete base, then insulation is put on each of them. In combination with such fastenings, one of the types of mineral wool is usually used. A square piece is cut from it, two holes are made in it, through which the insulation is placed on the rack.
To begin with, the insulation is placed near each rack
When all the logs are secured in the holder and aligned horizontally, the main insulation is laid over the entire surface of the floor. Then it is best to lay another layer of mineral wool - it should be raised almost to the level of the joists.
Laying mineral wool slabs between joists
A vapor barrier film is laid on top of the insulation - it is attached to the joists with staples.
Plywood 10 mm thick is screwed onto the joists. All gaps between the wall and plywood are sealed with polyurethane foam. After drying, it is cut off. And a decorative coating is laid on top of the plywood.
Another option would be metal or plastic adjustable stands that can be easily adjusted to the desired height. They are convenient if the floor on the loggia is not completely level, and with the help of stands it will be easy to align the logs strictly horizontally. Using such devices, you can dispense with the leveling screed.
One type of convenient adjustable joist stands
The logs are installed and secured onto the stands, and only then they are placed and screwed to the floor and leveled in height.
The remaining work on placing the insulation and coating is carried out in the same way as installation using metal holders.
If you couldn’t find the stands described above, or their installation seemed too complicated, and you definitely need to raise the floor to the level of the threshold of the balcony door, then a sheathing installed on stands made from the same bars will do.
You can also install logs using a homemade wooden structure
It is much more difficult to install such a structure when the floor is uneven, but it can be done. Such sheathing must be attached to the walls of the loggia.
The rest of the work is carried out in the same way as in the two previous cases.
If you do not plan to arrange an additional room on the balcony, but insulate it so that cold air does not penetrate into the apartment, then there is no need to raise the floor to the threshold level. It is enough that the insulation is laid to the height of the logs, fixed to thin polyethylene foam laid on concrete.
In this case, the logs are drilled through and secured with anchors. Mineral wool or polystyrene foam is laid between the joists and along the walls, covered with a vapor barrier and plywood.
Video - Insulating the loggia floor using logs
- Recently, bulk flooring (dry screed), which consists of fine expanded clay and gypsum fiber boards, has been increasingly used for insulation. If necessary, such a floor is laid in two layers.
One of the options for floor insulation is a bulk “dry” screed.
In order to install such insulation, temporary beacons are installed on the waterproofing material to level the poured mixture over them. In addition, a damper tape is attached to the walls, to the height of the future screed, which will protect the coating from deformation during any temperature changes.
Before backfilling, an elastic damper tape must be installed
Most often, such a floor on a loggia is leveled in parts due to the inconvenience of working in a cramped space. Having leveled one area and covered it with gypsum fiber panels, you can move on to the next. The leveling process must be constantly monitored using a building level.
The slabs begin to be laid from the corner of the loggia, using the grooves available on them, which are coated with “liquid nails” and overlapped on each other, forming a solid coating.
Connecting floor panels made using dry screed technology
When the panels are laid completely, the gaps between them and the walls are filled with polyurethane foam.
The surface turns out to be quite hard, and any decorative coatings can be laid on it, including enhanced insulation with infrared film.
- It is prohibited to install water central heating onto a balcony or loggia, but it is quite possible to organize electric heating of the room. The best and most economical option in this case is to immediately provide for the installation of infrared heating film on the floor.
Film floor heating will help maintain the optimal temperature on the loggia.
The infrared floor film should be laid on a hard, insulated surface. However, if you lay it on a concrete base, then it is impossible to obtain the desired effect from its work. It will function correctly, it is necessary to create the necessary conditions, which are to ensure that the heat from the film is retained and directed towards the loggia, and does not go into the concrete floor and walls.
To do this, the film is laid on an already insulated and leveled floor, under the decorative coating. learn more about the technology for installing film infrared floor heating on the corresponding page of our portal.
Prices for infrared heated floors
Infrared heated floor
Insulation of loggia walls
The process of insulating the walls is carried out in the same sequence as the rest of the surfaces of the loggia room. It can also be done in different ways, using lathing or installing rigid insulation, attaching it to the wall with glue or foam.
Insulation of walls with slabs of extruded polystyrene foam without lathing
- Installing penoplex is quite simple if you prepare the required panels in advance.
An adhesive is applied to the back of the insulation, and the panel is pressed against the wall - this is how all vertical surfaces are covered. For reliability, the panels are fixed using plastic “fungi”
- The most common insulation option is using wall lathing, because using it, you can use any thermal insulation material.
The sheathing is made of bars or metal profiles.
It is recommended, before installing the sheathing, to attach foil polyethylene foam to all surfaces, which will significantly enhance the effectiveness of any insulating material.
Continuous covering of the walls with foil polyethylene will create a kind of “thermos” that effectively retains heat in the loggia room
- A sheathing is attached on top of this substrate. Its guides are located at a distance from each other equal to the width or length of the insulating mats.
Installing wooden sheathing on walls
- Next, the selected thermal insulation material is laid or installed.
Insulation of walls with foam plastic...
...or mineral wool
- It is recommended to cover the insulation with a vapor barrier film, which is secured to wooden blocks with staples, and when using metal sheathing, it can be secured along the upper and lower edges.
Attaching the vapor barrier film
The final stage of insulation is covering the walls with a decorative material, such as lining, or a base for painting or plastering, for example, plasterboard.
Video - Insulating a loggia with extruded polystyrene foam
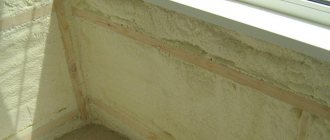
Insulation with polyurethane foam
This method is often used to insulate roofs from the inside and walls from the outside in private homes. But, thanks to the speed and ease of installation, today balconies and loggias are insulated using this method.
A modern method of insulation is spraying polyurethane foam
Polyurethane foam is sprayed onto the walls using special equipment, and specialized companies deal with this insulation.
However, before inviting them to spray such insulation, the walls need to be prepared by lathing them. It will be a kind of frame for the sprayed and expanding heat insulator, as well as for securing decorative finishing material.
The advantage of this method of insulation is that when sprayed, the material, expanding, closes all the cracks, making the surface absolutely not blown, without cold bridges. Polyurethane foam covers not only the walls, but also the ceiling and floor.
Video - How polyurethane foam is sprayed
Loggia design solutions
I would like to show several options for insulated loggias. Perhaps, having started the process of turning a cold room into a useful area, someone will be inspired by one of the ideas developed by the designers.
A small loggia has been transformed into a cozy relaxation area
In this case, a standard loggia with a small footage is presented, transformed into a cozy relaxation room. Here you can retire with a book or laptop and delve into reading. If a large family lives in an apartment, usually each member is doing what they love, and sometimes it is difficult to find a cozy place to sit in silence. An insulated loggia will be an ideal option for this.
In such a room you can place a small TV and enjoy your favorite programs or sit with handicrafts, comfortably placing your feet on a comfortable chair. The main thing is that there is extra space that can serve all family members in turn to do what they love.
An original option - the loggia turns into a stylish bar
This option is suitable for apartments in which the door to the loggia is located in the kitchen. In this case, it can become a dining room, especially since most kitchens in apartments are quite small.
If apartment owners like to frequently host parties, a loggia window sill can easily replace a bar counter.
You can also have a romantic dinner here. The evening city, which offers a wonderful view, and the pleasant summer air will create the necessary mood for this. In winter, it’s nice to sit at the counter, sipping coffee and looking at the wide panorama outside the window.
Glass sliding doors installed between the kitchen and the loggia will help to unite or separate the rooms, depending on the need.
A well-insulated loggia can be combined with a living room
In this version, the loggia was combined with the living room, and the wall, which previously served as a dividing element between the two rooms, became a unifying one, as it was transformed into a comfortable table.
The area of the former loggia in this layout can be used as an office with a comfortable desk, as well as for practicing hobbies when you don’t want anyone to interfere.
And, of course, combining the loggia and the room will increase the total space by opening a large window. The room will be more illuminated, which will help save on electricity.
Additional living space can be adapted for various activities, for example, making a winter garden, workshop or computer room on the loggia. Therefore, if the apartment is equipped with a loggia, but it is not yet insulated, you need to urgently get down to business and expand the area of your home by using a room that is not used functionally.
Video - How a loggia is insulated
Balcony glazing KOPE-M-Parus
In 2003, the KOPE project received a new, modernized version; changes also affected the balconies. Now this architectural form is made in the form of a bay window balcony with floor-to-ceiling glazing. The problem with balcony glazing is the connection of the frames at an angle; the height of the frames reaches 2900 mm. But there is a competent solution to the problem.
H-shaped connecting reinforced profiles are installed between the frames, allowing the structures to be firmly secured to each other along the entire length from floor to ceiling. The best option for glazing a KOPE-M-PARUS balcony are plastic profiles, the frames of which are connected to each other with reinforcing connectors.
Useful tips: how to avoid condensation
Condensation appears more often in the cold season.
The reason for this phenomenon is the temperature difference between inside and outside the room. Condensation also forms when there are a large number of plants that love moisture. Additional sources of moisture influence the increase in the percentage of humidity on the loggia or balcony. If condensation appears after glazing, then the installation was not carried out quite correctly and small gaps remain. To prevent condensation, the following methods are used:
- The easiest way to eliminate condensation is regular ventilation. This is relevant during the demi-season periods. Opening the windows for five minutes several times a day is enough.
- A special vapor barrier will allow you to get rid of condensation. It is attached in front of the insulating layer. Foil or polyethylene film can be used as a vapor barrier material.
- An effective way is to seal joints and seams. Cracks must be sealed with foam.
- The walls that are in contact with the street are insulated. Insulation is used from the inside of the ceiling and floor covering.
- You can install a supply ventilation valve, which will improve air circulation and microclimate in the room.
To perform high-quality thermal insulation, it is worth considering waterproofing
Particular attention should be paid to laying a vapor barrier layer
Insulating walls with your own hands will not only create a more comfortable environment, but will also reduce the noise level in the remaining rooms of the apartment. Choosing a quality material will help to produce excellent thermal insulation for the balcony for many years.
Preparing the loggia for installation of insulation
As before any finishing work, the necessary preparation of internal surfaces should be done before installing insulation. This includes:
- Cleaning walls and ceilings from remnants of old finishing materials.
- Puttying cracks and joints.
- Arrangement of waterproofing.
Cleaning walls and ceilings
Particular attention in this work should be paid if you decide to attach the insulation sheets using an adhesive composition. If the walls or ceiling are covered with smooth oil enamel, it is also advisable to remove it with a scraper. If the paint sticks too tightly, you can use a sanding machine to remove it or make notches on the surface with a construction pick or an old hatchet
If the paint sticks too tightly, you can use a sanding machine to remove it or make notches on the surface with a construction pick or an old hatchet.
Sealing cracks and crevices
The next step is to thoroughly seal all joints and cracks. This will prevent cold winter air from entering the room, which can cause condensation to form between the insulation layer and the wall. And this, in turn, leads to the appearance of mold and mildew.
To seal small cracks, you can use ready-made putties or dry putty mixtures, the choice of which is quite large in any construction supermarket. Large gaps can be sealed with polyurethane foam or cement mortar (plaster or concrete).
Waterproofing device
Waterproofing is another important stage in preparing internal surfaces for installation of insulation. Its purpose is to protect the loggia from the penetration of moisture from the outside through the smallest pores of concrete or brick. And this, again, is the accumulation of moisture under the insulation, mold and mildew.
For waterproofing, you can use roll materials based on bitumen. This is the well-known roofing material and its modern derivatives. Sheets of roofing felt using special bitumen mastics are used to cover the internal surfaces of the external walls, the upper and lower concrete slabs, that is, the floor and ceiling of the future room. The joints of the roofing felt sheets should overlap and be well coated with glue or mastic.
For the same purposes, you can use special liquid mastics on a bitumen or polymer base, which, after being applied to the wall surface, harden, forming a moisture-proof film. These mastics are applied using a brush or roller.
Surface waterproofing
At the next stage, you need to protect the floor and lower part of the walls from water. The walls must be waterproofed to the height of the final floor installation.
There are several main methods of waterproofing:
- Covering the floor with roll materials that do not allow moisture to pass through, for example roofing felt, which is hot glued onto bitumen mastic. Currently, there are roofing felt with a prepared glued mastic layer, which is heated with a burner.
- Penetrating waterproofing is a special composition for impregnating concrete. If you are going to lay tiles on the floor, then this method is not suitable. The effect of such protection against moisture is based on the fact that it penetrates the cellular structure of concrete and forms crystals that fill the pores of the material from the inside. The crystals become part of the concrete, compacting its structure and preventing water penetration. Since the composition is very toxic, it must be applied extremely carefully, protecting exposed skin, otherwise you may get burned.
- For tiles, it is recommended to use liquid rubber - a two-component mastic that is cold applied and quickly hardens. It is applied with a roller or wide brush. As liquid rubber hardens, it forms a kind of thin, moisture-proof film on the floor and walls.
- Waterproof plaster mixture, which is applied with a wide brush, or, if necessary, with a spatula of a suitable size.
- An inexpensive method is thick oil paint, which is easy to apply and hides minor flaws, but is quickly absorbed by concrete, which increases its consumption
- A time-tested method is to cover the floor with thick plastic film, making sure that it completely covers the height of the future floor and fits correctly in the corners. The film should form something like a bowl that will protect the insulation. Secure it with construction tape or liquid nails.
You can choose any method based on your preferences and budget. All of them perform their main function - they do not allow water to penetrate into the room, and therefore reduce the likelihood of black mold, which is very difficult to fight.
Is there any benefit to insulating a balcony?
Insulation work is not always strictly contraindicated. It is carried out in premises in need of repair. Clogging the cracks helps get rid of drafts in the apartment.
Insulation will help solve the problem of organizing space on the balcony and give it an aesthetic appearance.
Experts recommend abandoning balcony insulation in favor of conventional repairs. This will save money and improve the room.
It is better to abandon the idea of insulation and turn the balcony into a utility room or storage room for storing tools and household items. In the warm season, you can create a place to relax on the balcony by placing a coffee table and chair. During the winter months, it is convenient to use the balcony as a refrigeration room to keep food fresh.
Finishing features
In most cases, balconies are lined from the inside with clapboard or profile, but plasterboard is also used, followed by wallpapering. PVC panels are also used for cladding. As for the exterior finishing, it is better to entrust it to professionals, especially if your apartment is located higher than on the ground floor.
Interior decoration of balcony walls with clapboard
Balcony finishing with plastic panels
The process of finishing a balcony with plasterboard
You can also install an outlet on the balcony to which an electric heater will be connected. The described room is small, so heating will take a minimum of time. We also note that the double-glazed window weighs quite a lot, so the remaining materials (including the insulator itself) must be of minimal weight. By the way, this is another reason why it is better to give preference to EPS or foam boards.
The photo shows a socket and a connected heater
Video - Instructions for insulating a balcony
Now you know about the strengths and weaknesses of materials suitable for insulating a balcony, as well as the technologies for laying polystyrene foam and expanded clay. Therefore, it's time to get to work! Moreover, there is nothing complicated here if you are armed with step-by-step instructions and all the necessary materials. If you do everything correctly, you will turn the balcony into a full-fledged living room with all the ensuing advantages.
Insulation of the ceiling of a balcony in a panel house
Insulating the ceiling of a balcony in a panel house is an important stage of thermal insulation work. To do everything right, you should ensure the circulation of warm air in the room. To do this, you need to provide steam and heat insulation. As you know, warm air rises. To keep it indoors, a frame is mounted on the ceiling into which polystyrene foam or mineral wool is inserted.
A vapor barrier film is installed on the upper part of the frame, which is adjacent to the interfloor ceiling. It will not allow condensation to penetrate the insulation and ruin the repair. To make the structure as light as possible, any film vapor barrier is used. The material used to insulate the floor and walls is suitable as insulation.
The final stage is insulating the joints. Along the entire perimeter of the frame, the seam adjacent to the wall must be treated with sealant. It is enough to use the tape version. Avoid using silicone or acrylic, as both options are only suitable for treating plastic surfaces.
The frame with insulation can be sheathed with panels, a suspended or suspended ceiling can be made, or it can be covered with clapboard.
Rice. 8. Ceiling insulation option
Types of balconies
Balconies are as varied in appearance, internal layout, functionality, and insulation as the houses to which they belong. The glazed balcony also has its own varieties.
An elegant glass balcony along its entire perimeter and height is called a French balcony. Such balconies are installed in private buildings or special buildings. As a rule, they are not insulated; they serve as an excellent decoration for the home.
Panoramic glazed balconies can be classified as semi-warm, because the large area of the glazed surface is not able to retain heat. Such balconies, like stained glass ones, serve more the aesthetics and design of the house. A warm balcony maintains room temperature, and often such balconies are connected to the room or kitchen of the apartment.
A cold balcony usually looks like a warm one in appearance, but there is no heat inside, and therefore its arrangement can be much cheaper than other options. There are also balconies of the “bay window” type, but they often serve a decorative role and can increase the illumination of the room to which they are attached.
Glazing at Windows of the 21st Century Corporation
The 21st Century Windows Corporation has many years of positive experience in glazing houses of almost all series, including P-44, P-44T, P-3, P-3m, P-46 and many others.
You can be sure that:
- all work will be done professionally
- After installation you will not have any problems with operation
It is worth considering that even in standard houses the size and configuration of balconies may differ from those shown on our website. Therefore, it would be more correct to use the services of a professional measurer, who, moreover, will calculate the exact cost of your order.
You can call a surveyor and order standard glazing by contacting our company by phone-1 or visiting our nearest office in Moscow.
Stage 5. Insulate the ceiling
This procedure is also performed using a similar technology, but some differences still occur.
- First, make a marking along which the hangers for attaching the guides will be installed.
- Install the hangers themselves necessary to fix the guides (for the latter, use a galvanized profile or timber).
- In appropriate places, cut small holes in the insulator (foam or EPS) for hangers.
- Next, secure the insulation boards using the same mounting foam.
If the insulation weighs too much, you can use dowels for fastening. Blow out the cracks with foam. Otherwise there are no significant differences.
Decorative ceiling on top of insulation
Features of insulation in an old house
Thermal insulation work in buildings of the 50-70s of the last century has certain features. The minimum area of balconies limits the choice of materials. The remote structure is adjacent to the main building on only one side; on the other three, except for metal fencing, the project did not provide for anything for the construction of buildings.
To decide how to insulate a balcony in a Khrushchev-era building, you need to have an idea of the year of construction, the material of the walls and the actual wear and tear of the load-bearing structures. The quality of construction work was low; strict standards were not followed in the production of reinforced concrete products. There are official statistics that up to 90% of cases of collapse of building parts and balcony slabs are recorded in old housing stock.
The balcony slabs were designed only for the load of two to three people. The low strength of the slab often interferes with the thermal insulation of balcony rooms. In the Housing Code, glazing, without which it is impossible to insulate a Khrushchev-era balcony, is considered as a redevelopment. It must be agreed upon and permission obtained.
The modest size of the room dictates a careful choice of material for thermal insulation. “Native” balcony railings are usually made of rods or covered on top with a slate screen. The quality of the joints does not provide airtightness from external precipitation. Hygroscopic mineral wool will not work here.
The latter type of insulation with a layer thickness of 1 cm cannot guarantee the preservation of the room temperature if there is a faulty shutdown of the heating in the house. Thermal insulation material is combined with other types of insulation of balconies for the comfort of home occupants. In most cases, the choice is in favor of penoplex.
Installation work on the top floors will be difficult to perform if there is no canopy over the balcony. Without skills, a climbing kit, and electric welding, it is impossible to complete the entire cycle of work with your own hands. Work of increased difficulty is considered to be strengthening the balcony parapet before installing a frame made of multi-chamber double-glazed windows. Here we need professional installers for a full cycle of work on balcony insulation.
If you think about the type of insulation and sheathing, calculate the volume of work, purchase materials and fasteners in advance, two or three days off and good weather will be enough. The result will please family members and improve living conditions. Redistributing costs instead of paying craftsmen for insulation work will allow you to use finances for other purposes
Common mistakes when insulating a balcony
As you can see, there is nothing complicated about thermal insulation of a balcony. The main thing is to avoid common mistakes that are made when insulating yourself.
- Don't stop halfway. It often happens that the owner limits himself to installing good windows and sealing cracks, without paying due attention to the insulation of the parapet and other surfaces. As a result, the effect of such thermal insulation is visible only in electricity bills from the operation of an electric heater.
- Violation of technology and the use of low-quality materials can create cold bridges that lead to heat leaks from the room.
And the last point - do not neglect heating. Without it, the balcony will never be truly warm and comfortable.
Features of glazing design in Khrushchev
At this stage, the accuracy of measurements and calculations is very important. All elements of the future structure must precisely take their places and withstand the load intended for them.
At the same time, the glazing along with additional elements should not be too heavy so as not to exceed the strength of the balcony.
Calculating the weight of frames, double-glazed windows, support frames, and assessing the load-bearing capacity of basic balcony structures require special knowledge and high qualifications. Trying to do this work yourself can lead to irreparable consequences.
Professionalism in this matter is a prerequisite for safety, not just quality.
Frameless glazing
Frameless glazing seems beautiful and modern, and also takes up minimal space. But. This is single glazing, which in winter will turn the loggia into a branch of the refrigerator, and frost will penetrate into the cracks between the frames. Therefore, this option should be discarded immediately. Double glazing only. Plastic windows with double-glazed windows and hinged sashes will be the right solution. In addition, they do not take up much space, they are easy to clean, and you can install mosquito nets in them. But if you still don’t like plastic windows, you can look at new technologies: these are lift-and-slide windows with thermal insulation.
Ceiling insulation
If you are planning to insulate a balcony with your own hands, then it is best to start from the ceiling and move further from top to bottom. Of course, if the ceiling of your loggia is the floor of your neighbors, then the process of protecting the room from frost and wind is much simpler. However, if the roof is independent, then a little effort should be made to insulate it.
To best protect your balcony from cold and wind, we recommend performing the work in the following sequence:
- Spraying or special film for sound insulation.
- Waterproofing the ceiling on the balcony. In this case, the most popular materials are polyvinyl chloride or polyester.
- A special membrane that protects from wind. It freely allows steam to pass through, which is released from the insulation, but helps to completely isolate the ceiling from wind and drops that can enter the room along with it.
- Anti-condensation material that protects the insulation from the formation of water droplets.
- Frame (metal or wood of your choice). The sheathing is an optional element. The insulation can be installed using special glue. The main thing is to make sure that the mixture does not contain toluene. For greater reliability when fastening sheets, use dowels.
- Insulation for balcony ceiling. We recommend that you use polystyrene foam, polystyrene foam or mineral wool. They provide good protection from the cold and are easy to install, which is especially important when insulating a balcony ceiling.
- Vapor barrier for insulation. It does not allow water vapor to pass inside, which significantly increases the thermal insulation properties of the material.
First option: KNOW HOW from DEVI
This is the “Devicell Dry” system - it allows you to dry install a heating cable under a specialized laminated parquet board. This system has huge advantages, namely:
- You can start using heated floors immediately after installation, rather than waiting a whole month, as in the version with a screed;
- the load on the loggia floor (floor) is lightened by 2-3 times (depending on the covered floor area of the loggia);
- installation is carried out within one working day;
- installation can be carried out at any negative ambient temperature, which cannot be allowed in the version with a screed.
Insulation scheme for a balcony/loggia
- Glazing of a balcony/loggia
- Balcony/loggia wall
- Thermal insulation PENOPLEX COMFORT
- Vapor barrier
- Lathing
- Finishing the walls (plastic panels or moisture-resistant plasterboard)
- Fastening element
- Screed for finishing the floor
- Finishing the floor
- Floor of the balcony/loggia.
The sequence of insulating a loggia using PENOPLEX COMFORT
- Window units are being installed. The optimal means of sealing seams is PENOPLEXFASTFIX polyurethane foam.
- PENOPLEX COMFORT boards are attached with polyurethane adhesive PENOPLEXFASTFIX, which is also used to process joints between structures.
- The vapor barrier is attached - foil-coated polyethylene film - using double-sided tape. The vapor barrier is installed end-to-end, and the joint between the panels and the structures is glued with metal tape.
- We install the balcony floor.
In the photo - insulation of the loggia with PENOPLEX slabs in the apartment of actress Marina Dyuzheva
How to insulate a loggia to keep it warm in winter.
The main distinguishing feature of loggias is their ability to become an extension of the living space. There are two methods by which you can properly insulate a loggia. This is to turn this area into a continuation of the living space and insulate the loggia as a separate room. To insulate the loggia and turn it into a living area, as an extension of the room, it is necessary to first glaze it. To do this, you need to contact one of the companies that installs PVC double-glazed windows on windows.
After this, they connect the living space and the loggia by dismantling a small piece of the wall and obtaining a passage in the form of a large arch. We must not forget about diverting the heating battery to the side. Then the floors are leveled, the expanded area is insulated and finished, and electric lighting devices are installed. Thus, the room turns into a full-fledged living space. A more complex option is to insulate the loggia, turning it into a separate living room.
This work should also begin with the installation of double-glazed windows; you can do such work yourself if you are a specialist in the installation of PVC glass blocks. If you do not have experience in such installation, then you need to learn practice from specialists involved in the sale and installation of plastic windows. After installing the double-glazed windows, you can proceed to insulating the loggia with your own hands, using step-by-step instructions:
- To do this, the area of the room is thoroughly cleaned of debris and dirt.
- Double-glazed windows and mechanisms are covered to prevent damage and all kinds of scratches.
- Next, you can begin arranging the ceiling; for this, a waterproofing cellophane film is fixed to the surface using an adhesive mass; you can also use a special primer paint.
- Then electrical wiring is made in special plastic hoses with points for sockets and lighting.
- After this, a regular lathing made of wood or special metal profiles is installed on the ceiling.
- Now you can install the ceiling structure. The most suitable materials for thermal insulation are sheets of foam or mineral wool. They are fixed in the sheathing, bringing out the wires for lighting fixtures, if any are provided.
- The final work with the ceiling is the installation of plasterboard sheets; you can also use plastic or wooden panels.
The final work with the ceiling is the installation of plasterboard sheets; you can also use plastic or wooden panels.
You should not forget about electrical sockets, the wiring of which must be brought to the surface. Next, we begin to improve the flooring. To do this, we place wooden logs on top of the previously laid insulating cellophane film and lay slabs of insulating material, then lay wooden boards or chipboards on top. At this point, the main work on finishing the insulated loggia can be considered completed.
Finally, linoleum or other finishing is laid on the floor surface.
We can say that the work carried out to insulate a loggia in a panel house is identical. The only additions at the initial stage are drilling holes at a slope towards the street to create ventilation under the surface of the insulation if polystyrene was used.
It is worth remembering that there is another technology for insulating a loggia in a panel house. Such work can be done by insulating the external loggia, but for this you will need to contact professional industrial climbers, and this is quite expensive.
Material characteristics
When choosing sheets for balcony insulation, you should pay attention to the following factors:
- sizes,
- density,
- thickness.
Expanded polystyrene sheets produced by modern manufacturers have standard sizes: 2x1, 0.5x1 or 1x1. Those who are wondering how to cover the inside of a balcony should think about purchasing smaller sheets. It will be very inconvenient to install too large slabs in the limited space of the loggia. For a balcony, the best option is 0.5x1 or, as a last resort, 1x1.
As for thickness, you can buy absolutely any polystyrene foam for a balcony. The only thing you should be guided by in this case is such an indicator as the area of the loggia. After assembling the insulating pie, there should be enough free space left on the balcony for a comfortable pastime. Most often, owners of loggias of typical Soviet-built houses choose expanded polystyrene with a thickness of 40-50 mm.
The density of this type of insulation can be found by looking at the markings. The best answer to the question of how to sheathe the inside of a balcony would be to use expanded polystyrene grade 15-25. The higher the numbers, the lower the thermal conductivity of the material, and the more fragile it is. If the expanded polystyrene is intended to be covered with decorative plaster or wallpaper in the future, it is worth purchasing thicker slabs. If clapboard or panels are used as finishing finishing, you can take loose sheets that retain heat well.
Who should repair the stove?
Due to the fact that the regulations do not stipulate what a balcony is (a living space or part of a supporting structure), it is impossible to clearly answer the question of who to contact and who is responsible for the repairs. Ideally, the balcony slab should be replaced and strengthened by the management company, but the railings and parapet should be replaced by the apartment owner himself. However, it is impossible to accurately answer the question at whose expense the repairs are being carried out. On this basis, disagreements very often arise between apartment residents and the management organization.
If the fact of destruction of the integrity of the slab has been noticed, then you should write a statement to the management company. This document is signed by a specialist and recorded in the appropriate journal. A good reinforcement of your words would be an application in the form of several photographs of a destroyed balcony. Neighbors who live on the floor below must leave their signatures on the corresponding application. The next step will be to decide on further actions. You can wait for utilities, or you can carry out repairs with your own hands or with the help of construction crews. In the latter case, an estimate is needed in order to receive a recalculation of the rent in the future. If none of the options are suitable, you can safely go to court.
Article on the topic: Insulation of loggia with polyurethane foam
The main reasons for the destruction of the balcony
As practice shows, the main reason why balconies collapse is depressurization of joints and violation of waterproofing. As a result, moisture enters the room, forming condensation, from which mold appears.
In addition, moisture can act on reinforced concrete, penetrating into it and causing corrosion on the reinforcement. The age of concrete directly depends on the penetrating ability of water - the older it is, the easier it is for moisture to penetrate inside. Corroded reinforcement loses its load-bearing capacity and expands, which causes a deterioration in the load-bearing capacity of concrete.
Also, the destruction of the base of the balcony is caused by high pressure on the slab, sudden changes in temperature and a long absence of major and current repairs, such as in Khrushchev.
There are 2 stages of destruction of the base of the balcony:
- The first includes minor destruction when it is necessary to strengthen the slab. Such destruction occurs in houses whose age is approaching 40 years. You can do it yourself, as this is a minor repair. For example, in cases of crumbling corners.
- The second stage is the destructive appearance of the object. These include the collapse of part of the balcony, the appearance of cracks at the junction with the wall, open sections of reinforcement, destruction is observed in the upper layer of the platform or detachment in its lower part.
Factors affecting insulation
Unlike a loggia, a balcony is not part of the building, but is located completely outside it. The balcony space is separated from communication with the external environment by thin enclosing structures (parapet), a reinforced concrete slab acting as a floor, and window frames if the balcony is glazed. Based on this, we can draw the following conclusion: in order to insulate a room, it is necessary to minimize heat loss through the building envelope.
Choice of insulation
The choice of necessary materials and insulation technology depends on the following factors:
- Purpose.
- Budget.
- Seasons.
- Requirements for the characteristics of a heat insulator.
Let's consider how to properly insulate a balcony from the inside, based on the fact that it will be used as an extension of an apartment in a multi-story brick building. In other words, we carry out measures for thermal insulation of all surfaces, including the partition, which is provided on the balcony in some projects of panel apartment buildings.