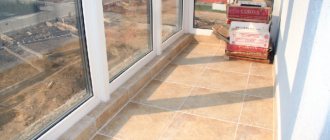
When renovating a balcony, many people wonder what material to make the floors from. There are many options, even though plywood is not one of the materials for finishing floors, it is still used. Its use is determined by the fact that it is much cheaper than floorboards. But when installing a plywood floor on a balcony, certain conditions must be met: the balcony must be glazed and insulated, since such floors do not tolerate moisture.
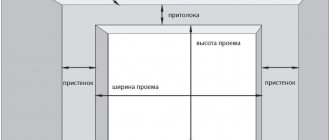
Scheme of laying the floor on the balcony.
To install a plywood floor you will need the following materials and tools:
- plywood;
- wooden blocks with a section of 40x40;
- penofol, the thickness of which is up to 0.1 cm, or other insulating material;
- wood hacksaw;
- jigsaw or milling equipment;
- insulation;
- screwdrivers;
- screws or dowels.
Pros and cons of using plywood for balcony floors
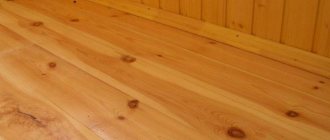
Plywood flooring is an aesthetic and comfortable solution. The main advantage of such a floor is its fairly easy installation, which any owner of an apartment with a balcony or loggia can handle, and alone. The cheapness of materials is also not the last thing when choosing a repair method. Correctly carried out preparatory work and high-quality installation guarantee a long service life of the floor covering.
But, it is important to note that plywood or chipboard for the floor on the balcony are afraid of moisture. Therefore, such a floor can only be laid in a glazed and insulated balcony.
Some insulation and sealing work is carried out before the actual installation of wood panels. With proper installation and the use of only high-quality and safe materials, such a plywood floor has practically no significant disadvantages.
Vapor barrier
Due to temperature changes outdoors and indoors, condensation forms on structures, which destroys them. To protect the wooden mesh and insulation, vapor barrier films are used. Penofol or polyethylene is suitable for these purposes.
Rules for installing vapor barrier on insulation:
- Foil films are placed with the metallized side facing the room.
- The material should be stretched well, the sheets should be overlapped. The joints are glued with tape or special glue. Punctures and tears of the film should not be allowed.
- On the joists, the vapor barrier is secured with slats up to 3 cm thick.
- A ventilation gap of at least 3 cm is left between the film and the rough flooring.
If all the rules are followed, a wooden floor on the balcony is laid on top of a layer of vapor barrier and slats.
Chipboard or plywood: what to choose?
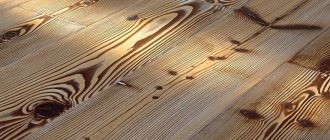
When the question of finishing a balcony arises, apartment owners find it difficult to decide between plywood or, in other words, laminated veneer, and chipboard. What is the difference and which material is better? Chipboard or particle board is a modern composite pressed material made from shavings and sawdust held together with formaldehyde resins. Plywood is several layers of wood veneer glued together and secured with a special glue.
Both materials are good in their own way, but when it comes to what to make the balcony floor from - chipboard or plywood, it is better to go with the second option. And that's why:
- plywood has the best aesthetic indicators - it looks flawless;
- Compared to particle boards, laminated veneer is better able to withstand high humidity - if chipboard becomes saturated with water, it may lose its shape;
- plywood copes better with mechanical stress, such as abrasion or weight load;
- glued veneer holds nails and screws perfectly.
Of course, chipboard also has its advantages, such as better bending strength or higher performance in sound and heat insulation. In addition, chipboard is cheaper. But we are talking about flooring, for which the most important thing is durability and preservation of the original shape. Therefore, if you do not know what to make the loggia floor from - chipboard or plywood, it is better to choose plywood.
Now let's take a closer look at the nuances of choosing and purchasing plywood for a plywood floor on a balcony or loggia.
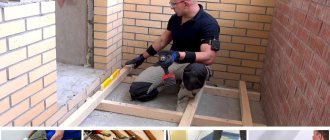
Installation of floorboards
Work should begin from the load-bearing wall. To do this, take measurements using a tape measure and cut off the first piece of floorboard to the required length with a hacksaw. After this, check its location using a level and a square. The angle between the wall and the board must be strictly 90 degrees.
They also maintain gaps on all sides of the walls within 10–15 mm (the side connecting to the next board is not taken into account). The screws are screwed in at an angle of 45 degrees, thus fixing the board to the beam.
Then they cut out the second piece and fasten it to the first at the end connection, after which they are adjusted tightly using a wooden strip and a hammer
It is important that the boards touch each other as much as possible. After this, fix the second board with screws at an angle of 45 degrees in the place of the free end connection
This is how all the boards are laid. The first and last of them are additionally fixed to the logs.
Finally, a plinth must be installed around the perimeter of the balcony.
Buying plywood from a manufacturer - is it profitable?
Plywood production
Many construction works cannot be completed without the use of reliable sheet material. Therefore, builders often ask themselves: where can they buy the right type of plywood at the most profitable price? Professionals recommend purchasing sheets in stores that are official representatives of woodworking companies (from the manufacturer), because such a purchase guarantees a number of advantages:
- Low prices (there is no intermediary markup in the cost of goods).
- Quality (plywood is manufactured and stored in strict compliance with requirements (according to GOST)).
- After-sales storage (many companies provide specially equipped warehouses for rent for the entire period of construction work).
- Transportation of material to the construction site.
Separately, it is worth noting the constant availability of a wide selection of slabs, different in the following parameters:
- material (hardwood or softwood);
- brand (moisture-resistant FC and water-resistant FSF);
- grade (I, II, III, IV and elite);
- degree of processing (Ш1 – processed on the front side, Ш2 – sanded on both sides, НШ – unpolished surface);
- size (standard and large format sheets);
- thickness (from 3 to 40 mm).
Today, woodworking enterprises in Russia place offers for the sale of goods not only in specialized retail outlets, but also in online stores, by visiting which you will receive all the information you need about lumber: photos, characteristics, areas of application and prices.
Waterproofing
To protect wooden logs and insulation from moisture, the balcony slab is covered with waterproofing. Its installation depends on the selected material.
Types of waterproofing:
- Coating. Applied with a brush, it hardens to create a seamless, moisture-resistant coating. For protection you can use “Liquid Rubber”. However, for adhesion of coating waterproofing, the temperature on the balcony must not be lower than +15 ˚C.
- Pasting. It is made using roll materials: PVC film, Penofol. This is the most economical method, but it requires reliable connection of the joints. There is also self-adhesive waterproofing "TechnoNIKOL", for installation of which you do not need adhesive tape and a torch. The adhesive moisture protection technology can be used at any temperature.
- Deep penetration compositions. Getting into the pores of concrete, they form a barrier to moisture. They can be used in dry weather at temperatures from +15˚C. Another disadvantage of such compositions is their high cost.
Before laying the logs on the concrete floor, the surface is first waterproofed
The most economical and frequently used types of waterproofing on the balcony are roofing felt and PVC film. However, the materials are outdated. The service life of roofing felt is no more than 5 years; when heated and frozen, it melts and cracks. And PVC film is easily damaged by mechanical stress.
Before waterproofing, the concrete floor should be cleaned of dirt and dust. A bitumen-polymer primer is applied to the screed under any type of waterproofing. The drying time of the composition is from 20 to 30 minutes. The surface of the balcony floor and the lower parts of the walls to a height of 15 cm are covered with moisture-proof material. Markings on vertical structures for waterproofing can be made with masking tape.
TechnoNIKOL self-adhesive roll film is cut to fit the size of the room. Adjacent sheets are laid with an overlap of at least 10 cm. The minimum width of the end joint is 15 cm. When connecting sheets in a T-shape, the corner of the middle covering is trimmed. The overlap of the wall waterproofing strips is 10 cm. Each connection is treated with a bitumen-polymer primer.
Other rolled materials are laid in a similar way. However, the joints are sealed with waterproofing tape.
Possible alternatives for purchasing plywood
Plywood warehouse
You can buy material not only from official dealers, because there are many intermediary companies, like New Supply, that sell plywood and other types of lumber. By giving preference to these companies, you should protect yourself from purchasing low-quality material and do not hesitate to ask the seller to provide all the information you are interested in (data about the organization, product quality, availability of the necessary quality certificates).
It is important to pay special attention to the issue of plywood storage, because even high-quality material will lose its properties if the basic rules of warehouse maintenance are not followed (control over the optimal microclimate of the room and regular preventive measures to prevent the proliferation of pathogens and pests).
Assembly of the structure
Logs are thick boards or bars of wood, four to five centimeters thick. Greater thickness is not required and besides, it will “eat up” too much free space. The bars are laid at a distance of five centimeters from the walls, along the length of the room. The distance between the laid logs should be no more than fifty centimeters. The number of elements is calculated based on the width of the space - for the width. Less than or equal to a meter, two logs are enough, but for larger spaces it is necessary to increase their number.
The logs must be attached to the base. Some “masters” do not do this and the result is an unstable and movable structure. To fix it, it is enough to use anchors every fifty to sixty centimeters along the length of the lag. For anchors in the bars, you need to pre-drill holes through which they will be inserted. The installation level of all parts must be strictly horizontal, and shims can be used to correct the position of the joists.
The next step is insulation. Here everyone chooses the most suitable material for themselves. Usually, mineral wool is used, insulated on both sides with a waterproofing film and a vapor-permeable membrane or penoplex. All cells and voids are filled with insulation. Next, all that remains is to cut and lay the covering. One point is important here - there should be small gaps, up to five millimeters, between the walls and the sheet covering.
To prevent the floor from subsequently sagging and “playing” under your feet, plywood for the balcony floor is selected in such a way that its thickness exceeds one centimeter. Thinner sheets are not able to properly withstand the loads that may occur when walking on the floor or placing heavy objects on it. Cutting is carried out with a jigsaw or hacksaw. The final result of the repair will be filling all free spaces and gaps with polyurethane foam.
Laying insulation material
If the floors rise to the height of the threshold, you will have to lay two layers of insulation. The first of them is laid on the floor, under the logs raised to a height, next to the pieces of mineral wool previously placed on the racks.
The best option for insulation is mineral wool
mineral wool
The second layer of insulation can be laid up to the top level of the joists, if space allows.
If the height allows, you can lay mineral wool in two layers
It is recommended to lay a layer of vapor barrier – plastic film or a special membrane – on top of the insulation.
Preparatory work
Before laying the floor on a plywood balcony, you need to do some preparation. Next step by step:
- Examine the floor surface on your balcony and loggia.
- If there is an old coating, it must be dismantled.
- If there are through openings, seal them with brickwork and plaster on top.
- If there are no openings, it is necessary to treat the floor surface to remove cracks, peeling, dampness and mold. This must be done both with the floor itself and with the corners and lower parts of the walls.
- Cover chips at joints and cracks with sealant or cement mortar (if they are large), similar in thickness to plasticine. If using a solution, the cracks must first be treated with a primer.
- All surfaces must be carefully leveled - use a spatula for this.
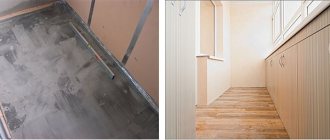
Important: the solution must dry and set, and for this you need to leave it for about 7 days. Subsequent cleaning of the surface and priming will not hurt if you are going to lay a plywood floor on a loggia on a concrete base. This will make it protected from moisture, and the materials on top will fit much better. Before starting installation, it would be a good idea to clean the floor and lower part of the walls with a vacuum cleaner.
Simply put, you need to put your balcony or loggia in perfect order.
Selection of materials
The construction of a warm covering includes preparing a balcony slab (for more details, see the article “how to repair a balcony slab”), leveling the floor, steam and waterproofing the balcony, installing a frame, insulation, attaching boards or plywood to slats.
For construction work you will need:
- Construction mixtures: cement, deep penetration primer, antiseptic, sealant.
- Wood materials: timber, slats, floorboards or plywood sheets.
- Waterproofing, antiseptic.
- Vapor-proof film - “Penofol” or polyethylene, foil tape.
- Insulation (mineral wool or polystyrene foam).
- Fasteners: self-tapping screws, anchors, dowel-nails, corners for fastening boards.
Logs are a frame made of timber for flooring. Wood species used for decking: spruce, oak, Siberian larch. Pine lumber is most often used: it is durable and has low cost. The aspect ratio of the timber should be 1:2, and the recommended length is 2 meters.
Logs on the balcony
To protect the frame from microorganisms, the timber is coated with an antiseptic. The composition will depend on the type of wood. For interior work, water-based impregnations and primers with antifungal components are used. Products containing alkyd varnish have a strong odor and can cause allergies. Examples of antiseptics for interior work: Pinotex Interior, Ognebio, Neomid 400.
Required tools:
- roulette;
- hammer drill or drill;
- screwdriver;
- hacksaw or jigsaw;
- primer brush;
- building level;
- simple pencil, permanent marker, masking tape.
You may also need a grinder, a spatula, and a carpenter's hammer for the floorboard.
Features of laying plywood on the floor of a balcony and loggia
You can make your own balcony floor from plywood in one of three ways:
- on a concrete screed;
- on a base of logs;
- on a wooden base.
In any case, it is important to follow some rules. For example, there should always be a gap of at least 2-4 mm between sheets of plywood. It is generally recommended to make the gap near the wall at least 15 mm - so that air can circulate. It is advisable to cut plywood using milling equipment, since working with a jigsaw often only delaminates the laminated veneer. The thickness of the plywood for the floor on the balcony should be approximately 15 mm or a little more.
The first thing you should pay close attention to is the waterproofing of the concrete surface. The penetration of unwanted moisture into the layers of insulation is the result of poorly carried out waterproofing, so this stage of work must be approached with all responsibility.
If waterproofing is installed incorrectly, there is a chance of encountering fungus and mold in the near future. And this, in turn, is not only a chance of damage to the entire floor structure, but also unpleasant odors. Typically, isoplast or more traditional roofing felt is used for waterproofing. In addition to roll materials, liquid waterproofing compounds are also very popular.
Some owners of balconies and loggias use lithium and silicate impregnations, epoxy compounds, and liquid glass. Whatever liquid waterproofing material is chosen, it must be applied to a perfectly flat surface, free from the slightest damage. Rolled waterproofing is laid on top of the mastic. Sheets of roofing felt should be laid overlapping and on the walls to a height of up to 20 cm.
If special equipment is available, the rolled material is applied using the “hot” method - fusing it onto the walls and floor with a construction hairdryer. Often, after laying the first layer, it is also coated with mastic, and the second is laid on top of it, but the direction of the sheets changes to perpendicular to the first layer. This technique allows you to create an absolutely sealed waterproofing layer for laying plywood on the balcony floor.
Laying plywood on a concrete base
The plywood fits well on the concrete screed. But it is not always possible to do such work perfectly without the proper experience. In this case, moisture-resistant plywood is used. After laying the waterproofing layer, mortar or warm concrete is poured over it. Next, the screed is reinforced and the surface is leveled. The main disadvantage of this method is that the floor on the balcony receives an extra static load.
The guideline for the height of the concrete screed is a line on the walls created using a water level. Upon completion of work, wooden blocks are laid over the screed. They need to create a grid with a cell side of up to 1 m. The thickness of the beam is slightly less than the height of the screed. Construction cement-sand mortar (in a ratio of 1 to 3) is poured into the cells and leveled. To prevent it from cracking when drying, it is covered with polyethylene and left for a week or more.
Afterwards the surface is primed with bitumen mastic. The sheets are laid on glue with mixing, so that the corners of 4 sheets at once do not meet anywhere. They are then drilled and screwed to the base from the center to the walls.
Laying plywood on a joist base
Do-it-yourself balcony floors made of plywood are best laid along joists. Firstly, this method is suitable for anyone who is not good at complex construction work, and secondly, it is a “dry” process that allows you to quickly level the floor and insulate it, and at the same time does not load the balcony or loggia with additional weight. The only disadvantage of the method is increased labor intensity.
After laying the waterproofing layer, you need to lay logs on top of it. The easiest way is to lay three bars - two along the walls and one in the center, along the length of the balcony. Typically, balconies in city apartments are too small rooms, so this arrangement is quite convenient. But depending on the amount of free space and the volume of available materials, you can use transverse laying of logs or make lathing. The latter is relevant when the plywood sheets have a small area. The best size of timber is with a section of 40×40 mm. To position the bars correctly, it is recommended to use a water level.
The first block from the entrance is placed along it, the one closest to the wall is oriented along it, and then the one in the middle is oriented along them, pressing with wedges from below. Insulation is laid between the joists at the same level. It doesn't matter which one to choose. The main thing is the environmental friendliness and safety of the material. To fix the plywood on the joists, use self-tapping screws, the holes for which are drilled separately. The caps are recessed with a countersink.
The plywood sheets should butt together exactly in the middle of the joists. It is necessary to leave small gaps between the sheets, and it is also important to leave them near the walls. This will not only provide the floor with air ventilation, but will also save you from the creaking of the floor on the balcony. Some particularly enterprising craftsmen set a slight slope from the wall along the joists to allow accidental moisture to drain, for which additional ventilation or a system for removing such moisture is installed. But this is true when the likelihood of high humidity is too high.
Laying plywood on a wooden base
If the old covering is still intact and has a strong structure, you can lay plywood on top. To secure the sheets, different materials and tools are used: glue, dowels or screws. It is recommended to pre-clean all surfaces and treat the floor with a primer. The sheets are laid so that no more than 3 seams meet at one point.
It is important to know
If you want to lay plywood in squares and not in a whole layer, then it is advisable to lay them in such a way that the cross-sections of the wood in the section are different.
Plywood (tongue and groove boards) requires acclimatization before laying. Therefore, you will have to keep her a little in conditions that are comfortable for her.
- So, if the temperature of the warehouse where the material was sold and the apartment are the same, then the board can be kept for about a day. If the temperature difference is significant, then the plywood will need to be kept for three to seven days. The board should acclimatize only in a horizontal position.
- If you want to improve the moisture resistance of plywood, you can impregnate it with a special solution based on polyvinyl acetate. The consistency of the product resembles PVA glue. It is necessary to apply several layers of impregnation until stains appear on the other side of the board. We do the same on the other side and dry the plywood in a horizontal position for about 3-4 days. After drying, the material can be additionally coated with an antiseptic-fungicide.
- And further. If you want to lay plywood in squares rather than a whole layer, then it is advisable to lay them in such a way that the sections of the wood in the cross-section are different. That is, there is no need to lay the cut squares of plywood end-to-end on the side along which the jigsaw was cut. And in order not to get confused, before installing the squares, lay the floor in the rough and put a number on it.
Solving possible problems
Sometimes it happens that the plywood for the floor on the balcony begins to creak after some time. Similar behavior can be observed almost immediately after installation. In this case, the reason for this behavior is already clear - something was done incorrectly during the work process. The floor may creak when in contact with a concrete base. In this case, you can solve the problem by giving the structure additional reinforcement using self-tapping screws.
They need to be installed at the junction of the joists and the plywood sheet approximately every 10 centimeters. It is important to tighten the hardware well. Sometimes plywood creaks due to insufficient thickness - less than 15 mm. This happens due to the increased load on the “empty” areas of the sheet, that is, those under which there is no support. When a person steps on this part of the plywood, the sheet bends and its edges stretch upward - all this creates a creaking sound.
This problem can also be eliminated by using self-tapping screws. You need to drill holes and insert screws into them, but do not tighten them, so that they reach the base. Under weight load, these screws will act as a support. Of course, nothing prevents you from rebuilding the plywood floor covering on the balcony with your own hands in order to find the exact cause of the unpleasant sounds.
Now you know how to make a plywood floor on a balcony using one of three popular methods. This work can be done with your own hands without relevant experience. The main thing is to follow the instructions.
Attaching adjustable joists
Installation of an adjustable system is simpler and will make it easier to obtain a perfectly flat surface. In this design, instead of anchors, plastic racks are used, which are screwed into wood and fixed to the base using dowels (for more details: “How to make adjustable floors on joists with your own hands”). By rotating special bolts you can set the required height. After the joists are adjusted, the protruding part of the bolts must be cut off.
In a wooden house, it is not recommended to fix the joists to the floor. And if a concrete screed is used as a base in the room, then in this case is it necessary to attach the logs to the concrete floor or not. In such a situation, fastening will not be superfluous. Everything is done quite simply, the main thing is to use high-quality materials and strictly follow all the rules. Then the design will be reliable and will serve for a long time.
Plywood parquet
Stages of installing adjustable joists.
This parquet appeared quite recently. The technology for its manufacture is very simple and anyone can do it:
Using plywood for the floor on a balcony is a good way to make the base smooth, durable and without squeaks. Which floor to choose is a purely individual matter, since the owner has to take into account his own financial capabilities, as well as make a choice in favor of a material that will satisfy his needs and tastes.
Source
Garden parquet tiles
If the balcony is not glazed, which will serve as a terrace, for pleasant evenings, garden parquet is laid on the prepared waterproofing. When planning this coating, you will need a floor with a slight slope. Such manipulations are necessary to ensure that water flows to the drainage system and does not accumulate under the tiles. As a rule, when planning a regular balcony, this point must be taken into account.
Main functions and features of parquet tiles:
The cladding is made from natural wood or a material containing 80-85% wood raw materials, with an admixture of polymer additives for binding the substance. The upper layer of lamellas is fixed on a lattice base made of PVC, and has special locks that fasten different plates into an indivisible plane. Thanks to this, the masonry process is noticeably simplified and does not require special knowledge or skills, so installation can be done independently.
Before starting work, it is necessary to take measurements. The tiles are produced with parameters of 30x30 cm and 50x50 cm. If necessary, it is possible to reduce the tile along the edge by 1-2 lamellas. Lathing the floor on a balcony under a plywood covering is also perfect for a closed type balcony with an insulated floor.
Tiles of the presented type are also used when installing garden paths or platforms. It would also be a good option for gazebos or bathhouses.
The excellent quality and durability of the product results in a fairly high price for the material, but the result is undoubtedly worth it.
Preparing the base
Scheme of a plywood floor on concrete with lathing on support bars.
The first step is to prepare the surface. There should be no foreign stains on the concrete base. It must be dry and clean. If another covering was laid before the installation of plywood floors, it should be removed before the concrete. Old floors will create additional stress and may lead to cracks.
Next, insulating material is laid on the cleaned base to protect the plywood floor from moisture and to provide thermal insulation. The most optimal material would be penofol. Before laying, it is necessary to take the dimensions of the area to be covered and cut them. Penofol is placed on the base with the foil side up.
To lay the beams, you need to know the size of the balcony. After measuring, the bars are sawed using a hacksaw. Place them at intervals of approximately 50 cm from each other.
Balcony floor insulation scheme.
Insulation of the floor on the balcony is carried out only after all the work on attaching the logs. The insulation material is placed between the bars of ready-made joists. Styrodur is often used for insulation.
When choosing a tool for cutting plywood, it is better to give preference to milling equipment, since using a jigsaw at the cut points can lead to splitting. Of course, you can use the entire sheet, but to obtain a larger number of damper seams, craftsmen recommend dividing it into several parts.
To ensure free air circulation, the gaps between sheets should be about 5 mm, and near the wall no more than 15 mm. Seams are necessary to improve ventilation properties. In addition, thanks to them, the number of fastenings increases, which ensures resistance to deformation.