The problem of maintaining heat in a house can be solved by laying traditional thermal insulation, for example, mineral wool, expanded polystyrene or foam. They have excellent insulating characteristics, but at the same time they have to put up with serious disadvantages, such as heavy dusting and the release of unsafe styrene or toluene vapors. As an option, you can insulate the floor with isolon; the material is quite new, but has already proven itself as a leader, without bad habits.
Izolon can be laid on both wooden and concrete floors
Types of isolon for thermal insulation of floors
There is nothing new in the technology of insulation with isolon. The material has been produced for quite a long time, so insulating the floor in a private house with isolon could have been done a decade and a half ago. Another thing is that insulation was used on a large scale mainly in industrial equipment, and only recently attracted everyone’s attention with its rather interesting characteristics.
The material is polyolefin foam with an additional reflective coating of aluminum foil. Due to this, it is easily recognizable by its characteristic surface pattern.
In order to get the desired effect from the installed thermal insulation, you need to imagine what kind of isolon structure is suitable for the floor in a wooden house as insulation.
The industry produces isolon with different structures:
- The classic version of foamed polyethylene filled with a pore-forming gas agent, this includes Izolon 100 and its foreign analogues;
- Foamed polyethylene, reinforced with catalyst additive. As a result, chemical bonds appear between individual pores—cells—that improve the durability and strength of the insulation. A typical representative is Izolon 300;
- Heavy and dense PET, which has undergone special treatment by sintering at elevated temperatures and irradiation. As a result, cells are crosslinked at the physical level, without the participation of reagents. The most striking representative of this type is Izolon 500.
Important! The greater the depth of additional processing of polyethylene foam, the higher its strength, the greater the number of air cells, and, accordingly, the lower the thermal conductivity coefficient.
Brands with a soft and viscous structure perfectly absorb noise and vibrations; Izolon 100 is suitable for soundproofing the floors and walls of a building. The more internal connections between the cells, the harder the material is, and the worse the sound insulation of the floor based on isolon works.
Izolon 300
In addition, thermal insulation based on foamed polyethylene is available with one-sided foil, with double-sided foil and also with a self-adhesive base on one side.
Izolon 300
This type of thermal insulation can be considered as a universal material, equally suitable for noise control and floor insulation. The three hundredth Izolon has good noise-absorbing characteristics, within 22-25 dB. The material is able to withstand prolonged heating and constant alternating load.
Laying isolon 300 on the floor guarantees effective protection against any vibrational low- and high-frequency noise and sounds. Isolon is especially good as insulation and sound insulation on concrete floor slabs. Available in rolls, in the form of a sheet with a thickness of 5 to 10 mm.
Material marking uses a numerical index, a sequence of four digits. The first two indicate the foaming ratio of the material, usually it is 30, which means an increase in the volume of polyethylene during processing by 30 times. The second pair of numbers indicates the thickness in millimeters.
Important! A good argument for using Izolon 300 as floor insulation in a wooden house is the fact that three hundredth polyethylene foam is the main material for heat and sound insulation of modern car bodies.
The cost of insulation directly depends on its thickness, on average the price is 1-3 dollars per meter.
Izolon 500
One of the most common and widely used insulation options for walls and floors of wooden houses, stone and brick buildings. In a situation where complete floor insulation is required, “Izolon 500” is subjected to special thermal and radiation treatment, as a result of which the insulation surface is quite rigid and durable.
Material characteristics:
- The compressive strength is 0.036 MPa, which means that you can walk on the insulation laid on the floor as if you were walking on EPS. Unlike penoplex, isolon retains fairly high elasticity and the ability to stretch without destruction by 130-180%;
- The thermal conductivity coefficient is only slightly higher than expanded polystyrene and mineral wool. It is 0.031 W/m*K versus 0.028 W/m*K for competitors;
- Izolon's flammability class is at the G2-G4 level.
Izolon 500 is somewhat inferior in noise insulation and sound absorption efficiency to its closest relatives. This figure is 20 dB versus 22 dB for the 300th brand and 26 dB for the 100th.
For wooden floors, insulation with a self-adhesive layer is best suited
The material is produced in the form of sheets with a thickness of 20 mm to 100 mm. Polyethylene foam can be easily cut and cut into any configuration for installation both on the screed and between load-bearing floor joists. The cost of Izolon 500 is 40% higher than that of the three hundredth brand.
The presence of full aluminum foil instead of a metallized lavsan coating, like penofol or polyisol, guarantees high thermal resistance when heated and at the same time provides almost complete, at the level of 97%, reflection of radiant heat.
What to choose for a specific situation
There is no universal recipe for using isolon. For example, for laminate flooring, it is recommended to use a 25 mm thick sheet for insulation and sound insulation. If the room is heated with infrared heaters, then insulation with a foil screen can be installed.
For interfloor ceilings, especially in modern houses where the floors are made of concrete slabs, it is recommended to use dense isolon 500 with a thickness of 8-10 mm. If you plan to install a heated floor in the room, then it is best to use double-sided foil-coated insulation material up to 10 mm thick.
Isolon may be inferior to mineral wool in terms of insulation efficiency, but there will definitely be no problems with it due to water, condensation or pathogenic microflora
A similar material can be used under classic concrete pouring or in a dry backfill screed. For insulation along joists or in two-layer versions using mineral wool, Izolon with a thickness of 20 mm and above is used.
Basic performance properties of isolon
To get a complete picture of the proposed thermal insulation material, read the description of its main performance properties given in the following table.
ISOLON - elastic thermal insulation, available in a wide range of densities and thicknesses
Table. Properties of isolon
| Properties of isolon | Description |
| Reflective effect | One of the main advantages of isolon is its high reflective effect, which contributes to an additional and very noticeable reduction in heat loss. |
| Compatibility with other materials | The properties of isolon allow it to be used both in combination with wooden structures and for insulating concrete floors. |
| Thickness | Compared to many other thermal insulation materials, isolon stands out favorably with its modest thickness, averaging 2-10 mm (sometimes up to 15 mm). Despite this, the material copes with the tasks assigned to it without any complaints. |
| Moisture permeability | The insulation does not absorb moisture, which makes it possible to count on its maximum long-term operation without reducing its thermal insulation characteristics. |
| Environmental friendliness | Isolon is not harmful to human health or the environment, which allows it to be used in premises for any purpose. |
| Other properties | Izolon is characterized by a long service life. The material is not subject to rotting. If necessary, izolon can be used in combination with other insulation materials. In addition to excellent thermal insulation characteristics, izolon has good noise absorption properties, which is an additional advantage. |
Which side should I place the isolon on the floor?
Experts advise in any case to carry out insulation with the foil surface directed towards the inside of the room. In this way, it is possible to block the leakage of radiant heat and at the same time strengthen the vapor barrier of the floor.
An exception may be a scheme with two-layer insulation of plank floors on wooden logs, provided that water heating is used in the house. For example, when laying the bottom layer of mineral wool, you can lay foil-coated polyethylene foam with aluminum foil to the mineral wool. This is done in order to block the seepage of supercooled water vapor through the layer of polyethylene foam insulation. The foil perfectly traps vapors, prevents moisture from condensing and forces it to escape through the air gap between the isolon and the mineral wool.
Let's sum it up
Insulating the floor of a log house is a very responsible job. The comfort of living in the house will depend on how correctly and efficiently it is done, so it is best to entrust it to specialists.
will help make your home warm and cozy. We have been providing finishing and insulation services for wooden houses for more than ten years and have accumulated vast experience in this area, which we want to share with you. We will be happy to provide our services to residents of Moscow and the region. Leave your requests, and we will send a specialist to you for free to inspect and draw up a preliminary estimate of the work.
On the Contact page you will find detailed information on how to contact us.
Calculate the cost of painting and insulating your home right now
Select types of work:
Select materials:
How to attach isolon to the floor
It is clear that the method of fixing the insulation depends on the nature of the base. Foamed polyethylene, even with great thickness, remains a plastic material. Therefore, it is impossible to lay Izolon on the floor using point fastening with self-tapping screws or metal brackets. Under load, isolon can break at the fastening points.
It is best to lay the insulation on an adhesive basis, and the glue should not dry out. These can be viscous oil mixtures, silicones, but it is best to use self-adhesive polyethylene foam or double-sided construction tape with a metallized surface.
Reviews
- In the comments, the craftsmen note that this layer is needed; it can really improve the appearance of the floor covering, masking minor imperfections of the concrete floor. It somewhat levels the surface and makes it warmer.
- Having carried out repairs with their own hands, some home craftsmen believe that there is no big difference; it is not at all necessary to lay a backing when you can simply lay carpet on top. However, in reality, not a single carpet can hide the coldness of a concrete floor or its unevenness.
How to attach isolon to a wooden floor
A slightly different scheme is used when laying the panel on a wooden base. If you need to insulate a plywood floor, it is best to lay insulation without fixing it to the base. Only the joints between sheets or panels are sealed. This method is recommended for a wooden base under flooring in the form of linoleum or laminate.
When laying isolon on joists, fixation is performed using staples, glue and wooden slats.
Varieties
The substrate for linoleum can be different. Each variety has its own characteristics and has advantages and disadvantages, which are taken into account when laying linoleum.
The names of the varieties are due to the composition.
- The jute layer is pressed from natural and artificial fibers, it perfectly absorbs and removes moisture without destroying the structure of linoleum, it has fire-resistant and antibacterial impregnation, contains a fire retardant, but is expensive;
- The linen variety is based on flax fiber, it is environmentally friendly, supports ventilation between the floor covering and the surface of the subfloor, does not rot, eliminates the formation of microorganisms, is not susceptible to mold, is fire resistant and is excellent for rooms for allergy sufferers, is sold in rolls, is made using the double needle punching method ;
- The cork layer is a product of processing tree bark, it is natural, has high levels of noise and heat insulation, but is completely unsuitable for installation in a room in which heavy furniture will be located (this type is pressed and has a soft structure);
- The coniferous variety is one of the best dampers for flooring, it is made from crushed coniferous trees, is sold in the form of sheets, tiles, rolls, has a thickness of up to 7 mm, dampens sound vibrations, masks floor unevenness, does not sag, does not dry out, does not require the use of glue during installation, although it is prone to mold and is not intended for rooms with high humidity;
- The combined material consists of a combination of flax, wool and jute fibers in equal parts, it is a universal solid substrate with high wear-resistant properties and maximum heat savings (due to the presence of wool fibers in the composition, the floor will be as warm as possible, jute will give the layer rigidity and excellent wear-resistant properties);
- The foam layer is significantly inferior to previous analogues in all respects: it practically does not warm the floor, sag under the weight of the furniture placed, loses its shape, sagging and decreasing in thickness (its only advantage is the price, although the loss in quality is much greater).
Preparing the base
Unlike penoplex, polystyrene foam and even mineral wool, Izolon is quite sensitive to mechanical load, so the material can only be laid on a flat horizontal surface. Especially if the flooring is supposed to be laminate or, even worse, linoleum. In this case, the height difference in a one-meter area should not exceed 2-3 mm, and in principle there should be no bumps and depressions.
The concrete floor must be cleaned of loose “cakes”, dust and dirt must be removed. We carefully knock down the cones with a hammer and chisel, and clean off the remains with a grinder. Any depressions must be filled and smoothed to floor level. Next, it is advisable to wash the concrete and cover the floor with a primer. Not with paint, not with varnish, but with a primer for concrete.
Important! Additional treatment does not affect the insulation of concrete with isolon, but the concrete surface, even if covered with thermal insulation, will mercilessly collect dust. This is especially true for thin screeds.
When people walk on the floor, the Izospan cloth will work like an air pump, and all the dust will slowly move from the surface to the walls, and then get inside the room through the baseboards.
Completely worn-out floors need to be overhauled before insulation; a new screed may have to be made. It is impossible to lay Izolon on a surface full of cavities and cracks; under load, the glued panel will separate into separate sheets or strips.
If you plan to insulate the floor with isolon in a wooden house, then first you will need to remove the old floor covering, clean or sand off the paint, and treat the wood with a bioprotective solution. The floorboards are wedged together with wooden inserts, but the cracks cannot be completely sealed, otherwise the floor will rot under the insulation. After sanding, they can be selectively blown out with foam.
Plywood floors are prepared in the same way as concrete floors, you just need to additionally check that all the sheets lie on the base without “popping” or “bubbles”. Holes are drilled in problem areas, foam is blown in and immediately loaded with pressure weighing at least 10 kg.
Peculiarities
The substrate is a special material of natural or synthetic origin, roll or sheet type, used when laying linoleum. More often it is sold in the form of meter-wide rolls, measuring 10 m in length. This is an additional layer with a thickness of 2 to 10 mm, which is placed between the linoleum and the concrete base. It is mobile for transportation: after purchasing it, it is easy to bring it home, as it fits in the trunk of a car.
The material may differ in appearance, has a different color and texture, and regardless of the appearance and components, it performs several functions :
- It is a noise-insulating material, through which it is possible to reduce the level of annoying extraneous sounds coming from neighboring apartments;
- Reduces the amount of heat loss, being a floor insulator (without it the floor is much colder);
- In case of minor surface defects of the concrete base, it is used as a floor leveler;
- Increases the service life of the floor covering by eliminating contact with the subfloor (it acts as a water barrier).
It is worth mentioning the appropriateness of using a substrate for linoleum. It is not suitable for every type of linoleum.
If the floor covering is of a multilayer (heterogeneous) type and has a jute or felt layer, no underlay is needed. In this case it is already there, so there is no need for a second one. Linoleum with a backing can be recognized by its thickness, which is about 5 mm, as well as the back side, which does not have a foam base.
Linoleum underlay can be used in different types of premises: industrial, warehouse, apartment and private house. It differs in texture and can be soft, hard, loose, dense, as well as a load on the working surface. The application is based on the characteristics of a particular room. Each type of insulating layer is designed for a different gender.
For example, humidity matters: some materials are completely unsuitable for use in such premises; under these conditions they can rot, develop mold or moths. Others are pressed, which is no good at all.
There are cases of floor covering when it is impossible to do without a substrate.
It is necessary in the following situations:
- When installing a private house with an unheated basement or in an apartment on the first floor of an apartment building;
- If the floor is incredibly cold even with carpet;
- In old apartment buildings with poor sound insulation.
It cannot be laid on old flooring or other used material. This can lead to the process of rotting of the old surface.
A high-quality substrate will save heat. Positioned tightly to the floor, it will give the linoleum an even appearance and relieve the floor of coolness, which is especially important if there are children or household members in poor health in the house.
How to properly lay foil-coated isolon on a concrete floor under linoleum
Oddly enough, many problems arise with the alignment of the panel. Izolon is usually purchased and stored in rolls; when it comes to laying insulation, the sheet unrolled on the floor acquires a wavy surface. You shouldn’t even try to stick such a “wave” evenly; the isolon will need to be laid out on the back side on the floor, slightly stretched and pressed along the edges with a light weight. After a couple of days, the isolon will become almost flat.
Next, we install the insulation according to the following scheme:
- We lay a waterproofing film on the floor. The procedure is mandatory for basement rooms and rooms on the first floor. For apartments, waterproofing on concrete floors can be omitted and replaced with a primer;
- Using a tape measure, measure the distance between the opposite walls of the room and cut off the Izolon strip with a margin of 10-15 mm. Knowing the width of the insulation roll and the dimensions of the room, we cut the required number of strips. Each time before cutting a new panel, we measure the length along the floor from wall to wall;
- We lay insulation on the floor along the starting wall. We are trying to adjust it so that the side edge of the canvas fits as tightly as possible to the wall. We lay the rest on the floor end to end, but without gluing with tape. Typically, one of the Isolon strips will have to be cut to fit into the overall width of the room;
- Place double-sided tape on the floor along the wall and lay the first strip of insulation on it. After leveling, we attach the remaining edges of the panel to the floor in a similar way. We add the remaining strips of Izolon to those already laid and connect them with tape;
- We lay fiberboard sheets on top of the insulation.
Due to the low strength of Izolon, you should not walk on the insulation; even without shoes you can easily damage the material. Therefore, when carrying out insulation work, it is necessary to use several small sheets of fiberboard, on which they move around the room.
Next, we lay the wood-fiber board, and glue the sheets together at the joints with mounting tape. It is impossible to glue fiberboard directly onto Izolon or lay linoleum on insulation without an intermediate layer. If the thermal insulation thickness is more than 8 mm, then plywood will have to be used instead of fiberboard.
Basement insulation with isolon. Floor insulation from inside and outside
If during the operation of the house it becomes necessary to carry out work on insulating the floor, which is the ceiling of the basement, this does not mean that it is necessary to open the white finish. Treatment can be carried out both externally and internally, from the basement side.
Read more: ways to insulate basement floors.
Heating in the basement is one of the insulation options. But in severe cold weather, having a heating system may not be enough. In addition, unnecessary communications take up part of the usable space and interfere with the placement of racks for storing workpieces.
Insulation is one of the main elements in construction
The algorithm for insulating a basement in a wooden house is not much different from identical work in a brick or concrete building. The first step is choosing the material. When choosing insulation, first of all you need to pay attention to the thermal insulation properties of the material.
The next parameter when assessing the quality of floor insulation in the basement is hygroscopicity. Condensation concentrates at the boundaries of warm and cold rooms. This means that during installation the insulation must be protected with a vapor barrier membrane. The peculiarity of floor insulation from the basement side is that the vapor barrier is placed above the material, and not under it.
And finally, it is necessary to take into account the fire resistance of the selected insulation. Some materials are not recommended for use in residential premises due to their high flammability, but they are quite acceptable for thermal insulation of a basement. Let's look at how you can insulate a basement from the inside.
How to lay isolon under OSB, plywood on a wooden floor
Thermal insulation procedures for plank and plywood floors are slightly different; in the first case, you will have to do thorough preparation to avoid damage to wooden parts, joists and supports. Thermal insulation of a plywood floor is somewhat simpler, but this reduces the height of the ceilings of the room.
We insulate the plank floor
The first step is to remove the floorboards. The boards are carefully unfastened, inspected, rejected or repaired.
Floorboards need to be removed
Only the joists will remain on the floor. If the beams are simply laid on a concrete base, then the procedure for laying Izolon is significantly simplified.
You will only need to lay insulation in the space between the beams. If the logs of the plank floor are raised above the ground on supports, then before laying the insulation, the beams will need to be hemmed with a plank on the cranial blocks, otherwise there will be nowhere to put the thermal insulation.
The general insulation scheme is as follows:
- We remove dust and dirt with a vacuum cleaner, treat the beams with an antiseptic impregnating solution and dry for at least two days;
- We cut Izolon sheets individually, according to the measured distance between the beams;
- If there is additional insulation with mineral wool under the Izolon layer, then first we lay a vapor barrier, then mineral wool, and only then sheets of polyethylene foam and always with staggered seams.
Izospan V or Izolon 100, 2-3 mm thick, can be laid on top of the beams. In both cases, the material is secured with a stapler and glued with tape. The thickness of the main insulating layer must be at least 50 mm.
Laying thermal insulation on a plywood base
First of all, you need to lay a beam on the plywood; it will act as a load-bearing frame that absorbs loads and protects the insulation from loads. The bars can be attached to plywood sheets with self-tapping screws using a vapor barrier film or without it, if the wooden base has been pre-treated with varnish.
The next stage is to lay Izolon between the bars. It is best to use sheets 20 mm thick; the thermal insulation is pushed between wooden guides and connected with tape.
A vapor barrier needs to be laid on top of Izolon. This solution reduces moisture absorption and deformation of the timber in the autumn-winter period. You can sew plywood or OSB on top.
How can you insulate?
High-quality floor installation using the right underlay material will extend the service life of the base. Even if the floor covering wears out over time, the underlay can last many times longer than linoleum, and if the preparation and installation technology is followed, it will eliminate the need to redo the base: it will be enough to simply remove the old linoleum and replace it with a new one.
In order for the floor covering on a concrete floor to last a long time, not to swell, crack, or sag due to a poor substrate, it is important to choose a layer with a density of 700-750 grams per square meter. m.
The installation technology is not as complicated as it seems at first glance.
It consists of several stages:
- Preparation of the working surface;
- Laying vapor barriers;
- Flooring substrate;
- Adhesive fixation.
Preparation
The first stage is to level the floor. First, it is cleaned of construction dust and debris, then leveled using a screed. If the unevenness is not significant, you can cover up the cracks and holes with a cement mixture. Tile adhesives of the Ceresit and Yunis brands are well suited for this.
To prevent the composition from cracking and tightly adhere to problem areas of the concrete floor, PVA glue is added to it (the secret of experienced craftsmen).
Before masking defects, it is important to prime the floor surface in these areas. It is important that the surface is clean, free of dust, and free of grease. There should be no tubercles or height differences on it. If the base is made of plywood, a layer of waterproofing is placed on the concrete floor. This is important to ensure that the wood is protected from moisture: this increases the service life of the material.
Waterproofing
Before laying the underlay, you need to check the floor surface several times for the presence of vapors by placing plastic film on the floor (if there is moisture, it will be visible). If a technology with a vapor barrier is conceived, you can use ordinary polyethylene film as it, placing it in strips with overlaps of approximately 10 cm (2 cm is enough for walls).
It is preferable if the waterproofing is a single sheet of film. This stage is carried out without fixing to the floor: subsequent layers will prevent the film from moving. The film can be secured to each other (any tape will do, even packing tape, but the best is strong reinforced tape).
Substrate
Afterwards you can lay the backing. This must be done carefully, no gaps are needed: the material is applied in strips end-to-end, fixing the insulation together using double-sided tape. The required amount of material is calculated in advance: there is no point in overpaying for excess raw materials that need to be trimmed. When laying out the material, it must be straightened immediately: folds and waves, and even more so distortions, are unacceptable on the surface.
The formation of joints is unacceptable for the reason that the floor covering will give out this relief, regardless of the class and type of canvas. This is especially true for the commercial type, which has a minimum thickness of 2-3 mm. If the substrate is dense, even a household coating will eventually demonstrate the curvature of the interlayer approaches. Corrugated synthetic material should be laid with the relief facing down (toward the concrete).
Fixation
The underlay must be glued to the floor, otherwise it is impossible to glue the linoleum itself. Fixation is carried out using a special resin-based, polyurethane-based glue or tape (depending on the type of substrate). It is important that the glue is suitable for the specific material, otherwise installation defects may occur. When working with double-sided tape, first glue it to the concrete at the joints.
After the canvas has been laid and straightened, the top layer is removed from the tape and the backing is glued to the floor. After the backing, all that remains is to lay the linoleum, cutting it to its location and gluing it to the floor with the backing using mastic.
The technology of floor insulation on boards is appropriate if there is no humidity in the room.
It is important to remember that sometimes the substrate and linoleum need to rest to achieve a flat surface. The leaf variety does not need this. It is much denser than a roll, and it fits better on an uneven surface, masking its imperfections.
How to lay Isolon under a floor screed
Very often, tiles, ceramics or any other floor coverings that require a sufficiently strong and rigid supporting surface are laid on an insulated concrete base. Isolon is an excellent type of insulation, but it is not strong enough, so it will need to be hidden under a screed.
Installation of thermal insulation under a concrete screed is carried out in the following way:
- We lay a waterproofing membrane on the subfloor, be sure to overlap the edges onto the walls to a height of at least 20 mm at the level of the final floor covering;
- We glue the joints between individual pieces of waterproofing twice, the first time with tape during installation, the second time with a primer, before laying the Isolon-based insulation;
- We roll out the roll into sheets and immediately lay the insulation on top of the waterproofing. Moreover, we change the laying direction to 90°. The edges of thermal insulation must also be laid on the walls with an allowance;
- Next, we install the reinforcing mesh; it will need to be raised on chips above the surface of the foil Izolon to a height of at least 20 mm;
- We install beacon chips on the insulation and fill the screed with a cement-sand mixture. The thickness of the screed must be at least 40 mm for insulation up to 10 mm thick. With a larger layer of thermal insulation, the layer is increased to 50 mm;
- After 4-5 hours, the chips are pulled out and the holes in the concrete are sealed.
The edge allowance for waterproofing and insulation is trimmed and fixed with a stapler. The gap is filled with foam and carefully trimmed. All that remains is to glue the tiles and nail the baseboards.
Warm floor on isolon, dry-laid under laminate
The procedure for installing thermal insulation
You are offered instructions for arranging thermal insulation, including isolon and additional insulation in the form of mineral wool (can be replaced with polystyrene foam/expanded polystyrene or other insulation of your choice).
If you wish, you can not arrange the second layer of the structure. For example, in the case of installing thermal insulation in an apartment in combination with a heated floor heating system, or while simultaneously using insulation as a substrate for laminate, you can limit yourself to using only isolon. The relevant instructions remain the same. For the rest, be guided by the features of the location and operation of the premises being equipped and your personal preferences.
Floors with heating pipes and ducts, the so-called “warm” floors, have become widespread in the construction of residential buildings. Foil-coated ISOLON is used as reflective insulation in the construction of such floors. Possible material options ISOLON 500, ISOLON 300 3-5 mm foil
First stage. Dismantling the coating
If you plan to insulate a floor that has already been in use, you will have to perform a number of preparatory measures, the first of which is the dismantling of the existing floor covering. We get rid of it and take the garbage out of the room.
The old floor should be removed
Second phase. Preparing the foundation
After getting rid of the old finishing, examine the condition of the underlying structure. Get rid of peeling and cracked screed down to the very base. If the finishing was laid on top of a wooden structure, replace the damaged elements with new ones or, if there is significant damage, install a new structure after first getting rid of the old one.
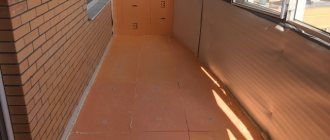
If necessary, strengthen the base, focusing on the characteristics of a particular situation. For example, if the floor of a balcony is being insulated, examine the condition of the parapet, make sure that the joints of the structural elements are intact, etc. Blow out any cracks found with foam. To eliminate individual defects in the concrete floor, use appropriate building mixtures, for example, cement-sand mortar. If significant differences in surface height are detected, it makes sense to pour a new screed with a thickness of about 30-40 mm.
floor screed
Floor leveling screed
In the case of insulation of a wooden structure, isolon, as a rule, is laid on top of the subfloor, presented in the form of a flooring made of material chosen by the owner (plywood, boards, etc.). This provision may vary, depending on the specifics of your specific situation. For example, it may be necessary to insulate the floor with isolon along the joists.
Laying isolon
Laying isolon on the subfloor
In this case, the following is done:
- beams are fixed on top of the subfloor in increments of up to 1 m;
- Boards or plywood panels are fixed between the joists. Wooden blocks are traditionally used for fastening;
- Isolon is laid on top of the boards/plywood and secured with tape.
Third stage. We arrange waterproofing
The necessary hydro- and vapor barrier of the floating floor is provided by a layer of IZOLON material. For hydro- and vapor barrier of a floating floor, the material ISOLON 500, ISOLON 300 4-8 mm is suitable
Cover the base with a suitable primer. Let the coating dry for the time recommended by the manufacturer of the selected primer. After this, we cover the surface with a simple plastic film or a special waterproofing membrane.
When laying waterproofing, we place the edges of the film at approximately 10-15 cm of the height of the walls and secure them with a stapler, nails or other suitable method. Pieces of film are laid with a 10-15 cm overlap. The joints are fixed with adhesive tape.
If desired, you can give preference to coating waterproofing. The work comes down to applying two layers of bitumen mastic, each 1-1.5 mm thick, onto a previously dust-free base. Before applying a new layer, wait a period of time as recommended by the manufacturer of the waterproofing compound.
waterproofing
Fourth stage. Laying the first thermal insulation layer
The necessary thermal insulation of the floor is provided by a layer of ISOLON. Material used: ISOLON 500, ISOLON 300 4-10 mm
If necessary, we adjust the rolled/sheet insulation material to size and lay the cut on top of the waterproofing layer. We fill the entire surface with pieces of isolon, making sure that there are no gaps at the joints, because because of them, the thermal insulation properties of the structure will deteriorate. We glue the joints directly with foil tape.
Foil tape
If laying a second layer of insulation is not provided, cover the isolon with waterproofing material and proceed with arranging the final finish in accordance with the chosen technology. When installing two-layer insulation, follow the steps described below.
Fifth stage. Installing logs
Laying lags
We cut the wooden beam pre-treated with antiseptic impregnation into the required number of elements along the length (for small rooms such as a balcony, it can be along the width) of the base and install it on top of the insulation. We place the outermost logs directly next to the walls. We place intermediate ones in 0.5-0.6 meter increments. We check the evenness of the installation of the logs using a level. After making sure that there are no differences, we fix the elements using dowels and self-tapping screws. There must be at least 4 fastenings for each lag. We screw in the outer fasteners, departing from the ends of the beam about 70 mm.
Sixth stage. Laying the second thermal insulation layer
Insulation is laid between the joists
We place the selected thermal insulation material in the space between the joists. The insulation must first be adjusted to the size of the formed cells and laid as tightly as possible, without gaps. If there are cracks, we get rid of them in a suitable way, for example, by blowing them out with foam.
Example of laying mineral wool
We lay a layer of waterproofing material on top of the mineral wool insulation. To fix the film to the joists, we use any suitable method. For example, protective material can be secured using a stapler.
Vapor barrier Izospan
If you decide to replace mineral wool with polystyrene foam or expanded polystyrene, you will not have to install an additional layer of waterproofing material.
expanded polystyrene
Seventh stage. Finishing the job
Finally, all we have to do is lay the finishing flooring on top of the joists. For its arrangement, boards with a thickness of 3 cm or sheet plywood are traditionally used. We lay the elements perpendicular to the joists and fix them with nails or self-tapping screws.
Finally, all we have to do is lay the finishing flooring on top of the joists.
Now we only need to arrange the selected finishing material - it will lie on a flat and insulated area without any problems.
| Type of coverage | Service life, years | Decorativeness | Ease of maintenance | Resistance to mechanical loads | Environmental friendliness | Maintainability |
| Parquet | 15-20 | average | average | not high | high | low |
| Linoleum | 3-7 | low | easily | not high | low | Can not be repaired |
| Tile | 5-15 | average | average | average | high | average |
| Carpet | 1-5 | low | hard | not high | low | Can not be repaired |
| Laminate | 3-7 | low | average | not high | low | Can not be repaired |
| Polymer | 10-30 | high | easily | high | high | high |
| Evaluation criterion | Laminate | Parquet | Cork materials | Solid floor board |
| Environmental Safety | Completely artificial material | Without varnish and glue, it is completely natural | Absolutely environmentally friendly and safe coating | Environmental friendliness at the highest level |
| Duration of operation | Traditionally up to 5-15 years | Up to 50 years, depending on the thickness of the base layer | At least 45-50 years old | Average – 35-40 years |
| Moisture resistance | Low | Low | Increases after waxing | Increases after impregnation with appropriate products |
| Thermal insulation indicators | Low | High | Very high | High |
| Difficulty of installation | Easy to set up | Requires professional skills | Can be installed independently, depending on the chosen installation method | Self-installation possible, basic skills required |
| Difficulty of care | The material is undemanding and easy to care for | Requires regular maintenance and careful use | Does not require special care. You can use a vacuum cleaner. The main thing is to avoid over-wetting the material. | Requires regular care |
Good luck!
Technological map for sound insulation of interfloor ceilings and floors using physically cross-linked polyethylene foam Isolon 500 as a sound insulation layer
isolon 500
How to put isolon under an electric heated floor
The first thing you will need to do is lay out the base for laying the thermal insulation. The subfloor can be poured in the form of a screed or assembled from a moisture-resistant plasterboard sheet. In any case, the surface should be as smooth and flat as possible.
Installation of isolon is carried out in the following order:
- We treat the base with a primer;
- We lay Izolon 100 without foil on the floor, carefully glue the joints, the edges should be laid on the walls with an allowance of 30 mm;
- The next layer is made of foil Isolon 500, it is best to lay two layers 10 mm thick with seams spaced apart;
- The sheets are laid out on the floor with the foil facing up and also taped with metallized tape;
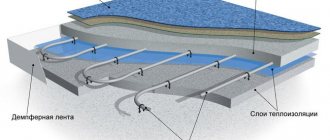
- Depending on the design of the heated floor, it will be necessary to install fastenings for heating pipes or cables on the insulation surface. In this case, the floor is covered with screed under the tiles.
For wooden floors, before laying the heating elements, support bars are laid, and only after that the cable or plastic pipes for the coolant are installed. All that remains is to connect the heating, check and cover the floor with a tongue and groove board.
Izolon forum. isolon
evgeny
Report to moderators
This method (under plywood) of laying isolon is quite acceptable when installing floor coverings. In addition to plywood sheets, on top of this heat-; soundproofing material can be laid parquet, laminate or linoleum.
KuPer
Participant
KuPer
Report to moderators
In principle, it is possible, but it will be of little use. The main advantages of isolon are low density and high porosity, which is why it is considered a good insulation material. It works great on walls, but under a load of plywood? A simple, crumpled sandwich made of plastic and foil. The styling effect is almost zero.
1
Kiril
Participant
Kiril
Report to moderators
I completely agree with evgeny. There is isolon, the density of which is designed specifically for floor insulation. But I would advise you not to take anything you come across, but one made of sewn polyethylene and with a self-adhesive bottom base.
Root
Forum member
Root
Report to moderators
Isolon is fine, but I repeat about plywood - do not lay layered or fibrous materials on the floor. Plywood and fiberboard behave unpredictably, you will curse everything from taking furniture out of the house, tearing down and redoing floors. And this happened more than once or twice with plywood on the floor.
evgeny
Newbie
evgeny
Report to moderators
Root: January 27, 2016 at 11:52 pm
on (expand)
Isolon is fine, but I repeat about plywood - do not lay layered or fibrous materials on the floor. Plywood and fiberboard behave unpredictably, you will curse everything from taking furniture out of the house, tearing down and redoing floors. And this happened more than once or twice with plywood on the floor.
Agree. If you have already placed Isolon on top of a wooden floor, then you can safely put flooring on top of it (linoleum, laminate, parquet). An extra layer in such a “pie” (plywood) can only do harm.
Artemus
Participant
Artemus
Report to moderators
evgeny: January 28, 2016 at 10:13
on (expand)
Agree. If you have already placed Isolon on top of a wooden floor, then you can safely put flooring on top of it (linoleum, laminate, parquet). An extra layer in such a “pie” (plywood) can only do harm.
Plywood will not harm, it will be easier to lay parquet or laminate on it later, plus the plywood layer in the cake will provide greater sound insulation. The downside is that the height of the room may decrease slightly depending on the thickness of the plywood sheet.
Root
Forum member
Root
Report to moderators
Laminate flooring will make a knocking noise against the plywood when you walk on it. The plywood will bend, the laminate will bend at least a little, and the whole thing will rattle underfoot. It is advisable to lay the laminate on a soft (but not thick) substrate.
Recommendations and common mistakes
The first mistake appears due to the desire to save. Insulation based on Izolon is quite expensive, so even pieces and small pieces are used. In practice, this means the appearance of a large number of cold bridges at the joints. Pasted tape provides only a mechanical connection; it will not protect against heat loss. Therefore, insulation must be laid with a minimum number of panels.
The second mistake is related to the refusal to use vapor barrier and waterproofing. Membranes must be used without fail; Izolon is capable of absorbing moisture up to 0.01%. This is not much, but it is enough to lead to a sharp increase in the thermal conductivity of the material upon contact with water.
Pros and cons of foil backing
Adding a foil layer to traditional types of substrate improves the quality characteristics of the material:
- durability increases (firmness and elasticity lasts longer);
- sound absorption increases;
- thermal insulation increases;
- Improves protection against mold, insects and mice.
At the same time, new qualitative characteristics appear:
- The ability of the substrate to reflect heat back into the room. Studies show that the reflective ability of foil to return heat to the apartment reaches 90% in some cases (the minimum value of the indicator is 30%);
- Properties of vapor and waterproofing.
The disadvantage for a substrate made of NPE polyethylene is a short service life, for other types of foil substrate it is a high price. However, this cost of foil pads is justified by the high quality of the product.
Possessing new properties, a substrate with foil becomes indispensable when installing heated floors and laminate flooring in wet rooms, for example, in the kitchen (in the bathroom and toilet, ceramic tiles are usually laid on the floor). Its use in dry rooms is not financially justified, since here the problem of heat conservation can be solved by other, cheaper methods.
Recommendations for use
When choosing foil insulation, you should decide on its thickness, which depends on the place to be insulated. To insulate the floor, a thickness of 0.2-0.4 cm is sufficient. For insulation of interfloor ceilings, rolls or layers from 1 to 3 cm are used. If isolon is used as a sound insulator, a thickness of 0.4-1 cm is sufficient.
Styling Tips:
- foil-coated isolon should not come into contact with electrical wiring. Foil is a metal that is an electrical conductor;
- When insulating a balcony, you should remember that isolon only retains heat, but does not generate it. Accordingly, insulation is half the task; you will also have to take care of the availability of heat sources;
- the air gap will prevent condensation accumulation;
- the material is laid end-to-end, and the joints themselves are covered with aluminum tape.
If you do all the work correctly, taking into account all the requirements, then when insulating the balcony you will have to sacrifice a small internal area. It will be occupied by mineral wool.
Foil-coated isolon is a material used for moisture, noise and heat insulation in both residential and industrial premises. Despite its small thickness, it effectively performs its duties. But in order for the insulation to last longer, it is necessary to adhere to the installation rules.
Types of glue and their manufacturers
The vast majority of adhesive compositions practically do not stick to polyethylene, simply being squeezed out from the area where the surfaces come into contact. But there are still materials that can cope with such a difficult task.
The most popular types of glue that can be used for polyethylene are:
- BF-2, BF-4;
- two-component acrylate;
- epoxy.
Butyraphenol glue (abbreviated as BF) is produced in Russia, in the city of St. Petersburg. The glue is a viscous, thick liquid of brown or reddish-brown color and does not rot or corrode.
BF-2 is suitable for gluing metal, plastic, ceramics and wood, and is used for restoration work. Glue cannot be used for dishes, as it contains toxic aldehydes and phenol. BF-2 is universal, chemically inert and moisture resistant.
BF-4 is practically no different from BF-2 in terms of chemical resistance, but its scope of application is slightly different. BF-4 is usually used for gluing elastic materials that are subject to vibration and bending. For example, leather, wood, plexiglass, textolite, metals and alloys.
Two-component acrylate adhesive V-Strong GELIAHAO 302 is characterized by increased strength, it is transparent and does not harden very quickly (in 4 minutes), which allows you not to rush too much when working. Excellent bonding of metal and plexiglass.
Transparent epoxy adhesive “Contact” is produced by ROSEL LLC, St. Petersburg, based on polyepoxy resin and hardener. Used for repairing products made of fiberglass, porcelain, wood, earthenware, glass, metal and various alloys. The composition perfectly fills cracks, voids and gaps, restores the shape and volume of objects. The seam is characterized by resistance to gasoline, oil, and water.
Technology of work using isolon
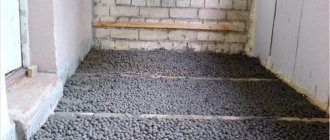
Today, several technologies are used at once that make it possible to use isolon for flooring in a wooden house. The following option for performing the work is considered the most traditional. First, a concrete screed is laid, to which expanded clay is usually added. This makes it lighter while simultaneously increasing its insulating properties. After drying, the surface is leveled and, if necessary, puttied.
Isolon is spread directly over the screed, which is fixed with glue or a screwdriver. The joints of the strips of heat-insulating material are sealed with tape. It is important that the insulation is laid on the walls with an overlap, the size of which is at least 12-15 cm. Naturally, the foil layer of isolon should be facing the inside of the building.
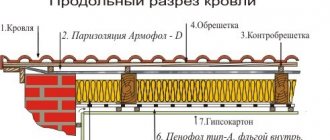
Then logs are laid over the insulation, onto which the plank covering is attached. Another layer of insulation in the form of mineral wool can be laid between the joists. At the same time, it must be protected from below by a vapor barrier membrane, and from above - by waterproofing materials that do not interfere with the removal of moisture from the surface.
In addition to the described technology for using isolon, when the floor is insulated from below, there are other options for its use. For example, when performing repair work. In this case, the old coating is first removed. Then logs soaked in antiseptic are laid along the rough flooring, to which sheets of plywood or boards are attached.
Isolon is spread over the completed flooring, which is fixed with a stapler or the already mentioned screwdriver. The joints of the material are taped. At the end of the repair work, the final floor and finishing coating are performed.
How to glue correctly: advice from professionals
Preparatory work
A high-quality start of work and processing of the base is a guarantee of an excellent result.
High-quality penofol adhesive is not a guarantee of a positive outcome. In order for the material to firmly adhere to the base and to restore a reliable monolithic screed between the elements, it is necessary to properly prepare the intended plane for the front of the work. To do this you need:
- Eliminate existing defects on the concrete surface, such as chips, cracks, depressions and unevenness.
- To improve adhesion, treat the surface with a primer.
- Dust the site, remove dirt, remove elements that have peeled off from the base.
- Treat the existing metal parts with a special agent that prevents the corrosion process.
- Apply an antiseptic solution to the concrete surface.
Gluing stage
Modern industry has simplified the fastening process by developing self-adhesive penofol. Ordinary polyethylene foam is glued using a special adhesive. The selected glue is applied in an even layer to the side where there is no foil. The edge parts of the penofol are lubricated with the substance more abundantly to avoid material lag at the joints. To ensure that the glue sets properly, wait 1 minute, then glue the polyethylene to the plane. To ensure high-quality installation of the material, the penofol is leveled and pressed until it is fixed. The resulting seams are additionally treated with glue. The plastered structure can be used 12 hours after installation of the heat-insulating material.
Properties and technical specifications ↑
The unique technical characteristics of folgoizolon set it apart from other building materials intended for insulation and sound insulation of various structures. Below are the main properties of isolon.
- High level of thermal insulation. The thermal conductivity coefficient of foil insulation is 0.031 W/mK, which is an excellent indicator when compared with other insulation materials. For example, the use of 10 mm thick isolon allows you to replace:
- 12 mm polystyrene foam;
- 45 mm wood or mineral wool;
- 150 mm bricks.
- Effective hydro-, steam- and sound insulation. The closed cell structure provides maximum resistance to the absorption of moisture and water vapor, and also prevents the penetration of sound waves. This characteristic is applicable even for a very thin layer.
- Elasticity and light weight. For construction purposes, foil isolon is produced in the form of sheets or rolls with a material density of 19-38 kg/m³. It is quite light and pleasant to the touch, and most importantly, it does not require the use of special tools for mechanical processing.
- Resistance to chemical products. An important characteristic of isolon is its resistance to oil, oil and gasoline. In addition, it is compatible with almost any building material: concrete, gypsum, lime, wood, etc.
- Long service life. Since this material is made on the basis of polymer raw materials, it is not susceptible to biological influence and, accordingly, to the process of decay. The service life without degradation is more than 80 years.
- Safety. In the production process of folgoizol, no toxic or harmful substances are used. It is odorless and can come into contact with human skin without any health consequences.
Insulation with Izolon. Alternative types of materials
There is no alternative to isolon as such, but we would be wrong if we do not briefly talk about materials that in certain cases can replace it.
Cotton materials, which include mineral wool, glass and ecowool, have almost the same heat and sound insulation properties as isolon. Their manufacturers insist that their main advantages are:
- Lightweight and easy to install.
- Low thermal conductivity.
- Strength under compression, mechanical stress, ruptures.
- High sound insulation characteristics.
- Not susceptible to fire.
- Resistance to temperature deformation.
- Biological and chemical resistance.
Mineral wool is available in the form of rolls and sheets and has different softness and thickness. It is extremely easy to install structures using various types of wool:
- The walls must be covered with a steam or hydrobarrier using a stapler.
- The next step is to assemble the frame from special metal profiles, the assembly step is 50 centimeters.
- Then cotton wool is laid, carefully distributed throughout the entire space, avoiding gaps.
- Then the cotton wool is fixed in any convenient way, the structure is covered with sheets of plasterboard, plastic panels, clapboard, fiberboard.
- The final stage is finishing the walls; its type depends on what material you have chosen or what is available.
The disadvantage of the material is its allergenicity; you should work in protective gloves and a mask to prevent contact of the material with the mucous membranes and skin of the hands. It also requires additional vapor barrier, since it loses its properties from moisture. In principle, the technology is simple and you can easily do everything yourself without overpaying to contractors.
Foam plastic or its analogues
The undoubted advantages of polystyrene foam include the following:
- Polystyrene foam is not afraid of moisture.
- It is a good heat insulator.
- Not susceptible to rotting, fungal or mold stains.
- Easy to install and cut.
- Has low weight.
- Heat resistant to low temperatures.
- Does not require waterproofing.
Polystyrene foam also has many disadvantages:
- It is fragile, crumbles, and requires additional protection with a dense base.
- Not breathing.
- Easily destroyed and enters into chemical reactions.
- We love rodents.
Polystyrene foam is used mainly in non-residential premises or for outdoor use. Installation is carried out using an adhesive mixture and requires additional fastening with “fungi”, careful coating of seams, plaster and subsequent painting.
The advantages of cork coverings undoubtedly include:
- Excellent insulation of extraneous noise and heat conservation.
- Waterproof properties.
- Resistance to deformation and pressure.
- Fire safety.
- Resistance to the formation of fungus and mold.
- Hypoallergenic.
- Low degree of contamination.
- A wide range of products available in slabs, rolls and mixtures.
There are no materials without disadvantages, cork has:
- High cost of material.
- Low durability of the protective coating.
- The appearance of traces from heavy equipment or furniture.
The cork is mounted on glue - acrylic or contact, either with one-sided or double-sided application. The work is painstaking and requires endurance and attention, but it is quite possible to do it yourself. Installation requires a special temperature regime and wall humidity level - temperature not lower than 18 degrees, humidity not more than 3%. When gluing, avoid the appearance of air bubbles between the wall and the material. Before starting work, the material must stand in the room for at least 24 hours.
As we see, there is no material that is also universal and technically suitable. It follows from this that the modern material – izolon – will find application in any home and for any needs. Insulating walls from the inside with isolon is the most rational solution. Use new products with pleasure and provide yourself with increased comfort without spending fabulous sums on it!
Sequence of work during insulation
When working with isolon, you must adhere to the basic rules of installation and operation, which will allow the insulation to last longer, performing its duties efficiently.
Insulation of ceiling and floor with Izolon
This material has a small thickness, therefore, in order to obtain a high-quality thermal insulation cake, it is often combined with other insulation materials, for example, mineral wool.
The ceiling insulation method consists of the following steps:
- Mineral wool is laid between the ceiling joists.
- Isolon is attached stretched along the joists.
- They stuff the counter-lattice.
- Apply the finishing touches.
Isolon can serve as a sound insulator, for which it is placed directly under the finish. In this case, the material is attached end-to-end to the working surface using a construction stapler.
Note! If possible, it is better to leave a gap between the isolon and the finish necessary for the evaporation of moisture.
When insulating the floor with isolon from the inside, the work order looks like this:
- Dismantling the old coating. If insulation is carried out in an old house, then first of all it is necessary to dismantle the existing floor covering.
- Preparing the base. At this stage, the underlying structures are restored: the cracks are sealed, a new screed is poured.
- Installation of floor waterproofing. The base is coated with a primer. After it has dried, the surface is covered with plastic film or a waterproofing membrane. Coating waterproofing can also be used.
- Laying a thermal insulation layer. Sheet or roll insulation is adjusted in size so that it covers the entire surface. The joints are sealed with foil tape - there should be no gaps at the bottom, as they significantly worsen the thermal insulation properties.
- Waterproofing material is laid on top of the isolon and a fine finish is provided.
Note! If necessary, double-layer insulation is installed.
Wall insulation with Izolon
As a rule, such work is carried out using additional insulation - mineral wool.
- Wooden blocks for the future counter-lattice are attached to the wall.
- Mineral wool is laid between the bars.
- Foil-coated isolon is nailed on top of the bars. Its shiny side should be directed towards the room.
- The rolls are laid end to end. Existing cracks are covered with aluminum tape.
- The counter-lattice is nailed.
- The trim is attached.
Additional Information! A gap of at least 15 mm should be left between the finishing material and the foil.
Successful examples and options
Knowing the intricacies of each material, many are interested in what exactly to choose, how the craftsmen work, what they lay so that the work is of high quality and the coating is impeccable.
Here are some examples of good choices:
- A jute backing is best suited for a nursery: it is environmentally friendly, does not release toxins into the air, and muffles the clatter of children’s feet;
- If there are high demands on the wear resistance of the substrate, you can lay a cork layer with rubber on the concrete: although it is not environmentally friendly, it is suitable for areas with high traffic and rooms with a high percentage of humidity;
